Dr. Trust ECG PEN User manual

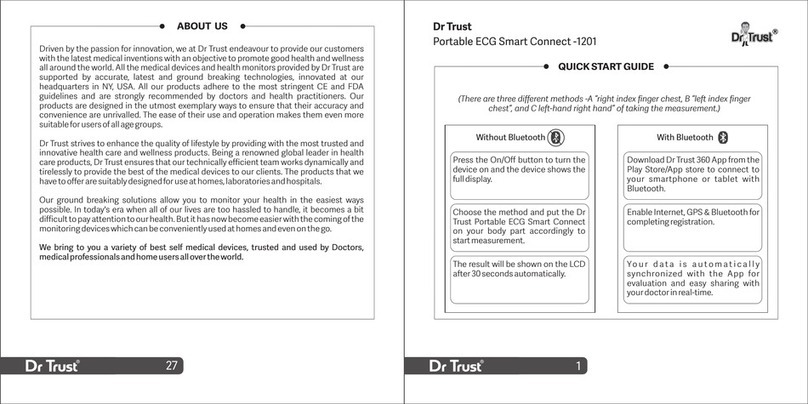
Driven by the passion for innovation, we at Dr Trust endeavour to provide our customers
with the latest medical inventions with an objective to promote good health and wellness
all around the world. All the medical devices and health monitors provided by Dr Trust are
supported by accurate, latest and ground breaking technologies, innovated at our
headquarters in NY, USA. All our products adhere to the most stringent CE and FDA
guidelines and are strongly recommended by doctors and health practitioners. Our
products are designed in the utmost exemplary ways to ensure that their accuracy and
convenience are unrivalled. The ease of their use and operation makes them even more
suitable for users of all age groups.
Dr Trust strives to enhance the quality of lifestyle by providing with the most trusted and
innovative health care and wellness products. Being a renowned global leader in health
care products, Dr Trust ensures that our technically ecient team works dynamically and
tirelessly to provide the best of the medical devices to our clients. The products that we
have to oer are suitably designed for use at homes, laboratories and hospitals.
Our ground breaking solutions allow you to monitor your health in the easiest ways
possible. In today's era when all of our lives are too hassled to handle, it becomes a bit
dicult to pay attention to our health. But it has now become easier with the coming of the
monitoring devices which can be conveniently used at homes and even on the go.
12. ABOUT US
SMART PORTABLE
ECG PEN
We bring to you a variety of best self medical devices, trusted and used by Doctors,
medical professionals and home users all over the world.
Thank you for purchasing Dr. Trust Smart Portable ECG Pen. Please read the
instructions before use. 1
26

TABLE OF CONTENTS
Main Features
Package Contents
Components
LCD Display
Battery Installation
Things to Know Before Taking Measurement
Operation Procedure
Common Wrong Operations
Measurement Results
Reviewing Results on ECG Pen
System Requirements
Installation and Connection
Application Interface
1. S nitions
2. General Notes
3. Important Safety Notes
4. Product Description
5. Preparation Before Taking Measurement
6. Taking Measurement
7. Result Display
8. iBP Monitor APP
3
3
4
5
7
8
13
14
9. Cleaning and Maintenance
10. Messages and Trouble Shooting
tions
12. EMC Information
13. Customer Support
16
17
18
19
25
1. SYMBOL DEFINITIONS
2. GENERAL NOTES
1. This is an Electrocardiogram (ECG) device that provides referential data that could be taken into
consideration by medical professionals.
2. The applied part is ECG
3. Self diagnosis or treatment is dangerous behavior. Please don't use the cardiogram or data generated
by the device to diagnose yourself.
4. Consult with medical professionals if you notice any change in your condition, regardless of the
measurement results.
32

5. The measurement results produced by the device only r ect the measurement taken at the
moment.
6. The cardiogram cannot show all variations and symptoms of the heart disease, please
consult with medical professionals when feeling discomfort with your heart.
3.IMPORTANT SAFETY NOTES
It is not recommended to use the device with a cardiac pacemaker or other implanted devices. Be
sure to follow your doctor's instruction if necessary.
Do not use this device during an MRI scan.
Do not use this device with a brillator.
Do not submerge (or immerse) the device in water or liquid. Do not clean the device with acetone,
or other volatile solutions. Clean the unit with a cloth dampened with water or mild detergent.Then
wipe it dry with a dry cloth.
Do not put the device in autoclaves, or gas sterilizationdevices.
Avoid hitting, dropping, stamping, shaking of the device.
Do not disassemble the device that may result in damage, malfunction, or abnormal operation.
Do not use this device on people with sensitive skin or allergies.
This device is not approved for use on children weighing less than 10 kg.
The electrodes of this device should not come in contact with other electrically conductive parts,
including earth ground.
Do not store/expose the device in the following environments: Locations exposed to direct
sunshine, high temperature or humidity, heavy dirt, near water or e, and under high electro-
magnetic .
Store the device in safe placeto avoid small parts swallowed by children under any circumstances.
*Static electricity may cause damage to the electronic components, to prevent electrostatic damage to the
device, grounding yourself to discharge the static electricity from the body is required before handling the
device. Increasing humidity, moisturizing skin can eectively reduce the accumulation of body surface
electrostaticcharge.
4. PRODUCT DESCRIPTION
Dr. Trust Smart Portable ECG Pen can complete your cardiogram measurement in about 30 seconds.
Your ECG Pen will automatically analyze and provide referential results using measurement data.
The ECG Pen can take up to 500+ measurements with two new coin-typed batteries and keep
records of 36 measurements.
The APP can assist you to:
Download ECG data.
C e your ECG Pen.
Store measurement records in chronicle order.
Display ECG waveforms for reference to medical professionals .
Main Features
Your package should include the following items.
Package contents
Main Unit
Dr. Trust ECG Pen
Accessories
Instruction manual
Two coin-typed batteries (trial batteries)
54

1.Heartbeat LED
2. Top Electrodes
3. Power Button
5.
7. Detection Switch
4. Bottom Electrode
Press 3 sec to turn on/off.
6.Battery Cover
Components
Lcd display
1
3
4
5
2
6
Mini
USB
Port
1. Heartbeat Indicator: Flashes in sync with the heartbeat during measurement.
2. Heart Rate: Shows average heart rate of recording.
3. Battery Level Indicator: Shows current battery level.
4. Digits Display:
a. Shows the sequence number of the measurement results stored in memory.
b. Shows the 30 second count down during measurement.
5. Time: Shows date and time.
6. Bluetooth Connection: Displays the status of Bluetooth connection.
5. PREPARATION BEFORE TAKING MEASUREMENT
To charge your ECG Pen, please follow the steps below:
1. Remove the battery cover by inserting the tip of y er.
2. Follow the +(positive) and -(negative) polarities indicated on the battery compartment.
Battery Installation
Remove Ba ery Cover
3. Slide the battery cover until it clicks into place.
76

Things to Know Before Taking Measurement
To assure accurate measurement, please observe the following:
Make sure that electrodes are directly in contact with your skin.
If your skin or hands are dry, moisten your skin with damp cloth before taking measurement.
If the electrodes are dirty, use a soft cloth or a cotton swab moistened with disinfectant alcohol to
clean dirt from the surface.
During the measurement, do not touch your body with the hand with which you are taking the
measurement.
Make sure there is no skin contact between your right and left hand (measuring method C), or
between your hand and chest (measuring methods A/B). Otherwise, the measurement cannot be
taken correctly.
Ideally perform the measurement either sitting down or lying down. Do not stand up.
Do not move or talk during the measurement and hold the device still. Movements of any kind will
falsify the measurements.
6. TAKING MEASUREMENT
Operation Procedure
There are three dierent methods of taking the measurement. Start with measurement method A,“right
index nger-chest.” If this method does not deliver measurements, or delivers only unstable
measurements (“EE” is frequently displayed), switch to method B “left index chest” and, if
necessary, to method C”left hand-right hand.”
The most suitable method/ procedure depends on the heart (shape of the heart) of each
individual user. If it is not possible to take stable measurements using a given measurementmethod, this
could have a harmless cause such as the shape of the heart. However, the cause may also be an illness or
disease.
Measurement method C oers maximum comfort, but oers a much lower measurement stability than
methods A or B.
Press the on/ o button for about three secondsto turn the device on. The device showsthe full display.
WARNING
If segments are missing, stop using the device and immediatelycontact customer services.To test whether
the full display is completely displayed, hold the On/O button when switching on the device.
Measurement Methods
Measurement
method A
“ chest”
(approximately corresponds to“lead 2”)
Top Electrodes
Place y wo upper electrodes on the device
and hold the device
You can determine the correct position for placing the lower electrode of
the device against your chest using the following methods:
• Draw an imaginary line from the front of your armpit downwards. At the
same time, draw an imaginary line going up 10 cm from the lowest rib on
the left side of your body. Place the lower electrode of the device at the
point where these two lines meet.
5 cm
• Draw an imaginary line from the bottom of the centre of your chest
(sternum) to the left. At the same time, draw an imaginary line from the front
of your armpit downwards. Place the lower electrode of the device at the
point where these two lines meet.
98

Lightly press the electrode against your chest until you hear or feel a click.
Measurement
method B
chest”
(approximately corresponds to“lead 3”)
Top Electrodes
Place your lef wo upper electrodes on the
device and hold the device vertically in your hand.
5 cm
You can determine the correct position for placing the lower
electrode of the device against your chest using the following
methods:
• Draw an imaginary line from the front of your armpit downwards.
At the same time, draw an imaginary line going up 10 cm from the
lowest rib on the left side of your body. Place the lower electrode of
the device at the point where these two lines meet.
• Draw an imaginary line from the bottom of the centre of your chest
(sternum) to the left. At the same time, draw an imaginary line from
the front of your armpit downwards. Place the lower electrode of the
device at the point where these two lines meet.
Lightly press the electrode against your chest until you hear or feel a click.
Important: Do not exert excessive pressure on the electrodes with y .
Important: Do not pr our skin.
Measurement
method C
“left hand–right hand”
(approximately corresponds to“lead 1”)
Place y wo upper electrodes on the device.
our left hand on the lower electrode.
Press the lower electrode until you hear or feel a click.
Important: Do not pr our skin.
Please note that there must be no skin contact between your right and left hand (measurement
method C) or hand and chest (measurement methods A/B). Otherwise, the measurement cannot be
taken correctly. Do not move during the measurement, do not speak and hold the device still.
Movements of any kind will falsify the measurements.
1. The device will start beeping (if the beep is enabled) and the number indicator
or a few seconds. This indicates that the measurement is about to begin.
2. The measurement is completed, and the results are displayed at the end of the
30-second countdown.
Note: If the bottom electrode is removed within the space of three seconds after the measurement
starts, the measurement will be displayed as EE.
1110

Common Wrong Operations
Please avoid the following operations:
Finger not touching the electrodes tight enough.
Measuring over/through clothing.
Pressing wrong side of ECG Pen against
the chest.
Holding ECG Pen in the wrong direction.
7. Result Display
:
Normal Result
: Slow Heart Rate (<60 bpm)
: Fast Heart Rate (>100 bpm)
: Paused Heart
beat
(pause>2 s)
: Irregular Rhythm
(Disrupted Rhythm)
: Abnormal Waveform (Altered Waveform)
Please note that if the displayed heart rate is , it indicates ECG signals are unstable or weak.
Please retake the measurement.
Measurement Results
The possible results are shown below.
1312

For reviewing the previous records, you may:
Reviewing Results on ECG Pen
1. Press the button for 3 seconds to turn on your ECG Pen. The LCD
shows the total number of records stored.
2. the button again, and the LCD shows the average heart rate of
the latest measurement and the Digits Display showsthe sequence
number of stored records.
3. By pressing the button repeatedly, the result will be shown in a cyclic order.
8. iBP Monitor APP
System requirements
Smartphone or Pad which support Bluetooth 4.0 (BLE)
Please scan the QR code to direct yourself to IBP monitor introduction web page.
You can easily scan the QR code using any of the QR code reader apps available on
play store.
Installation & Connection
If you wish to download the app for easy and convenient accessibility, follow the below mentioned
instructions for downloading and using the app. IBP monitor app is easily available on app store for IOS
users and Google play stores for android users.
Downloading the app
You can connect IBP monitor app with your Dr Trust ECG Pen devices using Bluetooth 4.0. It helps in
providing real-time display of ECG and blood pressure measurements. The app also automatically stores
records on smart-phone or tablet for further diagnosis.
QR code scanning
Application Interface
Measure
Using the measure feature, ECG and blood pressure can be conveniently measured. You can even switch
between the ECG trace graphsand main screen by clicking on the heart icon at top right corner.
Records
After you have connected your Dr Trust device to your smart-phone or your tablet, you can easily display
measurement records in reverse chronological order. The records would be automatically stored in your
smart-phone or your tablet.
Bp Analysis
Trend, distribution and static analysis of selected weekly/monthly/yearly period of blood pressure and
pulse readings are stored in readings.
Download
Using this aspect, you can easily download the records to your smart-phone. After downloading the
records, your Dr.Trust device would turn o automatically.
1514

Settings
You can edit your personal information in“user information”. Making advanced settings on Date/Time,
key keep, heart beat beep and hour display mode is achieved in“Device settings”. You can also obtain the
device information from here when your Dr. Trust device is in connection with your smart phone or your
tablet.
Information
This aspect of the app provides indicator of blood pressure readings as by World
Health Organisation, ECG summary results and app version.
Help
It provides the user with instructions of establishing connection between your DR. Trust device and your
tablet or smartphone.
About
It enriches the user with the information of BP monitor app developer.
9. CLEANING AND MAINTENANCE
Please clean the surface of the ECG Pen with a soft cloth dampened with water.
If the electrodes are dirty, please use a soft cloth or a cotton swab moistened with disinfectant alcohol to
clean dirt from the surface.
Connect device
Turn on the auto scan function on your app
Select your Dr. Trust device to establish connection.
Bluetooth would light on once it is successfully connected.
10. MESSAGES & TROUBLE SHOOTING
Message Shown Possible Cause Suggestion
Measurement result shows
t Rate.
Unstable or weak ECG signals. Please retake the measurement
following the manual's
instruction.
Measurement result shows
EE.
Failure analysis resulted from
either low contact pressure or
high noise level during
measurement.
Please retake the measurement
following the manual's
instruction.
Problem Possible Cause Suggestion
Power does not come on
after pressing the power
button for 3 seconds.
1. Battery power is low.
2. Batteries are installed with
wrong direction.
1. Replace with new batteries.
2. Make sure the polarities of
batteries are matched with the
ones indicated on the battery
compartment.
Electrode touching
skin, but measurement
does not start.
Pressing too lightly. Make sure to press the bottom
electrode down enough.
Measurement records
disappear from the device
storage.
Old records are overwritten by new
ones due to storage overload.
Download data periodically to
your computer for record
keeping.
■Bluetooth c
failed.
Basic communication problem
between the device and
Smartphone/Pad.
Please turn o the device, “Dr
Trus t iBP Monitor ” APP and
Bluetooth function of
Smartphone/Pad, then follow the
instructions mentioned above to
reconnect again.
1716

■Device ID is not
displayed on the box in
“iBP Monitor APP.
Problems of data exchanging for
tion.
If the d ev ic e is discovered
successfully, there will be a blank
on the box, then click on the
blank to manually link the device
with APP and display the device
ID.
11. SPECIFICATIONS
12. EMC INFORMATION
1918

2120

a. Field strengths from ed transmitters, such as base stations for radio (cellular/cordless)
telephones and land mobile radios, amateur radio, AM and FM radio broadcast and TV broadcast
cannot be predicted theoretically with accuracy. To assess the electromagnetic environment due to
ed RF transmitters, an electromagnetic site survey should be considered. If the measured
strength in the location in which the Dr.Trust ECG Pen is used exceeds the applicable RF compliance
level above, the Dr.Trust ECG Pen should be observed to verify normal operation. If abnormal
performance is observed, additional measures may be necessary, such as re-orienting or relocating
the Dr.Trust ECG Pen.
Recommended separation distances between portable and mobile RF communications
equipment and the Dr.Trust ECG Pen
The Dr.Trust ECG Pen is intended for use in an electromagnetic environment in which radiated RF
disturbances are controlled. The customer or the user of the Dr.Trust ECG Pen can help prevent
electromagnetic interference by maintaining a minimum distance between portable and mobile RF
communications equipment (transmitters) and the Dr.Trust ECG Pen as recommended below,
according to the maximum output power of the communications equipment.
2322

For transmitters rated at a maximum output power not listed above, the recommended separation
distance d in meters (m) can be estimated using the equation applicable to the frequency of the
transmitter, where P is the maximum output power rating of the transmitter in watts (W) according to
the transmitter manufacturer.
NOTE 1 At 80 MHz and 800 MHz, the separation distance for the higher frequency range applies.
NOTE 2 These guidelines may not apply in all situations. Electromagnetic propagation is aected by
absorption and r tion from structures, objects and people.
COPYRIGHT 2018 DR TRUST. ALL RIGHTS RESERVED
www.drtrustusa.com
@drtrust
@drtrustisin
2524
Table of contents
Other Dr. Trust Medical Equipment manuals
Popular Medical Equipment manuals by other brands

Enraf Nonius
Enraf Nonius 6 Series user manual

Ossur
Ossur Flex Foot Cheetah Instructions for use

Braun
Braun Aesculap TSPACE PEEK Instructions for use/Technical description

Atos Medical
Atos Medical PROVOX Micron HME Patient's and Physician's Manual

EvoEndo
EvoEndo LE Instructions for use

GE
GE LOGIQ E9 Service manual

Mindray
Mindray BeneView T1 Quick reference guide

Bio Compression Systems
Bio Compression Systems SC-2004-OC Instructions for use

Sunrise Medical
Sunrise Medical Guardian IC-5140 User instructions

SPAN
SPAN PressureGuard CustomCare owner's manual

babymoov
babymoov Cocoon Life Babydoppler Connect manual

DS Maref
DS Maref DVT-2600 Service manual