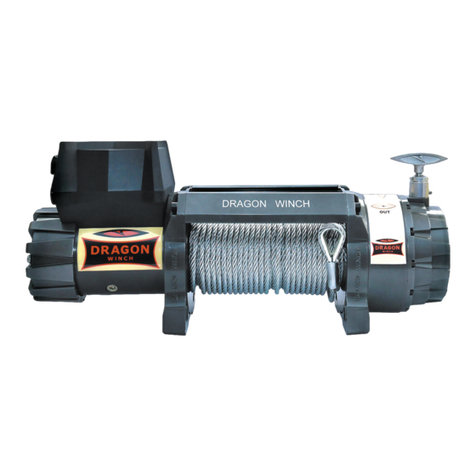
DRAGON WINCH DWM 10000 HD User manual


31
www.dragonwinch.com
GB
INTRODUCTION
Thank you for purchasing the Dragon Winch product and
we wish you many years of satisfaction with using our
products.
This manual was created to provide the user with informa-
tion necessary for safe and correct operation of the winch,
as well as its maintenance, repair and storage. It also con-
tains a description of the risks arising from the operation
of the winch.
Before the first use of the winch carefully read all the in-
formation contained in this manual. If you have any ques-
tions or if anything is unclear, please contact the manufac-
turer for more detailed information.
The operation manual is an integral part of the winch and
should be stored near the winch for reference, should it
be necessary. The manual must also be transferred to the
next user in case of resale of the winch.
The manufacturer reserves the right to make changes
without notice.
SYMBOLS USED IN THE MANUAL
Warning symbols used in this manual highlight the informa-
tion on potential risks and information of particular impor-
tance. These are:
IMPORTANT
Symbol for important additional informa-
tion which need particular attention.
i
!
ATTENTION
Symbol for the procedure, which, if not
performed correctly, may cause damage to
the device.
WARNING
Symbol for the procedure, which, if not
performed correctly, may cause injury and
even death of the operator.

www.dragonwinch.com
32
SAFETY PRECAUTIONS WHEN
OPERATING THE WINCHES
User
A) Operator
Never use a winch if you are under the influence of al-
cohol, drugs or medications which reduce attention and
speed of reaction.
B) Clothing
Do not wear loose clothing and jewellery that can be cau-
ght in moving parts.
Always wear leather gloves when holding the
winch rope. Do not hold steel rope with bare
hands, because even small cracks on the rope
may cause hand injury.
It is recommended to use non-slip shoes.
Use headgear and tie long hair.
C) Distance
Make sure unauthorized people are kept at appropriate
distance from the working winch and its rope. It is recom-
mended to be kept at 1.5 x of the rope length.
IMPORTANT
Follow all instructions in this manual to ensu-
re the safety to yourself and others. Proper
operation, maintenance and storage of the
winch have a crucial impact on its efficien-
cy and lifetime. Improper use of the winch
can be extremely dangerous both for the
user and others, and may lead to serious
damage. Before using the winch read this
manual carefully, and follow the instructions
contained herein.
i
IMPORTANT
Safety precautions and procedures presen-
ted in this manual cannot anticipate all po-
ssible circumstances and situations you may
encounter. It is always essential to use your
common sense and maximum caution.
i
IMPORTANT
In case of doubt concerning any point of this
manual, please contact the manufacturer.
i

33
www.dragonwinch.com
WARNING
Cracking rope may cause serious injury
and even death of people in its way.
Do not cross a stretched rope and do not
stand over the rope.
Winch
A) Operation
The winch should only be used for the purposes for which
it was designed - helping to get vehicles, cargo or objects
out from a difficult position. The use of a winch for other
purposes is inconsistent with its intended use and may re-
sult in death, injury and property damage.
B) Repair
Use only genuine spare parts. If they are not available,
use parts with appropriate attestations and safety certi-
fications.
C) Overloading
Do not overload the winch.
Winch capacity specifications are maximum parameters,
not working parameters.
Remember that the winch pull force values are given for
the first fake of the rope on the drum and for perfect con-
ditions. Every obstacle (slope, mud, water, slushy terrain,
etc.) significantly reduces the winch pull force.
Any jerks while pulling are very dangerous and may lead
to breaking the rope, damaging to the winch as well as
serious injuries.
In the description of the winch capaci-
ty, the term “vertical pull” is mentio-
ned, under no circumstances may the
winch be used for vertical load lifting.
Both the winch and the rope are not
designed for such use. The term “ver-
tical pull” only serves to determine the
capacity and the technical parameters of the winch.
If the motor has heated up too much, stop working for
a few minutes - until it cools down.
If the motor stops, disconnect the power supply and diag-
nose the problem.
Overloading the winch may also cause rope damage.
D) Accidental switching on of the winch
Avoid accidental switching on of the
winch by mechanically disconnecting it
from the power supply by a high current
switch (“disconnecting switch”), located
on the positive wire. When the winch is
not in use, switch gear transmission le-
ver to “OUT” or “LUZ”.
GB

www.dragonwinch.com
34
E) Checking the winch
Before each starting, check if the winch is not damaged.
Repair or replace any defective components.
Periodically check the winch mounting and making sure
that all screws are properly tightened.
F) Winch rope
The strength of the steel rope (cable) provided with the
winch is appropriate to the power and intended use of
each specific winch.
The diameter and length of the rope for the same winch
model may vary, maintaining constant strength and safety
parameters.
Before each use, check the condition of the rope. Frayed
rope with broken wires should be replaced immediately.
Always replace the rope with the same or equivalent type
recommended by the manufacturer. The equivalent types
must have the same pull force, quality, arrangement para-
meters and wire performance.
Pay attention to the correct direction of rope winding. The
rope must be wound on the underside of the winch drum
(between the mounting plate and the drum). Wrong di-
rection of rope winding may cause serious damage to the
winch.
The rope must be wound uniformly – fake next to fake
– on the winch drum in such a manner as to avoid building
up of the rope in one place or jamming under the lower
layers. Improper winding of the rope significantly reduces
the efficiency of the winch and may lead to damaging the
equipment. In such cases unwind the rope and start wind-
ing again.
After work, the rope should be
pulled (laid on the drum) with no
load. Hold the tightened rope in
one hand and the winch remote
control in the other.
For your own safety, during win-
ding keep a minimum distance of
1.5 m from the winch.
The working life of the rope is directly dependent on how
it is used and stored.
Repairing the rope
Repairing of a damaged rope consists in shortening it abo-
ve the damaged place and terminating it with a thimble.
!
ATTENTION
Do not use the winch rope as a tow-rope.
Pulling the load use only the winch.
Do not “boost” the winch with the vehicle
drive.

35
www.dragonwinch.com
G) Load
Loads must be pulled in a straight line. If pulling loads at
an angle is necessary, use the appropriate load block. In
this case, the angle between the winch drum and the rope
should be 90 degrees.
H) Battery
The battery must be efficient, charged and of adequate
capacity [Ah].
Use rubber gloves and goggles when handling the battery.
When operating the winch, the vehicle engine should be
running.
WINCH OPERATING PRINCIPLES
1. Remote control of the winch
should be stored in the vehicle.
2. Check the remote control tech-
nical condition before each con-
nection.
3. The winch is equipped with
a manual gear engaging and re-
leasing. Begin load winding with engaged gear. Do not
disengage and engage the gear while the winch motor is
running.
4. To avoid damaging the rope, do not install hooks directly
on the rope. It is necessary to use the factory-provided
thimble (eye) or pulley block with a movable pulley.
5. Observe the winch carefully during operation, while
maintaining the maximum possible distance. It is recom-
mended that the pulling process is stopped every meter to
check if the rope is wound correctly.
6. It is not recommended to attach the rope to the tow
hook of the pulled vehicle. The rope should be attached to
the vehicle frame.
GB

www.dragonwinch.com
36
7. Using pull block significantly increases the winch pull
force.
Pulling the load on a double rope (using pull block) increa-
ses the power of the winch almost twice, however it dec-
reases the range of the rope and pulling speed by half.
Remember to place the vehicle centrally, distributing the
load uniformly on both sections of the rope.
8. Do not wrap the rope di-
rectly around a tree. Use ap-
propriate synthetic bands or
protection.
9. Omega shackles are re-
commended for connecting
the winch rope with chain or
another rope.
10. When removing the rope
from the winch remember to
leave at least 5 rope fakes on
the drum.
11. It is recommended to put
a blanket or car mat on the
rope of the winch in opera-
tion. Should the rope break,
this will direct it towards the
ground.
It is also recommended to
open the car bonnet to prote-
ct windscreen from breaking
in such a case.
12. Winch rope during opera-
tion should be stretched all
the time. This prevents rope

37
www.dragonwinch.com
“breaking” and tangling. If the rope starts to tangle or
fold, stop using the winch, secure the pulled load, partial-
ly unwind the rope and start winding again. If this does not
work, loosen the rope and straighten it manually.
13. To stabilize the vehicle when pulling loads, it is recom-
mended to use stop blocks..
!
ATTENTION
The user is responsible for correct mounting of
the winch on a car.
WARNING
Fully extending the winch rope and running
the winch under load can result in pulling rope
mounting from the drum, damaging the equip-
ment and serious injury of persons nearby.
MOUNTING THE WINCH
1. Particular care should be taken not to chamfer the
winch during installation, which may lead to permanent
damage.
2. The winch shall be mounted in a suitable place.
3. The power of the winch must be adapted to the vehicle,
mounting place and method.
4. Winch should be mounted on a sturdy steel frame using
a 4- or 8-point mounting system. The winch must be moun-
ted horizontally.
5. It is important to mount the winch on a flat surface that
is technologically adapted to support the winch.
6. A special mounting plate, suitably chosen to the winch
model is recommended. The higher pull power of the
winch, the thicker mounting plate must be used (e.g. for
12,000 lbs - the minimum plate thickness is 6mm). Original
bolts are adapted to the minimum thickness of the moun-
ting plate.
7. If a thicker plate is used the bolts should be replaced
with new ones of at least the same hardness and appro-
priate length, so that the screw fully extends out of the
nut.
GB

www.dragonwinch.com
38
IMPORTANT
If there is not enough room to mount the winch,
the gear with the handle can be rotated by any
angle. Not applicable to DWH 9000-15000.
i
8. Rope roller guide should be assembled in a way that
facilitates pulling the rope in and out. The rope roller gu-
ide may not be mounted directly to the winch. The guide
roller should be attached to the mounting plate.
Methods for mounting the Dragon Winch devices recom-
mended by the manufacturer:
1. Standard mounting:
winch with mounting plate on the bottom.
IMPORTANT
When mounting the winch as shown in Fig.
3 the control box must be transferred and
mounted with the cover facing up.
i
2. Installation of the winch with mounting plate on the
side.
3. Installation of the winch with mounting plate on the
top.

39
www.dragonwinch.com
IMPORTANT
When tightening the power wires always lock
a lock nut with another spanner.
i
IMPORTANT
For your safety during the operation of
any winch, remember to always disconne-
ct mechanical high current circuit breaker
after you have finished working. A high
current switch, e.g.
“disconnecting switch”
allowsfortheemergency
switching off the winch
and its safe disconnec-
tion when not in use.
i
IMPORTANT
In order to correctly match the winch to the
vehicle type, please contact the manufac-
turer or retailer. Once the winch is appro-
priately matched to the vehicle, electrical
system will meet its power demand. Before
starting the winch, make sure that the batte-
ry is in good condition and fully charged, and
electrical connections were made correctly
for the winch model. During the operation of
the winch, vehicle engine should be running
to assure constant charging of the battery.
When connecting the winch to the electrical
installation follow the instructions below.
i
A. CONNECTION FOR WINCH MODELS:
DWM 10000 HD
DWM 12000 HD
DWM 13000 ST
Connection diagram - see section A at the end of the ma-
nual.
1. Connect short red wire with the red cover (E’) to the
red terminal (B) on the motor.
2. Connect short black wire (D’) to the black terminal
(D) on the motor.
3. Connect short black wire with yellow cover (C’) to
the yellow terminal (C) on the motor.
CONNECTION AND INSTALLATION
OF THE ELECTRIC WINCH
IMPORTANT
Individual winch models should be connec-
ted in different ways. The model is indica-
ted on every winch and the connection has
to be performed according to the indicated
model.
i
GB

www.dragonwinch.com
40
4. Connect thin black wire (A’) to the bottom terminal
(A) on the underside of the motor.
5. Connect long red power supply wire (B’) to the po-
sitive (+) terminal of the battery through the high current
switch, e. g. “disconnecting switch.”
6. Connect long black wire (F) (1.8 m) to the bottom
terminal (A) on the motor, and the other end of the wire
to the negative (-) terminal of the battery.
B. CONNECTION FOR WINCH MODEL: DWM 12 000 HDI
Connection diagram - see section B at the end of the ma-
nual.
1. Wired remote control and wireless remote control
system are properly connected and do not require user in-
tervention.
2. The set includes 2 electrical wires (red A and black
B) to connect the winch to the vehicle’s electrical sy-
stem.
3. Connect A red wire (fixed on one end in the relay
box) to the positive (+) terminal of the battery through the
high current switch, e. g. “disconnecting switch.”
4. Connect one end of the Bblack wire (supplied sepa-
rately with the winch set) to the terminal located in the
lower part of the winch motor and the other end to the
negative (-) terminal of the battery.
C. CONNECTION FOR WINCH MODELS:
DWM 8000 HD EN
DWM 12000 HD EN
DWM 13000 HD
DWM 13500 HD EN
DWT 14000 HD
DWT 16000 HD
DWT 16000 HDL
DWT 18000 HD
DWT 18000 HDL EN
DWT 20000 HD
DWT 22000 HD
DWH 9000 HD
DWH 12000 HD
DWH 15000 HD
Connection diagram - see section C at the end of the ma-
nual.
1. Wired remote control and wireless remote control
system are properly connected and do not require user in-
tervention.
2. The set includes 2 electrical wires (red A and black
B) to connect the winch to the vehicle’s electrical sy-
stem.
3. Connect
Ared wire (fixed on one end in the relay
box) to the positive (+) terminal of the battery through the
high current switch, e.g. “disconnecting switch.”
4. Connect one end of the Bblack wire (supplied sepa-
rately with the winch set) to the terminal located in the
lower part of the winch motor and the other end to the
negative (-) terminal of the battery.

41
www.dragonwinch.com
5. Connect the thin black wire Cto the terminal located in
the lower part of the winch motor.
D. CONNECTION FOR WINCH MODEL: DWTS 12000 HD
Connection diagram - see section D at the end of the ma-
nual.
1. Use Ared wire to connect the bolt placed on the
plastic housing of the winch relays with a positive (+) ter-
minal of the battery through the high current switch, e.g.
“disconnecting switch.”
2. Connect the black wire Bto the earth bolt located in
the lower part of the motor with a negative (-) terminal of
the battery.
E. CONNECTION FOR WINCH MODELS:
DWH 3000 HD
DWH 3500 HD
DWH 4500 HD
DWH 4500 HDL
Connection diagram - see section E at the end of the ma-
nual.
The relay has four pins on the front panel A, B, C, Dand
three wires coming out of the relay housing, two longer,
blue H and black J terminated with connectors, and a shor-
ter black Eterminated with a cable lug.
Connection of power leads - battery - relay - motor
1. With the first pair of leads (red and black) make the
following connections:
- Use the red lead (a) to connect the pin with the C mark
on the relay with the power on the motor marked with a
“+” or with a red washer.
- Use the black wire (b) to connect the pin with the D
mark on the relay to the negative bolt on the motor marked
with a “-” or with a black washer.
2. With the second pair of leads (red and black) make
the following connections:
- Connect the red pin Aon the relay with positive (+)
battery terminal
- Connect the black pin B on the relay with negative (-)
battery terminal
3. Connect the shorter thin black wire of the relay termi-
nated with a cable lug with the Bpin of the relay
Connection of radio control (wireless).
The remote control consists of a radio signal receiver
and a transmitter (remote controller). There are five
wires coming from the receiver: red: K, black: L, white:
N, yellow: M, blue is the “antenna”.
Connect the radio control as follows:
1. Connect the red Kwire of the receiver with Apin on
the relay.
2. Connect the black Lwire of the receiver with the B
pin on the relay.
3. Connect the white Nwire of the receiver, terminated
with a connector, to the longer thin black wire of the relay.
4. Connect the yellow Mwire of the receiver, terminated
GB

www.dragonwinch.com
42
with a connector, to the longer, thin black wire of the re-
lay.
5. The blue “antenna” wire remains unconnected.
Connecting the wired control of the winch
The wired control has three wires: red Fand two other,
terminated with connectors: blue Gand black I
1. Connect the red wire of the Apin on the relay.
2. Connect the blue Gwire to the blue Hwire of the
relay
3. Connect the black Iwire to the black Jwire of the
relay
F. CONNECTION FOR WINCH MODELS:
DWM 2000 ST
DWM 2500 ST
DWM 3500 ST
Connection diagram - see section F at the end of the ma-
nual.
The relay has four pins on the front panel A, B, C, Dand
three connectors coming out of the relay housing: H, E, J.
Connection of power leads - battery - relay - motor
1. With the first pair of leads (red and black) make the
following connections:
- Use the red lead (a) to connect the pin with the C mark
on the relay with the power on the motor marked with a
“+” or with a red washer.
- Use the black wire (b) to connect the pin with the D
mark on the relay to the negative bolt on the motor marked
with a “-” or with a black washer.
2. With the second pair of leads (red and black) make
the following connections:
- Connect the red (c) pin Aon the relay with positive (+)
battery terminal
- Connect the black (d) pin B on the relay with negative
(-) battery terminal
3. Connect the Econnector of the relay with the B pin
of the relay
Connection of radio control (wireless).
The remote control consists of a radio signal receiver and
a transmitter (remote controller). There are five wires co-
ming from the receiver: red: K, black: L, white: N, yellow:
M, blue is the “antenna”.
Connect the radio control as follows:
1. Connect the red K wire of the receiver with Apin on
the relay.
2. Connect the black L wire of the receiver with the B
pin on the relay.
3. Connect the white Nwire of the receiver terminated
with the connector to the J connector of the relay.
4. Connect the yellow M wire of the receiver, termina-
ted with a connector to the H connector of the relay.
5. The blue “antenna” wire remains unconnected.

43
www.dragonwinch.com
Connecting the wired control of the winch
The wired control has three wires: red Fand two other,
terminated with connectors: blue Gand black I.
1. Connect the red Fwire of the Apin on the relay
2. Connect the blue G wire with the Hconnector of the
relay
3. Connect the black Iwire with the Jconnector of the
relay
G. CONNECTION RADIO CONTROL FOR WINCH MODELS:
DWM 2000 ST
DWM 2500 ST
DWM 3500 ST
Connection diagram - see section G at the end of the
manual.
Connect the wireless control as follows:
a. Connect the red I wire to relay pin marked with A.
b. Connect the black J wire to relay pin marked with B,
and the other end (slide) to the control pin marked with 2.
c. Connect the white Kwire to the relay control pin
marked with 3.
d. Connect the yellow Lwire to the control pin marked
with 1.
H. FOR WINCH MODELS:
DWM 2000 YP, DWM 2500 YP AND DWM 3500 YP
FOLLOW THE DIAGRAM H.
The winch is controlled using a wired remote control that
already has a built-in relay.
IMPORTANT
1. Make sure that the electrical connections were
made correctly for your winch model.
2. The battery must be in a good condition.
3. Make sure that the electric cables are caught by
moving parts of the winch or vehicle.
4. Check the connections and the cables for dama-
ge regularly.
5. Tarnished or rusty wires reduce the efficiency of
the whole system.
6. All connections must be kept clean, which will
positively impact on their life and efficiency.
i
There are four wires coming out of the remote casing:
- two longer in red and black wires: aand b
- two shorter red and black wires: a’ and b’
Connect shorter a’ and b’ wires to the motor, red one to the
„+” pin of the motor, and the black one to the „-” pin.
Connect the longer wires to the battery, red one to „+” and
black one to „-”
USING THE WINCH
Pulling another vehicle or cargo
If you use the winch to pull another vehicle or cargo, put the
vehicle hand brake on and put stop blocks under wheels.
GB
!
ATTENTION
Do not confuse the cables with different length of
the wires. Connecting a long and a short cable to
the motor or battery can damage the relay and the
battery.

www.dragonwinch.com
44
WINCH LUBRICATION
AND MAINTENANCE
A new winch is factory-protected and does not require ad-
ditional preservation procedures. The winch requires pe-
riodic maintenance and technical surveys, depending on
the manner and conditions in which it is operated.
!
ATTENTION
1. Helping the winch consisting in the use of the car
engine may cause sudden jerks of the rope result-
ing in permanent damage to the winch.
2. Pulled vehicle may not be in any gear and auto-
matic transmission may not be in “park” position.
Otherwise serious damage may occur.
3. Do not wrap the anchor points with the rope.
This may lead to damage of these elements and the
rope. Use the original thimble (eye) on the rope,
shackles or pulley block.
4. Keep at a distance from the winch and rope in
operation.
5. Do not allow third parties to come near the
winch or rope in operation. Cracked or sliding rope
is a serious threat to life and health.
6. After you finish working with the winch, discon-
nect it from the power supply using the high cur-
rent switch - “disconnecting switch” and leave the
gear lever in the “OUT” or “LUZ” position.
Pull the necessary length of rope out and anchor it in the
appropriate place.
Gear lever located on the gear housing works as follows:
1. To disengage, switch gear transmission lever to
“OUT” or “LUZ,” it will allow to unwind the rope freely.
DO NOT START THE MOTOR IN THIS POSITION!
2. To start the winding, before starting the motor,
switch the lever to “IN” or “PRACA.” The winch is ready to
work. DO NOT START THE MOTOR BEFORE THE GEAR HAS
ENGAGED. PULL FOR ROPE TO PROTECT THE GEAR.
Before you begin, please check again all the connections,
rope and cables.
Hook the remote control to the winch. For safety reasons, it
is recommended to sit in the driver’s place while pulling.
Pulling on your own
When pulling your car with the winch on your own, start
the car engine, release the hand brake, switch the gears to
neutral, do not “help” the winch with the car engine.
Control the winch using “IN” and “OUT” buttons located
on the controller. Check regularly if the rope is wound on
the drum correctly.
If you stop the winch under load, put the stop blocks under
the wheels of the vehicle or the load. When putting the
stop blocks, do not stand behind the vehicle/load.
IMPORTANT
Before loading the winch, it is recommended to test
its operation by unwinding and winding the rope a few
times. It is essential to get to know the correct opera-
tion of the winch, both visually and acoustically.
i

45
www.dragonwinch.com
Periodic maintenance should be performed every 6 months
from the date of purchase, as well as after every use of the
winch in difficult terrain (off-road rallies, water, mud).
Periodic maintenance consists in: dismantling, cleaning, re-
placing the grease and replacing worn parts of the winch.
Steel wire rope should be greased periodically using an
appropriate penetrating oil. After the first unwinding the
rope is not covered by the warranty. Check the new rope
before use for any damage.
Also, keep all elements of the winch clean.
If you use the winch in difficult conditions (off-road rallies,
water, mud), if the winch and controller box get wet, dry
them, clean, check the technical condition and preserve.
IMPORTANT
It is recommended to run the winch at least once
per month. Unwind and wind the rope several ti-
mes using winch motor. This allows to keep the
winch elements in good repair. In case of prob-
lems, contact DRAGON WINCH service.
i
IMPORTANT
The parameters specified in the manual and des-
criptions are maximum parameters, not working
parameters. For your own safety and safety of
others load the winch at 80% maximum.
To select the winch correctly to your needs, con-
tact DRAGON WINCH distributor.
i
IMPORTANT
The pull capacity of the winch is also dependent
on the sloping of the area. Table 1.0 specifies
the maximum values of the weight of the load,
which can be applied to the winch depending on
the ground slope. The values are given in pounds
and kilograms.
i
GB
WINCH POWER
See Table 1.0 at the end of the manual.
These values apply to freely running vehicle, without ad-
ditional terrain obstacles.
In some cases, using a larger capacity winch or appropria-
te pulley block may be necessary. The values specify the
maximum pull force of the winch using a single rope, when
winding the first rope layer on the drum.

www.dragonwinch.com
46
PARAMETERS OF WINCHES
Model Pull force Gear Brake
Rope length
(m) Dimensions
(mm)
LxWxH
Gross
weight
(kg)
Bolt
pattern
(mm)
(lbs) (kg)
Steel
Synth.
Voltage (V)
Power (KM)
Reduction
dynamic
Model Rope load
kg Rope speed
m/min Power input
12 V (A) Power input
24 V (A) Model Rope layer Rope pull
force (kg) Rope on the drum
(m)
Rope winding speed and power input Pull force depending on the rope layers
Three-stage planetary
self-braking
winch
MAVERICK
DWM 13500 HD EN 12/24 7,8 13 500 6 123 358:1 31 -
574 x 196 x 266
57 4 254 x 114
DWM 12000 HD EN
12/24 7,8 12 000 5 443 358:1 31 -
574 x 196 x 266
55 4 254 x 114
DWM 8000 HD EN 12 7,8 8 000 3 629 358:1 31 -
574 x 196 x 266
53 4 254 x 114
DWM 13000 HD 12/24 6,8 13 000 5 897 265:1 30 -
537 x 159 x 246
43 4 254 x 114
DWM 13000 ST 12 6,8 13 000 5 897 265:1 30 -
535 x 159 x 243
42 4 254 x 114
DWM 12000 HDI 12 6,8 12 000 5 443 265:1 30 30
537 x 159 x 257
42 4 254 x 114
DWM 12000 HD 12/24 6,8 12 000 5 443 265:1 30 30
537 x 159 x 243
41 4 254 x 114
DWM 10000 HD 12 6,8 10 000 4 536 265:1 24 25
450 x 159 x 243
35 4 164 x 114
DWM 3500 ST 12 1,2 3 500 1 588
single-stage
transmission
153:1 15 -
32 x 10 x 10
10 4
130 x 80
DWM 2500 ST 12 0,9 2 500 1 133 153:1 10 -
28 x 10 x 10
92
79
DWM 2000 ST 12 0,9 2 000 907 153:1 10 -
28 x 10 x 10
62
79
DWM 13500 HD EN
- 5,7 68 40
1814 4,4 157 89
3629 2,0 280 157
6123 0,8 420 235
DWM 13500
HD EN
1 6123 4,8
2 4837 12,0
3 4163 21,0
4 3613 31.0
the number
of screws

47
www.dragonwinch.com
GB
Model Rope load
kg Rope speed
m/min Power input
12 V (A) Power input
24 V (A) Model Rope layer Rope pull
force (kg) Rope on the drum
(m)
Rope winding speed and power input Pull force depending on the rope layers
DWM 12000 HD EN
- 5,7 68 40
1814 4,4 157 89
3629 2,0 280 157
5443 1,0 370 205
DWM 8000 HD EN
- 5,7 68 -
1814 4,4 165 -
3629 2,0 295 -
DWM 13000 HD
- 5,9 58 35
1814 4,4 158 89
3629
2,8
314 178
5897 0,8 448 245
DWM 13000 ST
- 5,9 58 35
1814 4,4 158 89
3629
2,8
314 178
5897 0,8 448 245
DWM 12000 HDI
- 5,9 58 35
1814 4,4 158 89
3629 2,8 314 178
5443 0,9 415 225
DWM 12000 HD
- 5,9 58 35
1814 4,4 158 89
3629 2,8 314 178
5443 0,9 415 225
DWM 12000
HD EN
1 5443 4,8
2 4299 12,0
3 3701 21,0
4 3211 31,0
DWM 8000
HD EN
1 3629 7,0
2 3583 16,0
3 2467 26,1
4 2172 31,0
DWM
13000 HD
DWM
13000 ST
1 5897 4,9
2 4658 11,0
3 4009 17,8
4 3463 26,0
5 2889 30,0
DWM
12000 HDI
DWM
12000 HD
1 5443 5,3
2 4299 11,5
3 3701 18,6
4 3211 27,3
5 2667 30,0
DWM 10000 HD
1 4536 3,6
2 3583 7,8
3 3084 12,4
4 2676 17,8
5 2270 24,0

www.dragonwinch.com
48
Model Rope load
kg Rope speed
m/min Power input
12 V (A) Power input
24 V (A) Model Rope layer Rope pull
force (kg) Rope on the drum
(m)
Rope winding speed and power input Pull force depending on the rope layers
DWM 10000 HD
- 5,9 50 -
1814 3,6 180 -
4536 1,3 390 -
DWM 3500 ST
- 3,9 17 -
453 2,7 39 -
907 1,8 78 -
1588 0,6 120 -
DWM 2500 ST
- 3,5 11 -
453 2,4 53 -
1133 0,8 110 -
DWM 2000 ST
- 3,5 11 -
453 2,4 53 -
907 1,0 95 -
DWM 3500 ST
1
1588 1,6
2
1255
3,5
3
1079
5,7
4
937
8,4
5
778
11,3
6
619
15,0
DWM 2500 ST
1 1133 1,5
2 895 3,4
3 770 5,5
4 668 8,2
5 555 10,0
DWM 2000 ST
1 907 1,8
2 716 3,8
3 617 6,2
4 535 8,9
5 444 10,0

49
www.dragonwinch.com
Model Rope load
kg Rope speed
m/min Power input
12 V (A) Power input 24
V (A) Model Rope layer Rope pull
force (kg) Rope on the drum
(m)
Rope winding speed and power input Pull force depending on the rope layers
dynamic
automatic
Model Pull force Gear Brake
Rope length
(m) Dimensions
(mm)
LxWxH
Gross
weight
(kg)
Bolt
pattern
(mm)
(lbs) (kg)
Stal.
Syntet.
Voltage (V)
Power (KM)
Reduction
GB
Three-stage
planetary
HIGHLANDER
DWH 15000 HD 12/24 9,0 15 000 6 803 274:1 28 21/30 578 x 175 x 260 53 4 254 x 114
DWH 12000 HD 12/24 9,0 12 000 5 443 274:1 28 30 578 x 175 x 260 48 4 254 x 114
DWH 9000 HD 12 9,0 9 000 4 082 140:1 28 30 578 x 175 x 260 46 4 254 x 114
DWH 4500 HDL 12 1,9 4 500 2 041 138:1
20
-
389 x 114 x 115
14 4 168 x 76
DWH 4500 HD 12 1,9 4 500 2 041 138:1 15 15
337 x 114 x 115
13 4 124 x 76
DWH 3500 HD 12 1,6 3 500 1 588 138:1 15 15
347 x 114 x 115
12 4 124 x 76
DWH 3000 HD 12 1,4 3 000 1 360 138:1 15 15
347 x 114 x 115
12 4 124 x 76
DWH 15000 HD
- 6,5 65 39
1814 5,2 177 100
3629 3,8 353 201
6803 1,5 483 274
DWH 12000 HD
- 6,5 65 39
1814 5,2 177 100
3629 3,8 353 201
5443 2,0 470 265
DWH 15000 HD
1 6803 5,2
2 5372 11,0
3 4626 18,3
4 4014 26,6
5 3333 28,0
DWH 12000 HD
1 5443 5,8
2 4299 12,7
3 3701 20,0
4 3211 28,0
the number
of screws
This manual suits for next models
24
Table of contents
Languages:
Other DRAGON WINCH Winch manuals
Popular Winch manuals by other brands

Far Tools
Far Tools TE 907 Original manual

Gude
Gude GGHW 540/8 Translation of the original instructions

Paccar
Paccar Braden PD12C Installation maintenance and service manual

Clas Ohlson
Clas Ohlson HP-123D manual

Warrior Winches
Warrior Winches 20YPSHY-CAD owner's manual

MSW
MSW PROPULLATOR 2000-A user manual

Pullmaster
Pullmaster R7 Series Instructions and parts manual

Comeup
Comeup Rhino 12 Pro manual

HyQuest Solutions
HyQuest Solutions WS250 instruction manual

DINAMIC OIL
DINAMIC OIL SE35 instruction manual

Farmi Forest Corporation
Farmi Forest Corporation 61 Operation and maintenance manual

Uniforest
Uniforest 45H Instructions for use