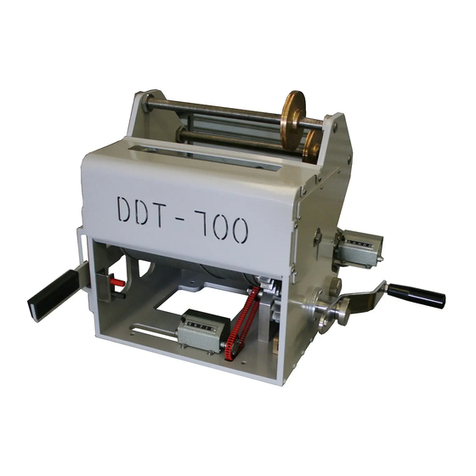
HyQuest Solutions WS250 User manual

HyQuest Solutions Pty Ltd
WS200/WS300/WS500 Page 1of 28 ISSUE 3:11/6/19
© Copyright
HYQUEST SOLUTIONS PTY LTD
48-50 Scrivener St, Warwick Farm, NSW 2170,
AUSTRALIA
Phone: +61 2 9601 2022 Fax: +61 2 9602 6971
Email: sales@hyquestsolutions.com.au
Web: www.hyquestsolutions.com.au
QUALITY SYSTEM
ISO: 9001
CERTIFIED
WS250/WS400/WS500
INSTRUCTION MANUAL

HyQuest Solutions Pty Ltd
WS200/WS300/WS500 Page 2of 28 ISSUE 3: 11/6/19
© Copyright
CONTENTS
CONTENTS...........................................................................................................................................................2
INTRODUCTION..................................................................................................................................................3
OPERATION .........................................................................................................................................................4
Initial set up:.......................................................................................................................................................4
MAINTENANCE...................................................................................................................................................7
SPECIFICATIONS ................................................................................................................................................8
FAULT FINDING..................................................................................................................................................9
Mechanical .........................................................................................................................................................9
Electrical.............................................................................................................................................................9
FITTING AMERGRAPH CABLE TO SLIPRING................................................................................................11
FITTING C1 CONNECTOR TO AMERGRAPH CABLE....................................................................................14
FITTING ANGLE PLUG TO AMERGRAPH CABLE.........................................................................................15
FITTING TEE PLUGTO AMERGRAPH CABLE ...............................................................................................17
PART LIST ..........................................................................................................................................................18

HyQuest Solutions Pty Ltd
WS200/WS300/WS500 Page 3of 28
© Copyright
INTRODUCTION
The HyQuest Solutions Models WS250, WS400 and WS500 Gauging Winches are our latest
generation of portable type single drum winches. The WS250/400/500 is used in conjunction with a
current meter and a gauging weight for the measurement of water flow in streams where wading is a
difficult task, hence measurement is performed from a boat or a bridge.
All models are fitted with an automatic “Weston” brake assembly that will hold the load in position
once the crank handle is stopped. Hence, to operate the winch and lower the suspended current
meter/gauging weight, it is necessary to rotate the handle in a counter-clockwise position.
They are also fitted with amergraph cable and a C1 connector ready for operation with a current
meter. As an option our SAN22SS stainless steel winch board and outrigger can be provided (see
page 4 of this manual.)
ISSUE 3:11/6/19

HyQuest Solutions Pty Ltd
WS200/WS300/WS500 Page 4of 28
© Copyright
OPERATION
The current meter can be fitted with a stabiliser tail fin which is attached to a hanger bar and
Colombus gauging weight in sizes of 7, 15, 23, 34, 45 and 68 Kg. This assembly is suspended from
the WS250/400/500 gauging winch with armoured signal cable.
HyQuest Solutions provides a range of counters to operate with the WS250/400/500 winch. The
models available are CMC20A, CMCsp, PVD100, PVD200 and the HydroTab/CMCbt android
device.
Initialsetup:
Remove the winch from the carry case.
Fit handle, washer and M10 retaining screw onto the shaft of the winch. Use the supplied
“Allen Key” to tightly lock the retaining screw.
For light gauging
weights use this
position on the handle
For heavy gauging weights,
use this position on the handle
to gain more torque
ISSUE 3:11/6/19

HyQuest Solutions Pty Ltd
WS200/WS300/WS500 Page 5of 28
© Copyright
Fit the winch to the required location such as the winch board or the A Reel trolley using the
supplied bolts and washers.
Wind off sufficient cable to attach gauging weight and current meter.
Connect pulse counter and check operation by spinning the Fan/cup wheel on the current
meter.
Using the Winch Board
All models can be used with the HyQuest Solutions Winch board model SAN22SS. Due to the wide
drum width on the Model WS500 it is not suitable for the 3WBC or 4WBC Bridge Crane products.
Note:
The Winch Board is light weight and is easily handled for performing boat or
bridge gauging. The WS250/400/500 is mounted to the winch board using the 4
mounting holes on the bottom of the frame and the 4 bolts supplied with the
winch.
SAN22SS Winch Board used for gauging a
stream from a bridge or from a boat
ISSUE 3:11/6/19

HyQuest Solutions Pty Ltd
WS200/WS300/WS500 Page 6of 28
© Copyright
Using the A Reel Trolley
Note:
The WS250/400 is mounted to the 3WBC Bridge Crane using the 4 mounting
holes on the bottom of the frame and the 4 bolts supplied with the winch.
A Reel Trolley used to perform gauging
from a bridge.
ISSUE 3:11/6/19

HyQuest Solutions Pty Ltd
WS200/WS300/WS500 Page 7of 28
© Copyright
During Operation
Rotate the handle in a counter-clockwise direction until the “underside” of the gauging weight
touches the surface of the water.
At this instance, you need to reset the mechanical counter on the winch. Please note do not
reset the counter while rotating as it may cause the number reels to momentarily jam. If this
happens, stop rotating the handle and then press the reset button again.
•Lower the current meter and weight to 0.2m, 0.6m or0.8m of the water level and measure
the velocity
MAINTENANCE
TheonlymaintenancerequiredistolightlyoilorgreasetheLayerwindingscrew
periodically.Thisusuallyisrequirediftheleadscrewappearstobe“dry”orifthe
sheaveisemitting“squealing”noisewhenrotating.
Mechanical Counter
Layer Winding Screw
ISSUE 3:11/6/19

HyQuest Solutions Pty Ltd
Page 8of 28
SPECIFICATIONS
70kg (154 lbs) maximum when used with the 4WBC bridge crane (Models
WS250 and 400 only).
45Kg ( 99lbs) when used stand alone on a SAN22SS winch frame or with
the 3WBC bridge crane. (all Models)
Cast Aluminium, 320mm (12.6”) Circumference.
Robust Stainless Steel Grade 304, Powder Coated.
Six digit resettable, registering depth in centimeters, 1cm resolution
(Imperial 1/10 of a foot)
Carry handle and light weight
Positive Weston Brake will hold the load in any position
Winch Model Capacity Using 2.5mm
(1/10”) Dia. Cable
(Supplied Standard)
Capacity Using 3.2 mm
(1/8”) Dia. Cable
(available on request)
WS250 25m (84ft) 20m (65ft)
WS400 40m (131ft) 30m (99ft)
WS500 50m (164ft) 40m (131ft)
4 x M10 mounting holes for winch board with outrigger model SAN22SS
4 x M10 mounting holes for A reel trolley
Manual
Winch
Model Length
(mm)& (inch) Width
(mm)& (inch) Height
(mm)& (inch) Weight
(Kg) & (lb)
WS250 341mm (13.4”) 210mm (8.3”) 230mm (9”) 15Kg (30 lb)
WS400 460mm (18”) 210mm (8.3”) 230mm (9”) 17Kg (38 lb)
WS500 540mm (21”) 210mm (8.3”) 230mm (9”) 23Kg (50 lb)
Load Capacity:
Sounding Drum:
Frame:
Counter:
Portable:
Brake:
Drum Capacity:
Mounting:
Operation:
Dimensions:
Packing Details:
WS200/WS300/WS500
© Copyright
Supplied in aluminum carry case
Winch
Model Length
(mm)&
(inch)
Width
(mm)&
(inch)
Height
(mm)&
(inch)
Weight
(Kg) &
(lb)
Volume
M3
WS250 461mm
(13.4”) 280mm
(11”) 270mm
(10.6”) 25Kg
(30 lb) 0.04
WS400 580mm
(23”) 280mm
(11”) 270mm
(10.6”) 27Kg
(38 lb) 0.044
WS500 660mm
(26”) 280mm
(11”) 270mm
(10.6”) 33Kg
(50 lb) 0.05
ISSUE 3:11/6/19

HyQuest Solutions Pty Ltd
WS200/WS300/WS500 Page 9of 28
© Copyright
FAU LT FINDING
Mechanical
Fault Symptom Possible Cause Action
Counter not registering -Counter was reset while rotating
handle -Reset counter in a stop
position
-Counter gear loose on shaft - Tighten Grub Screw
Weston brake will not
disengage -Seizure due to prolonged period
without use-Attach heavy load to
cable and pull or hit the
handle sharply in the
lower direction (Anti-
Clockwise). Repeat
several time and if
unsuccessful; remove
brake assembly for
inspection.
Weston brake slips in “raise”
mode -Ratchet wheel, friction disc and
drum end surfaces not “bedded-
in”
-Attach light load to
cable and wind up and
down several times with
Weston brake engaged.
If no improvement,
dismantle and check for
grease on friction
surfaces.
Layer winding sheave not
freely running, emitting
“squealing” noise or lead
screw dry
-Shaft dirty - Remove from winch
and clean sheave and
shaft separately. Lightly
oil or grease after re-
installing
-Thread damaged -Repair damaged thread
with file. Lightly oil or
grease after re-installing
-ThreadDry -Lightly oil or grease
Electrical
Fault Symptom Possible Cause Action
Current meter counter not
registering -Counter faulty -Bridge positive and
negative terminals on
counter. If no signal,
repair counter
-Lead damaged - Connect lead to counter
and bridge other end. If
no signal, lead faulty.
Replace or repair ends.
-Earth (Black) terminal is faulty -With lead connected to
winch, bridge red
terminal to frame. If no
signal terminal loose or
corroded.
ISSUE 3:11/6/19

HyQuest Solutions Pty Ltd
WS200/WS300/WS500 Page 10 of 28
© Copyright
-Damaged brush or terminal wire
-Wiring to slipring break
-Bridge slipring towinch
frame. If signal emits
that means proper circuit
between brush and red
terminal. If no signal,
loose red terminal
connection, broken, or
brush sticking. To check
condition of brush
remove signal adaptor
by unscrewing the black
terminal and the
mounting screw. Ensure
that brush and spring
move freely insignal
adaptor housing or
repair with file and
extend the spring.
-Check the wire on the
slipring if loose or
broken. If broken see
section fitting
amergraph cable to
slipring.
Fault Symptom Possible Cause Action
Current meter counter
registering continuously -Faulty lead -Fit lead to counter only.
Signal shows internal
short circuit in lead.
Inspect for break or
damage.
-Current meter or angle plug are
faulty -Disconnect meter. If
signal still emitting
continuously. Check the
earth inside angle plug
or damage to cable
between meter and
gauging weight. If
signal stops emitting
continuously repair the
current meter.
-Meter suspension cable is
damaged, or slipring wires
earthing to drum end
-With lead connected to
winch, bridge red
terminal to frame. If no
signal terminal loose or
corroded.
ISSUE 3:11/6/19

HyQuest Solutions Pty Ltd
WS200/WS300/WS500 Page 11 of 28
© Copyright
FITTINGAMERGRAPHCABLETOSLIPRING
Step1.
Step2.
Step3.
Remove 95 mm (3.7”) of the outer
layer of the amergraph cable
Remove 80 mm(3”) of the inner layer
of the amergraph cable cut 65mm (2.5”)
neatly. Twist the other 15mm to the edge
of the cable as shown
Add Heat shrink to the inner layer as
shown
Feed the cable through
drum end as shown
ISSUE 3:11/6/19

HyQuest Solutions Pty Ltd
WS200/WS300/WS500 Page 12 of 28
© Copyright
Step4.
Step5. Solder the ring terminal to the end of the
contact wire and slide the Heat shrink
over and shown. Apply heat to Heat
shrink
Slide 105mm (4”) of Heat shrink above
the cable end as shown
This is how the cable should look
ISSUE 3:11/6/19

HyQuest Solutions Pty Ltd
WS200/WS300/WS500 Page 13 of 28
© Copyright
Step6.
Screw the ring terminal to slipring using
the existing screw and tighten the cable
clamp and test signal.
Cable clamp
ISSUE 3:11/6/19

HyQuest Solutions Pty Ltd
WS200/WS300/WS500 Page 14 of 28
© Copyright
400
1. With R Clip SC019-01 and Pin C101-03 removed,
push the end of the sounding cable through the
connector body C101-01.
Connector Body
C101-01
2. Loop the cable and push back through the
connector for approximately 400MM.
Wedge C101-02
3. Fit Wedge inside cable loop.
4. Pull cable back until wedge is held and then pull
cable again tightly to lock Wedge in position.
Pin C101-03
R Clip SC019-01
Pull
FITTINGC1CONNECTORTOAMERGRAPHCABLE
ISSUE 3:11/6/19

HyQuest Solutions Pty Ltd
WS200/WS300/WS500 Page 15 of 28
© Copyright
FITTINGANGLEPLUGTOAMERGRAPHCABLE
1. Slide nut and flanged bush onto Amergraph cable.
2. Wrap insulating tape around cable 25mm (1") from end, or fit heat shrink, 20mm (3/4") long.
3. Unwind outer layer of cable and cut off at tape.
4. Unwind inner cable layer back to tape, one strand at a time and cut off 3mm (1/8") in
front of the insulation tape.
5. Slide flanged bush forward and bend the short inner layer strands onto the bush.
6. Strip conductor insulation back to 8mm (5/16") in front of the flanged bush.
7. Coat copper conductor wire with resin-cored solder. BE CAREFUL not to heat wire
insulation. Cut wire back to 4mm (5/32") long.
ISSUE 3:11/6/19

HyQuest Solutions Pty Ltd
WS200/WS300/WS500 Page 16 of 28
© Copyright
8. Slide rubber seal onto conductor and then push cable into plug. Look into the other
end of the plug and check that the conductor wire is in the centre of the plug hole.
9. Screw nut onto plug and tighten with a spanner.
10. Screw pin into plug and tighten, using a 1/16"Allen key as a lever.
11. Slide rubber insulator onto pin
12. Check circuit.
Angle Plug Assembly AP02
Plug
Rubber Seal
Check Location of
Conductor Wire
ISSUE 3:11/6/19

HyQuest Solutions Pty Ltd
WS200/WS300/WS500 Page 17 of 28
© Copyright
FITTINGTEEPLUGTOAMERGRAPHCABLE
1. Proceed steps 1-9 on both sides of plug.
2. Screw pin into plug and tighten, using 1/16" hexagon wrench as a lever
3. Slide rubber insulator onto pin
4. Check circuit.
Angle Plug Assembly TP02
ISSUE 3:11/6/19

HyQuest Solutions Pty Ltd
WS200/WS300/WS500 Page 18 of 28
© Copyright
PA RT LIST
ITEM NO. PART NUMBER DESCRIPTION QTY.
1 WS401 FRAME 1
2SC008-78 M10 NUTSERT 8
3 SC017-35 M10 HEX BOLT 6
4 SC004-34 M10 FLAT WASHER 6
5 SC045-21 M5x12 SOC HD SCREW 3
6 SC045-88 M5x8 SOC HD SCREW 3
Frame Assembly
ISSUE 3:11/6/19

HyQuest Solutions Pty Ltd
WS200/WS300/WS500 Page 19 of 28
© Copyright
Drum Assembly
ISSUE 3:11/6/19

HyQuest Solutions Pty Ltd
WS200/WS300/WS500 Page 20 of 28
© Copyright
ITEM NO. PART NUMBER DESCRIPTION QTY.
7 WS402-01 DRUM 1
8 WS402-02 DRUM END RHS 1
9 WS402-03 DRUM END LHS 1
10 WS402-04 BRAKE PAD 2
11 WS402-05 RATCHET 1
12 WS402-06 BRAKE SPACER 1
13 WS402-07 GEAR SPACER 1
14 WS402-08 DRUM GEAR 1
15 SC045-88 M5 x 8 SOC HD SCREW 3
16 LAT10-02 MYLAR DISK 1
17 LAT10-03 SLIP RING 1
18 LAT10-04 INSULATING BUSH 4
19 SC016-02 1/8W x 1/4" CHEESE HD SLOT SCREW 4
20 SC006-166 CABLE CLAMP 1
21 SC048-30 BUSH 1
22 SC042-08 1/8" ROLL PIN 6
Drum Assembly
ISSUE 3:11/6/19
This manual suits for next models
2
Table of contents
Other HyQuest Solutions Winch manuals
Popular Winch manuals by other brands

Tulsa
Tulsa 354IRL Service manual

Smittybilt
Smittybilt 35220 installation instructions

Farmi Forest Corporation
Farmi Forest Corporation JL 601 Operating, Maintenance and Spare Parts Manual

Bulldog Security
Bulldog Security DC Series owner's manual

SAHLINS
SAHLINS 3020-1000 instruction manual

Comeup
Comeup CP-750T Wiring diagram

HSS Hire
HSS Hire G Saver Operating & safety guide

TrailFX
TrailFX XV95 Assembly, Installation, Operation and Maintenance Instructions

HADEF
HADEF 42/87P Installation, operating, & maintenance instructions

Sealey
Sealey ATV1135.V2 instructions

FLINT HILL
FLINT HILL FHG47ZR Instruction manual parts catalog

MVP
MVP U0701-12 VDC instruction manual