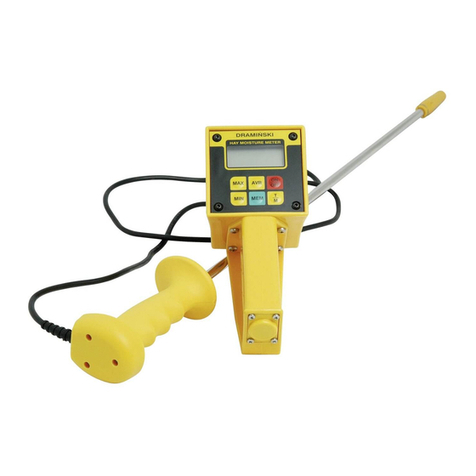
Draminski GRAIN MASTER User manual

RU
ES
FR
DE
EN
GRAIN MASTER (GMS)
Grain Moisture Meter
User manual
Bedienungsanleitung
Mode d’emploi
Manual de uso
Руководство по эксплуатации
ISO 9001

1
EN
SECTION 1 |
SECTION 2 |
SECTION 3 |
SECTION 4 |
SECTION 5 |
SECTION 6 |
SECTION 7 |
SECTION 8 |
SECTION 9 |
SECTION 10 |
SECTION 11 |
SECTION 12 |
SECTION 13 |
CONTENTS
INTRODUCTION. . . . . . . . . . . . . . . . . . . . . . . . . . . . . . . . . . 3
COMPONENTS. . . . . . . . . . . . . . . . . . . . . . . . . . . . . . . . . . . 5
PRODUCT DESCRIPTION . . . . . . . . . . . . . . . . . . . . . . . . . . . . 7
KEYBOARD FUNCTIONS . . . . . . . . . . . . . . . . . . . . . . . . . . . .11
DEVICE OPERATION . . . . . . . . . . . . . . . . . . . . . . . . . . . . . . .13
INSTRUCTIONS FOR MEASUREMENTS . . . . . . . . . . . . . . . . . . .17
MEASUREMENTS . . . . . . . . . . . . . . . . . . . . . . . . . . . . . . . . .21
LIST OF AVAILABLE SPECIESAND ADDING
NEW TYPES OF GRAIN. . . . . . . . . . . . . . . . . . . . . . . . . . . . . .25
UPDATING VIA USB . . . . . . . . . . . . . . . . . . . . . . . . . . . . . . .27
MODIFICATION OF MOISTURE INDICATIONS. . . . . . . . . . . . . . .29
MAIN MENU . . . . . . . . . . . . . . . . . . . . . . . . . . . . . . . . . . . .33
BATTERY REPLACEMENT . . . . . . . . . . . . . . . . . . . . . . . . . . . .41
FINAL NOTES . . . . . . . . . . . . . . . . . . . . . . . . . . . . . . . . . . .43
TECHNICAL DATA. . . . . . . . . . . . . . . . . . . . . . . . . . . . . . . . .45

2

3
EN
INTRODUCTION

4
Thank you for purchasing new Dramiński Grain Master
grain moisture meter. This excellent device will be very
useful in your activity. Thanks to special design and abil-
ity to grind the sample, grain moisture is accurately deter-
mined.
Innovative solutions, state-of-the-art technology and
great versatility due to the possibility of updating through
the USB port, make it a good long-term investment.
Increase your crops and enjoy your work with the Dramin-
ski GMS grain moisture meter.
The manufacturer – DRAMIŃSKI S.A. oers its users great
knowledge and reserves the right to introduce hardware
and rmware modications. DRAMIŃSKI S.A. reserves the
right to amend the contents of this instruction manual.
Read this instruction manual thoroughly before putting
this device into operation. It will guarantee the safety
of operation as well as long and reliable functioning of
the device.
Declaration of conformity is available for review at the
seat of DRAMIŃSKI S.A. at Wiktora Steena 21, Sząbruk,
11-036 Gietrzwałd, Poland
The manufacturer provides warranty and post-warranty
service in Poland. For more information and data, visit our
website www.draminski.com.
Please note that electronic equipment
and batteries must not be disposed of
in household waste containers. Used
equipment and appliances should
be delivered to special disposal facili-
ties, according to the valid regulations.
Proper waste disposal helps to save the
natural environment.
INTRODUCTION

5
EN
COMPONENTS
SECTION 1

6
COMPONENTS:
SECTION 1 | COMPONENTS
1. transport case with foam,
2. Dramiński GMS moisture meter,
3. rubber dust cup of mini-USB port,
4. 24 mm cap (dispenser),
5. instruction manual,
6. measuring chamber knob,
7. ratchet wrench,
8. USB cable to communicate with PC,
9. plastic brush to clean the measuring chamber,
10. plastic brush to clean the measuring chamber
(with a handle),
11. 1 battery, 9V (type 6LF-22).
42
3
7
6
1
5
11
810
9

7
EN
PRODUCT DESCRIPTION
SECTION 2

8 SECTION 2 | PRODUCT DESCIPTION
PRODUCT DESCRIPTION
1. measuring chamber knob,
2. knob’s block system,
3. knob’s block system limit,
4. grinding device,
5. measuring chamber with built-in
digital temperature sensor,
6. LED backlight graphic LCD
display,
7. membrane keyboard,
8. mini-USB port with a rubber cup,
9. dispenser to measure the volume
of the sample (24 mm cap),
10. ratchet wrench,
11. heavy duty ABS plastic casing,
12. battery compartment for 1 bat-
tery 9V (type 6LF-22).
1
2
4
5
6
7
8
12
9
10
11
3
4

9
EN
APPROXIMATE DIMENSIONS
10 cm
20,0 cm
SECTION 2 | PRODUCT DESCIPTION
5,8 cm
7,5 cm
4,5 cm
6,4 cm

10 SECTION 2 | PRODUCT DESCIPTION

11
EN
KEYBOARD FUNCTIONS
SECTION 3

12
– switch on
– switch o – hold for 5 seconds (NOTE!
GMS can be switched o using option “Turn
o!” in the main menu, if the device is not
used, it switches o automatically in order
to save the source of energy)
– switch on main menu – hold for 2 seconds
– program function clear
– program function conrm
– start measuring
– menu scrolling
– setting values of menu options
– grain selection from the list
– delete average result when measuring
moisture of the given sample
ESC
OK
on/o
Grain MasterGrain Master
SECTION 3 | KEYBOARD FUNCTIONS

13
EN
DEVICE OPERATION
SECTION 4

14
The GMS is ready for operation if a battery in the bat-
tery compartment is properly inserted (pay attention
to polarity).
Switch the device on with the help of the button.
a) you will hear 1 short sound signal and then greet-
ing text appears on the screen which shows the
name of the device, rmware version, calibration
version and serial number, e.g.:
www.draminski.com
Grain Master
Firmware v: 1.76 K:9.99
SN: GS010030
b) then there appears a list of available species and in
the upper part of the device there appears mod-
el of the device, battery level (when the device
switches on, it shows the last tested species), e.g.:
GMS
Choose species
Canola
Cannabis sativa
Blue lupine
Yellow lupine
NOTE! If the battery is discharged to continue op-
eration, the device automatically signals it with a
message:
GMS
Change battery
which means that you have to insert a new bat-
tery;
c) in order to save batteries, when no key is pressed
for a certain time, the device will go to a standby
mode and the backlight will turn o (that time can
be changed through the proper menu option –
see MAIN MENU section). Press any button to re-
turn to the operation mode;
SECTION 4 | DEVICE OPERATION

15
EN
d) if the GMS remains in the standby mode for several
minutes, it will shut down automatically (time set-
ting possible in menu). Then you will hear a short
sound signal informing that countdown from 10
to 0 is displayed on the screen – press any button
to stop, or the device will switch o automatically
to save power, e.g.:
GMS
Power o in 5 s
GMS
Power o in 1 s
e) e) for manual switch o, hold button for 5 sec-
onds or select “Turn o!” in the main menu.
SECTION 4 | DEVICE OPERATION

16 SECTION 4 | DEVICE OPERATION

17
EN
INSTRUCTIONS
FOR MEASUREMENTS
SECTION 5

18
– In order to measure proper volume of grain use the
cap with 24 mm screw which is used as dispenser
as well. You should take one full dispenser, spread
the grain on the grinding mechanism of the meas-
uring chamber and tighten the knob of the cham-
ber until it stops on the knob’s block system limit
extending from the measuring chamber. After
that select the species from the list of the device
and start measuring pressing button.
– Measuring the sample with the dispenser and
tightening the knob properly is necessary in or-
der to obtain accurate results.
– The measuring chamber should be thoroughly
cleaned especially when you change the species of
grain and when the samples have dierent, usually
increased moisture.
– Grinding device should be thoroughly cleaned af-
ter measuring samples which have increased hu-
midity.
– If humidity is increased (more than 25%), it is nec-
essary to avoid the situations when too cold grain
is inserted into the chamber, because water vapour
condenses on the surface of the grain. In these
situations it is necessary to mix the grain properly,
take the sample and wait a few minutes until the
temperature of the grain increases. Moreover, the
rst measuring result should be ignored, the nal
result should consist of an average result of the fol-
lowing three measurements.
– When mounting the knob on the threaded shaft of
the measuring chamber, you should pay special at-
tention to proper interlocking of the thread.
SECTION 5 | INSTRUCTIONS FOR MEASUREMENTS

19
EN
– Size of grains and purity of test sample de-
termine obtainment of a correct result. Cha,
screenings and dirt content within the sample
should be as low as possible.
– Water remaining on top of the sample (e.g. dew)
can aect measurement result. Samples should be
aired before measurement to avoid it.
– The nal result of measuring should be the aver-
age value of e.g. 3 recent tests of a given sample,
which is calculated automatically and displayed in
the bottom right corner of the screen (number of
measurements used for calculation of the average
value can be changed in the menu).
– Make sure that the measuring chamber tempera-
ture is the same as the sample temperature (do not
pour cool grain into the hot device (e.g. after being
exposed to sunlight and vice-versa).
The temperature sensor may react with a time-lag
because of metal parts of the measuring chamber.
– Every species has a dierent range of moisture;
however, when it is exceeded, it is signaled with a
particular sign, e.g.:
“<8.5%”(below the range), when the sample’s mois-
ture is less than 8.5%,
“>35.0%” (over the range), when the sample’s mois-
ture is more than 35%.
– If signicant departures are found in the result for
a given species, either too high or too low by a
similar value within the entire measurement range
in comparison with the drying-and-weighing test
method, indications must be modied.
SECTION 5 | INSTRUCTIONS FOR MEASUREMENTS
Other manuals for GRAIN MASTER
1
Table of contents
Languages:
Other Draminski Measuring Instrument manuals
Draminski
Draminski GRAIN MOISTURE METER User manual
Draminski
Draminski GMM mini User manual

Draminski
Draminski GMM mini User manual

Draminski
Draminski GRAIN MASTER User manual

Draminski
Draminski HMM User manual

Draminski
Draminski HMM User manual

Draminski
Draminski TwistGrain User manual

Draminski
Draminski GMM User manual

Draminski
Draminski Twist Grain pro User manual
Draminski
Draminski TG pro coffee User manual