Draminski Twist Grain pro User manual

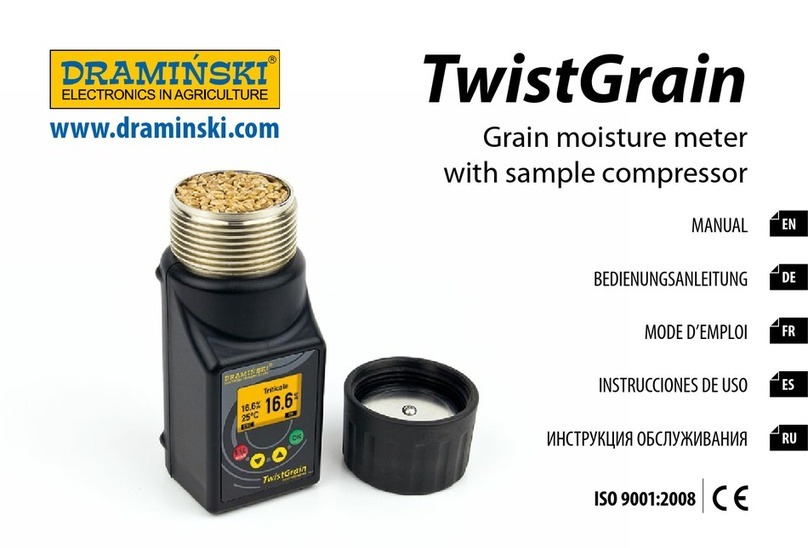
Dramiński Twist Grain pro
Grain moisture meter
with sample compressor
INSTRUCTION MANUAL
www.draminski.com
ISO 9001
EN

1
EN
CONTENT
INTRODUCTION . . . . . . . . . . . . . . . . . . . . . . . . . . . . . . . . . 3
CHAPTER 1 | EQUIPMENT . . . . . . . . . . . . . . . . . . . . . . . . . . . . . . . . . . . . 5
CHAPTER 2 | CONSTRUCTION OF THE DEVICE . . . . . . . . . . . . . . . . . . . . . . 7
CHAPTER 3 | KEYBOARD FUNCTIONS . . . . . . . . . . . . . . . . . . . . . . . . . . . 11
CHAPTER 4 | HOW TO START THE DEVICE . . . . . . . . . . . . . . . . . . . . . . . . 13
CHAPTER 5 | NOTES FOR MEASUREMENTS . . . . . . . . . . . . . . . . . . . . . . . 17
CHAPTER 6 | HUMIDITY MEASUREMENTS . . . . . . . . . . . . . . . . . . . . . . . . 21
CHAPTER 7 | EXTERNAL TEMPERATURE PROBE MEASUREMENTS . . . . . . . . . 25
CHAPTER 8 | LIST OF AVAILABLE SPECIES AND HOW TO ADD NEW SPECIES . . 29
CHAPTER 9 | UPDATE VIA USB . . . . . . . . . . . . . . . . . . . . . . . . . . . . . . . . 31
CHAPTER 10 | MODIFICATION OF HUMIDITY RESULTS . . . . . . . . . . . . . . . . 33
CHAPTER 11 | MAIN MENU . . . . . . . . . . . . . . . . . . . . . . . . . . . . . . . . . . . 37
CHAPTER 12 | CHANGE OF BATTERIES . . . . . . . . . . . . . . . . . . . . . . . . . . . 49
CHAPTER 13 | FINAL NOTES . . . . . . . . . . . . . . . . . . . . . . . . . . . . . . . . . . 53
CHAPTER 14 | TECHNICAL DATA . . . . . . . . . . . . . . . . . . . . . . . . . . . . . . . 55

2

3
EN
INTRODUCTION

4
Thank you for purchasing our new Dramiński Twist Grain
pro grain moisture meter. This perfect product will be irre-
placeable device in your activity. Due to its special design
(and pressing the sample before the measurement), you
will accurately determine your grain humidity.
Innovative solutions, state-of-the-art technology, vast
versatility, USB connection and a possibility to connect an
external temperature probe change the purchase of your
TG pro into a priceless investment. We wish you fruitful
harvests and pleasant work with the intelligent Draminski
Twist Grain pro grain moisture meter.
The manufacturer DRAMINSKI S.A. is always ready to sup-
port their users with their knowledge and simultaneously
reserves the right to introduce changes and improve-
ments to the design and the software. DRAMINSKI S.A.
also reserves the right to introduce changes to the present
instruction manual.
Before using the device, please, read this instruction man-
ual carefully. It will guarantee safety for the user and long,
reliable functioning of the grain moisture meter.
Declaration of conformity is located at the head oce of
DRAMINSKI S.A., ul. Owocowa 17, 10-860 Olsztyn, Poland.
More information and current data you will nd at
www.draminski.com
We would like to remind that electron-
ic devices, batteries and accumulators
cannot be thrown away into common
domestic waste containers. The user is
responsible to handover these types
of waste to companies which deal with
such utilization in accordance with the
applicable legal provisions. By assuring proper utilization
you help protect natural environment.
INTRODUCTION

5
EN
EQUIPMENT
CHAPTER 1

6
EQUIPMENT
CHAPTER 1 | EQUIPMENTE
1. Dramiński Twist Grain Pro grain moisture meter,
2. Tightening cap of the measuring chamber
(with inserted 3V battery type CR-2032),
3. Transport case,
4. Carrying strap attached to the case which
enables hanging the device,
5. USB cable used to communicate
with the computer,
6. Instruction manual,
7. 4 alkaline batteries 1.5V type LR6, AA,
8. Rubber protection of mini-USB slot.
6
1
8
32
7
5
4

7
EN
CONSTRUCTION OF THE DEVICE
CHAPTER 2

8 CHAPTER 2 | EXTERNAL CONSTRUCTION
1. Tightening cap with a sound signaling
a proper force of clamping,
2. Measuring chamber with
a digital temperature sensor,
3. High quality ABS body,
4. LCD LED backlit graphic display,
5. Four-button membrane keyboard,
6. Mini-USB slot with a rubber protector,
7. Chamber for 4 batteries 1.5V type LR6, AA.
1. The cap’s body is made with
addition of breglass,
2. Battery 3V (type CR-2032)
of the sound buzzer,
3. The slot to remove grain
residuals,
4. Screws 2.5x10,
5. Lid of the cap.
2
1
7
4
5
4
5
2
3
EXTERNAL CONSTRUCTION
3
1
6

9
EN
CHAPTER 2 | EXTERNAL CONSTRUCTION
APPROXIMATE DIMENSIONS
7 cm 7,5 cm
16,5 cm

10 CHAPTER 2 | EXTERNAL CONSTRUCTION

11
EN
KEYBOARD FUNCTIONS
CHAPTER 3

12
– To turn on the device.
– To turn o the device, hold the button
for 5 seconds, (NOTICE! TG pro can
be turned o via the menu using ”Turn o!”,
if the device is not operated, it will turn o
automatically in order to save the battery).
– To start the main menu – hold the button
for 2 seconds.
– To delete program functions.
– To conrm program function
– To start measurement.
– To navigate up and down the menu.
– To set the values in the menu.
– To select the grain from the list of species.
– To clear the average result of the measurements
of a particular sample.
–
To save the result with the date
and hour to the memory of the device.
pro
CHAPTER 3 | KEYBOARD FUNCTIONS

13
EN
HOW TO START THE DEVICE
CHAPTER 4

14 CHAPTER 4 | HOW TO START THE DEVICE
The Twist Grain pro is ready to operate if the battery
chamber contains properly inserted batteries (it is neces-
sary to pay attention to polarity).
In the main menu of the device you can select the
operating mode which you would like to use currently
(basic or advanced).
In the basic mode we focus on easiness of the use and
quick and comfortable measurements of humidity and
temperature of the grain so that operating of the device
was user-friendly for beginners.
In the advanced mode there are options enabling the us-
age of the external temperature probes, saving thousands
of measurements to the internal memory of the device
with dates and hours, segregation of the measurements
taking into account the grain samples, place of storage,
suppliers and much more information so that to satisfy
the needs of the most demanding customers. Addition-
ally, people who use the advanced mode can download
special software from our site www.draminski.com to
communicate with the computer which enables down-
loading the data from the TG pro to the computer hard
disk, creating reports, prints, diagrams, spreadsheets etc
Turn
ON the device using the button.
a) a greeting message appears on the display which
determines the name of the device, the software
version, the version of calibration and the series num-
ber, for example:
www.draminski.com
TwistGrain pro
Firmware v: 1.42 K:0.10
SN: TG000030
b) then a list of available species appears on the display,
in the upper corner appears a model of the device and
current battery status (in the advanced mode there
is also a date). After the device is turned on, there
appears the latest tested species, for example:
Basic mode Advanced mode
TG pro
Choose species
Rye
Triticale
Spring barley
Oats
TG pro 21.01.2018
Choose species
Rye
Triticale
Spring barley
Oats

15
EN
NOTICE! If the batteries are too low to carry on operating,
the device automatically signals it with the following
message:
TG pro
Change batteries
It means that the batteries have to be replaced by new
ones.
c) in order to save the source of power supply, when the
keys are not used, the devices turns to stand-by mode
after a certain time, it means that the display turns
black (this time can be set in the menu, see chapter:
MAIN MENU). Pressing on any key causes that the
device gets to operating mode again,
d) if the TG pro is in stand-by mode for a few minutes,
it will be turned o automatically (this time can be set
in the menu, see chapter: MAIN MENU). The device
will signal this by turning on the display and there
appears a countdown from 10 to 0, which can be
aborted by any button. However, if you do not do it,
the device will turn o automatically in order to save
the source of energy, for example:
TG pro
Power o in 5
TG pro
Power o in 1
e) in order to turn o the device, hold the
button
for 5 seconds or from the position of the MAIN MENU
choose option
”
Turn o!”
f) during the measurements, in the lower part of the dis-
play you see the cues what a certain button of the mem-
brane keyboard is responsible for, for example:
CHAPTER 4 | HOW TO START THE DEVICE

16 CHAPTER 4 | HOW TO START THE DEVICE
In the advanced mode
(function Esc) causes that you go back to the list of available species,
(function Clr) clears the average result,
(function Mem) safes the result in the internal memory,
(function Start) launches another measurement.
pro
TG pro 21.01.2018
12:53
Variety wheat
13.7%
Esc Clr Mem Start
13.8%
21.4C

17
EN
NOTES FOR MEASUREMENTS
CHAPTER 5

18
– Before you start the measurements, it is necessary
to check if the measuring chamber is clean and dry.
It is important to remember to remove the grain from
the chamber as soon as the measurement is nished.
– Fill the measuring chamber with the grain to the edge
and then twist the tightening cap until you hear a sound
signal. It is forbidden to add the grain after the sample
has been pressed. In the case of some species (for exam-
ple, grass seeds) which have an increased humidity, the
cap may not produce the sound signal and in such a case
it should be twisted to the end in order to perform the
measurement (do not add any grain to the chamber).
– If the sound signal of the tightening cap is too weak, it is
necessary to untwist the cap and replace the battery to
a new one. It is forbidden to bend the plates which cause
that the buzz produces a signal.
– During the measurements residual grain may penetrate
to the screw of the cap. In order to make twisting the cap
easier, you should regularly clean the screw, do not use
any sharp tools for that purpose.
– Please, remember to clean the chamber carefully so that
not to damage the temperature sensor which is located
at the bottom of the measuring chamber.
– The water which is cumulated on the surface of the
sample (for example, dew) can have an inuence on the
measurement results, that is why it is necessary to avoid
those situations and before the measurement you need
to ”air” the sample.
– It is necessary to remember that the device has an
automatic temperature compensation. That is why pay
attention to the temperature of the measuring cham-
ber, it should be similar to the temperature of the tested
sample (the cold sample should not be tested in the de-
vice which has been exposed to the sun, and vice versa).
– The nal result must be calculated from three meas-
urements for the given sample (the average is calcu-
lated and displayed automatically). The number of meas-
CHAPTER 5 | NOTES FOR MEASUREMENTS

19
EN
urements from which the average is calculated can be
changes in the main menu.
– To enable saving the measurement results to the mem-
ory of the device, it is necessary to run the advanced
mode (additionally in the main menu of the device you
can choose if the saved result must be the average of
the measurements).
– In order to save the measurements from an external
probe to the memory of the device, it is necessary to
turn to the advanced mode and in the settings you
should give this probe a name (it is important because it
helps the results to be properly catalogued).
– If you notice some important deviations in the results
for a certain species which increase or decrease the
value in the whole measurement range in comparison to
the laboratory method (drying and weighing method),
it is recommended to modify the measurements (see
CHAPTER: MODIFICATION OF HUMIDITY RESULTS).
– Every species has a dierent range of the measured
humidity. However, its exceed is signaled by a proper
sign, for example:
”<8.5%” (below the range), when the humidity of the
tested sample is less than 8.5%,
”>35.0%”(above the range), when the humidity of the
tested sample is more than 35%.
CHAPTER 5 | NOTES FOR MEASUREMENTS
Table of contents
Other Draminski Measuring Instrument manuals
Draminski
Draminski HMM User manual

Draminski
Draminski GRAIN MASTER User manual

Draminski
Draminski HMM User manual

Draminski
Draminski GRAIN MOISTURE METER User manual

Draminski
Draminski TwistGrain User manual

Draminski
Draminski DogScan User manual
Draminski
Draminski TwistGrain User manual

Draminski
Draminski 29356 User manual
Draminski
Draminski GMM mini User manual

Draminski
Draminski GMM mini User manual