Draper WIFIENDO User manual
91648
WIFI
ENDOSCOPE
EN
Original Instructions
Version 2
Read this manual in full before using this product and
retain it for future use. Always use the latest version of
the manual. Please visit drapertools.com/manuals for
the latest version.
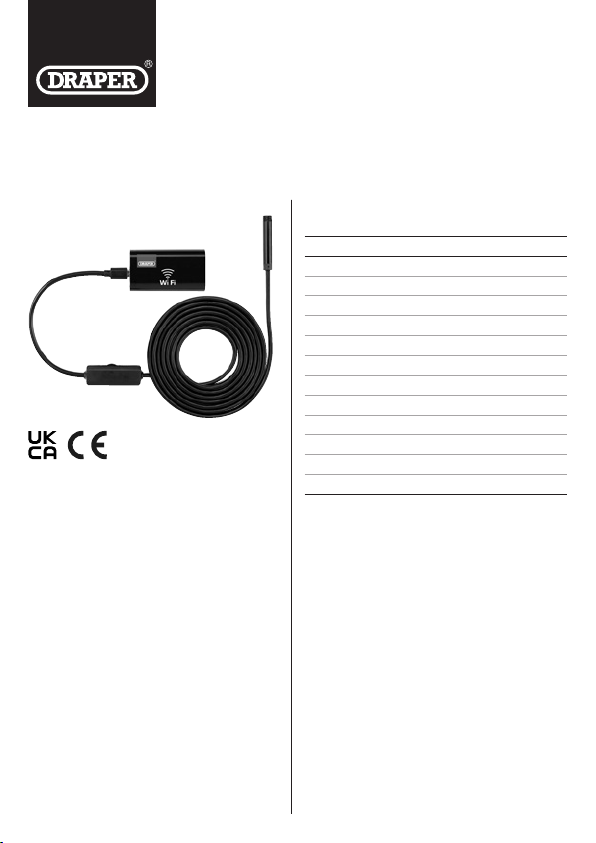
1. Intended Use
This product is designed for viewing inside wall cavities,
piping and other tight spaces and for close inspection of
engines and other obscured machine parts. Images and
video are transmitted wirelessly via Wi-Fi connection to
an app on your iOS or Android device and can be saved
to local storage.
Any other application will be considered misuse. Draper
Tools accepts no responsibility for improper use of this
product.
Important: The focal length of this device is 40–100mm.
It is not suitable for use as surveillance equipment or to
monitor large areas.
Important: Strictly not for medical use.
3. Health and Safety Information
• Always ensure that the cables are connected to the
correct ports of the battery pack; DO NOT apply a power
supply to the video input port.
• If condensation has formed inside the camera lens,
DO NOT use the camera until the moisture has fully
evaporated.
• While the camera elements are rated IP67 and are
suitable for use underwater or in dusty environments,
the Wi-Fi unit and brightness control should not be
exposed to liquids or heavy dust.
• DO NOT handle the battery pack with wet hands.
• DO NOT direct the LED lamp at your own or another
person’s eyes.
• DO NOT open or damage the battery pack or expose it
to high temperatures.
• Store the product in a cool, clean and dry environment,
out of direct sunlight and out of reach of children.
• Strictly NOT for medical use.
2. Specication
Stock No. 91648
Part No. WIFIENDO
Camera size Ø8mm
Resolution 2MP (640x480, 1280x720)
Focal length 40–100mm
Light 6 x adjustable LEDs
Mirror angle (accessory) 70°
Cable length 3.5m
Max. wireless range 30m
Wireless frequency 2.4GHz
Battery 800mA rechargeable
Battery life (full charge) Up to 90mins (approx.)
Compatible operating system iOS, Android
IP rating IP67 (camera and cable only)

4. Identication
5. Basic Operation Instructions
4.1 Product Overview
4.2 Device Interface
(1) 8mm camera
(2) Brightness control wheel
(3) Device interface
(4) Extension socket
(5) Power pack/Wi-Fi unit
(6) Rigid cable
(7) Charging port
(8) Connection indicator (green)
(9) Power button
(10) Power indicator (red)
(11) Video input port
(12) Reset
(A) 1 x Wi-Fi endoscope (not shown)
(B) 1 x Hook extension
(C) 1 x Magnet extension
(D) 1 x Fixing sleeve
(E) 1 x Mirror attachment
(F) 2 x Suction pads
(G) 1 x USB charging cable
4.3 What’s in the Box?
Carefully remove the product from the
packaging and examine it for signs of
damage that may have occurred during
shipment. Check them against the parts
shown below; if any part is damaged or
missing, contact the Draper Tools Helpline.
5.1 Charging the Battery Pack /
Wi-Fi Unit
Important: Charge the battery pack for at least
two hours before rst use. Charge the battery pack
periodically during storage to prevent damage to
the battery from disuse.
To charge the battery pack, insert the micro-USB adaptor
of the supplied USB charging cable (H) into the battery
pack charging port (7). Insert the other end of the cable
into a suitable socket or adaptor.
The power indicator (10) illuminates red while the product
is charging and goes out when it is fully charged.
5.2 Connecting to a Smart Device
and Operation
The product requires an app for the camera feed to be
viewed. This can be installed on compatible iOS and
Android devices.
Important: The app requires a Wi-Fi connection to the
endoscope during use. Internet access over Wi-Fi is
disabled on the viewing device during this time.
1. Scan the QR code above and select “IOS” or “Google
Play”, or manually search for the “Wi Check” app in
the Apple App Store or Google Play Store as
appropriate, and install it onto the smart device.
(5)
(2)
(1)
(6)
(4)
(3) (9)
(7)
(11)
(12)
(10)
(8)
(C)
(G)
(B)
(D)
(F)
(E)
2. Insert the camera cable into the video input port (11).
3. Press and hold the power button (9) for approximately
three seconds; the power (9) and connection (8)
indicators illuminate when the device is switched on.
The power indicator identies that the device is
active; the connection indicator identies that the
device is broadcasting a Wi-Fi signal.
Important: If the camera cable is not connected to the
Wi-Fi unit, the unit will switch o automatically after
two minutes.
4. Access the Wi-Fi settings of your smart device and
connect to the network named “Wi Check-xxxx”
where “xxxx” is a variable alphanumeric code.
5. Launch the Wi Check app on your device and grant
the required device permissions.
The connection indicator will ash when the
endoscope is connected to your smart device and the
camera feed is displayed on the screen.
6. Use the buttons in the app to change the resolution of
the video feed, ip or rotate the feed, and to capture
and browse photos and videos.
7. To switch o the camera, press and hold the power
button for three seconds.
Important: This app is developed and managed by a third
party and may be changed without warning. Draper Tools is
not responsible for changes made to the app. All details are
correct the time of publication.
5.3 Notes on Use
• The object must be within 40–100mm of the camera
lens to appear in focus; if the subject is blurry, the
camera may be too close or too far from the object.
• This product is suitable for examining small objects
and recesses only and cannot be used for surveillance
or medical purposes.
• To adjust the brightness of the LEDs, adjust the
brightness control wheel (2).
• If the Wi-Fi connection to the camera is interrupted,
your smart device may automatically connect to other
Wi-Fi networks.
− If this occurs, the device must be manually
reconnected to the product network.
− Draper Tools recommends “forgetting” all other
nearby networks on your smart device before using
this product to ensure that the device reconnects
to the product automatically if signal is interrupted.
• Device connectivity may be adversely aected by
signicant trac or interference from other Wi-Fi
networks.
• The product app is compatible with most iOS and
Android devices but may not work with every device.
• This product MUST be used in accordance with local
regulations.
6. Using the Accessories
6.1 The Mirror Attachment
For operations where a front-facing camera in not
appropriate, the mirror attachment (E) can be installed
onto the end of the camera head to change the
viewing angle.
To install the mirror attachment, carefully screw it
onto the threaded end of the camera.
1
Fig.
Important: DO NOT force the mirror onto the camera and
take care not to damage the threads.
Important: Ensure that the protective lm has been
removed from the mirror attachment before use.
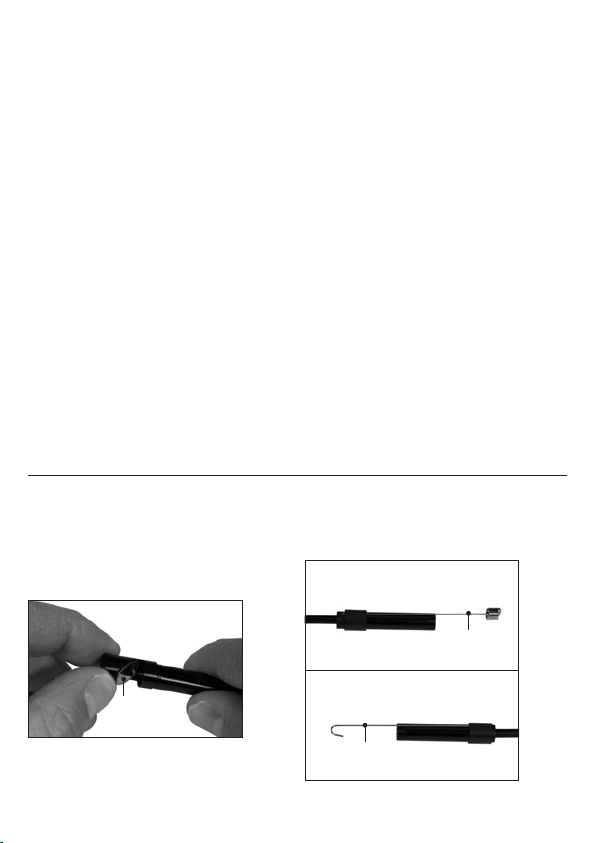
6.2 The Hook and Magnet Extensions
The hook (B) and magnet (C) extensions can be attached
to the camera head to move or retrieve damaged or
obstructive objects in the path of the camera.
2
Fig.
(E)
(B)
(C)
To attach an extension:
1. Insert the clawed end of the extension into the
extension socket (4).
3
Fig.
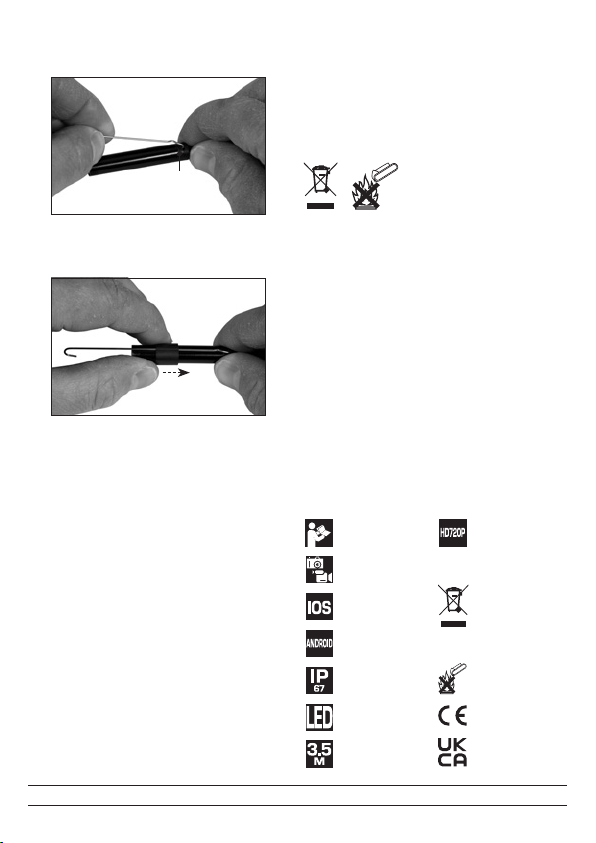
2. Hold the shaft of the extension piece up against the
camera body and slide the xing sleeve over the
tooled end of the extension.
4
Fig.
3. Locate the extension shaft in the groove of the xing
sleeve and slide the sleeve onto the camera as far as
possible to lock the extension in place.
4. To remove the extension, slide the xing sleeve o the
camera and detach the tool.
Important: If the hook or magnet extensions are
combined with the mirror attachment, the extension
must be installed rst.
6.3 The Suction Pads
For convenience, the smart device, Wi-Fi unit (5) and
brightness control box (2) can be xed to a wall or other
surface, or to each other, using the suction pads (G).
To attach the suction pads, remove the protective strip
and press the adhesive side rmly against the part to be
attached. Once attached, press the suction pad against
the surface to x the part in place.
7. Disposal
At the end of its working life, dispose of the product
responsibly and in line with local regulations. Recycle
where possible.
• DO NOT dispose of this product with domestic waste;
most local authorities provide recycling facilities.
• DO NOT burn or mutilate batteries; this may release
toxic or corrosive substances.
8. Warranty
Should the tool develop a fault, return the complete tool to
your nearest distributor or contact Draper Tools directly.
Proof of purchase must be provided.
If, upon inspection, it is found that the fault occurring is
due to defective materials or workmanship, repairs will be
carried out free of charge. This warranty covers parts and
labour for the lifetime of the product. However, if the tools
are hired out, the warranty period is 90 days from the date
of purchase.
This warranty does not apply to any consumable parts,
batteries or normal wear and tear, nor does it cover any
damage caused by misuse, careless or unsafe handling,
alterations, accidents, or repairs attempted or made by
any personnel other than the authorised Draper Tools
repair agent.
Visit drapertools.com/warranty for full details.
9. Explanation of Symbols
(4)
Read the
instruction manual
Captures images
and video
Compatible with
most iOS devices
Compatible with most
Android devices
This product
is IP67 rated
Features LED
worklight
Semi-rigid
cable length
Image
resolution
WEEE –
Waste Electrical &
Electronic Equipment
Do not dispose of Waste
Electrical & Electronic
Equipment in with
domestic rubbish
Do not incinerate
or throw onto re
European
conformity
UK Conformity
Assessed
Helpline: +44 (0) 23 8049 4344 Sales Desk: +44 (0) 23 8049 4333 General Enquiries: +44 (0) 23 8026 6355 Website: drapertools.com Email: [email protected]
Draper Tools Limited, Hursley Road, Chandler’s Ford, Eastleigh, Hampshire, SO53 1YF, UK 0523
This manual suits for next models
1
Other Draper Diagnostic Equipment manuals


