Bosch SAIC GRADE-X User manual

SAIC GRADE-X
SAIC GRADE-X
Automotive Diagnostic System
USER MANUAL
Version 2.3
Copyright ©2016 by Bosch Automotive Service Solutions

SAIC GRADE-X
0
Statement
This user manual is SAIC GRADE-X-specific. Without Bosch AA-AS (hereinafter referred to as
"BOSCH") written permission, any other company or individual in any form (electronic,
mechanical, photocopying, recording or otherwise), has no copy and backup.
This user manual only provides SAIC GRADE-X operating instructions. Bosch will not take any
responsibility if this user manual is used to operate on other equipment.
None SAIC GRADE-X product quality problems: such as user abusing, misusing, unauthorized
disassembling, repairing of this equipment, any other operation not following this user manual
that leading to this equipment broken will not be in the scope of free maintenance.
This user manual is for user with professional automotive and service technology.
Trademark
BOSCH is a registered trademark of Bosch Automotive Service Solutions (short for BOSCH) in China and
other countries. All other BOSCH trademarks, service marks, domain names, logos, and company names
referred to in this manual are either trademarks, registered trademarks, service marks, domain names,
logos, company names of or are otherwise the property of BOSCH or its affiliates. In countries where any of
the BOSCH trademarks, service marks, domain names, logos and company names is not registered,
BOSCH claims other rights associated with unregistered trademarks, service marks, domain names, logos,
and company names. Other products or company names referred in this manual may be trademarks of their
respective owners. You may not use any trademark, service mark, domain name, logo, or company name of
BOSCH or any third party without permission from the owner of the applicable trademark, service mark,
domain name, logo, or company name.
SAIC GRADE-X
1
SAIC GRADE-X User Manual instructions
Please read this user manual carefully before using SAIC GRADE-X.
The current user manual is based on the current features and functions available. Any new added features and
functions will be added to the user manual in the future.
When reading the manual, please pay special attention to the words “Note” and “Warn”. Read them carefully
for appropriate operation.
SAIC GRADE-X HARDWARE maintenance
Avoid shaking or dismantling as it may damage the internal components.
Do not use hard or sharp objects to touch it; do not use excessive force; do not expose the screen to strong
sunlight for a long period.
Caution: keep it away from water, moisture, high temperature or very low temperature;
Keep it away from strong magnetic fields.
Operation Instructions
Keep the scanner away from heat or fumes when using it;
If the vehicle battery contains acid, Please keep your hands and skin or fire sources away from the battery during
test
Exhaust gas of vehicle contains harmful chemicals, please ensure adequate ventilation.
Do not touch the cooling system components or exhaust manifolds when engine is running to high temperature;
Make sure the car is securely parked and the selector is at P or N position to prevent the vehicle from moving
when engine starts;
Make sure the diagnostic link connector is OK before starting the test; otherwise the scanner may be damaged.
BOSCH suggests you test the Power/Earth with multi-meter first.
Do not switch off the power or unplug the connectors during testing, otherwise you may damage the ECU or
scanner;
Precautions
Must be performed according to the above conditions.
Using SAIC GRADE-X tester, away from heat and moving parts to avoid interference.
When energized electrical components, never disconnect the circuit to prevent the self-inductance, mutual
inductance computer and automotive sensors.
When the electrical work, with non-magnetic objects close to the vehicle control unit with a vehicle control unit
may be damaged.
When dismantling car control unit or electrical components shall be carried out at the ignition switch is turned
off after 10 minutes.

SAIC GRADE-X
2
CONTENT
0 SAIC GRADE-X OS Requirement ................................................................................................ 4
0.1 GRADE-X not support WinXP any more ............................................................................. 4
0.2 GRADE-X supported OS ...................................................................................................... 4
0.3 How to get OS Version(Take WinXP as an example) .......................................................... 4
1. Software Installation ............................................................................................................... 5
2. Software Registration .............................................................................................................. 8
3. Software Upgrade .................................................................................................................. 10
4. VCI connector ........................................................................................................................ 13
5. UI Description ........................................................................................................................ 14
5.1 Startup interface .............................................................................................................. 14
5.2 System Settings ................................................................................................................ 14
5.2.1 【 】VCI settings .............................................................................................. 14
5.2.2 【 】Settings .................................................................................................... 15
5.2.3 【 】Print Content............................................................................................ 16
5.2.4【 】About ........................................................................................................ 17
5.2.5【 】Exit ............................................................................................................ 18
6. Test Steps .............................................................................................................................. 18
6.1 Vehicle Selection .............................................................................................................. 19
6.2 Choose ECUs manually or check ECUs automatically ...................................................... 19
6.3 Vehicle Information【 】 ........................................................................................... 22
6.3.1 Vehicle Information ...................................................................................................... 22
6.3.2 ECU Information ........................................................................................................... 23
6.4 DTC【 】 ................................................................................................................. 26
6.5 Data List【 】 ............................................................................................................. 34
6.6 Actuator Test【 】 .................................................................................................... 51
6.7 Configuration【 】 .................................................................................................... 54
6.8 Special Function【 】 ............................................................................................... 58

SAIC GRADE-X
3
6.9 Reflash【 】 ............................................................................................................... 63
6.10 Test Report【 】 ................................................................................................... 70

SAIC GRADE-X
4
0 SAIC GRADE-X OS Requirement
0.1 GRADE-X not support WinXP any more
GRADE-X will not support WinXP any more because:
Microsoft will not provide any service and support for WinXP any more
Diagnostic requirement becomes more and more complexed, GRADE-X need to use
latest new technology to meet new diagnostic requirement
WinXP can’t meet the new technical interface but Microsoft will not update
WinXP to support this
0.2 GRADE-X supported OS
Currently SAIC GRADE-X can run on Win7 and Win8. Win10 will be supported by the
end of this year. But the OS supported may change because of Microsoft’s strategy.
0.3 How to get OS Version(Take WinXP as an example)
Step 1: Right click “My Computer” on the desktop
Step 2: Choose “Properties”
Step 3: You can get the OS version from the screen
Step 4: You will see the next Screen if your OS is WinXP.

SAIC GRADE-X
5
1. Software Installation
Steps:
0) Get the latest installation package from the following site.
1) https://obd.maxuscloud.com/download/
2) Double click downloaded SAIC GRADE-X package in the previous step and click
【Next】. Shown as below:
3) In SAIC GRADE-X installation page, please read license agreement carefully, and
you need to click【I accept the agreement】 to continue. And then click【Next】
to continue. Shown as below:

SAIC GRADE-X
6
4) In the SAIC GRADE-X installation path page, click Browse to choose the path to
install SAIC-GRADE-X. Or else the default path will be used. For Win7 the
default path is C:\Program Files X86\Bosch\SAIC GRADE-X. And then click【Next】
to continue. Shown as below:
5) In the SAIC GRADE-X data path page, click Browse to choose the path to install
the data. Or else the data will be installed into the default path. For Win7
the default path is C:\Program Data\Bosch\SAIC GRADE-X. And then click 【Next】
to continue. Shown as below:

SAIC GRADE-X
7
6) Choose where to put this in the start menu. You can change the menu name
manually. Or else the default value “SAIC GRADE-X”will be used. And then
click【Next】to continue. Shown as below:
7) Select the additional tasks and click 【Next】 to continue, shown as below:
8) Ready to install, click 【Install】to continue, shown as below:

SAIC GRADE-X
8
9) When the installation is complete, click 【Finish】 to exit
2. Software Registration
Please register SAIC GRADE-X software following the steps below.
(1) Make sure the computer connected to the Internet network correctly and normally.
(2)Start SAIC GRADE-X ,it will pop-up computer hardware information (this page
for the user run SAIC GRADE-X the first time. Users don’t need to register SAIC
GRADE_X again after registered successfully in the future). Shown as below.
(3)Please send computer hardware information (red info box above,copy this
identification) to Maxus administrator by mail or phone. Maxus administrator will
register your computer and inform you whether your computer is registered successfully

SAIC GRADE-X
9
or not. At same time, please provide the name and code of your maintenance station 、
telephone number、e-mail、VCI serial number of these information synchronization
feedback the Maxus administrator for registration.
(4)After registered successfully, please click 【Refresh online】 button or restart
SAIC GRADE-X.
(5)After registered successfully, you will see the diagnostic software home page,
shown as below
(6)You will see the software homepage directly every time when your computer is
registered successfully. But you have to ensure your computer works connected to
network every 30 days. Or else you have to register your computer again following step
(1) to (5).
NOTE: When you want to change your computer. After you install SAIC GRADE-X on the new
computer the new hardware information will display on the machine. Please send it to
Maxus administrator to activate it. You also need to send your older hardware
information to Maxus administrator to revoke it.
User information is managed by the administrator Maxus, if any questions or encounter
problems, please contact MAXUS administrator.
Maxus administrator E-mail address: [email protected]

SAIC GRADE-X
10
3. Software Upgrade
Note: Software update notice can only be available after SAIC GRADE-X is registered
successfully.
1)When your computer is connected to internet, if your computer is not installed the
latest version of the software, you will automatically receive software updates notice,
as shown below:
2)Click on the icon then the following page will appear. Click【Install Update】 to
start the upgrade. As shown below:
3)SAIC GRADE-X Update information, you will get the upgraded content from this page.
And then click【update】to get the latest software,as shown below:

SAIC GRADE-X
11
4)Updating,as shown below:
5) If SAIC GRADE-X is running on your computer,you will be asked to close the
software and then update, as shown below:
6)When update is complete, click 【Finish】to exit,as shown below:
7)Start SAIC GRADE-X Diagnostic and check whether the version of the software has
been updated.

SAIC GRADE-X
12
8) Manually start update software
If you have not received update information for a long time, then you can manually
open the program,Steps:
(1) Open SAIC GRADE-X installation path,you can right-click the SAIC GRADE-X
icon on the desktop,click open file location in properties,as shown below:
(2) start wyUpdate.exe update software,as shown below:
(3) SAIC GRADE-X Update information, you will get the upgraded content from this
page. And then click【update】to get the latest software,as shown below:

SAIC GRADE-X
13
4. VCI connector
① Confirm whether the diagnosis seat and shape is good.
② Open the PC wireless.
③ Select the appropriate connector according to the shape of the vehicle and the
diagnostic socket.
④ Master test cord to connect the host and tighten.
⑤ Diagnostic test line will connect the main connector into the diagnostic socket of
the vehicle.
⑥ Check whether VCI power indicator is on. If the power indicator light is off,
please make sure the car seat is powered or not.
⑦ When VCI power indicator is on, VCI connected successfully.

SAIC GRADE-X
14
5. UI Description
5.1 Startup interface
When start SAIC GRADE-X diagnostics software the first page is as below; and also
the process bar is added.
5.2 System Settings
5.2.1 【 】VCI settings
1)User select the appropriate VCI host connection. For SAIC GRADE-X please select
D_PDU_API_Bosch_6520-SAIC-LDV currently. VCI Connection status is added.

SAIC GRADE-X
15
2)If the VCI button is grey,please install VCI Manager or CVDS,as shown below;
5.2.2 【 】Settings
1)Click the Settings button, the user can change the language【 】and unit【 】
and Appearance Setting【 】as shown below:
2)Click on the language settings, select the language you want, click 【Save Settings】

SAIC GRADE-X
16
to save the setting, as shown below;
3)Click quantity and unit settings【 】,Select the unit you want, click【Save
Settings】 to finish.
5.2.3 【 】Print Content
Click to print, you can copy the screen【 】,print screen【 】,print content

SAIC GRADE-X
17
【 】,as show below:
Copy screen【 】:You can copy the whole screen to the Clipboard
Print screen【 】:The screen can be Print directly.
Print content【 】:print data
5.2.4【 】About
Click【 】about, you could see version 【 】、license【 】、privacy
policy【 】 and user manual【 】,as shown below:

SAIC GRADE-X
18
5.2.5【 】Exit
You can click 【 】exit the system,you can click 【 】back to
main page/exit SAIC GRADE-X【 】,as shown below:
6. Test Steps
NOTE: The test process is based on EG10 as an example. Please refer to this for
other vehicles.
Table of contents
Other Bosch Diagnostic Equipment manuals

Bosch
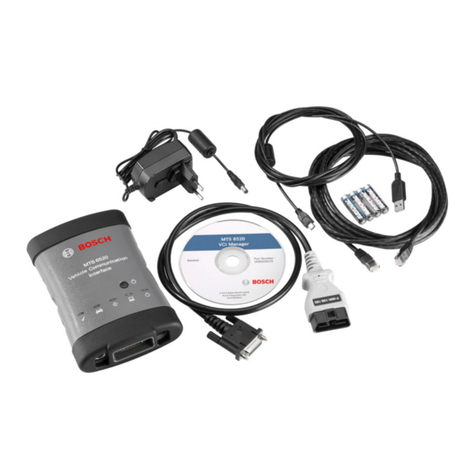
Bosch MTS 6520 VCI User manual

Bosch
Bosch TPA 200 User manual

Bosch
Bosch TECH 2 User manual

Bosch
Bosch NRS 1 687 001 866 User manual

Bosch
Bosch FSA 740 User manual

Bosch
Bosch BSA 43 Series Technical specifications

Bosch
Bosch Rexroth PS5000 Operating instructions

Bosch
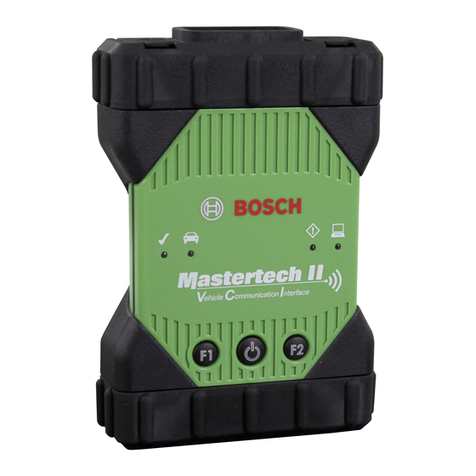
Bosch Mastertech II VCI User manual

Bosch
Bosch DCU 220 User manual

Bosch
Bosch DCU 100 User manual

Bosch
Bosch FSA 760 User manual

Bosch
Bosch KTS 250 User manual

Bosch
Bosch MTS 6531 User manual

Bosch
Bosch EPS 118 User manual

Bosch
Bosch BEA 060 User manual

Bosch
Bosch FWA 46 + Series User manual

Bosch
Bosch KTS 515 User manual

Bosch
Bosch MTS 6531 User manual

Bosch
Bosch TECH 2 User manual

Bosch
Bosch KTS 250 User manual