Sealey VS2076 User manual

Thank you for purchasing a Sealey product. Manufactured to a high standard, this product will, if used according to these instructions,
and properly maintained, give you years of trouble free performance.
I
MPORTANT:
PLEASE READ THESE INSTRUCTIONS CAREFULLY. NOTE THE SAFE OPERATIONAL REQUIREMENTS, WARNINGS & CAUTIONS. USE
THE PRODUCT CORRECTLY AND WITH CARE FOR THE PURPOSE FOR WHICH IT IS INTENDED. FAILURE TO DO SO MAY CAUSE DAMAGE AND/OR
PERSONAL INJURYAND WILL INVALIDATE THE WARRANTY. KEEP THESE INSTRUCTIONS SAFE FOR FUTURE USE.
VS2076 Issue:1 - 30/05/18
Original Language Version
© Jack Sealey Limited
Refer to instruction
manual Wear eye
protection
DIAGNOSTIC SOCKET MEMORY SAFE
EOBD 12V
MODEL NO: VS2076
1. SAFETY
1.1. GENERAL SAFETY.
9Observe standard workshop safety procedures when using the unit.
9Ensure that the vehicle ignition switch is turned OFF before connecting the unit.
9Ensure there is another person within hearing range, or close enough to come to your aid when working near, or with, lead-acid
batteries.
9Wear safety eye protection and protective clothing. Avoid touching eyes while working with or near the vehicle battery.
9Have fresh water and soap nearby in case battery acid contacts skin, clothing or eyes.
9 Washimmediatelywithsoapandwaterifbatteryacidcontactsskinorclothing.Ifacidenterseye,usheyeimmediatelywithcool,
clean running water for at least 15 minutes and seek immediate medical attention.
9Remove personal metallic items such as rings, bracelets, necklaces and watches. A lead-acid battery can produce a short-circuit
current high enough to weld a ring or the like to metal, which may cause severe burns.
9Keep the work area clean and uncluttered and ensure there is adequate lighting. Keep tools and other items away from the engine
and ensure you can see the vehicle battery and working parts of engine clearly.
9 Maintaincorrectbalanceandfooting.Ensuretheoorisnotslipperyandwearnon-slipshoes.
9Keep children and unauthorised persons away from the working area.
WARNING! DO NOTusetheunitwherethereareammablegasesorliquids.
WARNING! DO NOT use the unit on any vehicles other than those with 12Volt systems.
8DO NOT use the unit if you suspect that the battery pack or the casing is damaged.
8DO NOTsmokeorallowasparkorameinthevicinityofthevehiclebatteryorengine.
8DO NOT get the unit wet or use in damp or wet locations or areas where there is condensation.
8DO NOT use the unit for any purpose other than that for which it is designed.
9When not in use store the unit in a safe, dry, childproof location.
9Ensure that the unit is fully charged before storage and recharge every 30 days.
1.2. CHARGER PLUG ELECTRICAL SAFETY.
USE ONLY THE SUPPLIED CHARGER PLUG FOR CONNECTING THE CHARGER TO THE POWER SUPPLIER.
WARNING! It is the user’s responsibility to read, understand and comply with the following electrical instructions: You must ensure the
risk of electric shock is minimised by the installation of appropriate safety devices. An RCCB (Residual Current Circuit Breaker) should
be incorporated in the main distribution board. We also recommend that a RCD (Residual Current Device) is used with all electrical
products, particularly portable device which is plugged into an electrical supply not protected by an RCCB. You must also read
and understand the following instructions concerning electrical safety: The Electricity at Work Act 1989 requires all portable electrical
appliances,ifusedonbusinesspremises,tobetestedbyaqualiedelectrician,usingaPortableApplianceTester(PAT),atleastonce
a year.
The Health & Safety at Work Act 1974 makes owners of electrical appliances responsible for the safe condition of the appliance and
the safety of the appliance operator. If in any doubt about electrical safety, contact a qualied electrician.
9You must ensure that you: Inspect the charger plug, cable and connector for wear and damage to ensure items are safe before
connecting to the mains power supply.
9Check that the voltage marked on the charger plug is the same as the unit.
9Uncoil the cable between the charger plug and the unit.
888DO NOT pull the charger plug from the mains socket by the lead.
88WARNING! DO NOT use any other type of charger with this product other than the supplied mains charger. Failure to observe this
warningcouldresultininjuryand/orreandwillinvalidatethewarranty.
888DO NOT attempt to dismantle the charger plug.
888DO NOT use the charger plug to charge or power any other electrical item.
888 WARNING! Theunitispoweredbyasealedlead-acidbatterywhichcanbedangerousifnothandledwithcare.
898Chargebatterypackpriortofirstuse.Thebatterywillhavebeenshippedinalowchargestate.
888
8DO NOT charge battery pack when room temperature is below 50°F (10°C) or above 104°F (40°C).
8888 DO NOT attempt to recharge the battery pack by means of an engine generator or a DC power source.
8DO NOT short-circuit the battery pack by linking both terminals with a metal object.88
8888 DO NOT store the unit in locations where the temperature may exceed 104°F (40°C).
Wear protective
clothing

8WARNING! Dispose of spent battery pack correctly and in accordance with local regulations as it contains acid.
8DO NOT attempt to dismantle the battery pack. For safety and environmental reasons DO NOT discard in domestic waste or by
burning. ONLY discard or recycle according to local waste authority regulations.
WARNING!Thewarnings,cautionsandinstructionsinthismanualcannotcoverallpossibleconditionsandsituationsthatmay
occur. It must be understood by the operator that common sense and caution are factors which cannot be built into this product, but
must be applied by the operator.
2. INTRODUCTION
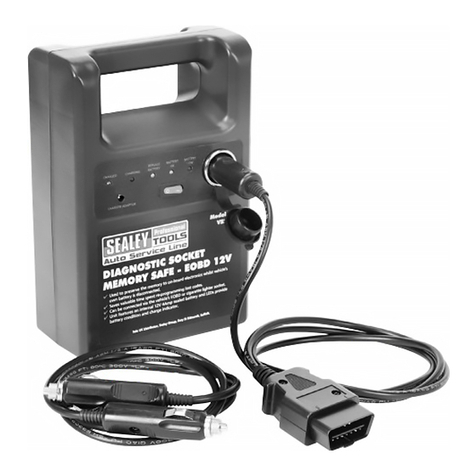
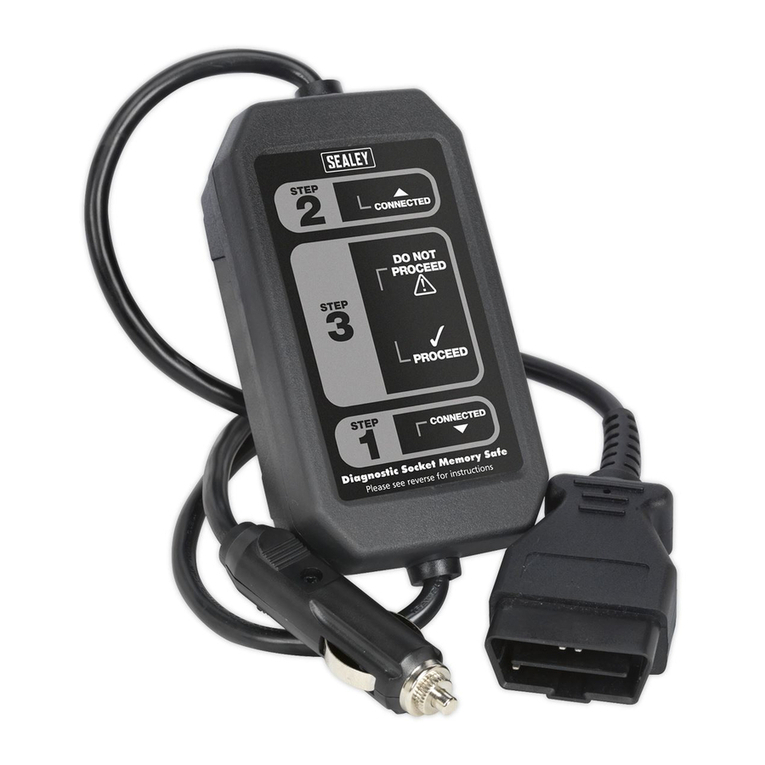
Used to preserve the memory to on-board electronics whilst vehicle’s own battery is disconnected. Saves valuable time spent re-programming
lost codes. Can be connected via the vehicle’s EOBD or vehicle accessory power socket. Unit features an internal 12V 7Ah sealed battery and
LEDs provide battery condition and charge indicator. Supplied with mains charger.
3. SPECIFICATION
Model no:................................................................. VS2076
Battery type:....................... Maintenance free AGM lead acid
Battery capacity: ..............................................................7Ah
Cable length:................................................................1.3mtr
Connection:.........................EOBD/Vehicle Accessory Socket
Weight:........................................................................... 3kgs
4. OPERATION
4.1. Charging the internal battery
4.1.1. Ensurethatthebatteryischargedfullybeforeuse.Thebatterystatuspanelshows:
Red:50%chargeorless.Thememorysafeshouldbechargedbeforeuse.
Yellow:50%to75%charge.Thememorysafemaybeusedbutshouldberechargedassoonaspossible.
Green: fully charged.
4.1.2. T o charge:insertthepinjackplugoftheAC/DCchargerintothechargersocket.
4.1.3. Connect the charger to the electric supply and switch on.
4.1.4. When charging, the red light on charging status panel will light.
4.1.5. When fully charged, the green light will show.
4.1.6. A yellow light denotes a defective battery, which should be replaced.
4.1.7. If the red light does not extinguish after 24hrs charging, this also indicates a defective battery.
4.2. Using the memory safe
4.2.1. TheAC/DCchargerandtheleadsmaybestoredintherearcompartmentwhennotinuse.
4.2.2. Turnoffallelectricalloadsonthevehicle(blowers,lights,radioetc.).
4.2.3. Connect the memory safe to the vehicle by means of the EOBD cable or the accessory lead.
4.2.3.1. I f usingtheEOBDcable,connecttheplugtotheEOBDsocket.Thelocationofthiscanbefoundinthevehiclehandbook.
4.2.3.2. T o usetheaccessorylead,plugoneendintotheaccessorysocketontheunitandtheotherintothevehicleaccessorysocket.
4.2.3.3. Ensure that, if using the accessory lead, the ignition switch is turned to the ‘ACC’ setting. DO NOT movethekeytothe‘START’
position, as the current draw may blow the fuse in the accessory socket circuit or the memory safe.
4.2.3.4. When a good connection is made using the accessory lead, the red LEDs in the plugs will light.
4.2.4. T o activatethememorysafeunit,presstheon/offbuttonfor3seconds.
4.2.5. ThegreenLEDindicatesthatthereissufcientvoltageintheinternalbatterytoproceedandthatgoodconnectionshavebeen
established. If either yellow or red are lit, recharge the memory safe battery.
4.2.6. With the green LED lit, it is safe to disconnect the vehicle battery.
Warning: Be aware that the battery leads will still be live; take care to insulate them to avoid a short circuit.
VS2076 Issue:1 - 30/05/18
Original Language Version
© Jack Sealey Limited

4.2.7. Having replaced the vehicle battery and reconnected it, switch the memory safe off by pressing the on/off switch for a further
3 seconds. Disconnect the lead from the vehicle.
NOTE: Theunitwillclosedownafter4hourstosavepower.AllsixLEDswilllightfor30secondsasawarning;tore-energise,press
the on/off button again for 3 seconds.
4.3. Using as a 12V DC power source
4.3.1. Thememorybankmaybeusedtopowera12VDCdeviceviatheaccessorysocket.
4.3.2. Ensure that the device is switched off before connecting to the memory safe. Switch on when connected.
4.3.3. If the device draws more than 4A or has a short circuit, the internal circuit breaker in the memory safe will operate. If this happens,
disconnectthe12Vdevice.Thecircuitbreakerwillresetautomaticallyoncetheoverloadhasbeenremoved.
8DO NOT use as a power source whilst the unit is connected to a vehicle: this will drain the internal battery, reducing the operating
time.
5. MAINTENANCE
5.1. Battery replacement/removal
5.1.1. Open the rear compartment and withdraw the battery. Disconnect the spade terminals to release.
5.1.2. T o replacethebattery:reconnectthespadeterminals,observingthecorrectpolarityandplacethebatterybackintoposition.
5.1.3. Close the rear compartment.
5.2. Cleaning
8DO NOT use solvent or abrasive cleaners on this product.
Sealey Group, Kempson Way, Suffolk Business Park, Bury St Edmunds, Suffolk. IP32 7AR
01284 757500 01284 703534 sales@sealey.co.uk www.sealey.co.uk
BATTERY REMOVAL For battery removal details, see section 5.1.
Under the Waste Batteries and Accumulators Regulations 2009, Jack Sealey Ltd are required to inform potential purchasers of products
containing batteries (as defined within these regulations), that they are registered with Valpak’s registered compliance scheme.
JackSealeyLtdBatteriesProducerRegistrationNumber(BPRN)isBPRN00705.
Note: It is our policy to continually improve products and as such we reserve the right to alter data, specifications and component parts without prior
notice.
Important: No Liability is accepted for incorrect use of this product.
Warranty: Guarantee is 12 months from purchase date, proof of which is required for any claim.
WEEE REGULATIONS
Dispose of this product at the end of its working life in compliance with the EU Directive on Waste Electrical and Electronic Equipment
(WEEE). When the product is no longer required, it must be disposed of in an environmentally protective way. Contact your local solid
waste authority for recycling information.
ENVIRONMENT PROTECTION
Recycle unwanted materials instead of disposing of them as waste. All tools, accessories and packaging should be sorted, taken to
a recycling centre and disposed of in a manner which is compatible with the environment. When the product becomes completely
unserviceable and requires disposal, drain any fluids (if applicable) into approved containers and dispose of the product and fluids
according to local regulations.
VS2076 Issue:1 - 30/05/18
Original Language Version
© Jack Sealey Limited
Partssupportisavailableforthisproduct.Toobtainparts,emailsales@sealey.co.ukortelephone01284757500
Table of contents
Other Sealey Diagnostic Equipment manuals

Sealey
Sealey VS2073 User manual

Sealey
Sealey VS403.V2 User manual

Sealey
Sealey VS921 User manual

Sealey
Sealey LED038 User manual

Sealey
Sealey VS8623 User manual

Sealey
Sealey BT2020 User manual

Sealey
Sealey VSCAN User manual

Sealey
Sealey TL93.V2 User manual

Sealey
Sealey VS2071.V2 User manual

Sealey
Sealey BT2012 User manual

Sealey
Sealey VS4021.V2 User manual

Sealey
Sealey VS868 User manual

Sealey
Sealey VS2072.V2 User manual

Sealey
Sealey AUTO SERVICE VS819 User manual

Sealey
Sealey VS8700 User manual

Sealey
Sealey VS8196.V3 User manual

Sealey
Sealey VS2071 User manual

Sealey
Sealey TA130 User manual

Sealey
Sealey Auto Service VS8197.V2 User manual

Sealey
Sealey VS2073 User manual