14 15
EN EN
How to Use
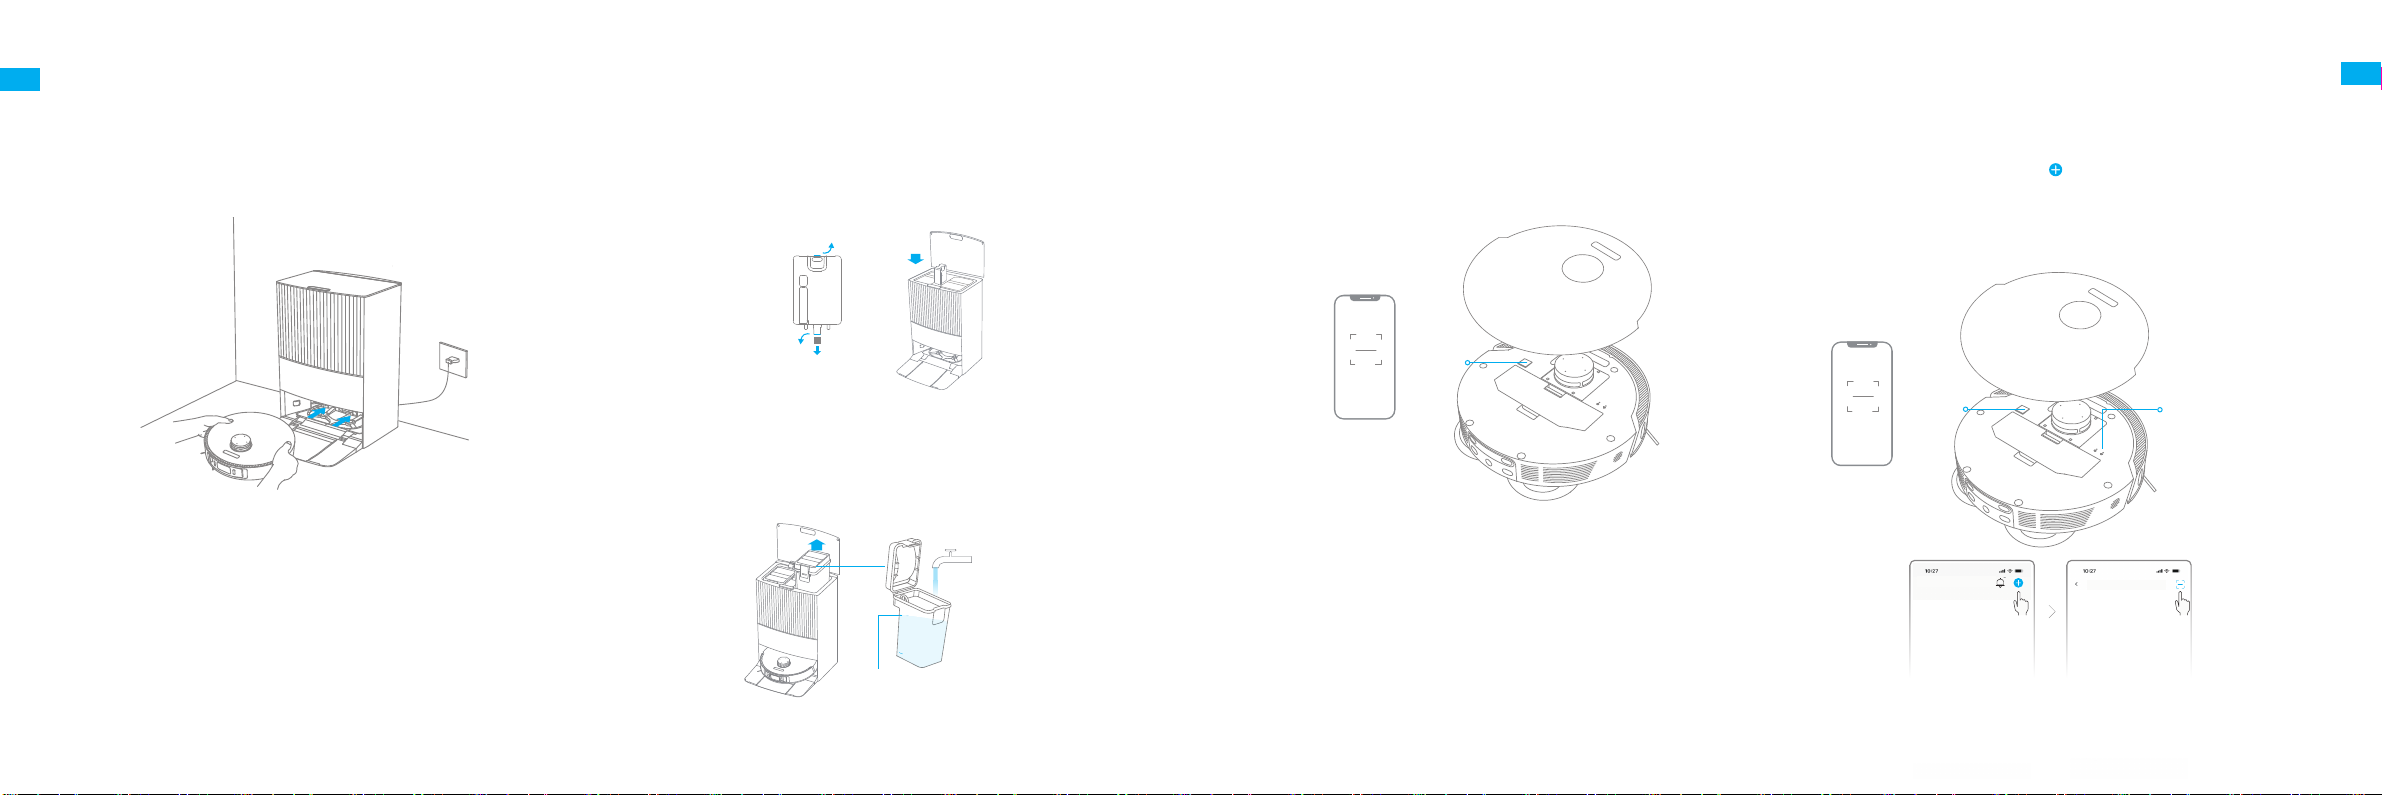
Turn On/O
Press and hold thebutton for 3 seconds to turn on the robot.The power
indicatorshould be illuminated. Place the robot onto the base station, the
robot should turn onautomatically and begin charging. To turn o the
robot, move the robot away from the base stationand press and hold the
button for 3 seconds.
Fast Mapping
After configuring the network for the first time, follow the instructions in
the app to quickly create a map. The robot will start mapping without
cleaning. When the robot returns to the base station, the mapping process
has been completed and the map will be saved automatically.
Pause/Sleep
When the robot is running, press any button to pause it.
If the robotispausedfor more than 10 minutes, it automatically enters
sleep mode. All indicators on the robot will turn o. Press any button on
the robot or base station, orusethe app to wake up the robot.
Note:
·The robot will turn off automatically if it is left in the sleep mode for
more than 12 hours.
·If the robot is paused and placed onto the base station, the current
cleaning process will end.
Do Not Disturb (DND) Mode
When the robot is set to Do Not Disturb (DND) mode, the robot will be
prevented from resuming cleaning and the power indicator will turn
o. DND mode is disabled by default at the factory. You can use the
app to enable DND mode or modify the DND period. The DND period
is 22:00–8:00 by default.
Note:
·The scheduled cleaning tasks will be performed as usual during the
DND period.
·The robot will resume cleanup where it left off after the DND period
expires.
Spot Cleaning
When the robot is on standby, press briefly the button to enable the
spot cleaning mode. In this mode, the robot cleans a square-shaped
area of 1.5 × 1.5 meters around it and returns to its starting point once
the spot cleaning is completed.
Robot Restarting
If the robot stops responding or cannot be turned o, press and hold
the button for 10 seconds to forcefully turn it o. Then, press and
hold the button for 3 seconds to turn the robot on.
Auto Resume Cleaning
If the battery is too low, the robot will automatically return to the base
station to charge. After charging to the appropriate battery level, it
will resume unfinished cleaning tasks.
Note: To use this function, please open it in the App.
Vacuum and Mop
Note: When using the mop assembly for the first time, the robot
performs the "Vacuum and Mop" task by default.
1. Start cleaning
Press the button on the base station or on the robot, or use the
app to make the robot start from the base station. Then the robot will
plan the optimal cleaning route and perform the cleaning task based on
the created map.
How to Use
Note:
·To ensure the robot can easily return to the base station after cleaning,
it is recommended to make the robot start from the base station.
·The mop pads will be cleaned before the robot starts mopping, please
wait patiently.
·Do not move the base station, the clean water tank, the used water tank,
or the washboard during operation.
2. Auto mop washing
When cleaning, the robot will automatically return to the base station to
wash mop pads based on the mop pad cleaning frequency specified in
the app. The base station will automatically refill the robot's water tank
and the robot will resume cleanup.