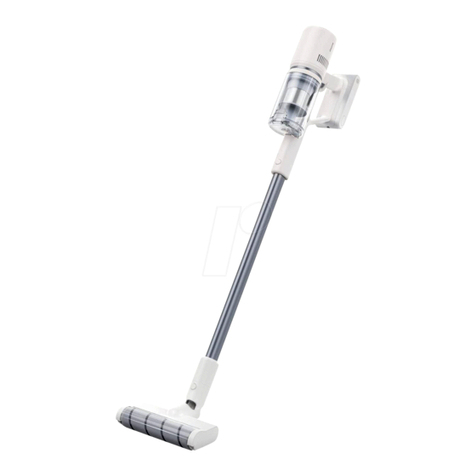
Dreame P10 Pro User manual

VPD2-EU-A01
Manufactured by: Dreame Trading (Tianjin) Co., Ltd.
For more information, please visit www.dreame-technology.com
Das Wort "dreame" ist die Abkürzung von Dreame Technology Co., Ltd. und seinen
Tochterunternehmen in China. Es ist die Transliteration des chinesischen Namens " 追觅 "
dieser Firma, was für das Streben nach Vollendung steht und die Vision des Unternehmens
widerspiegelt, nämlich im Bereich der Technologie unaufhaltsam weiterzustreben, zu
erforschen und entdecken.
Dreame est l'abréviation de l'entreprise chinoise Dreame Technology Co., Ltd. et ses liales,
qui est la traduction phonétique du nom chinois de l'entreprise « 追觅 », reétant la vision
de l'entreprise qui consiste à poursuivre, explorer et rechercher constamment les avancées
technologiques.
La parola "dreame" è l'abbreviazione dell'azienda Dreame Technology Co., Ltd. e delle sue
liali in Cina. È la traslitterazione del nome cinese dell'azienda " 追觅 ", che dimostra la
continua ricerca, esplorazione e visione di ricerca dell'azienda nella tecnologia.
La palabra "dreame" es la abreviatura de Dreame Technology Co., Ltd. y sus subsidiarias
en China. Es la transliteración del nombre chino de " 追觅 ", que signica luchar por la
excelencia en cada esfuerzo y reeja la visión de la compañía de continuamente buscar,
explorar e investigar en tecnologás.
Dreame — сокращённое название китайской компании Dreame Technology Co., Ltd. и
ее дочерних предприятий. Dreame является транслитерацией названия компании
на китайском языке « 追觅 », в котором отражено корпоративное видение компании
в сфере науки и технологий — непрерывный поиск, исследования и стремление к
успеху.
Słowo "dreame" to skrót od Dreame Technology Co., Ltd. i spółek w Chinach. Jest to
transliteracja chińskiej nazwy rmy " 追觅 " co oznacza dążenie do doskonałości w każdym
przedsięwzięciu, odzwierciedlając wizję rmy, jaką jest ciągłe prowadzenie, odkrywanie i
poszukiwania w nauce i technologii.
A plavara "dreame" é a abreviatura da Dreame Technology Co., Ltd. também é a tradução do
seu nome chinês " 追觅 ", o que signica buscar a excelência em todos os empreendimentos
e reete a visão da empresa de busca, exploração e criação da tecnologia.
Dreame, Dreame Technology Co., Ltd. ve Çinli kurulu un yan kurulu lar n n k saltmas d r ve
irketin teknolojide sürekli takip, ara t rma ve ara t rma vizyonunu yans tan irketin Çince ad
" 追觅 " nin çevirisidir.
Made in China

Cordless Stick Vacuum
User Manual
P10 Pro


ENEN User Manual
Benutzerhandbuch
Manuel d'utilisation
Manuale utente
Manual de usuario
Руководство пользователя
Instrukcja obsługi
Manual do utilizador
Kullan m K lavuzu
1
20
39
58
77
96
117
136
155
EN
IT
PL
DE
ES
PT
FR
RU
TR

1
ENEN
Warning
Safety Instructions
To prevent accidents including electric shock or re caused by improper use, please read this
manual carefully before use and retain it for future reference.
• This product can be used by children aged from 8 years and above and persons with
physical, sensory, intellectual deciencies, or limited experience or knowledge under
the supervision of a parent or guardian to ensure safe operation and to avoid any risk of
hazards. Cleaning and maintenance shall not be made by children without supervision.
• The vacuum is not a toy. Children shall not play with or operate this product. Please
exercise caution when using the vacuum near children. Do not allow children to clean or
maintain the vacuum unless supervised by a parent or guardian.
• Do not use the vacuum outdoors or on wet surfaces. Only use the vacuum on dry indoor
surfaces. Do not touch the plug or any part of the vacuum with wet hands.
• To reduce the risk of re, explosion, or injury, check to make sure the lithium battery and
charging adapter are undamaged before use. Do not use the vacuum if either the lithium
battery or charger is damaged.
• The soft roller brush bar, battery, metal connector pin, and vacuum are electrically
conductive and should not be immersed in water or other liquid. Make sure to dry all lters
after cleaning.
• Prevent injury caused by moving parts. Turn o the vacuum before cleaning the soft roller
brush bar. The soft roller brush bar, dust bin and lter must all be properly installed before
using the vacuum.
• Only use the original charging adapter. Never use an unoriginal adapter, as this may cause
the lithium battery to catch re.
• Do not use the vacuum to pick up ammable or combustible liquids, such as gasoline, or
bleach, ammonia, drain cleaners or other liquids.
• Do not use the vacuum to pick up sharp or hard objects, such as glass, nails, screws, or
coins, which may damage the machine. Do not use the vacuum to pick up drywall particles,
ashes like replace ash, or smoking or burning materials such as coal, cigarette butts or
matches.
• Check the area to be cleaned before use. To prevent the openings from being blocked,
clear the larger paper, spitball, plastic cloth or sharp objects (such as glass, nails, screws,
coins, etc.) and any object which is larger than openings.
• Keep hair, loose clothing, ngers and other parts of the body away from the vacuum's
openings and moving parts. Do not point the hose, wand or tools at your eyes or ears or put
them in your mouth.
• Do not put any object into the vacuum's openings. Do not use the vacuum with any
opening blocked. Keep free of dust, lint, hair, or other items which may reduce airow.
• Do not rest the vacuum against a chair, table, or other unstable surface, as this may cause
damage to the machine or personal injury. If the vacuum becomes damaged from being
knocked over or is otherwise malfunctioning, please contact our authorized service
department. Never attempt to disassemble the device on your own.
EN

2
ENEN • All instructions in the manual for recharging the battery must be strictly followed. Failureto
properly charge the battery within the specied temperature range could damage the
battery.
• Please be extra careful when using the vacuum to clean stairs.
• Make sure the vacuum is unplugged when not used for extended periods as well as prior to
performing any maintenance or repairs.
• Do not install, charge, or use this product outdoors, in bathrooms, or around a pool.
• Fire Hazard Warning: Do not apply any type of fragrance to the vacuum's lter. These types
of products are known to contain ammable chemicals which may cause the vacuum to
catch re.
• This product is designed for home use only.
• Only use the original charger (Model YLS0251B-E300080). Failing to do so may cause the
lithium-ion battery to catch re.
• Do not use and store in extremely hot or cold environments (below 0℃ /32° F or above 40℃
/104° F). Please charge the cordless vacuum in temperature above 0℃ /32° F and below
40℃ /104° F.
• Only use the approved battery type (Model P2125-7S1P-SCA). Failing to do so may cause
the lithium-ion battery to catch re.
We, Dreame Trading (Tianjin) Co., Ltd., hereby, declares that this equipment is in compliance
with the applicable Directives and European Norms, and amendments. The full text of the
EU declaration of conformity is available at the following internet address: www.dreame-
technology.com
EN
For detailed e-manual, please go to https://www.dreame-technology.com/pages/user-
manuals-and-faqs

3
ENEN
Accessories List
Product Overview
Note: The illustrations in this manual are indicative only. The actual product may dier.
2-in-1 Crevice Nozzle Power Adapter
Soft Roller Brush BarExtension Rod
EN
Mini Motorized Brush
Attachment Clip Wall Mount
(Including screws ×2,
wall plugs ×2)

4
ENEN
Component Names
Product Overview
EN
Battery Pack Release
Button
Extension Rod
Release Button
Extension Rod
Display Screen
Dust Bin Release Button
Charging Port
Antistatic Contact
Dust Bin
On/O Switch
Press to turn on
Release to turn o
Soft Roller
Brush Bar
Brushbar Head
Release Button
Attachment Clip

5
ENEN Product Overview
Display Screen
Note: If the vacuum is not working properly, the screen display will produce an error
message. Please refer to the troubleshooting section to nd your solution.
Electronic Lock
• Press briey to enter/exit lock
• Upon locked, press briey to switch to
continuous cleaning
Suction Level Button
Press briey to switch the suction levels
Status Indicator
• Blue: Normal
• Red: Out of battery/Error
Battery Status Indicator
Suction Level Status
Eco
Med
Turbo
EN
• Red: Battery Level < 20%
• White: Battery Level ≥ 20%

6
ENEN Installation
Vacuum and Accessories
Installation Diagram
Click
Click
EN

7
ENEN
Wall Mount Installation Diagram
The mount should be installed in a cool, dry place near a power outlet. Make sure the
installation area is clear of any pipes such as gas or water lines, and air ducts, electric wires
and cables, or drainage lines.
Connecting the Charging Adapter to the Wall Mount
1. Rotate the clip in the bottom of wall mount 90 degrees counterclockwise to remove it
from the mount.
2. Insert the charging adapter cord into the notch on the clip.
3. Rotate the clip 90 degrees clockwise until it clicks into place.
1. Before installation, measure the wall in the height of 100cm above the ground.
2. Mark and drill two 8mm diameter holes into the wall with an electric drill. Insert the wall
plugs into the holes.
3. Align the position holes on the mount with the holes on the wall. Fasten it to the wall
with the included screws.
Installation
100cm

8
ENEN Charging
Note:
• The vacuum cannot be used while charging.
• Fully charge the vacuum before using it for the rst time. This will take about 3 hours.
• Vacuuming at Turbo mode for a prolonged period will cause the battery to heat up,
which increases charging time. Allow the vacuum to cool down for 30 minutes before
charging it.
Battery Indicator
The battery indicators ash and then turn bright constantly in sequence depending on the
battery condition.
Note: The screen will turn o if there is no operation for more than 30 seconds.
Display Screen
Battery Status Indicator
• Red: Battery Level < 20%
• White: Battery Level ≥ 20%
Charging Methods

9
ENEN How to Use
Working Methods
Select from two working methods for the vacuum, based on your needs.
Method 1: Discontinuous Cleaning Mode
Press and hold the on/o switch to power it on, and release it to stop immediately.
Method 2: Continuous Cleaning Mode (Electronic Lock)
Click the button to switch to Continuous Cleaning Mode and the button is on. Then
release the on/o switch to make the vacuum in Continuous Cleaning Mode.
Use the electronic lock to free your ngers and avoid nger fatigue caused by holding the
switch.
Notes:
• In this mode, briey press the switch to suspend the operation or start again,and the
working mode of the vacuum will not change.
• Click the electronic lock again to quit the Continuous Cleaning Mode.

10
ENEN How to Use
Using Dierent Accessories
Soft Roller Brush Bar: Suitable for
vacuuming wood, tile, marble, and other
hard oor surfaces as well as for vacuuming
up larger pieces of dirt and debris.
2-in-1 Crevice Nozzle: Suitable for
vacuuming cracks, corners of doors and
windows, stairs, and other hard-to-reach
places.
Note:
• If any rotating part becomes stuck, the vacuum may shut o automatically. Remove any
trapped foreign objects, then resume use.
• When the battery becomes overheated, the vacuum will automatically shut o. Wait
until the battery temperature returns to normal, then resume use.
Mini Motorized Brush: For vacuuming dirt,
pet hair, and other stubborn debris from
sofas, bedding, and other fabric surfaces.
Attachment Clip: The 2-in-1 crevice nozzle
can be stored in the attachment clip as
shown when not in use.

11
ENEN Care & Maintenance
Tips:
1. Always use genuine parts to keep your warranty from being void.
2. If the vacuum is not used for an extended period, fully charge it, unplug its charger, and
store it in a cool, low-humidity environment away from direct sunlight. To avoid over-
discharging the battery, recharge the vacuum at least once every three months.
Cleaning the Vacuum
Wipe the vacuum with a soft dry cloth.
Cleaning the Dust Bin & Pre-Filter
Before cleaning the dust bin, disconnect
the adapter and keep the vacuum's power
switch in the o position.
1. Press the dust bin release button and
hold the dust bin to remove form the
vacuum in the direction of the arrow .
2. Empty the bin.
Note: It is recommended to clean the dust
bin after use.
Method 1: Press the release button on the
bottom of the bin.
Method 2: Hold the upper cover of dust bin,
then remove the cyclone assembly.

12
ENEN
1
2
Care & Maintenance
3. Remove the pre-lter. Rotate the cyclone assembly slightly to remove from the dust
bin.
4. Rinse the cyclone assembly, pre-lter, and dust bin until they are clean. After washing,
air dry for at least 24 hours .
Note:
• It is recommended to clean the dust bin once every month.
• It is recommended to clean the cyclone system and pre-lter at least once every 3 to 4
months.
Pre-Filter
Cyclone Assembly
Dust Bin
12
6
111
57
210
48
39 24 hrs

13
ENEN
2
1
Pre-Filter
Cyclone Assembly
Dust Bin
Care & Maintenance
Installing Dust Bin Assembly
1. Install the cyclone assembly and pre-lter into the dust bin.
Note: Make sure all lters are completely dry before re-installing.
2. Align the slots on the dust bin with the notches on the vacuum. Pull down the dust bin
until you hear a click.
Click
1
2

14
ENEN Care & Maintenance
Cleaning the Filter
It is recommended to clean the lter once every 4 to 6 months.
1. Remove the dust cup as shown in the
gure.
3. Clean the lter with clean water. Make
sure you rotate the lter 360° to thoroughly
and remove all dust caught in the lter.
Lightly tap the lter several times to remove
any excess dirt.
2. Remove the lter from the vacuum by
pulling it down in the direction shown in the
gure.
4. Allow the lter to air dry for 24 hours.
Note:
• Only use clean water to wash the lter. Do not use detergent.
• Do not attempt to clean the lter with a brush or nger.
12
6
111
57
210
48
9 3
24 hrs

15
ENEN
The vacuum contains a removable rechargeable lithium-ion battery pack which has a
limited number of recharge cycles. After extended use, the battery pack may no longer
hold a charge. If this happens, it means the battery pack has reached the end of its life
cycle and needs to be replaced.
1. Press down the battery pack release button and slide the battery pack to the right, as
illustrated, to remove it.
2. Install the new battery pack.
Care & Maintenance
Battery Pack
Installing the Filter
1. Insert the lter into the vacuum and
gently press down, as illustrated.
2. Reinstall the dust bin.
Click
1
2
Other manuals for P10 Pro
3
Table of contents
Languages:
Other Dreame Vacuum Cleaner manuals

Dreame
Dreame H12 User manual

Dreame
Dreame DreameBot D10s Pro User manual

Dreame
Dreame V12 User manual

Dreame
Dreame VTN1 User manual

Dreame
Dreame DreameBot W10 Pro User manual

Dreame
Dreame F9 User manual

Dreame
Dreame R10 Pro User manual

Dreame
Dreame D10s Plus User manual

Dreame
Dreame Bot W10 User manual

Dreame
Dreame DreameBot D10 Plus User manual

Dreame
Dreame L10Pro User manual

Dreame
Dreame P10 User manual

Dreame
Dreame R20 User manual

Dreame
Dreame H11 MAX User manual

Dreame
Dreame H12 Pro User manual

Dreame
Dreame DreameBot L10S Pro User manual

Dreame
Dreame V11SE Installation guide

Dreame
Dreame H11 User manual

Dreame
Dreame U20 User manual

Dreame
Dreame U20 User manual