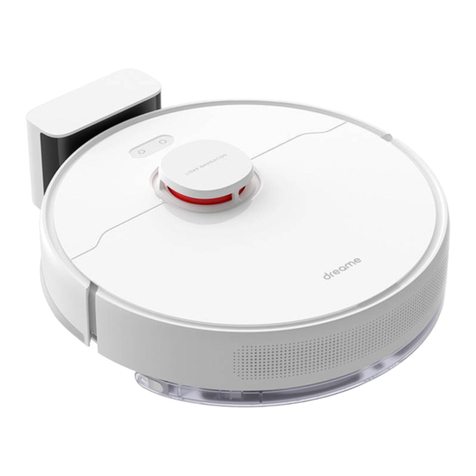
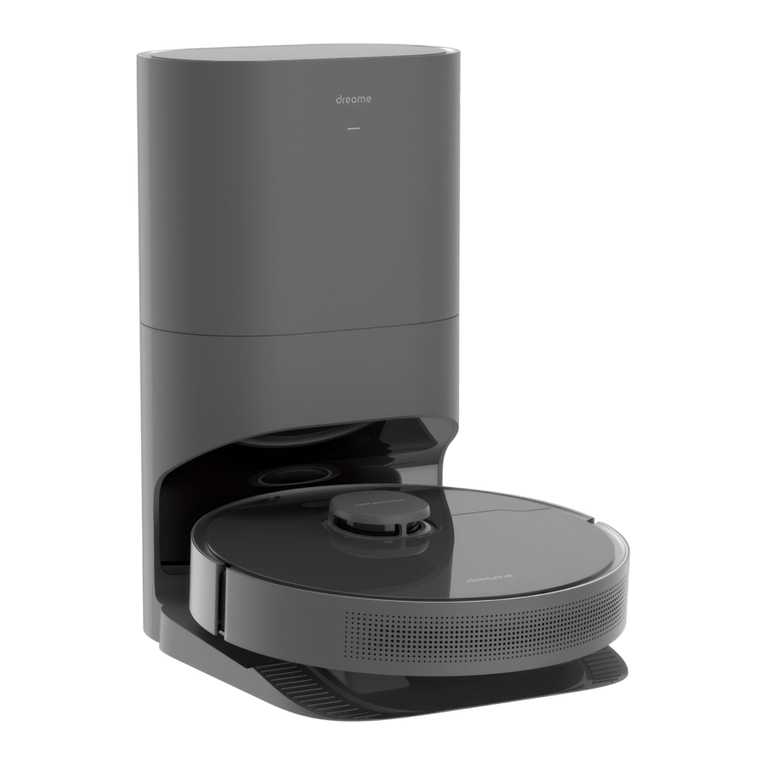
Dreame DreameBot W10 Pro User manual

注:此页面非印刷内容
M
R2104-

RLS6TAC-EU-A02
The illustrations in this manual are for reference only. Please refer to the actual product.
הרבחה ןוזח תא וכותב שיחממו יניסה םשה לילצ לע ססובמה קיתעת והז .Dreame Technology Co., Ltd. and its subsidiaries תיניסה הרבחה לש רצוקמה ומש וניה Dreame
.היגולגונכטה םוחתב קסופ יתלב ןפואב ףורדלו שפחל
"
łł ąż
łśżęęąęąął
Self-Cleaning Robot Vacuum and Mop
User Manual
W10 Pro

1
EN
Contents
User Manual
Benutzerhandbuch
Manuel d'utilisation
Manuale utente
Manual de usuario
Руководство пользователя
Instrukcja obsługi
EN
DE
FR
IT
ES
RU
PL
HE
SA
1
26
54
80
106
133
160
187
213
Safety Information
Usage
Restrictions · This product should not be used by children younger than 8 years old nor persons with
physical, sensory, intellectual deficiencies, or limited experience or knowledge without
the supervision of a parent or guardian to ensure safe operation and to avoid any risks.
Cleaning and maintenance shall not be performed by children without supervision.
· Clear the area to be cleaned. Children shall not play with this product. Ensure children
and pets are kept at a safe distance from the robot while it is operating.
· This product is for floor cleaning in a home environment only. Do not use it outdoors, on
non-floor surfaces, or in a commercial or industrial setting.
· Ensure that the appliance operates correctly in a proper environment. Otherwise, do not
use the appliance.
· If the power cord is damaged, it must be replaced by a special cord or assembly
available from the manufacturer or its service agent.
· Do not use the robot in an area suspended above ground level without a protective barrier.
· Do not place the robot upside down. Do not use the LDS cover, robot cover, or bumper as a
handle for the robot.
· Do not use the robot at an ambient temperature above 40° C or below 0° C or on a floor
with liquids or sticky substances.
· To prevent damage or harm from dragging, clear any loose objects from the floor, and
remove cables or power cords on the cleaning path before operating the appliance.
· Remove fragile or small items from the floor to prevent the robot from bumping into and
damaging them.
· Keep hair, fingers, and other body parts away from the suction opening of the robots.
· Keep the cleaning tool out of reach of children.
· Do not operate the appliance in a room where an infant or child is sleeping.
· Do not place children, pets, or any item on top of the robot regardless of whether it is
stationary or moving.
To avoid electric shock, re or injury caused by improper use of the appliance, please read the user
manual carefully before using the appliance and keep it for future reference.

2 3
EN EN
Safety Information
Batteries and
Charging
· Do not use the robot to clean any burning objects. Do not use the robot to pick up
flammable or combustible liquids, corrosive gases, or undiluted acids or solvents.
· Do not vacuum hard or sharp objects. Do not use the appliance to pick up objects such as
stones, large pieces of paper or any item that may clog the appliance.
· Plug must be removed from the socket-outlet before cleaning or maintaining the appliance.
· Do not use a wet cloth to wipe or any liquid to rinse the robot and base. Washable parts
must be dried completely before installing and using them.
· Please use this product in accordance with the instructions in the User Manual. Users are
responsible for any loss or damage that arise from improper use of this product.
· Do not use any third-party battery or self-wash base. Use only with RCS4 supply unit.
· Do not attempt to disassemble, repair, or modify the battery or self-wash base on your own.
· Do not place the self-wash base near a heat source.
· Do not use a wet cloth or wet hands to wipe or clean the base's charging contacts.
· Do not improperly dispose of old batteries. Unneeded batteries should be discarded at
an appropriate recycling facility.
· If the power cord becomes damaged or broken, stop using it immediately and contact
after-sales service.
· Make sure the robot is turned off when being transported and kept in its original
packaging if possible.
· If the robot will not be used for an extended period of time, fully charge it, then turn it off
and store it in a cool, dry place. Recharge the robot at least once every 3 months to avoid
over-discharging the battery.
Laser Safety
Information · The laser distance sensor complies with the IEC 60825-1:2014 standard for Class 1
laser products and does not generate dangerous laser radiation.
Hereby, Dreame Trading(Tianjin)Co., Ltd. declares that the radio equipment type RLS6TAC is in compliance with Directive 2014/53/EU. The full
text of the EU declaration of conformity is available at the following internet address: https://global.dreametech.com
For detailed e-manual, please go tohttps://global.dreametech.com/pages/user-manuals-and-faqs
Self-Wash Base
(Including a fresh tank, waste tank,
and washboard)
Package Contents
Product Overview
Power Cord Mop Pad (×2)Side Brush Cleaning Tool
User Manual Robot
Note: Illustrations of product, accessories, and user interface in the user manual are for reference purposes only. Actual product and functions may vary due to product
enhancements.
The illustrations in this manual are for reference only. Please refer to the actual product.
Self-Cleaning Robot Vacuum and Mop
User Manual
W10 Pro
Cleaning Brush

4 5
EN EN
Product Overview
Robot
Spot Cleaning Button
·Press briey to start spot cleaning
Power/Clean Button
·Press and hold for 3 seconds to turn on or o
·Press briey to start cleaning after the robot is turned on
Return-to-Base Button
·Press briey to send the robot back to the base
·Press and hold for 3 seconds to disable Child Lock
Status Indicator
·Solid White: Cleaning or cleaned
·Breathing White: Charging
·Blinking Orange: Low battery or error
Note:Press any button to pause while the robot is cleaning, returning to charge, returning
to self-clean, or in Spot Cleaning mode.
Product Overview
Main Wheel
Cli Sensors
Cli Sensors
Main Wheel
Main Brush
Brush Guard Clips
Magnetic Mounts
Universal Wheel
Side Brush
Auxiliary Wheel
Edge Sensor
Charging Contacts
LDS Upper Cover
Cli Sensors
Laser Distance Sensor (LDS)
Robot and Sensors
Ultrasonic Sensor
3D ToF Sensor
AI Visual Sensor
Air Outlet / Speaker
Wi-Fi Indicator
Reset Button
·Press and hold for 3
seconds to restore to
factory settings
Bumper
Cover

6 7
EN EN
Self-Wash Base
Upper Cover
Water Tank Plug
Control Panel
Mop Pad
Washboard
Washboard Clips
Floating Ball Filter Media
Control Panel
Clean Button
Return-to-Base
/ Exit Button
Display Screen
Product Overview
Clip Clip
Waste Tank Fresh Tank Press and hold the and buttons for 3 seconds to activate or deactivate
Child Lock. After Child Lock is activated, all buttons on the robot and the base
are locked.
Child Lock
Clean Button
Press briey to start or pause cleaning.
Return-to-Base / Exit Button
When the robot is on the base:
Press briey to make the robot exit the base.
Press and hold for 3 seconds to clean and dry the mop pads.
When the robot is out of the base:
Press briey to send the robot back to the base. The robot resumes
cleaning after the mop pads are cleaned.
Press and hold for 3 seconds to stop cleaning and send the robot
back to the base to have the mop pads cleaned and dried.
·
·
·
·
Dust BinSelf-Wash Base
Signaling Area
Charging Contacts
Power Port
Overow Sensors
Product Overview
Washboard Bracket
Overow Sensors
Self-Wash Base Back
Filter
Bin Cover
Bin Clip
· Push gently in the direction
indicated by the arrow to open
the cover

8 9
EN EN
>1.5 m
>
5
c
m
>
5
c
m
PREP Your Home
Remove power cords, slippers, and hard objects that may collide with the
robot to improve work eciency.
Open the door of the room to be cleaned, and put the furniture in its proper
place to leave more space.
Before cleaning, place a physical barrier at the edge of the stairs and sofa
to ensure the secure and smooth operations of the robot.
The robot can recognize objects with an AI Visual sensor. To keep the
optimal recognition performance, make sure all areas to be cleaned are
well illuminated.
Note: When operating the robot for the rst time, follow it around while cleaning to remove any potential obstacles in time.
To prevent the robot from not recognizing areas that need to be cleaned, do not stand in front of the robot, threshold, hallway, or narrow places.
1. Remove the protective strips
2. Install the side brush
Before Use
3. Place the base against the wall and charge the robot
Click
Install the side brush
until it clicks into place.
Within the Good Wi-Fi
Range
Note:
·Remove any objects that are closer than 1.5 m from the front and 5 cm from either
side of the base.
·Make sure that no objects might block the signaling area.
·To prevent water stains from wetting wood oors or carpets, placing the base on
tile or marble oors is recommended.
· Install the base in a location that is as open as possible with a good Wi-Fi signal.
· Insert the power cord into the base and plug it into the socket.
· Place the robot onto the base, and the robot will trun on
automatically and start charging.
· Fully charging the robot before the rst use is recommended. After the robot
is fully charged, the status indicator will illuminate white for 10 minutes and
will then dim.

10 11
EN EN
3. Reset Wi-Fi
Note: If the robot cannot connect to your phone, Reset the Wi-Fi network and try
again.
Wi-Fi Indicator
· Blinking slowly: To be connected
· Blinking quickly: Connecting
· On: Connected
xxxxxx' s home
No home environment info
Devices Rooms
Add a device
Scan
Note:
·Only 2.4 GHz Wi-Fi is supported.
·Due to upgrades in the app software, the actual operations may be dierent from
the statements in this manual. Please follow the instructions based on the current
app version.
Simultaneously press and hold the and buttons until you hear a voice
prompt saying, "Waiting for the network conguration." Once the Wi-Fi
indicator is blinking slowly, the Wi-Fi has been congured.
Fast Mapping
How to Use
Remove the mop pads before engaging fast mapping.
After you connect the robot to the app, create a map as instructed in the app.
The robot will move around to scan the environment and create a map. It will
not clean at this time. After the robot returns to the base, a map is created
and saved automatically.
Pause / Sleep
When the robot is cleaning, press briey any buttons on the robot or the
button on the base to pause the robot.
If the robot is paused for more than 10 minutes, it automatically enters sleep
mode. The power indicator and charging indicator will turn o. Press any
button on the robot or base, or use the app to wake up the robot.
Note:
· The robot will turn o automatically if it is left in the sleep mode for more than 12 hours.
· If the robot is paused and placed onto the base, the current cleaning process will end.
Restoring Factory Settings
IIf the robot does not function properly and the buttons elicit no response
after being restarted, use a pin to press the reset button for 3 seconds until
you hear a voice saying "Restoring factory settings". It will take about 5
minutes to reset the robot to its original factory settings. After resetting the
robot, you will have to recreate maps and no-go zones.
Turn On/O
When the robot is not placed on the base and is on standby, press briey
the button to enable the spot cleaning mode. In this mode, the robot cleans a
square-shaped area of 1.5 × 1.5 meters around it and returns to its starting point
once the spot cleaning is completed.
Spot Cleaning
Press and hold the button for 3 seconds to turn on the robot. The power
indicator should be illuminated. Place the robot onto the base, the robot
should turn on automatically and begin charging. To turn o the robot, move
the robot away from the base and press and hold the button for 3 seconds.
1.5 m
1.5 m
1.Download the Mi Home/Xiaomi Home App
Scan the QR code on the robot to download and install the Mi Home/Xiaomi
Home app.
2. Add Device
Connecting with Mi Home/Xiaomi Home App
Under the Cover
Open the Mi Home/Xiaomi Home, tap " " in the upper right, and then scan
the QR code above again to add "DreameBot W10 Pro". Please follow the
prompts to nish the Wi-Fi connection.
The appliance works with the Mi Home/Xiaomi Home app, which can be used to control the appliance and make it interact with other smart devices.
12 13
EN EN
Note:
· Make sure that the robot is fully charged before using it. Do not manually move
the robot when it is cleaning.
· If the battery gets low while cleaning, the robot will return to the base and resume
cleaning after charging its battery. The "Resume Cleaning" function must be enabled
on the app in advance.
Cleaning Mode
After the robot is turned on, it cleans each room by cleaning along the
edges and walls rst and then cleaning in an S-shaped pattern. The robot
automatically returns to the base to charge its battery after cleaning.
How to Use
Sweeping Function
Note: Do not attach the mop pads while using the sweeping function.
Method 1: Press the button on the base sand the robot will start
sweeping.
Method 2: Press the button on the robot and the robot will start sweeping.
MAX
To the MAX Line
Mopping Function
1. Attach the mop pads
2. Take out the fresh tank, ll it with clean water, and then place the fresh
tank into the base.
Note:
· Do not ll with hot water, otherwise the fresh tank may be deformed.
· Use only Dreame-branded detergents to help prevent malfunction.
Note: Do not use the mopping function on the carpet.
6. Clean the mop pads
How to Use
Note:
· If the robot is not on the base, please put it back before starting it.
· The robot will clean the mop pads before it starts cleaning. Please wait patiently
until the mop pads are cleaned.
· Do not manually move the base, fresh tank, waste tank, or washboard while mopping.
Note:
· To engage mop cleaning at any time, press and hold the button on the base for 3 seconds.
· While cleaning the mop pads, if the water in the fresh tank is insucient or the
waste tank is full, the robot will send a voice prompt, or the app will send a notication.
· After the robot nishes mopping, promptly clean the waste tank to prevent mold
or odor. Changing the mop pads every 1 to 3 months is recommended.
After the robot completes cleaning and returns to charge, the base will start
cleaning and drying the mop pads.
3. Place the robot onto the base 5. Return to self-clean
While mopping, the robot will return to the base to have the mop pads
cleaned according to cleaning conditions set in the app. The robot will
resume cleaning after the mop pads are cleaned.
Press the button. The robot will start from the base and mop the house based
on the optimal cleaning plan arranged in the map.
4. Start mopping

14 15
EN EN
Dust Bin
Routine Maintenance
1. Open the robot cover and press the dust bin clip to remove the dust bin.
2. Open the bin cover and empty the bin as shown in the diagram.
* Clean it as needed
Note: The cleaning tool can be used to empty the dust bin.
Filter
1. Remove the lter and gently tap the lter frame to shake out the dirt.
Note: Do not attempt to clean the lter with a brush, nger, or sharp object.
2. If necessary, rinse the dust bin and the lter under the running water and
dry them completely before re-installing.
Note:
· Only rinse the dust bin and the lter with clean water. Do not use any soap or detergent.
· Use the dust bin and lter only when whey are completely dry.
* Clean it once every 2 weeks (fully dry after cleaning) and change it every 3 months
How to Use
Functions in the App
1. Map management
The homepage of the app displays the current map. On this page, "No-Go
Zone" allows you to set zones to be avoided. "Map Management" allows you
to modify the current map.
For optimal performance, follow the instructions below to clean and maintain
the robot and base.
2. Cleaning mode settings
"Cleaning Mode" on the homepage allows you to change the cleaning mode,
the suction power, and the dampness of the mop pads.
3. Self-cleaning settings
"Self-Cleaning Settings" on the homepage allows you to change the
frequency of self-cleaning, manually start a mop pad cleaning task, or
manually start or stop a mop pad drying task.
4. Product settings
The "Settings" page allows you to enable or disable device functions, congure
scheduled cleanup, or view cleaning history and device information.
Note:
· A map must be created before you can use the room-based or zone-based
cleaning function or manage the maps.
· For more information about functions, check the corresponding interfaces or
guides in the app.
· The app you use may be an updated version, please follow the instructions based
on the current app version.
Routine Maintenance
Parts
Note: The replacement frequency will depend on your usage of the robot. If an
exception occurs due to special circumstances, the parts should be replaced.
Part Maintenance Frequency Replacement Frequency
Waste Tank After each use /
Dust Bin Filter
Once every 2 weeks
Every 3 to 6 months
Fresh Tank
/
Fresh Tank Filter Media
Washboard
Main Brush/ Side Brush
3D ToF Sensor/ AI Visual Sensor
Mop Pad
Once every month
Every 1 to 3 months
Dust Bin
/
Bottom of the Robot
Cli Sensors
Universal Wheel/ Auxiliary
Wheel
Charging Contacts on Robot
Signaling Area on Base
Overow Sensors on Base
Charging Contacts on Base
Body of the Base
Side Brush /Every 3 to 6 months
Main Brush Every 6 to 12 months

16 17
EN EN
1. Press the clips on both sides of the bottom of the base to remove the
washboard.
3. Wipe the bottom of the base with a dry cloth.
2. Use the provided cleaning tool to clean the washboard completely.
4. Insert the washboard into the base as shown in the diagram, making sure
that both clips are in place.
Washboard * Clean once every 2 weeks
Routine Maintenance
Note: Make sure that the washboard brackets are in place.
Click Click
Click Click
Fresh Tank * Clean the lter media once every 2 weeks
1. Open the fresh tank cover, move the hose to the side to remove and clean
the lter media as shown in the diagram.
2. Put the lter media and hose back in their original position.
Waste Tank
1. Take out the waste tank, open the waste tank cover, and then dump the
wastewater.
2. Clean the waste tank with water and put it in the base.
Note: The oating ball in the waste tank is a moving part. Do not clean the oating
ball excessively in case of aecting its functions.
* Clean after each use
Routine Maintenance

18 19
EN EN
Note: Wet cloth can damage sensitive elements within the robot and base.
Please use a dry cloth for cleaning.
Robot Sensors and Charging Contacts
Robot Restarting
Battery
The robot contains a high-performance lithium-ion battery pack. Make sure
that the battery remains well-charged for daily use to maintain optimal
battery performance. If the robot is not used for an extended period of time,
turn it o and put it away. To prevent damages from over-discharging, charge
the robot at least once every three months.
Routine Maintenance
Wipe the robot's sensors and charging contacts by using a soft, dry cloth:
· Cli sensors at the bottom of the robot
· Charging contacts at the back of the robot
· Return-to-base sensor at the front of the robot
· Bumper at the front of the robot
· LDS on the top of the robot
· 3D ToF sensor and AI Visual sensor at the front of the robot
Cli Sensors
Self-Wash Base Charging Contacts and Overow
Sensor
LDS
Charging Contacts
3D ToF Sensor
AI Visual Sensor
Bumper
Charging Contacts
Overow Sensor
If the robot stops responding or cannot be turned o, press and hold down
the button for 10 seconds to force a shutdown. Then, press and hold the
button for 3 seconds to turn the robot on.
Press the brush guard clips inwards to remove the brush guard and lift the
brush out of the robot.
Pull out the brush covers as shown in the diagram. Use the provided cleaning
tool to remove any hair tangled in the brush.
Cleaning the Main Brush
Note: If any hair is thoroughly tangled in the brush, do not pull it too hard. Doing
so may damage the main brush.
Remove and clean the side brush.
Cleaning the Side Brush
Cleaning the Universal Wheel/Auxiliary Wheel
Note:
·Use a tool such as a small screwdriver to separate the axle and tire of the
universal wheel. Do not use excessive force.
·Rinse the universal wheel under the running water and put it back after drying it
completely.
Routine Maintenance

20 21
EN EN
FAQ
Problem Possible Cause and Solution
The robot will not turn
on.
1. The battery is low. Recharge the robot on the base and try again.
2. The temperature of the battery is too low or too high. It is recommended to operate the appliance at a
temperature between 32 ℉ (0℃ ) and 104 ℉ (0℃ ).
The robot will not
charge.
1. The base is unplugged. Make sure that both ends of the power cord are plugged in.
2. Poor contact. Wipe the charging contacts on both the base and the robot.
The robot fails to
connect to Wi-Fi.
1. The Wi-Fi network password is incorrect. Make sure the password used to connect to your Wi-Fi network is correct.
2. The robot does not support a 5 GHz Wi-Fi connection. Make sure the robot is connected to a 2.4 GHz Wi-Fi connection.
3. The Wi-Fi signal is weak. Make sure the robot is in an area with good Wi-Fi coverage.
4. The robot may not be ready to be congured. Please exit and re-enter the app, and then try again as instructed.
A room-based map
cannot be created in
the app.
1. The robot must start from the base to create a map. Using the fast mapping function is recommended.
2. Do not move the robot when the robot creates a map for the rst time, otherwise positioning failure may occur.
3. After the robot creates a map for the rst time, check whether it fails to return to the base. If so, remove any obstacles around it.
The robot cannot nd
the base or will not
return to the base.
1. The base is unplugged or has been moved when the robot is not placed onto the base. Manually place the robot on the base.
2. The robot can not return to the base since its path is blocked. For example, a door is closed. Ensure the robot has a clear path.
3. There are too many obstacles around the base. Place the base in an area without any obstacles around it.
4. Moving the robot may cause it to re-position itself or re-map its surroundings. If the robot is too far from the base, it might not be
able to automatically return to the base. In this case, manually place the robot onto the base.
5. Wipe the signaling area on the base to ensure no dust or dirt is blocking the signal.
6. Wipe 3D ToF Obstacle Avoidance Sensor on the robot with a soft dry cloth gently to keep the lens clean and unobstructed.
The robot is stuck in
front of the base and
cannot return to the
base.
1. Check whether there is enough space around the base. Keep the immediate area within 1.5 m in front of the base and 5 cm on both
side of the base clear of objects.
2. The robot may slip. Check whether there is water in front of the base, if so, wipe it and try to send the robot back again.
3. Change the place where you put the base and try again.
The robot will not turn
o.
1. The robot can be turned o only when it is not charging. To turn o the robot, move the robot away from the
base and press and hold the button for 3 seconds.
2. If the robot cannot be turned o by performing step 1, press and hold the button for 10 seconds to force a shutdown. If the
problem persists, please contact after-sales service.
If the base does not work properly, an error icon and message will be displayed on the display screen. Read the message and handle the issue based on the
following table.
Errors
Error Icon Error Message Solution
Insucient Water in Fresh Tank Add a sucient amount of water to the fresh tank.
Fresh Tank Not Installed Install the clean water tank.
Waste Tank Malfunction Install the waste tank.
Empty the used water.
Washboard Not Installed Check whether the washboard is installed and whether the clips on both sides of
the washboard are in place.
Abnormal Washboard Water Level Check whether the waste port is clogged. If yes, clean it.
Robot Malfunction Check whether an exception has occurred for the robot. Please refer to the "FAQ"
section in this manual for troubleshooting.

22 23
EN EN
FAQ
Problem Possible Cause and Solution
The robot fails to
recognize objects. 1. The AI recognition process requires sucient light. Make sure the robot is performing the cleaning task in a well-lit room.
2. Wipe the camera lens with a soft cloth and keep it clean.
The robot moves
without following the
set route.
1. Make sure objects, such as power cords and slippers, have been organized before using the robot.
2. Working on wet slippery surfaces sometimes causes the main wheel to slip. Drying the wet places before using the robot is
recommended.
The robot misses the
rooms to be cleaned.
1. Make sure that the doors of the rooms to be cleaned are open.
2. Check whether there is a threshold higher than 1.8 cm at the door of the room. The robot cannot climb over high
thresholds or steps.
3. If the place in front of the room to be cleaned is wet and slippery, the robot may slip and work abnormally. Drying the oor
before using the robot is recommended.
4. Check whether there is a small door mat or carpet at the door of the room. The carpet will be avoided while the robot is mopping.
Please turn o the carpet recognition function on the "Settings" page of the app.
The robot often strays
into no-go zones or
areas with virtual walls.
1. View the homepage of the app to check whether an error has occurred with the current map. If so, restore the map in the "Map
Management" settings.
2. When you set virtual walls or no-go zones, adjusting boundaries based on the home environment and including all areas that
are prone to trapping the robot, such as sinking steps and underneath furniture, is recommended.
The robot gets into
trouble while working
and stops.
1. The robot automatically powers o when its battery is depleted to 0%.
2. The robot fails to charge, which causes its battery power to run out and causes the robot to shut down. The possible cause is
that the base is not connected to the power supply, or the robot and the base are in poor contact. Please check the connection.
If the problem persists, please contact the after-sales service.
The robot will not
resume cleaning after
charging.
1. Make sure that the robot is not set to the "Do Not Disturb" (DND) mode, which will prevent it from resuming cleaning.
2. The robot does not resume cleaning when it is manually recharged or placed onto the base.
FAQ
Problem Possible Cause and Solution
The charging speed is
slow.
It takes about 6 hours to fully charge the robot when its battery is low.
1. If you operate the robot at temperatures outside of the specied range, the charging speed will automatically
slow down to extend the battery life.
2. The charging contacts on both the robot and the base may be dirty, please wipe them with a soft cloth.
The robot is
malfunctioning. Turn o the robot and then restart it.
The side brush falls o. 1. Re-install the side brush until it clicks into place.
2. The side brush may be entangled by power cords. Remove power cords from the oor before cleaning.
The mop pads fall o. The mop pads may be entangled by power cords. Remove power cords from the oor before cleaning.
The cleaning
performance is poor.
1. The dust bin is full. Empty it.
2. The lter needs cleaning. Check and clean it.
3. The lter is not fully dried after being washed. Dry the lter before use.
The robot leaks dust
while cleaning.
Take out the main brush and the dust bin, and remove any debris that may have become trapped around spaces that hold the main
brush and the dust bin.
The noise increases
while the robot is
operating.
1. The dust bin is full. Empty it.
2. Hard objects are trapped around the main brush and the dust bin. Check and clean them up.
3. The main brush and the side brush may be entangled with hair or debris. Check and clean them up.
4. Switch the suction mode to "Standard" or "Quiet".
The robot makes a
strange noise while
operating.
Please turn and press the main wheel to check if there is any object entangled or stuck, if so, clean them promptly. If the problem
persists, please contact the after-sales service.
The robot is stuck and
stops operating.
1. Check the corresponding area to make sure whether there are obstacles such as power cords, curtains, or carpet
tassels around the robot. Removing them so that the robot can continue to work is recommended.
2. The robot may be trapped by furniture. It is recommended to elevate the furniture, place a physical barrier to block
o the problem areas, or set no-go zones by using the app.

24 25
EN EN
Specications
Model RLS6TAC
Battery 6400 mAh (Nominal Capacity)
Charging Time Approx. 6 hours
OS Compatibility Android 4.4 or iOS 10.0 and later
Rated Voltage 14.4 V
Rated Power 55 W
Wi-Fi Wireless Connectivity Wi-Fi IEEE 802.11b/g/n 2.4 GHz
Operation Frequency 2400-2483.5 MHz
Maximum Output Power < 20 dBm
SRD Wireless Operation
Frequency 433.92 MHz
Maximum Output Power < 10 dBm
Robot Self-Wash Base
Model RCS4
Rated Input 100-240 V ~ 50-60 Hz 1.5 A
Rated Output 20.0 V 1 A
SRD Wireless Operation
Frequency 433.92 MHz
Maximum Output Power < 10 dBm
Under normal use of condition, this equipment should be kept a separation
distance of at least 20 cm between the antenna and the body of the user.
All products bearing this symbol are waste electrical and electronic equipment (WEEE as in directive 2012/19/EU) which should not be mixed with unsorted
household waste. Instead, you should protect human health and the environment by handing
over your waste equipment to a designated collection point for the recycling of waste electrical and electronic equipment, appointed by the government or local
authorities. Correct disposal and recycling will help prevent potential negative consequences to the environment and human health. Please contact the installer
or local authorities for more information about the location as well as terms and conditions of such collection points.
WEEE Information
FAQ
Problem Possible Cause and Solution
The robot will not clean
automatically at the
scheduled time.
The robot has low battery. The scheduled cleaning will not start unless the battery level is over 15%.
The robot does not
respond to the base.
The robot is too far away from the base and they cannot communicate with each other. Using the app to control the robot is
recommended.
Water in the fresh tank
is insucient.
1. Replenish clean water in time.
2. Unplug the power cord from the base, take out the fresh tank and put it back, and then power on the base and try again.
3. Pour out the remaining water in the fresh tank, rinse the bottom of the fresh tank and lter media, and then try
again after adding water into it.
4. Check the metal lter at the water inlet of the base to see if there are foreign objects, if any, please take out the
foreign objects.
If the problem persists, please contact the after-sales service.
The water level in
the washboard is
abnormal.
1. Remove the washboard and check whether the sewage drain is blocked and clean it.
2. Wipe the metal elastic pieces of the overow sensor within the washboard with a dry cloth.
3. Gently press down on the waste tank to ensure that the waste tank is installed in place.
4. Check if the sealing ring of the waste tank is loose or not installed properly, if so, reset it manually. If the problem
persists, please contact the after-sales service.
The washboard is not
installed. Check whether the washboard is installed in place or whether the clips on both sides of the washboard are in place.

26 27
DEDE Sicherheitsinformationen
· Verwenden Sie den Roboter nicht in einem Bereich, der sich über dem
Bodenniveau befindet und der nicht durch eine Schutzbarriere begrenzt wird.
· Stellen Sie den Roboter nicht auf den Kopf. Verwenden Sie die LDS-Abdeckung,
die Roboterabdeckung oder den Bumper nicht als Griff für den Roboter.
· Benutzen Sie den Roboter nicht in Umgebungen, in denen die Temperaturen
über 40 ° C oder unter 0 ° C liegen, und auch nicht auf Böden mit Flüssigkeiten
oder klebrigen Substanzen.
· Bevor Sie das Gerät in Betrieb nehmen, entfernen Sie Kabel oder Netzkabel, um
Beschädigungen oder Schäden durch Ziehen zu vermeiden.
· Entfernen Sie zerbrechliche oder kleine Gegenstände vom Boden, um zu
verhindern, dass der Roboter sie anstößt und beschädigt.
· Halten Sie Haare, Finger und andere Körperteile von der Saugöffnung des
Roboters fern.
· Halten Sie das Reinigungswerkzeug außerhalb der Reichweite von Kindern.
· Betreiben Sie das Gerät nicht in einem Raum, in dem ein Säugling oder ein Kind
schläft.
· Kinder, Haustiere oder Gegenstände dürfen weder auf dem stillstehenden noch
dem sich bewegenden Roboter positioniert werden.
· Benutzen Sie den Roboter nicht zum Aufwischen oder Aufsaugen
brennender Substanzen. Verwenden Sie den Roboter nicht zum Aufsaugen
von entflammbaren oder brennbaren Flüssigkeiten, ätzenden Gasen oder
unverdünnten Säuren oder Lösungsmitteln.
Nutzungseinschränkungen
Sicherheitsinformationen
· Dieses Produkt sollte nicht von Kindern unter 8 Jahren oder von
Personen mit körperlichen, sensorischen, intellektuellen Mängeln
oder eingeschränkter Erfahrung oder Wissen ohne die Aufsicht eines
Elternteils oder Erziehungsberechtigten verwendet werden, um
einen sicheren Betrieb zu gewährleisten und Risiken zu vermeiden.
Reinigung und Wartung dürfen nicht von Kindern ohne Aufsicht
durchgeführt werden.
· Der zu reinigende Bereich muss freigeräumt werden. Kinder
dürfen nicht mit diesem Produkt spielen. Sorgen Sie dafür, dass
Kinder und Haustiere während des Betriebs des Roboters einen
sicheren Abstand zum Gerät halten.
· Dieses Produkt ist nur für die Bodenreinigung in einer häuslichen
Umgebung geeignet. Benutzen Sie es nicht im Freien, auf
anderen Oberflächen als dem Boden oder in einer kommerziellen
oder industriellen Umgebung.
· Stellen Sie sicher, dass das Gerät in einer geeigneten Umgebung
ordnungsgemäß betrieben wird. Andernfalls dürfen Sie das Gerät
nicht verwenden.
· Wenn das Stromkabel beschädigt ist, schalten Sie das Gerät sofort
aus und wenden Sie sich an den Kundendienst.
Um Stromschläge, Brände oder Verletzungen durch unsachgemäßen Gebrauch des Geräts zu
vermeiden, lesen Sie bitte die Bedienungsanleitung vor dem Gebrauch sorgfältig durch und bewahren
Sie sie zum späteren Gebrauch auf.

28 29
DEDE
Laserdistanzsensor · Der Laserdistanzsensor entspricht der Norm IEC 60825-1:2014 für
Laserprodukte der Klasse 1 und erzeugt keine gefährliche Laserstrahlung.
Sicherheitsinformationen
Hiermit bestätigt, Dreame Trading (Tianjin) Co., Ltd. dass das Funkgerät des Typs RLS6TAC mit der Verordnung 2014/53/EU in Einklangsteht. Der vollständige
Wortlaut der EU-Konformitätserklärung ist unter der folgenden Internetadresse abrufbar: https://global.dreametech.com
· Stellen Sie sicher, dass der Roboter beim Transport ausgeschaltet ist und
möglichst in der Originalverpackung befördert wird.
· Wenn der Roboter für eine längere Zeit nicht benutzt werden soll, laden
Sie ihn voll auf, schalten ihn aus und lagern ihn an einem kühlen und
trockenen Ort. Laden Sie den Roboter mindestens je 3 Monate auf, um eine
Tiefentladung des Akkus zu vermeiden.
Sicherheitsinformationen
Akkus und Ladung
· Saugen Sie keine harten oder scharfen Gegenstände ein. Verwenden Sie
das Gerät nicht zum Aufnehmen von Gegenständen wie Steinen, großen
Papierstücken oder anderen Dingen, die das Gerät verstopfen könnten.
· Bitte schalten Sie das Gerät vor der Reinigung und Wartung aus und ziehen
Sie den Netzstecker.
· Verwenden Sie kein nasses Tuch zum Abwischen und keine Flüssigkeit zum
Abspülen des Roboters und der Basis. Abwaschbare Teile müssen vor dem
Einbau und Gebrauch vollständig getrocknet werden.
· Bitte verwenden Sie das Produkt gemäß den Anweisungen im
Benutzerhandbuch. Der Benutzer ist für jeglichen Verlust oder Schaden
verantwortlich, der aufgrund inkorrekter Verwendung dieses Produkts
entsteht.
· Keine Fremdbatterie und keine Selbstreinigungsbasis verwenden. Nur mit
Versorgungseinheit RCS4 verwenden.
· Versuchen Sie nicht, den Akku oder die Selbstreinigungsbasis selbst zu
zerlegen, zu reparieren oder zu modifizieren.
· Stellen Sie die Selbstreinigungsbasis nicht in der Nähe einer Wärmequelle auf.
· Verwenden Sie kein nasses Tuch und keine nassen Hände, um die
Ladekontakte der Basis zu wischen oder zu reinigen.
· Entsorgen Sie alte Akkus sachgemäß. Unbenutzte Akkus sollten in einer
geeigneten Recycling-Einrichtung entsorgt werden.
· Wenn das Stromkabel beschädigt ist, schalten Sie das Gerät sofort aus und
wenden Sie sich an den Kundendienst.

30 31
DEDE Produktübersicht
Roboter
Taste für die Punktreinigung
·Kurz drücken, um die Punktreinigung zu starten
Ein-/Aus- und Reinigungstaste
·Halten Sie die Taste 3 Sekunden lang gedrückt, um das Gerät ein-
oderauszuschalten
·Kurz drücken zum Start der Reinigung nach dem Einschalten des Roboters
Rückkehr-zur-Basis-Taste
·Kurz drücken, um den Roboter zurück zur Basis zu schicken
·Halten Sie die Taste 3 Sekunden lang gedrückt, um die Kindersicherung zu
deaktivieren
Statusanzeige
·Auf Weiß: Reinigen oder gereinigt
·Leuchtet weiß: Auaden
·Leuchtet Orange: Niedrige Batterie oder Fehler
Hinweis: Drücken Sie eine beliebige Taste, um den Reinigungsvorgang zu
unterbrechen, zum Auaden zurückzukehren, zum Selbstreinigungsmodus
zurückzukehren oder den Spot-Reinigungsmodus zu aktivieren.
Netzkabel Reinigungswerkzeug
Benutzerhandbuch Roboter
Wischer (×2)Seitenbürste
Selbstreinigungsbasis
(Einschließlich Reinwassertank,
Schmutzwassertank und Waschbrett)
Packungsinhalt
Produktübersicht
The illustrations in this manual are for reference only. Please refer to the actual product.
Self-Cleaning Robot Vacuum and Mop
User Manual
W10 Pro
Reinigungsbürste
Hinweis: Abbildungen von Produkt, Zubehör und Benutzeroberäche im Benutzerhandbuch dienen nur zu Referenzzwecken. Das tatsächliche Produkt und die Funktionen
können aufgrund von Produkt-Updates abweichen.

32 33
DEDE
Selbstreinigungsbasis
Obere Abdeckung
Wassertankstecker
Bedienfeld
Wischer-
Waschbrett
Waschbrett-Klammern
Schwimmende
Kugel Filtermedien
Bedienfeld
Reinigungstaste
Zurück zur
Basisstation /
Beenden-Taste Bildschirm
Produktübersicht
Klammer Klammer
Abwassertank Frischwassertank
Zurück zur Basisstation / Beenden-Taste
Kindersicherung
Reinigungstaste
Kurz drücken, um die Reinigung zu starten oder zu pausieren.
Halten Sie die Tasten und 3 Sekunden lang gedrückt, um die
Kindersicherung zu aktivieren oder zu deaktivieren. Nachdem die
Kindersicherung aktiviert wurde, sind alle Tasten am Roboter und an der
Basisstation gesperrt.
Wenn sich der Roboter auf der Basisstation bendet:
Drücken Sie kurz, damit der Roboter die Basisstation verlässt.
Halten Sie die Taste 3 Sekunden lang gedrückt, um das Wischpad zu reinigen
und zu trocknen.
Wenn sich der Roboter nicht auf der Basisstation bendet:
Drücken Sie kurz, um den Roboter zurück zur Basis zu schicken. Der Roboter
setzt die Reinigung fort, nachdem der Wischergereinigt wurde.
Halten Sie 3 Sekunden gedrückt, um die Reinigung zu beenden. Der Roboter
kehrt zur Reinigungsbasis zurück,dann wascht und trockt den Wischer. Wenn
der Roboter auf die Basis gestellt wird, wenn Sie 3 Sekunden lang drücken
und halten, wird der Wischer sofort gereinigt und getrocknet.
·
·
·
·
Produktübersicht
AI Visueller Sensor
Luftauslass /
Lautsprecher
WLAN-Anzeiger
Reset-Taste
· Drücken und halten Sie
3 Sekunden lang, um
die Werkseinstellungen
wiederherzustellen Hauptrad
Absturz-Sensoren
Absturz-Sensoren
Hauptrad
Hauptbürste
Freigabe
Hauptbürstenabdeckung
Magnetische Befestigungen
Universal-Rad
Seitenbürste
Hilfsrad
Kantensensor
Ladekontakte
LDS Obere Abdeckung
Stoßfänger
Absturz-Sensor
Abdeckung
Laserdistanzsensor
Roboter und Sensoren
Ultraschallsensor
3D ToF Sensor

34 35
DEDE Bereite Ihr Zuhause
Entfernen Sie Netzkabel, Hausschuhe und harte Gegenstände, die mit dem
Roboter kollidieren können, um die Arbeitsezienz zu verbessern.
Önen Sie die Tür des zu reinigenden Raumes und stellen Sie die Möbel in die
geeignete Position, um mehr Platz zu schaen.
Der Roboter kann Objekte mit einem AI Visueller Sensor erkennen. Stellen
Sie sicher, dass alle zu reinigenden Bereiche gut beleuchtet sind, um die
optimale Erkennungsleistung zu erreichen.
Montieren Sie vor der Reinigung die physische Barriere an den Kanten
von Treppen und Möbeln, um dem Roboter ein reibungsloses Arbeiten zu
ermöglichen.
Hinweis: Wenn Sie den Roboter zum ersten Mal in Betrieb nehmen, folgen Sie ihm während der Reinigung, um mögliche Hindernisse rechtzeitig zu beseitigen.Um zu
verhindern, dass der Roboter den zu reinigenden Bereich nicht erkennt, stellen Sie sich nicht vor den Roboter, vor eine Schwelle, oder die enge Stelle einer Flur hin.
Staubbehälter
Filter
Staubbehälterabdeckung
Freigabe Staubbehälter
Selbstreinigungsbasis
Signalbereich
Ladekontakte
Stromanschluss
Überlaufsensoren
Produktübersicht
Waschbrett-Halterung
Überlaufsensoren
Rückseite der
Selbstreinigungsbasis
· Drücken Sie leicht in die durch
den Pfeil angezeigte Richtung,
um die Abdeckung zu önen
Table of contents
Languages:
Other Dreame Vacuum Cleaner manuals

Dreame
Dreame DreameBot L10 Ultra User manual

Dreame
Dreame R20 User manual

Dreame
Dreame DreameBot L10 Ultra User manual

Dreame
Dreame P10 User manual

Dreame
Dreame R10 User manual

Dreame
Dreame DreameBot D9 PLus User manual

Dreame
Dreame U20 User manual

Dreame
Dreame DreameBot D10s User manual

Dreame
Dreame H11 MAX User manual

Dreame
Dreame H12 User manual

Dreame
Dreame D9 User manual

Dreame
Dreame V12 Installation guide

Dreame
Dreame R20 User manual

Dreame
Dreame H11 Dimensions

Dreame
Dreame D10s Plus User manual

Dreame
Dreame D10s Plus User manual

Dreame
Dreame F9 User manual

Dreame
Dreame H12 Pro User manual

Dreame
Dreame Vortech Z10 Station User manual

Dreame
Dreame DreameBot L10 Prime User manual