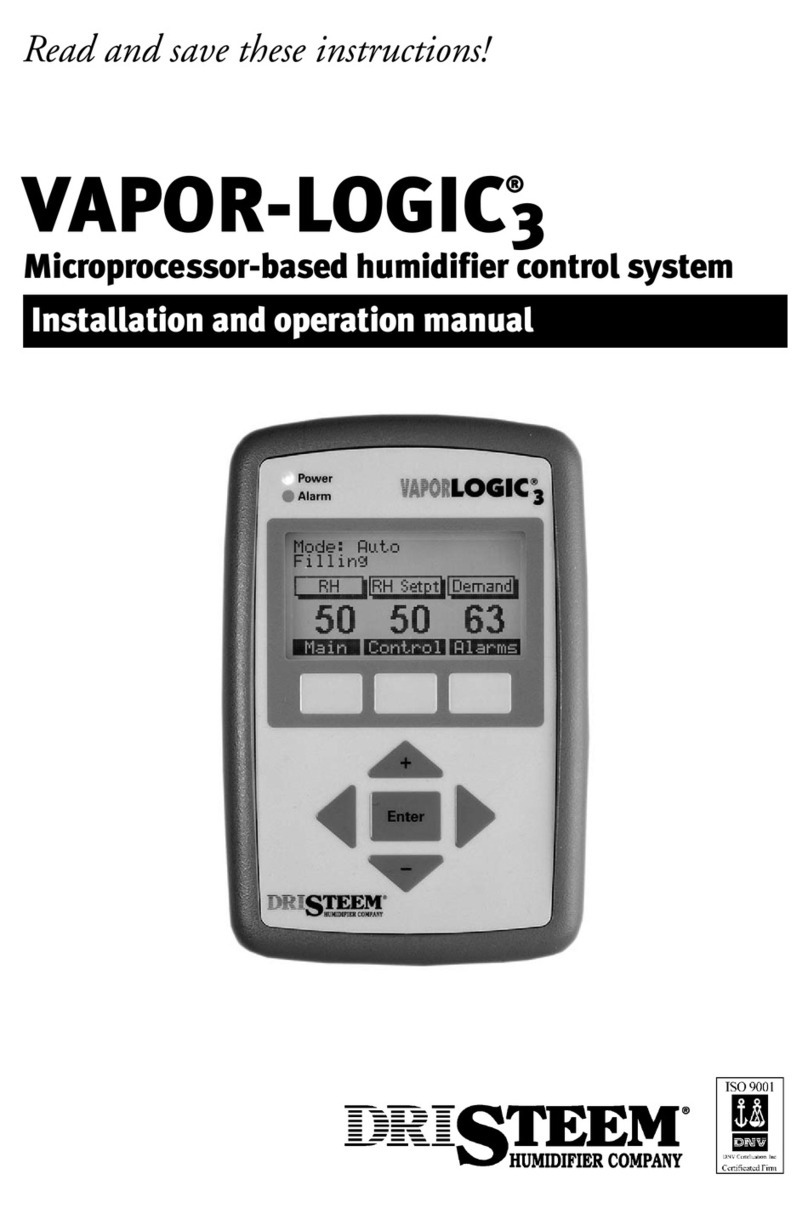
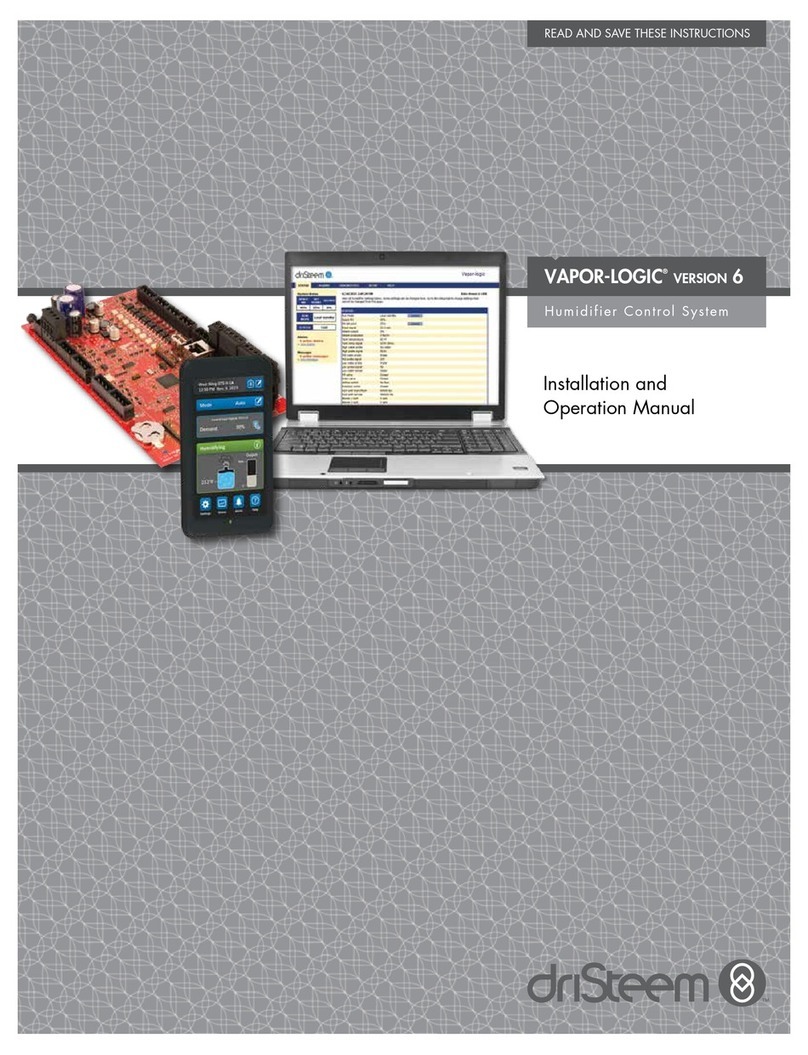
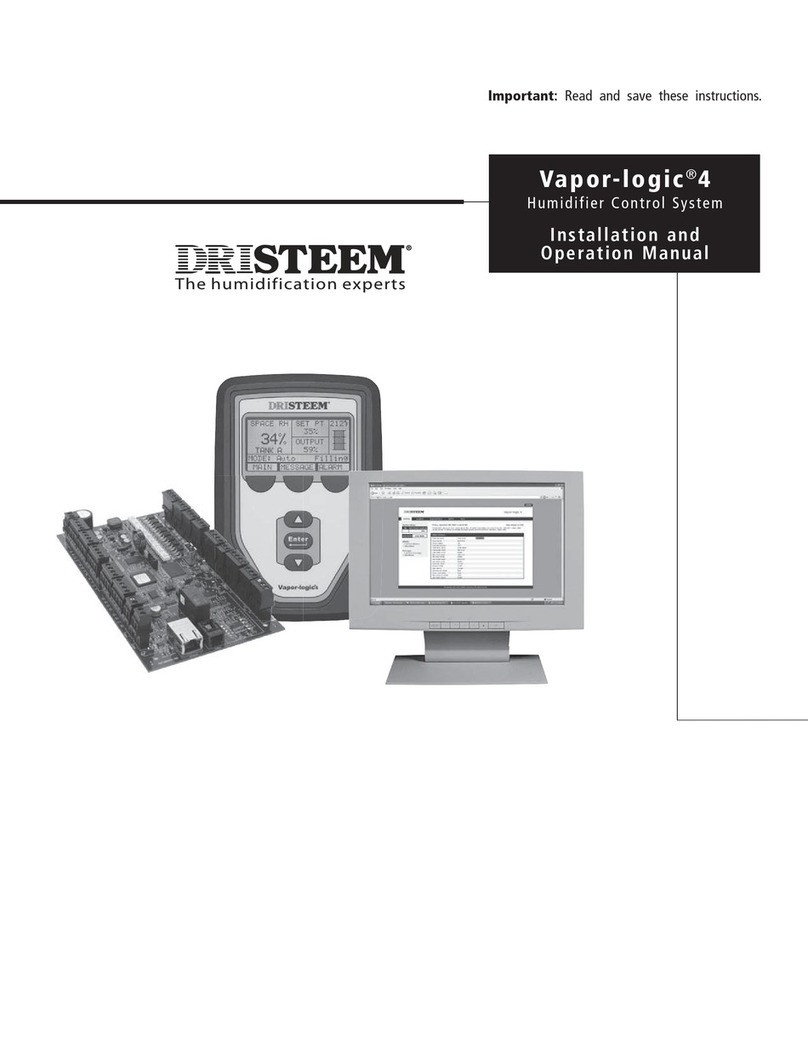
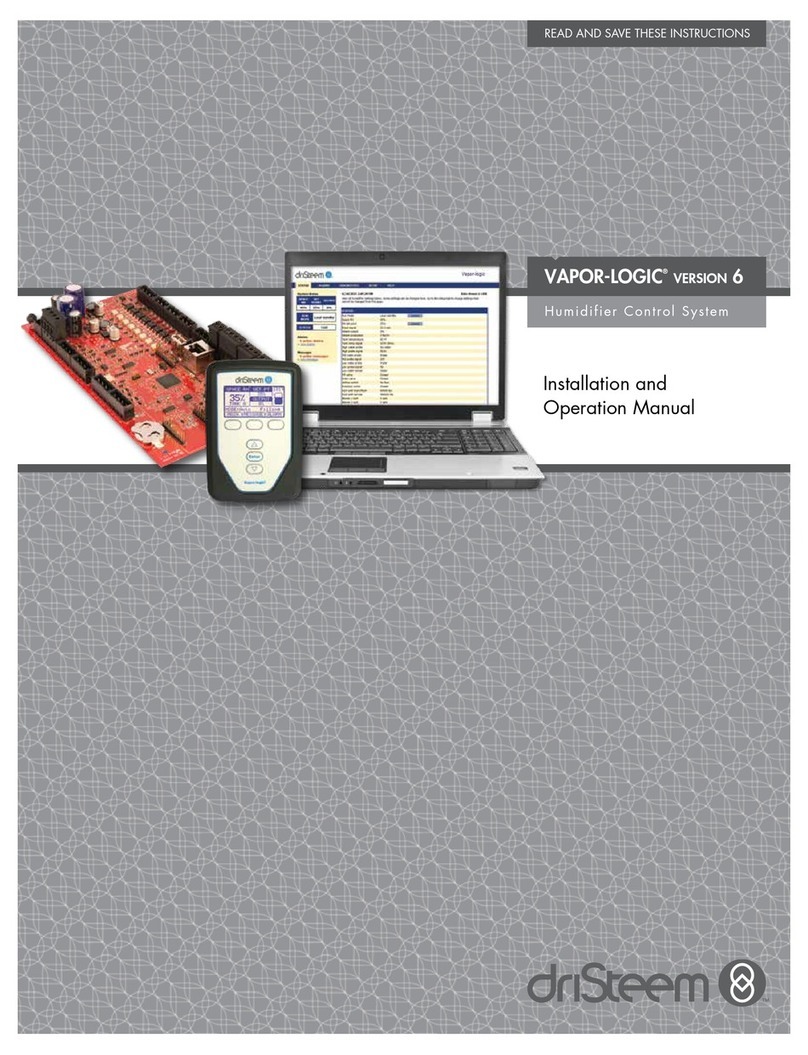
DriSteem Vapor-Logic User manual

READ AND SAVE THESE INSTRUCTIONS
VAPOR-LOGIC
MICROPROCESSOR HUMIDIFIER
CONTROL SYSTEM
INSTALLATION INSTRUCTIONS &
MAINTENANCE OPERATIONS
MANUAL
ä
HUMIDIFIER COMPANY
®

2
TO THE PURCHASER AND THE INSTALLER
Thank you for deciding to purchase the VAPOR-LOGIC®microprocessor humidifier control system. We have applied
our best efforts in designing and developing this microprocessor to give you total satisfaction and many years of
trouble-freeservice. Avoidingcertainpitfallsduringinstallationandobservingproperoperatingpracticesthereafterwill
assure you of achieving that objective. We therefore respectfully urge you to familiarize yourself with the contents of
this manual.
DRI-STEEMHumidifierCompany
Introduction
VAPOR-LOGIC Microprocessor ............................................ 3
VAPOR-LOGICControlBoard
Installation .......................................................................... 4 - 5
Operation ............................................................................ 5 - 8
VAPOR-LOGICKeyPad/DigitalDisplay
Operation ............................................................................ 8 - 11
SensingDevice Placement andWiring
Placement ........................................................................... 12
Control Precautions .............................................................. 12
Humidistats and Transmitters ................................................ 12- 13
Proper Wiring Procedures .............................................................. 14
VAPOR-LOGICP.I.D. Control Loop
Terminology ......................................................................... 15 -16
Tuning ................................................................................. 17-18
VAPOR-LOGIC Program Code Nomenclature .................................. 19
Main Menu / Auto Scroll Information ............................................. 20-21
Digital Display Read Outs .............................................................. 22
Digital Display / Key Pad Trouble Shooting Guide .......................... 23- 24
Fault Indicator Codes ..................................................................... 25-28
Trouble Shooting Guide ................................................................. 29 - 35
Replacement Parts ......................................................................... 36
Glossary ........................................................................................ 37-38
Maintenance Service Record .......................................................... 39
Warranty ........................................................................................ 40
TABLE OF CONTENTS

3
This manual explains the operation of, and gives instruc-
tions for, the installation and use of the VAPOR-LOGIC®
microprocessor.
VAPOR-LOGICisacustommicroprocessor humidifier
control system developed to be compatible with
DRI-STEEM electric humidifiers. The versatile micropro-
cessor software is configured to meet the needs of a
multitude of humidifier applications. The advanced
technology of VAPOR-LOGIC is paired with simplified
operatingproceduresthatmakethemicroprocessoreasy
to use.
VAPOR-LOGIC features include a self-diagnostics test
duringinitialization, end of seasonauto-drain, and a full-
function digital display key pad which allows you to
monitorandadjusthumidifierperformanceparametersas
necessary. VAPOR-LOGIC also offers a variety of control
modes:
•On-offoperating mode controls singleor multiple
electric staged outputs and multiple zone valve humidi-
ficationapplications.
Expected accuracies: ±5-7%RH
•Timeproportioningmodulationfunction controls
humidifier outputs via cyclic actions on electrical
contactors or a modulated pulsed signal to our solid
statezerofiredSCRpowercontrollers.
Expected accuracies:
- ContactorAction: ±2-4%RH
- SCRAction:±1-3%RH
•ProportionalActioncontrols modulating steam or hot
water valves by providing a linear analog D.C. signal
voltage to the valve motors. (For STS or LTS
humidifiers.)
Expected Accuracies: ±2-5% RH
•VAPOR-LOGICcontrols with a P.I.D. (proportional,
integral,derivative)function.
Expected accuracies: ±1-3%RH
VAPOR-LOGICcontrolshumidifiersystemswith
capacitiesupto1140poundsperhour.
Drain
Valve
Control
Input 1
Control
Input 2
Control
Input 3
Control
Input 4
Control
Input 5
Fill
Valve
WaterLevel
ControlInput
VAPOR-LOGIC
Firmware version
identification Basic 1.01
thru 1.10 Basic 2.01 and
up
R=Resistance Input
I=Milliamp Input
V=DC Voltage Input
N.C
COM
N.O.
5/32" Dia (4) Mounting Holes
To Remote Fault Indicator
(by others)
Figure3-1: VAPOR-LOGIC
printedcircuitboard
INTRODUCTION
Jumper Connector
4.900
5.500
0.200
VAPOR-LOGIC Part No. 408640
6.600
7.000
Printed Circuit Board Indentification
6.4 MPCB.14000A (Prototype)
6.4 MPCB.14010B (Release)
6.1 AF14000C (Adv. Release)
6.1 AF.14OOOD,E (2.01 Release)
Heart Beat/
Fault
Indicator
Output to
Contactor
Coils
Analogor
DigitalVDC
Output
OM-355
0.300

4
TheVAPOR-LOGICcontrolboardisshippedmounted
with all internal wiring completed within a control cabinet.
Allsoftware has been custom programmed into your
VAPOR-LOGICsystem accordingtotheoriginal order
requirements. RefertotheVAPOR-LOGICcontrolboard
drawingfor detail of theboard and connection points.(See
Figure3-1onpage3.)
TheVAPOR-LOGICcontrolboardshouldalwaysbewired
following local and national electric codes.
VAPOR-LOGIC is powered by a low voltage class #2
controltransformer.Thetransformer provides a 24 VAC
supply,protected by anintegrally mounted manualreset
circuitbreaker.
Allhumidifierpowerwiringisrepresentedon thehumidifier
wiringdiagram.* Followfieldwiretorquerequirements
shownonthehumidifierwiringdiagramwhenconnecting
thepower and controlwiringinsidethehumidifier control
cabinet. AdditionalprecautionsaboutVAPOR-LOGIC
controlboardconnections:
• Use 1/8" straight blade or number zero Phillips
headscrewdriveronVAPOR-LOGICcontrol
boardterminalblocks.
• DRI-STEEMrecommendssingle#18gauge
pre-tinnedwireend. Torque to 5 inch pounds.
• WhenterminatingmultiplewirestoVAPOR-LOGIC
controlboardterminal blocks, DRI-STEEM
recommendssecuring themultiplewiresand one
additionalwire with appropriately sized wire nut. Use
the single additional wire's opposite end to connect to
theVAPOR-LOGICterminalblock.
• Never run control system wires bundled with, or in the
same conduit as, power wires.
• Pick a location that will allow for easy access to
controlcabinet and internal electricalcomponents.
Mount control cabinet using the mounting tabs.
• Install the control cabinet less than 30 feet from
thehumidifier.
*A wiring diagram and information guide is attached to
the inside of control cabinet door. All instructions
should remain with the control cabinet after
installation.
When the local and/or remote digital display key pads are
providedwiththe VAPOR-LOGIC system, mounting and
wiring the modules have been simplified for you. Do not
locate the module inside the control cabinet. The
hardwareispre-mountedinathermoplasticcasewithfront
access to digital display and key pad. DRI-STEEM also
provides26gauge4-wirepre-connectedmodularcables
withmale modular plugsattached. The modular plugsare
6-position4-wire type RJ11 arrangement. Position case in
a convenient location for easy access. The ambient
temperaturerangefor modulesis
32°-122°F. Exceeding these limits will result in a
poor reading, or no reading at all.
The digital display key pad case is fabricated in two
sections; light pressure at the base of the back of the
case will separate the two sections. The front half
includestheelectronicdisplay module control board and
key pad, which are secured by four screws. DRI-STEEM
recommends the back section of enclosure be secured to
a standard flush mounted single gang electrical switch
box with modular cable routed out the rear of the case.
(See Figure 4-1.) A second choice is a direct mount to
any surface using field supplied screws. Route modular
cable out the bottom of enclosure. Because of various
mounting possibilities, first provide necessary clearance
holesfor the hardwareyou are usingby opening the two
pilot mounting holes on back of enclosure. Mount back of
enclosure to flat surface and secure as necessary.
Caution: Overtightening will distort the back of
thecase.
OM-411
Figure 4-1: Exploded view of key pad/digital display
VAPOR-LOGIC®CONTROL BOARD INSTALLATION
VAPOR-LOGIC KEY PAD / DIGITAL DISPLAY INSTALLATION

5
Align the front section over the two top finger hooks on
the back section, rotate down, and snap front section
onto the back section. Route modular cable as needed
to control cabinet and drill necessary hole for appropriate
cable strain relief fitting. Note: Do not wrap cable
around the key pad. When routing modular cable within
control cabinet, route cable away from all power wiring
andconnect the malemodular plug into either VAPOR-
LOGICprintedcircuitboard-mountedfemalemodular
receptacles, J1 or J2. Push male plug in until you hear a
“click.” The 4-wire cable provides the D.C. power to
digital module and completes the RS485 type digital
communicationbetweenthelocaland/orremotemodules
andtheVAPOR-LOGICcontrolboard.
Caution: When fabricating longer modular cables,
electrical polarity is very important in securing the
type RJ11 male plugs to cable. Both ends of cable
polarity connections must be identical. (See Figure
5-1.)
Important: To properly identify the second remote key
padto the master VAPOR-LOGICmicroprocessor, a
shunt connection is provided and installed by DRI-STEEM
across connector pin J6. Refer to the digital module
printed circuit board on page 8 to confirm location and
AUTO When the slide switch is in “AUTO” position, the
humidifieris in fulloperation, maintaining thewater
level and capable of generating steam upon a call
for humidity.
STDBY When the slide switch moves to the “STDBY”
(stand-by) position, it interrupts the control
system and turns the humidifier off. “STDBY” is
usedforregularhumidifierinspection.
DRAIN When the slide switch moves to the “DRAIN”
position, it deactivates the heating elements and
the fill valve. The electric drain valve is then
activated,and the water drains from the evaporat-
ing chamber. The drain valve also has a manual
drain lever. If the humidifier needs to be drained
duringan electrical power outage, thisfunction
can be used. (A “DI” model humidifier will have a
“DRAIN” mode only with special option End of
SeasonDrain.)
TEST When the slide switch moves to the “TEST”
position, it activates the test cycle. All electrical
devices that are on when the test cycle is initiated
are deactivated. During this cycle the fill valve
and all electrical contactors will be cycled on-off
individually. The drain valve will then be held
open for 30 seconds. At the completion of the
test cycle, VAPOR-LOGIC will revert to stand-by
mode. (The “TEST” mode is not functional on
SlaveBoards.)
OM-355-3
RJ11 Type Male
Modular Plug
Modular 4
Wire Cable
Yellow
Green
Red
Black
Yellow
Green
Red
Black
4 Electrical
Connection
Points Identical
Electrical
Polarity
OM-332
Figure 5-1: Cable polarity connections
Figure 5-2: Four position slide switch placement
VAPOR-LOGIC CONTROL BOARD OPERATION
VAPOR-LOGIC®KEY PAD / DIGITAL DISPLAY INSTALLATION

6
AutoDrainSequence
VAPOR-LOGICispre-programmedtoenteranautomatic
drain, flush, and refill cycle based upon the actual time the
humidifier has produced steam. VAPOR-LOGIC is factory-
set for a 50 hour (accumulated “ON” time) drain interval,
with 8 minute drain and 8 minute flush durations. When
VAPOR-LOGICinitiatestheautodrainsequence, all
energized heaters are turned off. The drain valve is then
opened to allow the tank to drain. The drain valve remains
openduring the flush sequencefor drainage while the fill
valve is open. At the completion of the flush cycle, the
drain valve closes, allowing the fill valve to refill the tank.
TheVAPOR-LOGICtimersarethenresetandthehumidi-
fierreturnstonormal“AUTO”operation.
End of Season Drain
If there is not a call for humidity over a 72 hour period,
VAPOR-LOGICautomaticallydrainstheevaporating
chamber. The drain valve is held open for one hour.
The humidifier then switches into “STDBY” mode until
there is a call for humidity, at which time VAPOR-LOGIC
automaticallyresumesnormaloperation.
VAPOR-LOGIC®CONTROL BOARD OPERATION
call for humidification, even during the fill cycle, the heat-
ing elements will stay on to provide continuous output.
On-BoardFaultIndicatorLight
The indicator light has dual functions. One function is to
presenta continuousheartbeat(cyclingon-off), indicating
anormaloperationcontrolbytheVAPOR-LOGICmicropro-
cessor. The second function is the detection of a FAULT
condition,indicated by the change from the normal heart-
beat to an on-off cycle of long and short pulses. The
different pulse patterns indicate the type of fault detected.
The chart of fault code descriptions can be found in the
Trouble-shootingGuideonpages24-27.
To have an indication of a humidifier fault at a remote
location,VAPOR-LOGIC hasapre-wiredfault relay(SPDT
contactarrangement) wired to control terminal block J7.
This will allow for field connection of a low voltage (24
VAC, 1 amp max.) circuit for remote indication that a fault
condition exists. The remote fault indication does not
indicate which fault has occurred, only that VAPOR-LOGIC
has detected a fault. You must return to the humidifier
VAPOR-LOGICcontrolboardtoreadtheon-boardfault
indicator light code in order to determine what type of fault
wasdetected.
ControlBoardConnections (SeeFigure7-1.)
J1, J2 Two parallel wired type RJ11 (6position,4 wire)
female modular jack connections for supply
voltageandVAPOR-LOGICcommunicationto
optional digital key pad. When multiple humidifier
systemsare combined using RS485 communica-
tion format, J1 and J2 also provide communication
toadditionalVAPOR-LOGICcontrolslaveboards.
J3 End of line communication terminator pins
require a jumper connector across J3 pins
whenVAPOR-LOGICsupportsa“Remote”digital
key pad.
J5 Wireterminalconnectionsupplies output signal
to electric contactor coils and/or modulatingSCR
control.
• Terminal K1: 24 VAC signal to heater
number1contactor
• Terminal K2: 24 VAC signal to heater
number2contactor
• Terminal K3: 24 VAC signal to heater
number3contactor
• Terminal K4: 24 VAC signal to heater
number4contactor
• Terminal A1: A time proportioned
positive polarity 0-SVDC signal to the input
ofa slave SCR power controller, 0-15 VDC
to the input steam or hot water valve. The
negative polarity from SCR is connected to
terminal #4 of wire connector J12.
Figure 6-1: Conductivity probe system
Water level - C
Water level - B
Water level - A
OM-270
ProbeSystem
A conductivity probe system allows VAPOR-LOGIC to
control water levels for optimum operating efficiency. The
three-probe system is monitored by the
VAPOR-LOGICcontrol, which performsallthe
necessary logic and timing functions to provide total water
level control and safety shutdown.
VAPOR-LOGICautomatically maintainsthewaterlevel
between the upper two probes A and B. When the water
level falls below probe B, the fill valve is opened until the
water level reaches the upper probe A. A minimum two
second delay is incorporated in the skim time software to
ensure that turbulence does not cause an incomplete fill.
An adjustable skim time allows for an extended skim
period(2-60seconds)toreducesurfacemineralaccumula-
tion. The fill valve remains energized for the designated
delay time. Access this adjustment through the key pad
sub-menu.(Seepage 10.) Probe C provides low water
protection for the heating elements. If the water level falls
belowprobeC,theheatersarede-energized. (SeeFigure
6-1.)
Inaddition to controlling thewater level, VAPOR-LOGIC
determines when the heaters are turned on. If there is a
7
J6 Wireterminal connectorsupplies 24 VAC voltage
to fill (20) and drain (18) valves with terminals 19
(drain)and 21 (fill)asneutralreturns.
J7 Wireterminal connection allows forremotefault
indication.
J8 Wireterminal connector receives thenecessary
input signal from external device:
a. Humidity Control uses Control Input 1.
• Terminal 5: Positive polarity 21 VDC
supply max. 25 mA
• Terminal 6: Positive polarity of control
signal
• Terminal 7: Negative polarity of control
signal
Input selector pin J9 configures Input 1.
b. Optional high limit humidity control uses
Control Input 2.
• Terminal 8: Positive polarity 21 VDC
supply max. 25 mA
• Terminal 9: Positive polarity of control
signal
• Terminal 10: Negative polarity of control
signal
Input selector pin J10 configures Input 2.
c. Optionaltemperaturecompensationsensor
uses Control Input 3.
• Terminal 11: Positive polarity 21 VDC
supply max. 25 mA
• Terminal 12: Positive polarity of control
signal
• Terminal 13: Negative polarity of control
signal
Input selector pin J13 configures Input 3.
d. Air flow proving switch uses optically
isolatedControl Input 4. Terminal14 sup-
plies 24 VAC to proving switch circuit,
SPST, normally closed. Terminal 15 is
returnconnectionfrom proving switch into
VAPOR-LOGICcontrol.
e. Optionalfreezeprotectionaquastatuses
optically isolated Control Input 5. Terminal
16 supplies 24 VAC to aquastat, SPST,
normally closed. Adjustable temperature
range40°-180°F,but40°Fsettingpreferred.
Terminal17isreturn connection from
aquastatintoVAPOR-LOGICcontrol.
J9 Selection pins control the configuration of
the type of input control into Control Input 1
(Terminals5 through7)of wireterminal
connectorJ4.
b. I = Milliamp 4-20 mA range
• used with any humidity sensor with output
4-20mA
• usedwithanycomputerorenergyman-
agement system with 4-20 mA output
• internalresistance250 ohms, terminal #6
positive VDC input, terminal #7 negative
VDCinput
c. V = Volts D.C. 1-15 volt range (6-9 VDC
controlspan)
• used with any control humidistat 0-15
VDC
• Terminal#5 provides positive 21VDC
supply, terminal #6 positive VDC input,
terminal#7 negativeVDCinput
J10 Identical to J9 input selector pins except config-
uresControlInput 2 (Terminals 8 through 10)of
wire terminal connector J4. Typically used for
high limit humidistat.
Important: Allconnectiondiagramsshowconnector
shunts on J9 and J10. The connector shunts and
appropriatecomputersoftwarehavebeenselectedby
DRI-STEEMbasedonoriginalcustomer orders. Field
changing the input connector shunts will require
computersoftwaremodification.
J11 Identical to J9 input selector pins except
configuresControlInput3(Terminals11
through 13) of wire terminal connector J4.
Typically used for on-off staging or 4-20 mA
inputforoptional temperaturecompensation.
• used with on-off humidistats, staging
switches, PE switches
• usedwithanalog 0-135 ohm input device
(pneumatictransducerorhumidistat)
a. R=Resistance 0-135 ohms range
OM-355-1
VAPOR-LOGIC®CONTROL BOARD OPERATION
Figure7-1: VAPOR-LOGICprintedcircuitboard

8
VAPOR-LOGIC KEY PAD / DIGITAL DISPLAY OPERATION
J12 Connectorreceivesnecessary continuity input
signals from water detection devices.
a. Probe system water level detection
• Terminal1 detects maximum water
levelfromtopproberod andbrownwire
plug.
• Terminal 2 detects water level at refill
pointfrommiddleproberodandorange
wireplug.
• Terminal 3 detects water level at its
lowestpointfromlowerproberodand
purpleplugwire.
• Terminal 4 is the common return path
for all water detection rods from the
humidifiertankground(yellowpigtailwire
in humidifier junction box) back to
VAPOR-LOGICcontrol.
viewabove center. (Later modelincorporates
fixed resistors on wide angle displays.)
DL1 The indicator light will blink on and off at a
constant heartbeat rate to indicate that all
systemcontrolsareoperatingproperly.
KeyPadKeyDescriptions
(SeeFigure9-1.)
0-9 The number keys allow you to enter new data into
aVAPOR-LOGICsub-menu.
b. DI system detection
• Terminals 1 & 2 are not used.
• Terminal 3 is connected to the humidifier
tank low water float switch (normally
open).
• Terminal 4 is the return signal from float
switchto VAPOR-LOGIC control.
J13 Wireterminalconnector supplies 24 VAC to power
theVAPOR-LOGICcontrolboard.
• Double terminal T1 - 24 VAC +, 7 VA
maximumload.
• DoubleterminalT2- 24 VAC-comm.
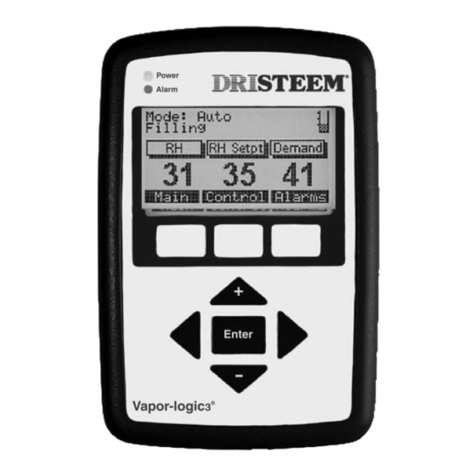
The key pad/digital display completes the advanced
VAPOR-LOGIC system. The key pad with the digital LCD
read-out provides descriptions of any faults detected by
VAPOR-LOGIC, continuous scrolling of all functions and
conditions, and access to VAPOR-LOGIC main and sub-
menusinordertochangeoperatingparameters.
The standard key pad/digital display is identified as the
“Local”modulebytheVAPOR-LOGICmicroprocessor.
Important: When a second key pad is supplied,
VAPOR-LOGICmust identifyit as“Remote.”
DRI-STEEM does this by attaching a connector shunt
across pin J6 on the digital display printed circuit board.
(SeeFigure8-1forlocation.)
CAUTION: Donot connector disconnect modular
cable on key pad/digital display from VAPOR-LOGIC
control board while power is applied. A communica-
tion failure would most likely take place.
DigitalDisplayPrintedCircuitBoardConnections
(SeeFigure8-1.)
J1, J2 SameasVAPOR-LOGICcontrolboard.(Seepage
6.)
J4 A plastic connector shunt placed over J4 pins will
terminate the end of line communication.
J5 A plastic connector shunt or jumper placed over
J5 pins will allow you to test each function of the
key pad keys.
J6 A plastic connector shunt placed over J6 pins will
identify the key pad/digital display as the
second,orremote operating device, to the
VAPOR-LOGICmicroprocessor.
RT1 You may adjust the visual vertical angle at which
the display reads using this control. Turning
in a clockwise direction will direct the angle of
DRI-STEEM
P/N 408650
DL1 RT1
J4
J5
J1
J2
J6 OM-334
VAPOR-LOGIC®CONTROL BOARD OPERATION
Figure 8-1: Digital display printed circuit board
connections

9
ers are incorporated,each humidifier’s fill and
drain valves and contactors are cycled on-off, one
humidifier at a time.) No other functions are
accessible during a “test” cycle. If the humidifier
is in operation at the time the “test” function is
initiated, all humidifier electrical devices are
turned off before the cycle begins.
CLR The“clear”functionwill
clearanynew data
presentedtoVAPOR-LOGIC
sub-menu.Pressingthis
key will also return you
tothe VAPOR-LOGICmain
menufromthesub-menu.
Pressing“CLR”asecond
time will place you into
“AUTO”mode.
ENT The“enter”functionwill
displaytheinformation
heldinVAPOR-LOGIC
sub-menumemoryand
will also enter new data
intothe sub-menumemory.
TEST (Located in the same posi-
tion as , the test key was
usedonVAPOR-LOGIC
firmwareV1.01through
V1.10.) The “test” function will initiate a self-test
cycle on the humidifier. The test mode will
perform an on-off cycle of fill and drain valves and
all electrical contactors. (When multiple humidifi-
(On key pad/digital displays with firmware V2.01 and
higher.) The “ ” function will transfer one of the auto-
matic scrolling items on the lower line to the upper line for
review. The item selected will be updated every few
seconds if a change is detected by VAPOR-LOGIC and
willremain isolated on the upper line whilethe remaining
functions will continue scrolling on the lower line. Typical
items that may be selected from Auto Scroll for review
are: Actual RH, Actual High Limit RH, Glass Tempera-
ture, System Demand, and System Output.
OM-335
Figure 9-1: Key pad
VAPOR-LOGIC®KEY PAD / DIGITAL DISPLAY OPERATION
ARROWS The“up”and“down”
arrowswill allowyou
to scroll through the
VAPOR-LOGICmain
menu one step at a
time.
MODE The“mode”
functiontransfers
VAPOR-LOGICfrom
the automatic scrolling
modeinto the Main
Menu format. You
may then scroll
throughthemain
menuusingthearrow
keys to find the item
of interest. After
selecting the item,
press the “ENT” key.
VAPOR-LOGIC will
take you into the sub-
menuand display the
presentdataheldin
memory for that item. To change the data in memory,
enter the new information using the 0-9 keys. After new
information is keyed in, press the “ENT” key to have
VAPOR-LOGICread the newinformationandstore inthe
microprocessor memory. Press “mode” to return to the
automaticscrolling mode.
VAPOR-LOGIC
DESIRED RH: 35%

10
SensorTrim Calibration
VAPOR-LOGICcancompensatefordifferencesinsensing
device accuracies caused by sensor placement, environ-
ment, aging, etc. By accessing the VAPOR-LOGIC sub-
menu(press “MODE” key) and scrollingtotheappropriate
sensor trim menu (using arrow keys), pressing the “ENT”
key will allow you to input a two-digit trim factor to the
sensor input. (Note:As long as the adjusted value does
not exceed the range limits for each sensor, the trim value
will allow you to compensate for small variances in the
readings.)
Example: The desired room RH is 50%, the display
shows 48% RH, and the actual value is 51%.
1. Access the trim % RH sub-menu as directed
above.
2. Key in the RH value: 51
3. Press “ENT.” VAPOR-LOGIC will then enter
the value into memory.
4. Press “CLR” twice to complete the
adjustment.
Note: To disable any trim value, enter “00” into the sub-
menu. This will return you to the value being read.
VAPOR-LOGIC®KEY PAD / DIGITAL DISPLAY OPERATION

11
VAPOR-LOGIC®KEY PAD/DIGITAL DISPLAY OPERATION
KeyPad/DigitalDisplayFunctionKeysTest
To perform the operation test on the function keys:
1. Turnpoweroff.
2. To access the printed circuit board, remove
the front section of the key pad. (Apply
pressure at the bottom of the key pad.)
3. Remove the connector shunt from the single pin
of J5 and reposition it across the pair of J5 pins.
4. Restorepower.
5. The display will read: “DISPLAY DIAG. TEST,”
whilealternatelyflashing“ADJUST
CONTRAST”and“SHORTJ6TOCONT.”
6. Place the second connector shunt across J6
pins. This will initiate the self-test of key pad
function keys.
7. The first prompt, “DISPLAY DIAG.TEST,” and
“PRESS <1>” will appear. Press key number
“1.” If key number “1” operates satisfactorily,
the key pad will bring up the next prompt:
“PRESS <2>.” This process will continue,
from left to right, top row to the bottom row,
until all the keys have been tested.
8. At the completion of the test, remove
connector shunt J5 and reposition to a
single pin of J5. IMPORTANT: If the key pad
was identified as a “Local” display, remove
connector shunt from the pair of J6 pins and
reposition to a single pin of J6.
9. Re-connect front section of the key pad to the
back section.
10. Press the “RESET” button on the sub-panel
inside the control cabinet and hold for a few
secondstorestart VAPOR-LOGIC.
AccessingVAPOR-LOGICSub-MenuInformation
To access any sub-menu from the main menu, press
“MODE” and then use the up and down arrow keys to
scroll through until the menu item you want is shown.
Press “ENT.” As an example, this is how you would
access the first sub-menu item and change the
parameters:
1. Press “MODE.” “Set % RH” will be displayed.
2. To view present set point, press “ENT” and
VAPOR-LOGICwillbringupthecurrentinforma-
tion: 1. Set % RH
__: 35% RH
3. You may now either return to the Main Menu
(press “CLR”) or enter a different set point. To
enter a new set point, press the numerical keys
that correspond. For instance, if you want to
enter a set point of 50%, press “5” followed by
“0.” The display will read:
1. Set % RH
50: 35% RH
4. Press “ENT” to instruct VAPOR-LOGIC to
replace the old set point with the new
information you just entered. The key pad should
now display : 1. Set % RH
__: 50% RH
Note: If you exceed the range limits of any
sub-menu(seechartonpages20-21),
VAPOR-LOGICwillprompt: “Outof Range.”
Press “CLR” to return to Item 1 of the Main
Menu and start over.
5. Scrollingup and down (using the arrow keys) will
allowyoutochooseanother sub-menu. Press
“CLR”againtoreturnVAPOR-LOGICto “AUTO”
mode. (Press “MODE” at any time whilein
the Main Menu or Sub-Menu items to returnto
“AUTO”mode.)

12
SensingPlacement
The location of the humidity sensing devices is very
important to achieve accurate humidity control. A
drawing of a typical small air handling system is shown
below (Figure 12-1). For the best control, place the
humidity sensing device in the center of room, just inside
of the return air duct (location “A”). This will provide the
least amount of variation caused by air flow patterns and
room temperature. Placement of the duct humidity
sensing device within outlet of air handler (location “D”) is
ideal for duct high limit control, but the actual placement
must be downstream from dispersion tubes a sufficient
distance to ensure steam absorption has taken place.
Accurate control of temperatures in room and ducts is
also very important to improve control of relative
humidity.
ControlPrecautions
Unsatisfactory results from humidifying control may
involve more than just the controller’s capability to
control the system. Other factors that play an important
role in overall system control are:
• Size of the humidification system.
• Overall system dynamics associated with
moisture migration time lags.
• Accuracy of humidistats and humidity transmit-
ters and their location.
• Dry bulb temperature accuracy in space or duct.
• Velocities and air flow patterns in ducts and
spaceenvironments.
• Electricalnoiseorinterference.
WiringOn-OffHumidistats
DRI-STEEM may provide three types of on-off controls:
wallmounted, ductmounted,andpneumatic/electric
relay. The wiring diagram (found on the inside of the
humidifiercontrol cabinet)willshowproper wiringfor
these controls.
WiringModulatingHumidistats
Thestandardmodulatinghumidistatcontrollers
DRI-STEEM may provide are either duct or room
humidistats.
Thehumidistatsarepoweredby21VDCsupply provided
by the VAPOR-LOGIC control board. A 6-9 VDC control
signal is returned to provide the modulating function.
Using a pneumatic modulating signal, DRI-STEEM may
provide a transducer to accept a 3-20 psi pneumatic input
range.
A two-wire 0-135 ohm humidistat is also adaptable to the
VAPOR-LOGICcontrolboard.
Wiring Modulating Humidity or Temperature
Transmitters
AlltransmittersprovidedbyDRI-STEEMaretwo-wire
devices. (Seeyour wiring diagram for proper
connections.) The humidity transmitters have a range of
0-100% RH with an output of 4-20 mA. The temperature
transmitters (there are two models) have ranges of -20° to
120° F or -20° to 160° F. Both produce 4-20 mA output.
%RH= (Milliamp reading minus 4.) Divide by .16.
Air Handling Unit
LOCATION
A) Best
B) Fair
C) Poor,
D) Best duct high limit
humidistat
OM-360
SENSING DEVICE PLACEMENT AND WIRING
A
Figure 12-1: Humidistat control or humidityandtemperaturetransmittersrecommended placement
B
B
D
CB
B
A
Room conditions:
72° F °± 1° F
50% RH
Temperature compensation transmitter located on lower
corner of the inside surface of double pane window glass
North or North-
East facing
window
Duct conditions:
60° F °± 1° F
75% RH
Steam absorption
has taken place
Air flow switch
High limit humidistat or high limit transmitter,
placement for VAV applications
AHU
Relief Air
Outside Air
Return Air

13
OPTION: Variable Air Volume (VAV) (30 feet from the
humidifier.) When the VAV control option is requested,
DRI-STEEMwill provide,inaddition totheroom control
transmitter, a duct mounted humidity transmitter (4-20 mA
outputover0-100%RHrange).
Note: DRI-STEEM recommends using a #18 gauge
plenum rated shielded cable for transmitter wiring and
grounding shield at a common point in control
cabinet.(SeeFigure13-1.)
OPTION: Cold Snap RH Offset
When selected as an option, DRI-STEEM provides a cold
snap temperature transmitter. The cold snap transmitter
monitorsinteriorwindowglasstemperaturetoprevent
condensation from forming on the interior glass surfaces
by lowering the relative humidity set point below the dew
point.
Thermostat control wires
Window framing
Double pane window glass
Temperature sensor tip, secure to inside surface of window
glass using clear RTV silicone adhesive around tip
Typical sensor
umbilical cord
routing
Surface mounted
thermostat
temperature control
box on wall
ThetransmitterprovidedwithVAPOR-LOGICfirmware
V1.01throughV1.10(part#405882)iscalibratedfor
-20° F to 120° F with output from 4-20 mA. A temperature
readingof50° F should produce a measurement of 12
mA.
ThetransmitterprovidedwithVAPOR-LOGICfirmware
V2.01andhigher(part#405889)iscalibratedfor
-20° F to 160° F with output from 4-20 mA. A temperature
readingof70° F should produce a measurement of 12
mA.
ColdSnap Transmitter Placement (SeeFigure13-2.)
1. Position the cold snap transmitter control box
onawall adjacent to lower window framing
androutethetemperaturesensorumbilical
cordbehindthewallandoutthroughwindow
framework.
2. Place flat surface of temperature sensor tip on
lower corner of glass surface.
3. Temporaily hold the sensor tip in place with
strips of masking tape.
4. Apply small amount of clear RTV silicone
adhesiveoverandaround the sensor tip
(making sure the sensor tip is in contact with
thewindowglass).
5. After adhesive has cured, remove masking
tape.
Sensor
Tip
VAPOR-LOGIC
1+
2 -
OM-337
Temperature
Transmitter ShieldedCable
T+
T-
OM-311
SENSING DEVICE PLACEMENT AND WIRING
Figure 13-1: Shielded cable
Figure 13-2: Cold snap transmitter placement

14
Electrical currents can produce undesirable effects in
the electronic control circuits that eventually affect
controllability. Electrical “noise”is generated by electrical
equipment, such as switching resistive loads, electric
motors,solenoid coils, welding machinery, fluorescent
light circuits, etc. The electrical “noise”or interference
generated from these sources (and the effects on
controllers) is very difficult to define, but most common
symptomsare erratic operationorintermittentproblems.
However,most noise problems can be prevented by using
wiring practices and techniques which do not allow for
couplingor inducing of electrical interferenceintocontrol
circuits. Some simple wiring practices associated with
DRI-STEEMhumidifierequipmentshouldminimize
interaction of noise and controls:
• Humidifier and control cabinets must be
connectedtoacodeapprovedearthground.
• Whenrouting electrical wiringinsidethecontrol
cabinet,separatelinevoltagewiringfrom low
voltage control circuit wiring.
• Use separate electrical conduits for line and
low voltage wiring from the humidifier to
humidity sensors airflow switches etc.
• Do not mix chassis or safety grounds with
current carrying commons. No safety grounds
should ever be used as a conductor or neutral
to return circuit current.
• Thepreferredmethodofexternalelectrical
connections to humidistats, room/duct
humidityandtemperaturetransmitters,water
level control devices and control signal input
connections from building control systems is
by using minimum size #18 gauge plenum
rated wire cable of twisted pair type, including
cableshieldingandground wire.
• Allgroundingof shielded cable connections
shouldbe returned to the controlcabinet
and tied to the earth a single ground point. Do
not ground shield at the device end.
• Do not locate the control cabinet more than 30
feet from the humidifier.
PROPER WIRING PROCEDURES

15
OptionalFeature
Using the P.I.D. Control Loop in conjunction with
VAPOR-LOGICgivesyouthepotentialforunprecedented
control accuracies. You are able to fine-tune the control
system to meet your specific humidification needs.
Understandingthe terminology of P.I.D.,and the purpose
for each inclusion, will greatly assist you in using
VAPOR-LOGIC P.I.D. to its full potential.
ProportionalBand(P)
Adjustable range: 100, or 20% RH, to 1000, or 2% RH.
The Proportional Band is the % RH band below the set
pointwhere the control will time-proportionthe output via
a contactor or solid state SCR preset at 10% RH. Or, it is
the % RH band below the set point where the control will
provide a steady state analog VDC signal to a steam or
hot water valve.
If the Proportional Band is too narrow, on-off control
action hunting will be evident. There will be minimal
proportionalaction.
If the Proportional Band is too wide, proportional action
will be present, but there will be slow response to change.
The greatest potential in this situation would be to control
away from the desired set point. (See Figure 15-1.)
Integral Term (I)
Adjustable range: 50 to 500 factor, with default of 250.
The Integral, or reset, Term will reduce the actual set
point droop from the desired set point when added to the
ProportionalBandcontrol.
To do this, the Integral Term algorithm actually shifts the
ProportionalBandaroundthe desired set point to increase
ordecreasetheoutputas needed.
If the Integral Term is too little, droop will be evident.
If the Integral Term is too large, on-off cycling, or hunting,
will be evident. (See Figure 15-2.)
VAPOR-LOGIC® P.I.D. CONTROL LOOP: TERMINOLOGY
Proportional Band Shifted
0% Demand
Humidity % RH
Desired Set Point
OM-592
Time
Below Set Point and
Proportional Band
100% Demand
OM-591
Within Band
Time Proportional
Control
Droop Eliminated
Integral Term Added
Desired Set Point
100% Demand
Time
Above Set Point
0% Demand
Error
Error
Humidity % RH
Desired Set Point
Droop
Proportional
Band
Proportional
Band
Figure15-1: Proportionalband
Figure 15-2: Integral term

16
VAPOR-LOGIC®P.I.D. CONTROL LOOP: TERMINOLOGY
Humidity % RH
100% Demand Below Proportional Band
DerivativeTerm(D)
Adjustable gain factor range: 0 to 500, with default of
zero.
The Derivative, or rate (anticipatory), Term reduces the
potentialforovershootandundershootaroundthedesired
setpointwhen added to the Proportional Band and
Integral control functions. The Derivative algorithm
measures the rate of % RH change-over time that is
taking place and forces the control into the proportioning
actions on an accelerated basis to slow the change.
As the rate of change diminishes, the Derivative Term
becomes less effective on the Proportional Band. (See
Figures16-1and16-2.)
Important: In 80% of the humidification applications, the
Derivative Term is not necessary, which explains why the
default value is zero.
If there is too little Derivative Term, overshoot is evident.
If there is too much Derivative Term, there will be very
poor control, frequent system disturbances, or too much
time to reach the desired set point.
SampleInterval
Adjustment range: 5 to 1200 seconds, default value of 30
seconds.
The Sample Interval is the interval time (in seconds)
duringwhichVAPOR-LOGICreviewsallthecontrolling
parameters (desired and actual RH set points, P.I.D.
terms,and output percentage) and then makes the
necessary adjustments to the control output to achieve
the desired set point.
If the Sample Interval is too short, over control and
system on-off hunting will be evident.
If the Sample Interval is too long, there will be poor
response to changes and large errors from the desired set
point.
Humidity % RH
Time
Time OM-593
OM-594
Proportional Band at
Normal Control Position
Reduced
Overshoot
0% Demand Above Set Point
Rate of Change
Desired Set Point Rate of Change
Proportional
Band
Desired Set Point
Proportional Band Starts to Return to Normal
Control Position as Rate of Change Diminishes
Proportional Band Shifted
Down to Reduce the Rate of
Change
Figure 16-1: Proportional action without derivative gain
Figure 16-2: Proportional action with derivative gain

17
In this section, we will focus on the VAPOR-LOGIC P.I.D.
controller as the primary control in a closed loop system
that needs to be tuned for optimum performance. The
availability of these adjustments provide a means to work
withdifferenthumidificationapplications.
Thefollowing steps are general and applicable to most
humidification situations. Each setting is gone through in
sequence: ProportionalBand,Integral,Derivative,and
SampleIntervalRate.
Precautions
· Takeyour time when tuning theVAPOR-LOGIC
system.
· Evaluate the system dynamics: slow changes in
largehumidificationareasorhumidificationfor
comfort, medium changes for most applications, and
fast changes for system RH’s that can change in
seconds, controlling within a duct or controlling
downstreamfromthehumidifier.
· Do not change more than one control adjustment at
a time, allowing the system to settle down and reach
astateofequilibrium before making another change.
· Remember that the time you spend tuning the
VAPOR-LOGIC system is in direct proportion to the
accuracy of control you need.
PotentialAccuracies
• TP modulation (contactor): ±2-5%RH
• TPmodulation (SCR): ±2-4%RH
• 100%SCRmodulation:±1-3%RH
• 100%SCR modulation (DI/RO water systems):
±1-2%RH
• Modulated steam and hot water valves: ±1-4% RH
The P.I.D. controls are listed in the sequence in which
theyshouldbe adjusted.
ProportionalBandAdjustment
The Proportional Band adjustment is the means of
selecting the response speed (gain) or sensitivity of the
VAPOR-LOGIC controller to achieve stability in the
system. The Proportional Band is measured in the
percent RH span that must be wider than the natural
dynamics of the system and yet not wide enough to
dampenthesystemresponse. (Time Proportioning
Output.)
The internal cycle time is pre-set to switch faster than the
natural dynamics of the system.
The tuning procedure is very simple if a humidity recorder
is available to monitor the actual % RH variable. If a
recorder is not available, observe the process response
andrecordreadingsoveradefinedtimeperiodusinga
wet/dry bulb psychrometric sling.
VAPOR-LOGIC®P.I.D. CONTROL LOOP: TUNING
If there are oscillations with the Proportional Band at its
narrowest setting (not zero), the adjustment of the
ProportionalBandshould be increased in smallincrements
until the offset (droop) starts to increase. When the
ProportionalBand has been tunedproperly, you will see
system stability. Often, an offset (droop) from the set
point will then occur. At this point in tuning the system,
the % RH variable should be in a state of equilibrium, but
not right at the desired set point. (Refer to Figures 17-
1,17-2and17-3.)
Measured % RH
Actual % RH Variable
Figure 17-3:
If the system response looks like this, the Proportional Band is very
close to the correct setting for this system. Increase the Proportional
Band in small increments until the % RH stabilizes.
Measured % RH
Time
Figure 17-2:
If the system response looks like this, increase the Proportional Band
by a factor of two.
Measured % RH
Actual % RH Variable
Time
Figure 17-1:
If the system response looks like this, decrease the Proportional Band
by a factor of two.
Time
OM-596
OM-595
OM-597
Desired Set Point
Desired Set Point
Actual % RH Variable
Desired Set Point
Droop

18
IntegralAdjustment
The VAPOR-LOGIC Integral Adjustment is tuned at this
point in time to adjust for the droop that is caused by the
proportionaloutput. (VAPOR-LOGICdefaultis250
derivativeadjustment for Integral Term.) Theoperator
will make small Integral Adjustments in the proper
direction(increase ordecrease)to bringaboutthe
alignment of the actual % RH and the desired % RH set
point.
Please make small changes in the Integral Adjustment
(range 0 to 1000) and allow the system to return to a
stateof equilibriumbeforemakingadditional changes.
This may take several system cycle times. Also, the
integral will have to be changed if the % RH set point or
other dynamic characteristics are changed substantially.
Derivative
The initial setting for the Derivative Adjustment should be
at the smallest integer possible (least corrective action).
Increase the integer in small increments and increase the
% RH set point moderately after each adjustment.
Observe the actual process of the approach of the % RH
to the set point. If it overshoots, continue to increase the
rate integer in small increments. Then increase the set
point % RH moderately until the optimum approach to the
desired set point is achieved. If at some point the
system becomes very sluggish, or doesn’t reach the new
set point at all, too much Derivative action has been
adjusted in the control system. The amount of Derivative
valuemust bedecreasedtoreduce the“dampening”
effect.
SampleIntervalAdjustment
The Sample Interval default setting is at 30 seconds, and
this will perform satisfactorily in most applications. The
range of Interval time is from 4 to 1200 seconds. Too
short an Interval will cause over control, while too long an
Interval will cause sluggish control.
Important: Anydramatic set point changes or system
dynamic variations will require a re-tuning of the
controlparameters(P.I.D.).
VAPOR-LOGIC®P.I.D. CONTROL LOOP: TUNING

19
All the combinations represented are supported by appropriate software. Your particular system may not include all the
features shown in this program code nomenclature. Always refer to your wiring diagram on the inside of control cabinet
doortoidentifyyour particularProgramCodeNumber,thendecipheryoursystem usingVAPOR-LOGICProgramCode
describedbelow.
VAPOR-LOGIC®PROGRAM CODE NOMENCLATURE
OM-361

20
MAIN MENU/AUTO SCROLL INFORMATION
Thefollowingpagescontaininformation about the digital read-outs and fault conditions that VAPOR-LOGIC communi-
cates. This includes a wide variety of present system conditions, faults, and programmable parameters that ultimately
control the humidification system, as well as a trouble-shooting guide to help you with operational procedures. The
chartsare organized based upon when or whythe information is communicated.
MAIN MENU
READ-OUT MAIN MENU
DESCRIPTION RANGE DEFAULT AUTO
SCROLL AUTO SCROLL
READ-OUT
"SET % RH" Room Set Point (1) 20-80% RH 35% yes "DESIRED RH:%"
"ACTUAL RH: %"
"TRIM % RH" Trim Range (1) ±10% from
present set
point reading No trim. no
"SET RH T.R." Throttling Range (1) 2-20% RH 11% RH no
"SET H.L. RH" Duct Set Point
(VAV Option) (2) 50-90% RH 70% RH yes "MAX. H.L. RH:%"
"ACT. H.L. RH:%"
"TRIM H.L. %RH" Trim High Limit Range
(2)
±10% from
present high
limit set point
reading
No trim. no
"TRIM TEMP" Trim Temperature
Range (3)
±20°F from
present glass
temperature
reading
No trim. no
"SET ADS
INTERVAL" Auto Drain Sequence
Interval (4) 1-99 hours 50 hours no
"SET ADS
DURATION" Auto Drain Sequence
Duration (4) 1-30 minutes 8 minutes no
"SET AFS
DURATION" Auto Flush Sequence
Duration (4) 1-30 minutes 8 minutes no
"SET SKIM DUR" Skim Time Duration 2-60 seconds 2 seconds no
"TIME TO ADS"
Time Until Auto Drain
Sequence (in hours,
minutes, seconds)
(4)
1-99 hours 50 hours no
"TIME TO
SERVICE"
Time Until
Recommended
Service (in hours,
minutes, seconds)
(4)
Counts down
from 2000
hours. 2000 hours no
Other manuals for Vapor-Logic
3
Table of contents
Other DriSteem Control System manuals

DriSteem
DriSteem Vapor-logic 4 User manual

DriSteem
DriSteem Vapor-Logic User manual

DriSteem
DriSteem Vapor-logic3 User manual

DriSteem
DriSteem Vapor-logic 6 User manual

DriSteem
DriSteem Vapor-logic3 User manual

DriSteem
DriSteem Vapor-Logic User manual

DriSteem
DriSteem VAPOR-LOGIC 3 User manual

DriSteem
DriSteem Vapor-Logic User manual
Popular Control System manuals by other brands

Philips
Philips SBCSK310/05 Instructions for use

Ez-Boom
Ez-Boom 2010 Quick reference card

PAW
PAW HeatBloC K33R Installation and operation instruction

Contro l4
Contro l4 Control4 Smart Home quick start guide

Toshiba
Toshiba TOSDIC-CIE DS Hardware operation manual

CommScope
CommScope Teletilt ATC200-LITE-USB Setup