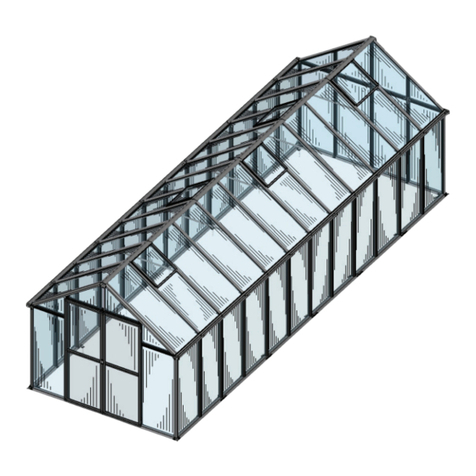
DrivhusSenter FORTA PA MUR User manual

FORTA PÅ MUR
Greenhouse / Drivhus / Szklarnia / Skleník / Šiltnamis / Siltumnīca / Kasvuhooned
Assembly manual / monteringsinformasjon / Instrukcja montażu / Montážny návod
/Surinkimo instrukcija / Uzstādīšanas instrukcija / Kokkupanemisjuhend
www.drivhussenter.no

/ 3
/ 2
/ 11
/ 12
3. Base / Sokkel / Montaż podstawy (alu-bazy) / Montáž
základového rámu / Pagrindo surinkimas / Pamatnes uzstādīšana /
Põhjatarindi kokku panemine
/ 13
/ 25
/ 31
6. Glazing / Glazing / Instalacja wypełnienia (szkło/poli -
węglan) / Inštalácia výplní / Dangos įdėjimas / Pārklājuma likšana /
Kattematerjalide mõõdud
/ 32
4. Frame / Ramme / Montaż szkieletu szklarni / Montáž
konštrukcie / Rėmo rinkimas / Rāmja uzstādīšana / Nurgapostide
kokkupanemine
8. Fittings / Andere Elemente / Montaż wyposażenia dodatko -
wego / Montáž kovania / Furnitūros sudėjimas / Furnitūras likšana /
Tarvikud paigaldamine
7. Downpipes / Nedløpsrør / Montaż rur spus -
towych / Inštalácia dažďových zvodov / Lietvamzdžių tvirtinimas /
Uzstāda notekcaurules / Vihmaveetorude paigaldamine
9. Annex / Tilbygg / Załącznik / Príloha / Priedas / Papildinā-
jums / Täienduseks
/ 33
/ 20
5. Door / Dør / Montaż drzwi / Montáž dverí / Durų
surinkimas / Durvju / Ukse kokkupanek
Table of Contents /
Innholdsfortegnelse /
Spis treści / Obsah / Turinys /
Saturs / Üldjuhend
1. General assembly information / Generell monteringsinformasjon
informacje o montażu / Všeobecné informácie k montáži / Bendra
instrukcija / Opējā instrukcija / Sisukord
2. Frame proles / Rammeprofiler / Prole konstrukcji / Proly
konštrukcie / Rėmo proliai / Rāmja proli / Karkassi proilid

EN / General information
Dear Customer,
We would like to congratulate you on your new greenhouse purchase! Please read this manual for an easier assembly
and maintenance of your greenhouse. The assembly does not require special technical knowledge. We recommend
that two people assemble the greenhouse. Please follow the instruction steps in the sequence described in the manual
taking into account all additional information provided. Open one package at a time. Do not mix the contents of dier-
ent packages. Please store all the packages in a dry place and protect them from exposure to direct sunlight, wind and
rain.
Important
It is recommended that you place your greenhouse in an area that receives the most sunlight and is protected from
the wind. Avoid placing your greenhouse under close to trees. We strongly recommend that you assemble your green-
house on a windless and dry day. Avoid leaving the construction unnished overnight. Always wear gloves, footwear
and goggles when assembling your greenhouse as the edges of the aluminium extrusions, polycarbonate panels or
glass can be very sharp. If using a ladder, please make sure it is placed on an even surface.
Tools and materials
You will need the following to assemble your greenhouse:
Screwdriver Electric drill Tape-measure
Ladder Silicone caulk Level
Concrete 10 & 13 mm wrenches Spade / ground drill
Rope (if greenhouse length exceeds 6 m)
Tips
Anchor the base of your greenhouse by securing its footings in the ground with concrete. Make sure that the base is
100% level and square - the diagonals have to be of equal length! We recommend that you oil the door and window
screws to tighten them easily.
Polycarbonate panels
The external side of polycarbonate panels block ultraviolet rays. This side has a special white lm and/or is marked
with a text. Make sure that the external side of the panel faces outside. Peel approximately 5 cm of the white lm o
the polycarbonate panel along its perimeter prior to installing the panel into the frame. When you have assembled
your greenhouse, peel o the rest of the protective lm. Do not leave polycarbonate panels lying directly on the
ground. Please make sure you place them on the carton packaging.
Accessories
A wide range of accessories for your greenhouse are available from the manufacturer/seller. These will help you to
better care for your plants and keep your greenhouse care and maintenance products neat and organised. To be
updated, follow the news section of the manufacturer's website.
Maintenance and care
Regularly oil the door joints, latches or sliding door tracks. Remove leaves and other dirt from gutters and door tracks.
Once in a while, make sure that doors and windows are properly tightened and in place. Use appropriate disinfectants
to clean your greenhouse in the beginning of the season, prior to its use, and after the vegetation period is over. Clean
the inside and outside of polycarbonate panels with warm water and soft cloth before and after the growing season.
Only mild cleaning products that are safe for aluminium and polycarbonate should be used (e.g., dishwashing liquid,
household soap etc.). If a strong wind is approaching, close the doors and windows rmly. Greenhouse care in winter
period: before the winter season starts, provide additional support to the roof beam from the inside of your green-
house; keep the roof clean of snow accumulation, especially of thick, wet or icy; remove it as soon as possible; protect
your greenhouse from snow falling o the surrounding trees and roofs of the nearby constructions.
Warranty
All the greenhouses are produced in compliance with the highest quality standards (CE). The manufacturer gives a 12
year warranty against defects in workmanship and/or construction; a 2 year warranty on painted parts, if any. The man-
ufacturer guarantees that all glass and polycarbonate pieces are manufactured to the correct dimensions and are free
from material defects. Due to the nature of glass, there is no guarantee that glass will not be broken during customer
handling, installation, or use. The polycarbonate must be installed and maintained according to the manufacturer
specications. This Warranty does not cover exible parts of the greenhouse, transportation, any damages relating to
strong wind (>21 m/s), heavy snow or any other extreme environmental conditions, also any damages caused by
improper placement / assembly / use/ care. In case you are not satised with the quality of your greenhouse, please
contact the company from which you purchased the product and indicate the type of your greenhouse and the defect-
ed part.
Insurance
We strongly recommend that you contact your insurance company to make sure your greenhouse will be covered on
your policy.
/ 3
GENERAL ASSEMBLY INFORMATION / / OGÓLNE INFORMACJE O
MONTAŻU / VŠEOBECNÉ INFORMÁCIE K MONTÁŽI / BENDRA INSTRUKCIJA / KOPĒJĀ INSTRUK

FORSIKRING
Vi anbefaler deg å kontakte forsikringsselskapet ditt for å sørge for at drivhuset ditt vil dekkes av
forsikringen din.
Vi anbefaler deg å kontakte forsikringsselskapet ditt for å sørge for at drivhuset ditt dekkes av forsikringen din.
FORSIKRING
og informer og type drivhus og den defekte delen.
montering / bruk / stell. Hvis du ikke er fornøyd med kvaliteten på ditt drivhus, vennligst kontakt firmaet du kjøpe drivhuset av
skader knyttet til sterk vind (> 21 m/s), kraftig snø eller andre ekstreme miljøforhold, eller skader forårsaket av feil plassering /
henhold til produsentens spesifikasjoner. Denne garantien dekker ikke fleksible deler av drivhuset, transportskader, eventuelle
glass ikke blir ødelagt under kundens håndtering, installasjon eller bruk. Polykarbonat må installeres og vedlikeholdes i
polykarbonatplater er produsert i riktig størrelse og er fri for materielle feil. På grunn av glassets natur er det ingen garanti for at
mangler i utførelse og/eller konstruksjon og 2 års garanti på malte deler, hvis noen. Produsenten garanterer at alle glass- og
Alle drivhusene er produsert i samsvar med de høyeste kvalitetsstandarderer (CE). Produsenten gir en 12 års garanti mot
GARANTI
snø fra nærliggende trær eller bygninger.
hold taket fritt for snø – spesielt tykk, våt og isete snø, fjern snø så fort som mulig,
sørg for at drivhuset ikke kan bli truffet av
Vedlikehold av drivhus om vinteren: før vintersesongen starter må det gis ekstra støtte til takbjelken fra
innsiden av drivhuset,
benyttes
(oppvaskmiddel, husholdningssåpne etc.) Ved sterk vind må dører og vinduer lukkes skikkelig.
vann og klut før og etter
sesongen. Kun milde rengjøringsprodukter, som er trygge for aluminium og polykarbonat, skal
drivhuset før det tas i bruk ved sesongstart og etter at
sesongen er over. Rengjør
begge sider
av polykarbonatet med varmt
annen må du sørge for at dører og vinduer er ordentlig på plass og strammet. Bruk
passende desinfeksjonsmilder til å rengjøre
Dørhengsler, sperrer og skyvedørssporene må oljes regelmessig. Fjern løv og annet skitt fra takrenner
og dørspor. Fra tid til
VEDLIKEHOLD OG STELL
polykarbonatplater ligge direkte på bakken.
Vennligst plasser de på kartongen.
du monterer platen i rammen. Når drivhuset er ferdigmontert kan du dra av resten av den hvite filmen. Ikke la
tekst. Sørg for at denne siden vender ut fra drivhuset. Dra av ca. 5 cm av den hvite
filmen langs polykarbonatets ytterkanter før
Den utvendige siden av polykarbonatet har UV-beskyttelse. Denne siden har en spesiell hvit film og/eller
er markert med en
POLYKARBONATPLATER
dem.
vater og firkantet – diagonalene må være like lange! Vi anbefaler at du oljer døre
r
og vindusskrue
r
for lett å kunne stramme
Forankre sokkelen på drivhuset ditt ved å feste jordspydene i bakken med betong. Forsikre deg om at
sokkelen er 100% i
TIPS
• Spade/jordbor
• Vater
• Målebånd
• 10 & 13 mm skiftenøkler
• Silikon
• Elektrisk drill
• Tau (om drivhuset er lenger enn 6 meter)
• Betong
• Stige
• Skrutrekker
Du trenger følgende til montering av drivhuset:
VERKTØY OG MATERIALER
polykarbonatet og glasset kan være
veldig skarpe. Benytter du stige, vennligst sørg for at denne står på et flatt underlag.
over natten. Bruk alltid hansker, skotøy og vernebriller når
drivhuset monteres da kantene på aluminumskonstruksjonen,
nærheten av trær. Vi anbefaler sterkt at drivhuset monteres på en vindstille og tørr
dag. Unngå å la konstruksjonen stå uferdig
Det anbefales å plassere drivhuset der det mottar mest sollys og hvor det er beskyttet fra vinden. Unngå
å plassere drivhuset i
VIKTIG!
sammen. Vennligst oppbevar alle
pakkene på et tørt sted, beskyttet fra sol og vind.
og ta hensyn til all tilleggsinformasjon som er gitt. Åpne én
pakke om gangen. Innhold fra to ulike pakker må ikke blandes
kunnskap. Vi anbefaler å være minimum to personer for å montere drivhuset. Følg
instruksjonstrinnene som angitt i manualen
Vennligst les denne manualen for en enklere montering og vedlikehold av drivhuset. Monteringen krever
ingen spesiell teknisk
Vi ønsker å gratulere deg så mye med ditt nye drivhus!
Kjære kunde.
NO /
G
enerell informasjon
Dette symbolet betyr at merket produkt ikke er inkludert og må kjøpes separat.

26
26
28
2
3
4
6
2
2
11 4
9
9
9
6
6
6
28
28
28
2
3
11
2
4
26
T20
9
3
20x3
6
28
5
25
Frame proles / Rammeprofiler / Prole konstrukcji / Proly konštrukcie /
Rėmo proliai / Rāmja proli / Karkassi proilid
/ 10
FRAME PROFILES / / PROFILE KONSTRUKCJI / VÝSTUŽ RÁMU
KONŠTRUKCIE / RĖMO PROFILIAI / RĀMJA PROFILI / KARKASSI PROFIILID
20x3
T20
20x3

309 cm
A
B
X
Y
Drivhus 236 cm Drivhus 309 cm
X XY Y
2396 3134
2396
3134
4610
5348
6086
6824
7562
8300
9038
2396
3134
4610
5348
6086
6824
7562
8300
9038
3872 3872
236 cm
930
733 733
038/03
4
930
1102 1102
0
3
8/034
X
Y
A
B
A=B
Base assembly on wall/ Sokkelmontering / Montaż podstawy (alu-bazy)
na ścianie / Montáž základového rámu na stenu / Pagrindo surinkimas ant sienelės /
Pamatnes uzstādīšana uz sienas / Alusraami panemine seinale
/ 11
BASE ASSEMBLY / / MONTAŻ PODSTAWY ALUBAZY / MONTÁŽ
ZÁKLADOVÉHO RÁMU / PAGRINDO SURINKIMAS / PAMATNES UZSTĀDĪŠANA / PÕHJATARINDI

1
B
A
1
A=B
/ 12
BASE ASSEMBLY / / MONTAŻ PODSTAWY ALUBAZY / MONTÁŽ
ZÁKLADOVÉHO RÁMU / PAGRINDO SURINKIMAS / PAMATNES UZSTĀDĪŠANA / PÕHJATARINDI
1 a
1 b 1 c
1 d
~40mm
M6x12
M6x80 M6x80
~25mm
M6
28
Base assembly on wall/ Sokkelmontering / Montaż podstawy (alu-bazy)
na ścianie / Montáž základového rámu na stenu / Pagrindo surinkimas ant sienelės /
Pamatnes uzstādīšana uz sienas / Alusraami panemine seinale
Note: if the length exceeds 6 m, refer to Page 35
NB: hvis lengden er lenger enn 6 m, se side 33
Uwaga: jeśli długość przekracza 6 m, przejdź do strony 35
Poznámka: pri dĺžke nad 6 m pozri stranu 35
Pastaba: jei ilgis viršija 6 metrus, žiūrėti 35 psl.
Piezīme: ja garums pārsniedz 6 metrus, skatīt 35 lpp.
Märkus: juhul, kui pikkus ületab 6 meetrit, vt lk 35.

2 a 2 b
2
Left /
Venstre /
Lewy /
Ľavá /
Kairė /
Kreisā /
Vasak
L. L.
L.
R.
R.
M6x12
9
M6
28
Corner frame assembly / Rammemontering / Montaż prolu narożnego /
Montáž rohových prolov / Kampinių prolių surinkimas / Stūra montāža /
Nurgapostide kokkupanemine
/ 13
FRAME ASSEMBLY / / MONTAŻ SZKIELETU SZKLARNI / MONTÁŽ KONŠTRUK
CIE / RĖMO RINKIMAS / RĀMJA UZSTĀDĪŠANA / NURGAPOSTIDE KOKKUPANEMINE
Left /
Venstre
/Lewy /
Ľavá /
Kairė /
Kreisā
/
Vasak
Left
/
Venstre
/Lewy
/
Ľavá
/
Kairė /
Kreisā /
Vasak
R.
Right /
Høyre /
Prawy /
Pravá /
Dešinė /
Labā /
Parem
Right
/
Høyre
/
Prawy
/
Pravá
/
Dešinė /
Labā
/
Parem
Right
/
Høyre
/
Prawy
/
Pravá
/
Dešinė /
Labā
/
Parem

4
3
3
3
236 cm309 cm
3
4
4
3
3
3
4
4
4
3 a 3 b 3 c 4
/ 14
FRAME ASSEMBLY / / MONTAŻ SZKIELETU SZKLARNI / MONTÁŽ KONŠTRUK
CIE / RĖMO RINKIMAS / RĀMJA UZSTĀDĪŠANA / NURGAPOSTIDE KOKKUPANEMINE
M6x12
9
4
9
20x3
28
20x3
Frame assembly / Rammemontering / Montaż szkieletu szklarni / Montáž
konštrukcie /Rėmo rinkimas / Rāmja uzstādīšana / Nurgapostide kokkupanemine
Note: X-shape diagonal bracing is used for 236 cm-wide greenhouse
: 236 ""
Uwaga: X-sposób montażu skośnych wzmocnień ścian jest używany do 236 cm szerokości szklarni
Poznámka: X-tvar diagonálnej výstuhy sa používa pre šírku skleníka 236 cm
Pastaba: 236 cm pločio šiltnamiui naudojama “X” formos įstrižainė
Piezīme: 236 cm platai siltumnīcai izmanto “X” formas diagonāli
Märkus: 236 cm laiuse kasvuhoone korral kasutatakse X-kujulist diagonaalproili

5
236 cm
5 a 5 b
/ 15
FRAME ASSEMBLY / / MONTAŻ SZKIELETU SZKLARNI / MONTÁŽ KONŠTRUK
CIE / RĖMO RINKIMAS / RĀMJA UZSTĀDĪŠANA / NURGAPOSTIDE KOKKUPANEMINE
3
20x3
M6x12
4
4
3
9
9
5
309 cm
Frame assembly / Rammemontering / Montaż szkieletu szklarni / Montáž
konštrukcie /Rėmo rinkimas / Rāmja uzstādīšana / Nurgapostide kokkupanemine
Note: if the length exceeds 6 m, refer to Page 35
NB: hvis lengden er lenger enn 6 m, se side 35.
Uwaga:
jeśli długość przekracza 6 m, przejdź do strony 35
Poznámka:
pri dĺžke nad 6 m pozri stranu 35
Pastaba:
jei ilgis viršija 6 metrus, žiūrėti 35 psl.
Piezīme:
ja garums pārsniedz 6 metrus, skatīt 35 lpp.
Märkus:
juhul, kui pikkus ületab 6 meetrit, vt lk 35.

7
8 a
8 b
6
/ 16
FRAME ASSEMBLY / / MONTAŻ SZKIELETU SZKLARNI / MONTÁŽ KONŠTRUK
CIE / RĖMO RINKIMAS / RĀMJA UZSTĀDĪŠANA / NURGAPOSTIDE KOKKUPANEMINE
8 b1
6 7 8 a
2
M6x12
23
M6
M6
M6
28 M6x12
M6
M6x12
28
26
26
4
26
M4,8x19
ø4,0 mm
Frame assembly / Rammemontering / Montaż szkieletu szklarni / Montáž
konštrukcie /Rėmo rinkimas / Rāmja uzstādīšana / Nurgapostide kokkupanemine
Note: if the length exceeds 6 m, refer to Page 33
NB: hvis lengden er lenger enn 6 m, se side 33.
Uwaga:
jeśli długość przekracza 6 m, przejdź do strony 33
Poznámka:
pri dĺžke nad 6 m pozri stranu 33
Pastaba:
jei ilgis viršija 6 metrus, žiūrėti 33 psl.
Pi
M
e
ä
z
r
īm
ku
e
s:
:
j
ja
u
g
h
a
ul
r
,
u
k
m
ui
s p
pi
ā
k
r
k
s
u
n
s
ie
ü
d
l
z
et
6
a
m
b 6
etr
m
u
e
s
e
,
t
s
ri
k
t
a
,
t
v
īt
t l
3
k
3
3
lp
3.
p.
a)
8 b2
Door / Dør / Drzwi / Dvere / Durys / Durvis / Uks
8 b3
Door /
Dør
/ Drzwi / Dvere / Durys / Durvis / Uks

10
/ 17
Uwaga: jeśli długość przekracza 6 m, przejdź do strony 35
Poznámka: pri dĺžke nad 6 m pozri stranu 35
Pastaba: jei ilgis viršija 6 metrus, žiūrėti 35 psl.
Piezīme: ja garums pārsniedz 6 metrus, skatīt 35 lpp.
Märkus: juhul, kui pikkus ületab 6 meetrit, vt lk 35.
FRAME ASSEMBLY / / MONTAŻ SZKIELETU SZKLARNI / MONTÁŽ KONŠTRUK
CIE / RĖMO RINKIMAS / RĀMJA UZSTĀDĪŠANA / NURGAPOSTIDE KOKKUPANEMINE
20x3
10 a 10 b
9 a 9 b
M6x12
M6x12
6
20x3
11
6
4
M6
3
20x3
9
9
Frame assembly / Rammemontering / Montaż szkieletu szklarni / Montáž
konštrukcie /Rėmo rinkimas / Rāmja uzstādīšana / Nurgapostide kokkupanemine
Note: if the length exceeds 6 m, refer to Page 35
NB: hvis lengden er lenger enn 6 m, se side 35.

3
11 12 a 12 b
2
M6x12
11
2
M6x12
M6
2
M6
/ 18
FRAME ASSEMBLY / / MONTAŻ SZKIELETU SZKLARNI / MONTÁŽ KONŠTRUK
CIE / RĖMO RINKIMAS / RĀMJA UZSTĀDĪŠANA / NURGAPOSTIDE KOKKUPANEMINE
11 12
Frame assembly / Rammemontering / Montaż szkieletu szklarni / Montáž
konštrukcie /Rėmo rinkimas / Rāmja uzstādīšana / Nurgapostide kokkupanemine

D
DETAIL D
SOLIDWORKS Educational Product. For Instructional Use Only.
E
DETAIL E
SCALE 1 : 2
SOLIDWORKS Educational Product. For Instructional Use Only.
13 a 13 b 14
16
15
15
16
/ 19
FRAME ASSEMBLY / / MONTAŻ SZKIELETU SZKLARNI / MONTÁŽ KONŠTRUK
CIE / RĖMO RINKIMAS / RĀMJA UZSTĀDĪŠANA / NURGAPOSTIDE KOKKUPANEMINE
M6x12
11 24
M6x12
20x3
11
2
T20
1
T20
M6x12
M6x12
M6x12
6
6
4
11
2
13
M6
DETAIL G
SCALE 1 : 10
SOLIDWORKS Educational Product. For Instructional Use Only.
M6
M6
M6
X2
14
Frame assembly / Rammemontering / Montaż szkieletu szklarni / Montáž
konštrukcie /Rėmo rinkimas / Rāmja uzstādīšana / Nurgapostide kokkupanemine

17
17 a 17 b
17 c
5
5
17 d
4,8x32
12 mm
25
25
25
5
DOOR ASSEMBLY / / MONTAŻ DRZWI / MONTÁŽ DVERÍ / DURŲ SURINKIMAS /
DURVJU MONTĀŽA / UKSE KOKKU PANEMINE / 20
Door assembly / Dørmontering / Montaż drzwi / Montáž dverí / Durų surinkimas /
Durvju montāža / Ukse kokku panemine

montāža / Ukse kokku panemine
Door assembly / / Montaż drzwi / Montáž dverí / Durų surinkimas / Durvju
montāža / Ukse kokku panemine
Door assembly / / Montaż drzwi / Montáž dverí / Durų surinkimas / Durvju
18 b
18
18 c 18 d 2019
20
18 a
M6x8
DOOR ASSEMBLY / / MONTAŻ DRZWI / MONTÁŽ DVERÍ / DURŲ SURINKIMAS /
DURVJU MONTĀŽA / UKSE KOKKU PANEMINE / 21
M4,8x38 TORX
Door assembly / Dørmontering / Montaż drzwi / Montáž dverí / Durų surinkimas /
Durvju montāža / Ukse kokku panemine
19

1
2
3
1
1
2
2
21
+5 cm
2
2
DOOR ASSEMBLY / / MONTAŻ DRZWI / MONTÁŽ DVERÍ / DURŲ SURINKIMAS /
DURVJU MONTĀŽA / UKSE KOKKU PANEMINE / 22
Door assembly / Dørmontering / Montaż drzwi / Montáž dverí / Durų surinkimas /
Durvju montāža / Ukse kokku panemine
Panel installation /
Plateinstallasjon
/Instalacja
wypełnienia (szkło/poliwęglan) /Inštalácia
výplní / Dangos įdėjimas / Pārklājuma
likšana /
Katteplaatide paigaldamine
Glazing rubber insertion /
Innsetting av lategummi
/Montaż wypełnienia z użyciem uszczelek /
Inštalácia
montážnych gumených tesnení / Gumų
uždėjimas /Gumijas uzlikšana / Kummitihendite
paigaldamine
Glazing rubber insertion / /
Innsetting av plategummi
/Inštalácia
montážnych gumených tesnení /Gumų
uždėjimas / Gumijas uzlikšana /Kummitihendite
paigaldamine
1

DOOR ASSEMBLY / / MONTAŻ DRZWI / MONTÁŽ DVERÍ / DURŲ SURINKIMAS /
DURVJU MONTĀŽA / UKSE KOKKU PANEMINE / 23
21 a 21 b
22 a 22 b
Door installation / Dørmontering / Zamontowanie drzwi / Inštalácia dverí /
Durų įstatymas / Durvju ievietošana / Ukse paigaldamine
26
M6x12
25
M4,8x38 TORX
26
21
22

23
T Bolt M6x12
2
20x3
/ 24
23 b
23 c
23 a
ø6,5 mm
23 d
FRAME ASSEMBLY / / MONTAŻ SZKIELETU SZKLARNI / MONTÁŽ KONŠTRUK
CIE / RĖMO RINKIMAS / RĀMJA UZSTĀDĪŠANA / NURGAPOSTIDE KOKKUPANEMINE
T Bolt M6x12
M6
2
20x3
Frame assembly / Installasjon av diagonal avstivning i tak / Montáž konštrukcie /
Rėmo rinkimas / Rāmja uzstādīšana / Nurgapostide kokkupanemine
R
efer to Page 34
C
34 .
P
rzejdź do strony 34
P
ozri stranu 34
Ž
iūrėti 34 psl.
S
katīt 34 lpp.
Vt lk 34.

Polycarbonate / / Poliwęglan /
Polykarbonát / Polikarbonatas /
Polikarbonāts / Polükarbonaat
/ 25
Polycarbonate /
/
Poliwęglan /
Polykarbonát /
Polikarbonatas /
Polikarbonāts /
Polükarbonaat
Glass /
C /
Szkło /
Sklo /
Stiklas /
Stikls /
Klaas
Glass / C / Szkło /
Sklo / Stiklas /
Stikls / Klaas
23
S I L I
S I L I
Installation of glazing sheets / Montering av plater / Instalacja wypełnienia
(szkło/poliwęglan) / Inštalácia výplní / Dangos įdėjimas / Pārklājuma likšana /
Katteplaatide paigaldamine
GLAZING / / INSTALACJA WYPEŁNIENIA SZKŁO/POLIWĘGLAN /
INŠTALÁCIA VÝPLNÍ / DANGOS ĮDĖJIMAS / PĀRKLĀJUMA LIKŠANA / KATTEMATERJALIDE
MÕÕDUD
EN ATTENTION! The UV-protected side
of the polycarbonate sheet is covered
with white lm with text. This side should
face outwards!
NO OBS! Den UV-beskyttede siden av
polykarbonatet er dekket med en hvit
plast. Denne siden skal vende utover!
!
Other DrivhusSenter Greenhouse Kit manuals
Popular Greenhouse Kit manuals by other brands

VOLYA
VOLYA 2017 Assembly manual

Konifera
Konifera SF2500 Assembly instructions

Palram
Palram Automatic Vent Opener Assembly instructions

Vitavia
Vitavia VM0035-P Assembly instructions

LAMS
LAMS MELISSA 0,90 Assembly instructions

Palram Applications
Palram Applications Crystal Clear Plant Inn Assembly instructions

Vitavia
Vitavia VM0017-T 2500 Assembly instructions

FILCLAIR
FILCLAIR Serralux 2,70m manual

Palram
Palram CANOPIA TURINO 3x4,25 How to assemble

ENERAMA
ENERAMA Pyramid Garden Safety & Setup Instructions

Palram
Palram Balance 8'x12' Hybrid Glazing Assembly instructions

Little Cottage
Little Cottage Octagon Greenhouse manual