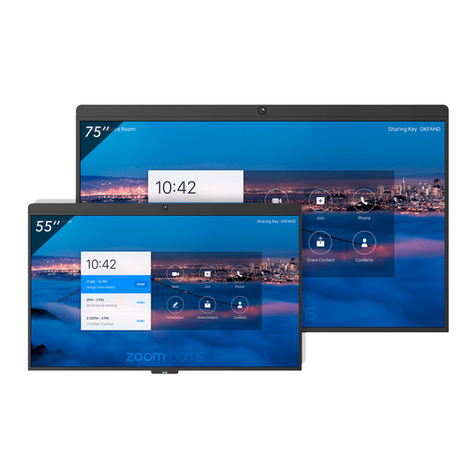
DTEN D7 55 User manual

D7 | Zoom Rooms
D7 55” Onboarding Guide
The specifications and information regarding the products in this manual are subject to change without notice. Functionalities/Extend features depending on both Zoom Room Software and DTEN Firmware updates
DTEN. Confidential. The content of this presentation is proprietary and confidential information of DTEN. It is not intended to be distributed to any third party without the written consent of DTEN.

CONTENTS
Open Box Guide
●Open Box Guide
●Return Policy
●Package Contents
Assembling DTEN D7
●Overview D7
●Best Practices For Mounting The Display
●D7 - Setup
●Mounting DTEN D7
●WiFi Setup (optional)
Quick Tips
Problems? Contact Support
01
02
03
04
The specifications and information regarding the products in this manual are subject to change without notice. Functionalities/Extend features depending on both Zoom Room Software and DTEN Firmware updates
DTEN. Confidential. The content of this presentation is proprietary and confidential information of DTEN. It is not intended to be distributed to any third party without the written consent of DTEN.

01
Open Box
Guide
The specifications and information regarding the products in this manual are subject to change without notice. Functionalities/Extend features depending on both Zoom Room Software and DTEN Firmware updates
DTEN. Confidential. The content of this presentation is proprietary and confidential information of DTEN. It is not intended to be distributed to any third party without the written consent of DTEN.

Open Box Guide
Step 4
Take out the wall
mount box located at
the bottom.
Step 3
Pull out the display
protection bag, along
with the display.
Step 1
Take out the AV
bar .
Step 2
Take out the side foam
strips. Take out the
accessory bag.
The specifications and information regarding the products in this manual are subject to change without notice. Functionalities/Extend features depending on both Zoom Room Software and DTEN Firmware updates
DTEN. Confidential. The content of this presentation is proprietary and confidential information of DTEN. It is not intended to be distributed to any third party without the written consent of DTEN.

DO NOT throw away your
box to be eligible for a 7
days return.
The specifications and information regarding the products in this manual are subject to change without notice. Functionalities/Extend features depending on both Zoom Room Software and DTEN Firmware updates
DTEN. Confidential. The content of this presentation is proprietary and confidential information of DTEN. It is not intended to be distributed to any third party without the written consent of DTEN.

Package Contents
1. DTEN D7 HD Interactive
Unit
2. AV Panel
3. Wall Mounting Brackets
4. Monitor Mounting Clips
5. Wifi Antenna X2
6. D7 Stylus
7. Power Cable
The specifications and information regarding the products in this manual are subject to change without notice. Functionalities/Extend features depending on both Zoom Room Software and DTEN Firmware updates
DTEN. Confidential. The content of this presentation is proprietary and confidential information of DTEN. It is not intended to be distributed to any third party without the written consent of DTEN.

02
Assembling
DTEN D7
The specifications and information regarding the products in this manual are subject to change without notice. Functionalities/Extend features depending on both Zoom Room Software and DTEN Firmware updates
DTEN. Confidential. The content of this presentation is proprietary and confidential information of DTEN. It is not intended to be distributed to any third party without the written consent of DTEN.

Overview D7 Layout
The specifications and information regarding the products in this manual are subject to change without notice. Functionalities/Extend features depending on both Zoom Room Software and DTEN Firmware updates
DTEN. Confidential. The content of this presentation is proprietary and confidential information of DTEN. It is not intended to be distributed to any third party without the written consent of DTEN.

MOUNTING DTEN D7
Best Practices For Mounting The Display
1. The space should be well lit.
2. Fluorescent lighting is not recommended.
3. Avoid bright lights or colors in the background behind attendees.
4. Participants’ faces should not be in the shadow.
The specifications and information regarding the products in this manual are subject to change without notice. Functionalities/Extend features depending on both Zoom Room Software and DTEN Firmware updates
DTEN. Confidential. The content of this presentation is proprietary and confidential information of DTEN. It is not intended to be distributed to any third party without the written consent of DTEN.

D7 - Setup
AV
Panel
1
Stylu
s
Holde
r
ON the Display:
1. Attach the AV Panel to the front(as shown).
2. The stylus may be attached to the magnetic clip/shoe.
The specifications and information regarding the products in this manual are subject to change without notice. Functionalities/Extend features depending on both Zoom Room Software and DTEN Firmware updates
DTEN. Confidential. The content of this presentation is proprietary and confidential information of DTEN. It is not intended to be distributed to any third party without the written consent of DTEN.

D7 - Setup
ON the PC:
1. Attach the Antennae at the rear (as shown).
2. Connect an Ethernet cable connected to PC port.
With all connections made:
1. Insert the power cord into the outlet.
2. Arrange or dress cables using ties or tape.
1
1
Etherne
t
Antenn
a
Antenn
a
The specifications and information regarding the products in this manual are subject to change without notice. Functionalities/Extend features depending on both Zoom Room Software and DTEN Firmware updates
DTEN. Confidential. The content of this presentation is proprietary and confidential information of DTEN. It is not intended to be distributed to any third party without the written consent of DTEN.

MOUNTING DTEN D7
Safety note & Tool requirements
IMPORTANT
The monitors must be mounted safely and securely. Mounting and installation
should only be performed by experienced or professional personnel.
You will need:
1. Power drill with wood or masonry bits
2. Screwdrivers
3. Level, tape measure
4. Stud Finder (for drywall construction)
The specifications and information regarding the products in this manual are subject to change without notice. Functionalities/Extend features depending on both Zoom Room Software and DTEN Firmware updates
DTEN. Confidential. The content of this presentation is proprietary and confidential information of DTEN. It is not intended to be distributed to any third party without the written consent of DTEN.

MOUNTING DTEN D7
Set up Wall Mounting
1. Use four M6 screws and washers to mount the frame to the wall.
2. Attach the mounting clip to the monitor with 4 screws.
3. Mount the monitor to the wall by clip and pull down.
4. Measure the distance between the wall and the monitor to have 3.5” from the wall.
The specifications and information regarding the products in this manual are subject to change without notice. Functionalities/Extend features depending on both Zoom Room Software and DTEN Firmware updates
DTEN. Confidential. The content of this presentation is proprietary and confidential information of DTEN. It is not intended to be distributed to any third party without the written consent of DTEN.

WiFi Setup
(optional)
Connecting To A WiFi Network
1. Plug in a keyboard onto the PC's blue USB port (the top left
port)
2. Press Ctrl+Alt+Delete and you will see the following screen
3. Click Sign Out
You will see be brought the Windows lock screen The
passwords for both accounts are:
Zoom (Zoom Rooms) - Zoom123
ZoomAdmin (access to the PC) - Zoom1234
The specifications and information regarding the products in this manual are subject to change without notice. Functionalities/Extend features depending on both Zoom Room Software and DTEN Firmware updates
DTEN. Confidential. The content of this presentation is proprietary and confidential information of DTEN. It is not intended to be distributed to any third party without the written consent of DTEN.

WiFi Setup
(optional)
Connecting To A WiFi Network
4. In Windows: Click: ‘Start > ‘Settings’ > ‘Network & wireless’ > ‘Wi-Fi’ .
5. Select your network and enter a password as directed.
6. Click Zoom to return to ZOOM ROOMS.
The specifications and information regarding the products in this manual are subject to change without notice. Functionalities/Extend features depending on both Zoom Room Software and DTEN Firmware updates
DTEN. Confidential. The content of this presentation is proprietary and confidential information of DTEN. It is not intended to be distributed to any third party without the written consent of DTEN.

03
Quick Tips
The specifications and information regarding the products in this manual are subject to change without notice. Functionalities/Extend features depending on both Zoom Room Software and DTEN Firmware updates
DTEN. Confidential. The content of this presentation is proprietary and confidential information of DTEN. It is not intended to be distributed to any third party without the written consent of DTEN.

How to check the Zoom Rooms software
version?
1. Tap and hold on the screen until you see a light gray box.
2. Let go to display a pop-up menu.
3. Tap About.
You will see the Zoom Rooms version installed.
The specifications and information regarding the products in this manual are subject to change without notice. Functionalities/Extend features depending on both Zoom Room Software and DTEN Firmware updates
DTEN. Confidential. The content of this presentation is proprietary and confidential information of DTEN. It is not intended to be distributed to any third party without the written consent of DTEN.

How to check the DTEN version & DTEN ID?
1. Press the Menu button once for the DTEN version.
2. Press the Menu button 5X times for the DTEN ID.
The specifications and information regarding the products in this manual are subject to change without notice. Functionalities/Extend features depending on both Zoom Room Software and DTEN Firmware updates
DTEN. Confidential. The content of this presentation is proprietary and confidential information of DTEN. It is not intended to be distributed to any third party without the written consent of DTEN.

How Do I Fix Issues With The DTEN D7
Microphone?
1. Unplug the the DTEN mic array bar on the top of the unit,then
plug it back in. You will see a notification and a plug-in sound
effect if the system detects the media bar.
2. In the Zoom Rooms application, tap a blank area of the screen
then tap Settings in the lower-right corner.
3. Tap Microphone.
4. Tap the Source field and select Microphone (DTEN Mic
Array 7).
Microphone is not working or the quality is not clear
The specifications and information regarding the products in this manual are subject to change without notice. Functionalities/Extend features depending on both Zoom Room Software and DTEN Firmware updates
DTEN. Confidential. The content of this presentation is proprietary and confidential information of DTEN. It is not intended to be distributed to any third party without the written consent of DTEN.

Changing the Speaker Volume
Increase the volume by using the volume buttons located on the back
of the DTEN at the lower-right corner. Also ensure you use DTEN's
built-in speakers:
1.On the DTEN touchscreen, tap a blank area of the screen
then tap Settings in the lower-right corner.
2.Tap Speaker.
3.In the Source section, select DTEN Board as default audio
output.
4.Tap Test Speaker button to test the quality of the speaker.
5.Use the volume slider to adjust the volume.
The specifications and information regarding the products in this manual are subject to change without notice. Functionalities/Extend features depending on both Zoom Room Software and DTEN Firmware updates
DTEN. Confidential. The content of this presentation is proprietary and confidential information of DTEN. It is not intended to be distributed to any third party without the written consent of DTEN.
Table of contents
Other DTEN Touchscreen manuals
Popular Touchscreen manuals by other brands

ViewSonic
ViewSonic ViewBoard IFP50 Series quick start guide

Siemens
Siemens SIMATIC IFP1200 Basic operating instructions

Russound
Russound xts installation manual

QOLSYS
QOLSYS IQ PANEL 2 installation manual

Wacom
Wacom CINTIQ DTK-2700 Important product information

Sam4s
Sam4s SPS-2000 Program reference manual