ANTES DE USAR, FAVOR LEA TODAS PRECAUCIONES
Y ETIQUETAS DE ADVERTENCIA
www.duromed.com
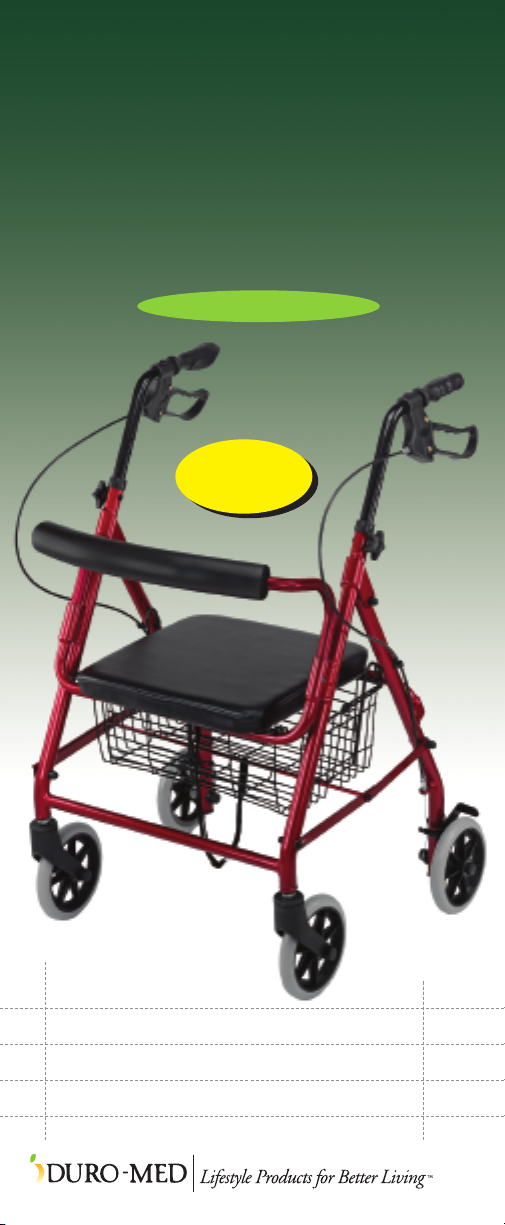
USO DEL
NUEVO ROLLATOR
APRETAR PARA PARAR
SOLTAR PARA ANDAR
EMPUJAR HACIA ABAJO
PARA ASEGURAR
LEVANTE EL ASIENTO Y
HALE LA TIRA PARA
ACTIVAR EL MECANISMO
PLEGABLE
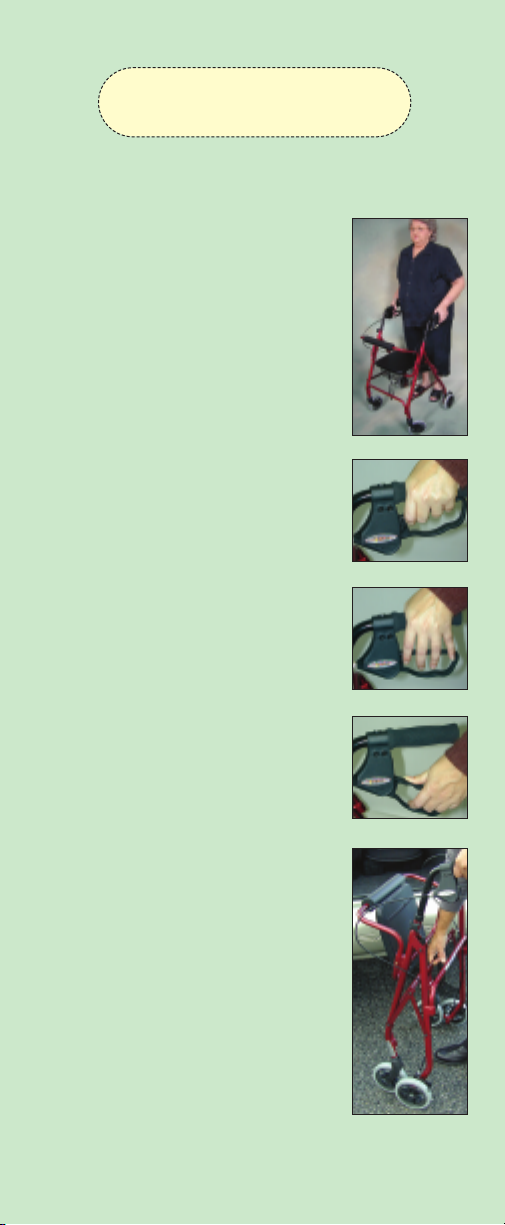
FACIL PARA CAMINAR
EL PASEO
Esta unidad debe ser usado como una ayuda de
movilidad que crea un equilibrio natural.
Con manos bien agarradas sobre los pasamanos,
el usuario puede caminar despacio detrás del
rollator. Con cuidado, empuje adelante con el peso
distribuído uniformemente entre manillares.
EL FRENADO
Freno Normal
puede ser activado tirando la manija
de freno hacia arriba, similar al funcionamiento de
los frenos de una bicicleta. Esta función puede ser
aplicada andando con el rollator para reducir
la velocidad del ímpetu, pararse un momento,
o maniobra alrededor de los obstaculos que
pueden estar en su camino.
Freno de Parada
puede ser activado empujando
la manija abajo en la posición de cerradura. Esta
función debería ser activada cuando el usuario se
detiene por un periodo largo
. Por razones de
seguridad, el freno de parada siempre deberá estar
activado antes de sentarse en el asiento. Además
si esta comprando, sería buena idea de activar el
freno de parada mientras usted se detiene en la
sección de la tienda para evitar que el rollator se
mueva hacia adelante. Para desactivar el freno de
parada, empuje gentilmente el pasamano hacia
arriba. El sistema de freno es conveniente y fácil
de operar. Personas que posiblemente tengan
problemas con las manos deberían encontrar el
freno de parada ancho, confortable y no se dobla.
La presión mínima tendrá que ser aplicada para
activar el sistema de freno de lazo que se cierra.
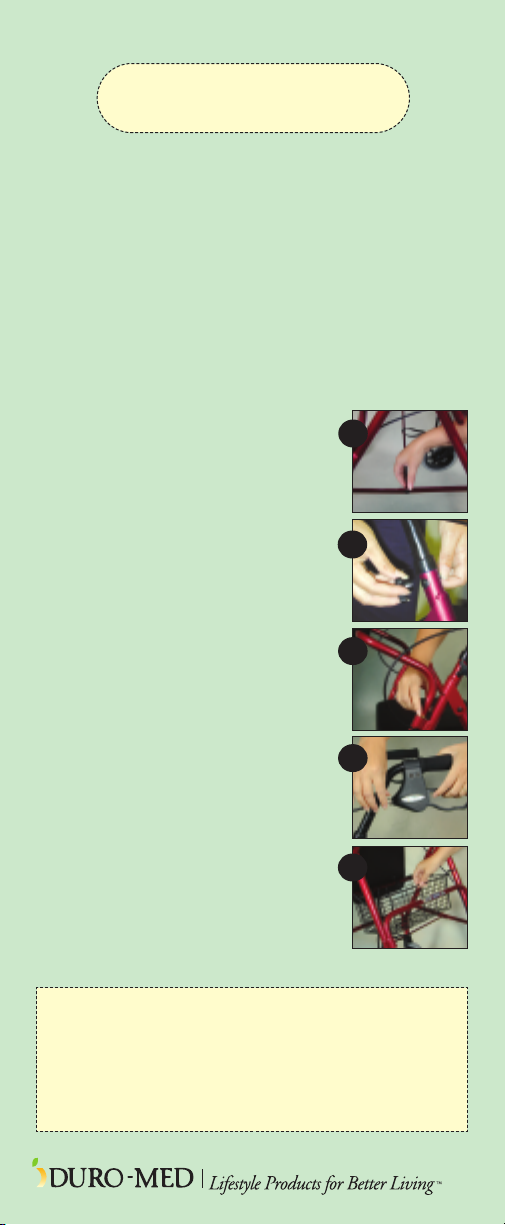
EL PLEGADO
La canasta debería ser removida antes del
plegado de cualquier rollator. Desde la posición
del usuario de la unidad se agarra la correa
plegable, localizada bajo el asiento de bisagra,
y se levanta en la posición doblada.
EL MANTENIMIENTO
Siempre se asegura que sus frenos funcionan
correctamente antes del empleo. Cuide que el
freno se maneja este libre de suciedad, el polvo y
la mugre. El desarrollo de partículas podría hacer
que sus frenos no funcionen correctamente.
Si los frenos no frenan, compruebe los cables
para la soltura. Los cables pueden ser apretados
en el tornillo de ajustador localizado donde el
cable es conectado a la manija de freno. Si el
cable es roto, esto tendrá que ser reemplazado.
De vez en cuando compruebe y apriete todas las
tuercas, cerrojos, tornillos, y otras partes
localizado en el rollator.