Duronic CH500 User manual

CH500 - Chopper

2

3
English Manual
Manuel d’utilisation en français
Gebrauchsanleitung auf Deutsch
Manual de Instrucciones en Español
Manuale D’istruzioni In Italiano
5
14
23
32
41
Contents

4

5
English Manual

6
Diagram
1. Top Cover
2. Silicon Ring
3. Food Scraper
4. Upper Knife Blade
5. Finger Grip
6. Blade interlock
Scraping Rotator
7. Lower Knife Blade
8. Bowl
9. Safety Interlock
10. Power Switch
11. Motor base
12. Rubber feet

7
Safety
●The blades are very sharp, handle with care.
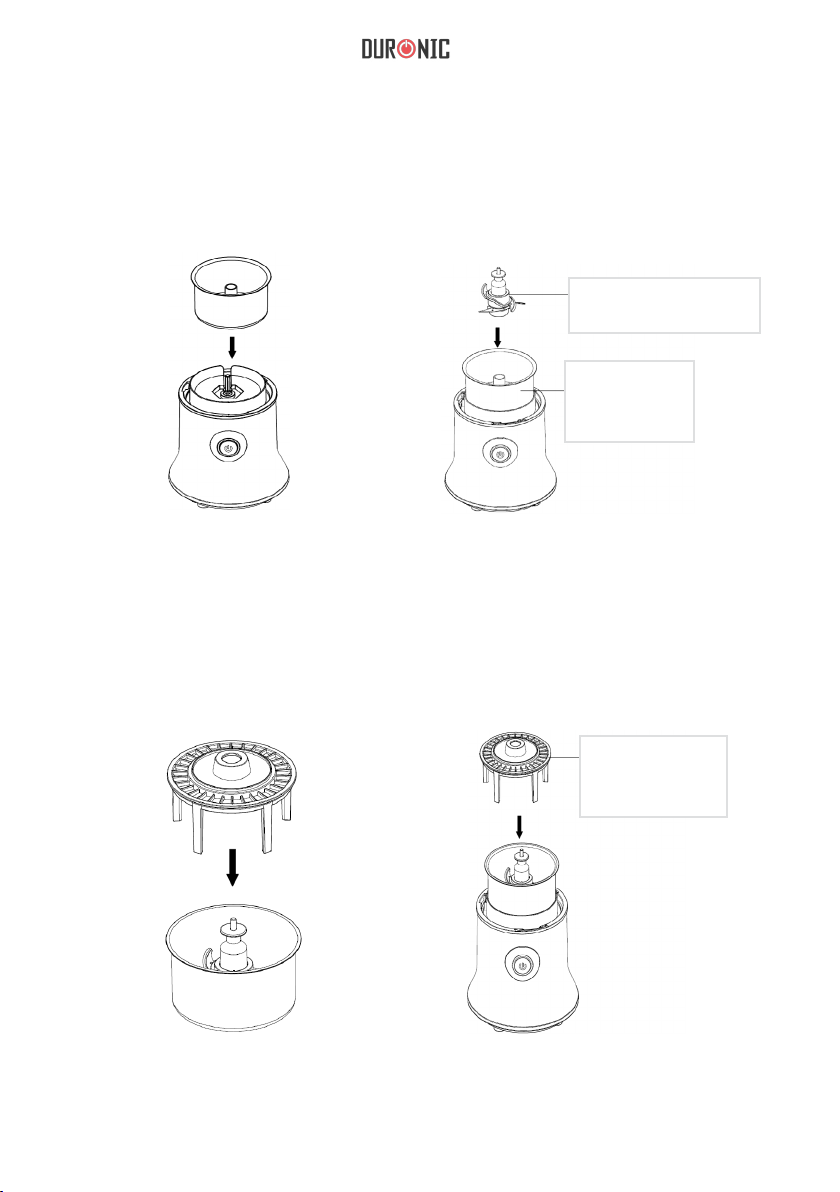
Always hold part number 5 at the top when handling the blade.
●To reduce the risk of injury, never assemble the blade without the stainless-
steel bowl (part 8) properly in place rst.
●Keep hands and utensils away from the blade when the chopper is in use.
●Do not use excessive force on the interlocking mechanism. This appliance will
be damaged and may cause injury if the interlock mechanism is subject
to excessive force. This will also void the warranty due to misuse.
●Always ensure the unit is switched off before disassembling the Chopper.
●Do not operate the appliance with a damaged cord. Return the appliance to
the nearest authorized service facility for examination, repair, or electrical/
mechanical adjustment.
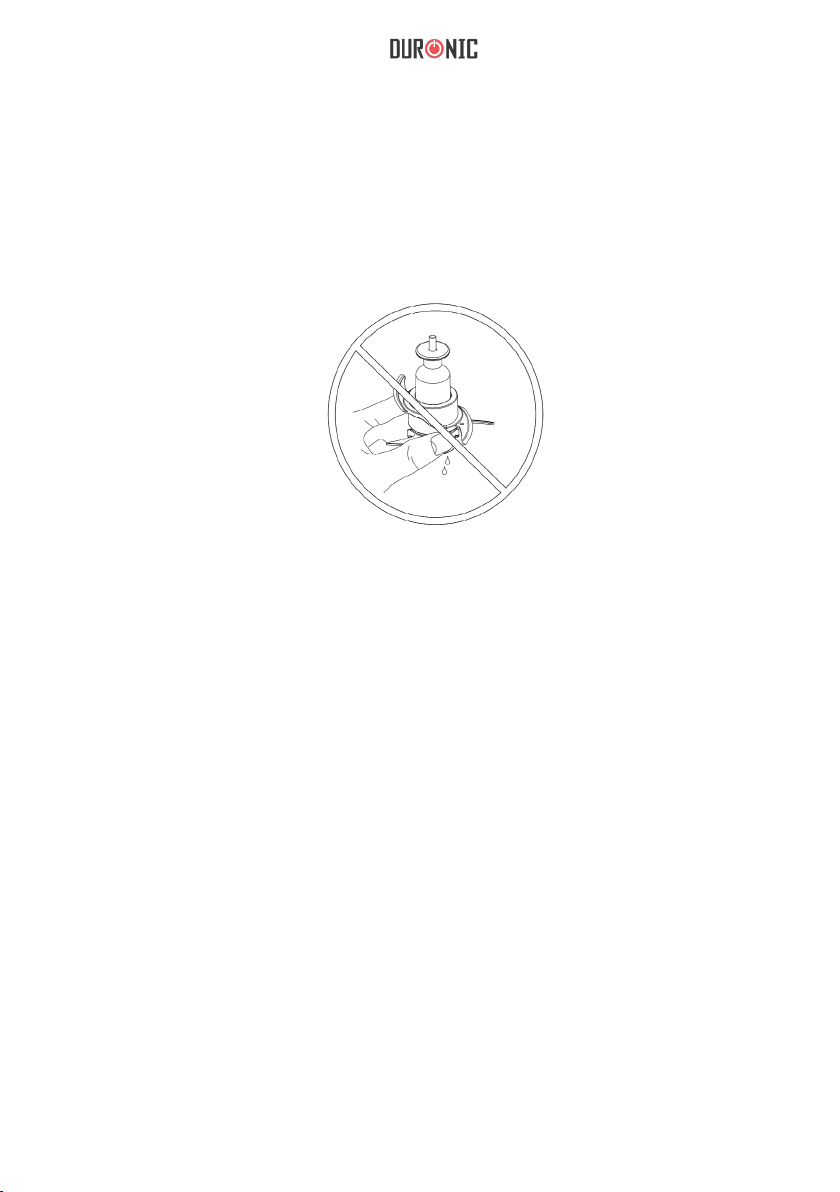
●Never let the motor base, cord or plug get wet.
●Never let the cord hang over the edge of the table/worktop or touch hot
surfaces.
●This appliance is not intended for use by persons (including children) with
reduced physical, sensory, or mental capabilities, lack of experience and
knowledge, unless they have been given supervision or instruction concerning
use of the appliance by a person responsible for their safety.

8
●Children should be supervised to ensure that they do not play with the
appliance.
●Do not use outdoors. This product is made for indoor domestic use only.
Duronic will not accept any liability if the appliance is subject to improper use,
or failure to comply with these instructions.
●To protect against the risk of an electrical shock, do not put the motor base in
water or other liquids.
●The use of attachments not recommended or sold by the manufacturer may
cause re, electric shock, or injury.
●Make sure the cover is securely locked in place before operating appliance.
*Before plugging in*
Make sure your household voltage corresponds with the rating label
on the product.

9
The knife blade unit comes in 2 parts, a lower and an upper blade.
●For coarser chopping use the lower blade on its own.
● For ne chopping or to make puree, use both blades together.
This will also achieve faster results.
How to assemble
the silicon ring.
To use your food chopper
Soft press for pulse Press full for continuous use
Press
Install the silicon ring into
the inside of the lid then
press the ring by hand
until it is xed on.
Note: After processing food, the upper blade may disengage from the lower blade. This
is normal as the blade assembly is designed to be loose to ease separation after use.

10
1. Fit the bowl on to the power unit. 2. Fit the blade assembly into the bowl.
3. Cut the food into small pieces and
place into the bowl. Larger pieces
of food should be cut into smaller
pieces to t into the bowl.
Blade Assembly
Bowl
Food Scraper
4. Fit the food scraper into the bowl.
Turn the scraping rotator to scrape
the sides of the bowl.

11
5. Place the top cover on to unit
and turn it anti-clockwise to lock
into place and to activate safety
switch.
Note: The chopper has a safety
switch, which can be activated by
locking the top cover, as shown
below.
LockUnlock
IMPORTANT
●If preparing food for babies or young children, always check that the
ingredients are thoroughly blended before feeding.
●Do not run the food chopper continuously for longer than 30 seconds.
Leave to cool for 2 minutes’ in-between each 30 second operation.
●Do not operate the food chopper if the bowl is empty.
●Always allow hot food to cool before processing.
●Do not place any part of the chopper in a microwave.

12
Hints
●If the chopper struggles to process the ingredients, remove some of the mixture
and continue processing in several batches, otherwise you may strain the
motor and cause it to overheat.
●Remember that chopping hard ingredients such as coffee beans, spices,
chocolate or ice will wear down the blade.
●Beware of over processing some ingredients. Stop and check the
consistency frequently.
●To achieve better results, always scrape food down from the side of the bowl.
●The best results are obtained by chopping small ingredient quantities at a time.
●Ensure that the blade, bowl and cover are thoroughly dry before chopping dry
ingredients such as nuts or breadcrumbs.
●Do not use harsh detergents or metallic, abrasive objects to clean
the unit as the surface of the unit or accessories might get damaged.
●If necessary, just wipe the motor unit with a dry or damp cloth.
●Store the unit in a dry safe place out of the reach of children.
Care and Cleaning
●IPlease dry all parts including rubber seal before assembling again
after cleaning.

13
Warranty
1 Year Guarantee from Shine-Mart Ltd, Trademark owners of Duronic Products.
NOTE: THESE STATEMENTS DO NOT AFFECT YOUR STATUTORY RIGHTS AS A
CONSUMER
This product has been manufactured under the strictest or quality control procedures, and
using the highest quality of materials, to ensure excellent performance and reliability. It will
give very good and long lasting service, provided it is properly used and maintained. The
product is guaranteed for 1 years from the date of original purchase. If any defect arises due
to a faulty materials or poor workmanship, the faulty product must be returned to the original
place of purchase. Refund or replacement is at the discretion of that company.
Duronic Products are offered with a 1 year guarantee under the following conditions:
1. The product must be returned to the retailer with original proof of purchase.
2. The product must be installed and used in accordance with the instructions contained in
this operating manual.
3. It must be used only for domestic purposes.
4. It does not cover wear and tear, malicious damage, misuse, neglect, inexpert repairs or
consumable parts.
5. Shine-Mart Ltd has no responsibilities for accidental or consequential loss or damage.
6. Shine-Mart Ltd are not liable to carry out any type of servicing work, under the guarantee
7. Valid in the UK only
This product is tted with CE:1363 plug and fuse
Imported by Shine-Mart Ltd, RM3 8SB
Information on waste Disposal for Consumers of
Electrical & Electronic Equipment.
This mark on a product and/or accompanying documents indicates that when it
is to be disposed of, it must be treated as Waste
Electrical & Electronic Equipment, (WEEE).
Any WEEE marked products must not be mixed with general household waste,
but kept separate for the treatment, recovery and recycling of the materials used.
For proper treatment, recovery and recycling; please take all WEEE marked
waste to your Local Authority Civic waste site,
where it will be accepted free of charge.
If customers dispose of Waste Electrical & Electronic Equipment correctly, they
will be helping to save valuable resources and preventing any potential negative
effects upon human health and the environment, of any hazardous materials that
the waste may contain.

14
Manuel d’utilisation en français

15
Aperçu du produit
1. Couvercle
2. Anneau en silicone
3. Racloir
4. Lame supérieure
5. Axe centrale
6. Verrouillage des lames
Racloir
7. Lame inférieure
8. Bol
9. Verrouillage du bol
10. Alimentation
11. Base
12. Pieds antidérapants

16
Instructions de sécurité
- Les lames sont très aiguisées, veuillez les manipuler avec vigilance. Tenez toujours
l’axe central (5) lorsque vous manipulez la lame.
- Pour réduire le risque de blessure, n’assemblez jamais la lame si le bol n'est pas
correctement inséré.
- Gardez vos mains hors de portée des lames et ne tentez pas d’insérer d’ustensiles
lorsque l’appareil est en fonctionnement.
- N’utilisez pas de force excessive sur le mécanisme de verrouillage. Cet appareil sera
endommagé et pourrait provoquer des blessures involontaires si ce mécanisme était
sujet à une pression excessive. Ceci pourrait également annuler la garantie pour des
raisons de négligence.
- Assurez-vous toujours d’éteindre l’appareil avant de démonter le hachoir.
- N’utilisez pas l’appareil si l’alimentation est endommagée. Contactez votre revendeur
ou tout autre technicien qualifié pour procéder à l’inspection et à la réparation de
l’appareil.
- N’immergez pas la base, le câble d’alimentation ou la prise dans l’eau.
- Ne laissez pas l’alimentation pendre le long d’une table, de votre plan de travail ou
entrer en contact avec les surfaces chaudes.
- Cet appareil n’est pas conçu pour être utilisé par les personnes, y compris les enfants,
souffrant de capacités sensorielles, mentales ou physiques réduites, ainsi que toute
personne n’ayant pas l’expérience nécessaire ou reçu les instructions suffisantes pour
utiliser cet appareil en toute sécurité, à moins qu’elle ne soit sous stricte supervision de
la personne responsable de leur sécurité ou de la personne sachant utiliser ce type de
produit.

17
- Les enfants doivent rester sous stricte supervision afin d’éviter qu’ils ne jouent avec
cet appareil.
- N’utilisez pas cet appareil à l’extérieur. Ce produit est conçu pour un usage
domestique uniquement. Duronic se dégage de toute responsabilité si l’appareil est
sujet à une utilisation malveillante ou si les instructions contenues dans ce manuel
sont ignorées.
- Pour éviter tout risque de décharge électrique, n’immergez pas la base dans l’eau
ou tout autre liquide.
- L’utilisation d’accessoires qui ne sont pas recommandées ou vendues par Duronic
peut provoquer des blessures et présenter un risque d’électrocution ou d’incendie.
- Assurez-vous que le couvercle soit correctement verrouillé avant d’utiliser l’appareil.
N.B. Assurez-vous que le voltage indiqué sur l'appareil corresponde à la norme
disponible dans votre pays.

18
La lame se compose de deux éléments, une lame inférieure et une lame supérieure.
- Pour obtenir un résultat épais, utilisez la lame inférieure uniquement.
- Pour obtenir un résultat fin ou pour faire de la purée, utilisez les deux lames
conjointement. Ceci permettra également d’obtenir des résultats plus rapides.
Assemblage du
joint en silicone :
Préparation du produit
Appuyez délicatement sur la
touche de démarrage pour
utiliser la fonction « pulse ».
Enfoncez la touche de
démarrage pour une utilisation
continue.
Insertion
Le joint peut être retiré
pour procéder au
nettoyage du couvercle,
veuillez toutefois vous
assurer de ne pas
l’endommager lorsque
vous le retirez. Pour le
remettre en place, placez-
le simplement au fond du
couvercle et appuyez sur
toute sa surface pour
l’enfoncer complètement.
Note: After processing food, the upper blade may disengage from the lower blade. This
is normal as the blade assembly is designed to be loose to ease separation after use.

19
1. Placez le bol sur la base. 2. Placez la lame dans le bol.
3. Coupez vos ingrédients et placez-
les dans le bol. Les ingrédients
larges devraient être coupés en
petits morceaux afin qu’ils
puissent être ajoutés aisément.
Axe centrale
Bol
Racloir
4. Placez le racloir dans le bol.
Tournez le racloir durant le
fonctionnement de l’appareil pour
racler les parois du bol et obtenir un
résultat plus homogène.

20
5. Placez le couvercle sur l’appareil
puis tournez le couvercle dans le
sens inverse des aiguilles d’une
montre pour le verrouiller et
désactiver la fonction de
sécurité.
Note : cet appareil est doté d’une
fonction de sécurité qui se
déclenche dès que le couvercle
n’est pas correctement verrouillé.
Vérouiller
Déverouiller
Important :
- Pour préparer des purées à donner aux bébés et aux enfants en bas âge, vérifiez
toujours la consistance pour vous assurer que le résultat soit parfaitement homogène.
- N’utilisez pas l’appareil pendant une période prolongée, généralement de plus de 30
secondes. Pour garantir la durabilité du moteur, il est recommandé de laisser l’appareil
reposer 2 minutes entre chaque opération.
- N’utilisez pas l’appareil si le bol est vide.
- Laissez toujours les ingrédients chauds refroidir avant de les mixer. Le mixage
d’ingrédients chauds pourrait provoquer des émanations de vapeur qui doivent pouvoir
s’échapper du bol. Il est par conséquent important de mixer des ingrédients à
température ambiante uniquement.
- Aucun élément de cet appareil ne peut être placé dans un micro-onde.
Table of contents
Languages:
Other Duronic Food Processor manuals
Popular Food Processor manuals by other brands

Silvercrest
Silvercrest KH1160 operating instructions

Silvercrest
Silvercrest SMZS 260 G1 operating instructions

EUROPRO
EUROPRO NINJA Master Prep QB900W 30 owner's manual

Silvercrest
Silvercrest SMZ CD 400 A 1 operating instructions

Cookworks
Cookworks CH1117BN Care & instruction manual

nuVita
nuVita Pappasana 1960 user manual