Charging your machine
It’s important to fully charge your new machine before using it for the first
time, and after every clean. This is because the battery and monitoring
system’s algorithm ‘learns’ over time, and fully charging your machine helps
it to more accurately calculate and display remaining run time.
Connect to charger either directly or in the dock.
The blue LEDs on either side of the battery will flash during charging.
When the battery is fully charged, both LEDs will light for 5 seconds.
Your battery is fully charged when the display shows 100%.
Your machine won’t operate or charge if the ambient temperature is below
5°C(41°F). This is designed to protect both the motor and battery.
You can help prolong the battery life by leaving your machine to cool down
before recharging.
Changing your click-in battery
If you have additional click-in batteries, we recommend that you alternate the
batteries to maintain even performance.
Removing your battery
Push the Battery release button on the handle and slide the battery
off your machine.
Charge the battery.
Refitting your battery
Align your battery with the handle and slide it in. Push firmly until it
clicks into place.
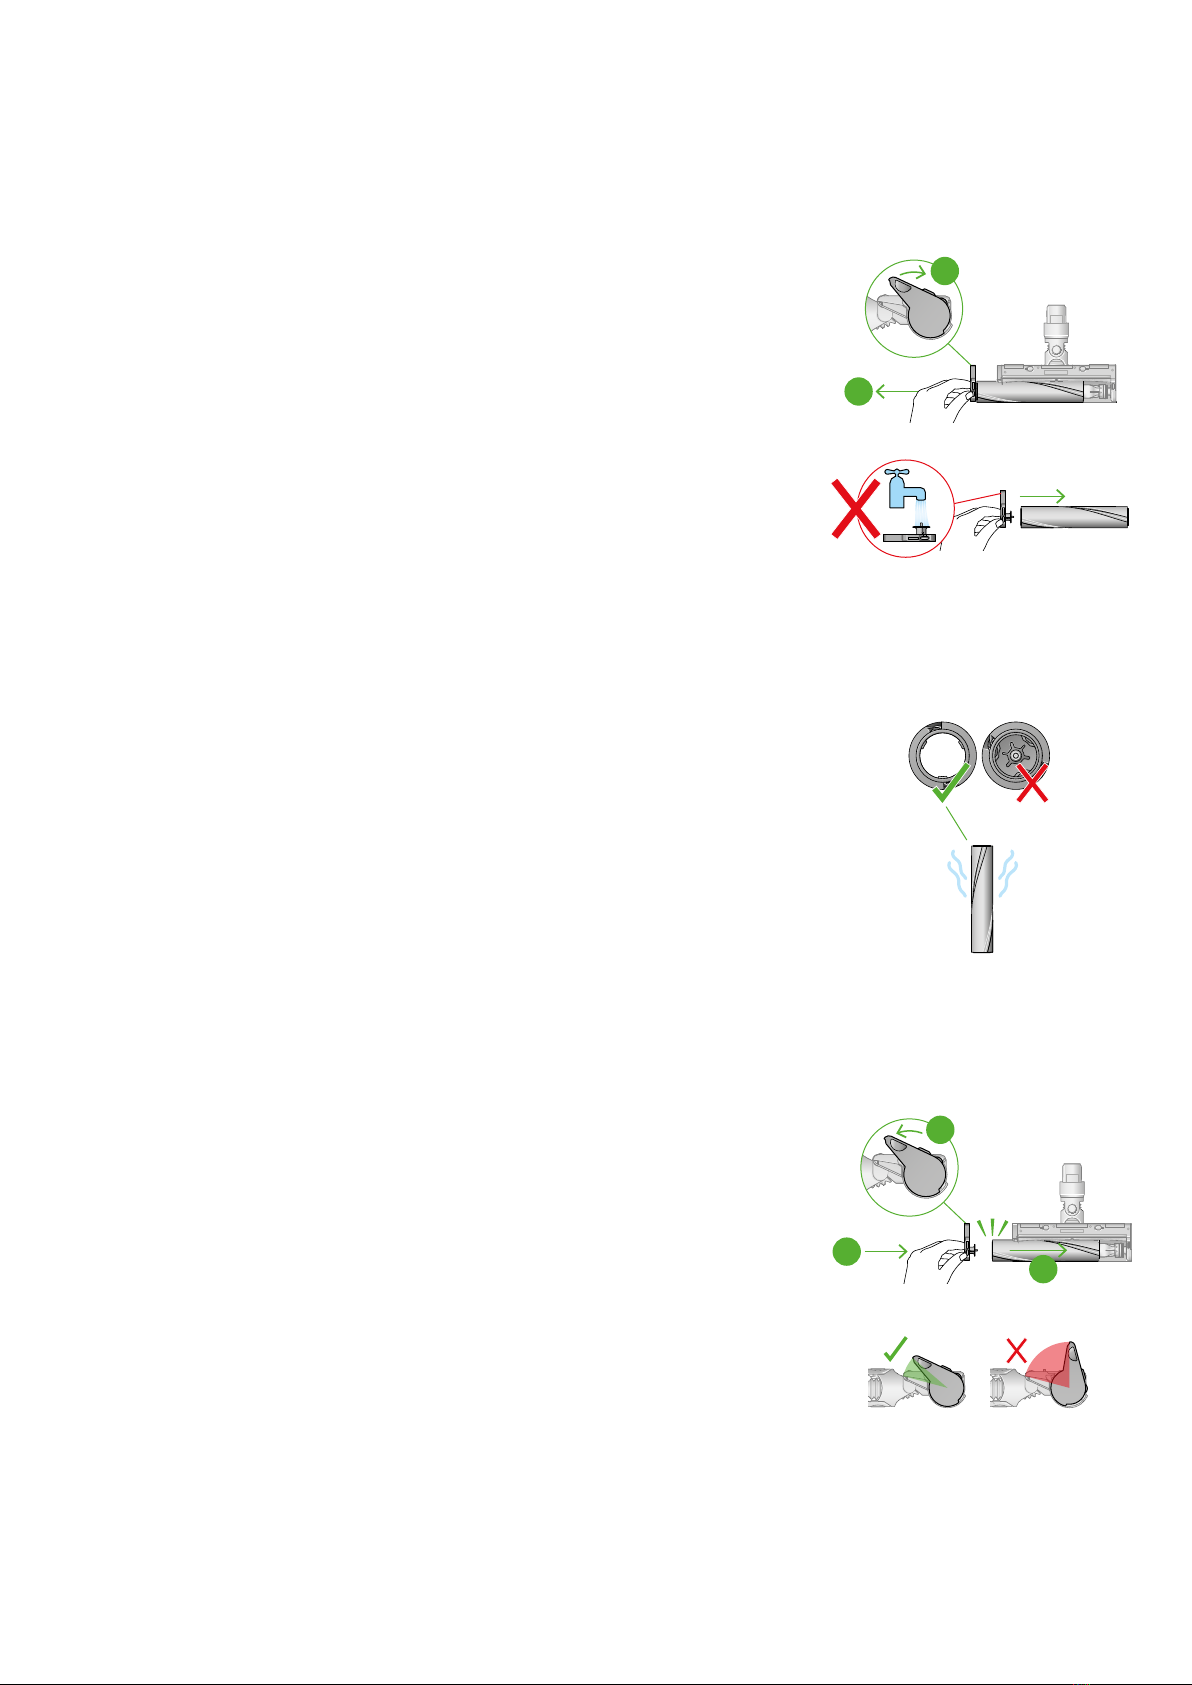
Caring for your floors
Check that the underside of the cleaner head or tool is clean and free from
any objects that may cause damage.
Before vacuuming your flooring, rugs, and carpets, check the manufacturer’s
recommended cleaning instructions.
The brush bar on your machine can damage certain carpet types and floors.
Some carpets will fuzz if a rotating brush bar is used when vacuuming. If this
happens, we recommend vacuuming without the motorised floor tool and
consulting with your flooring manufacturer.
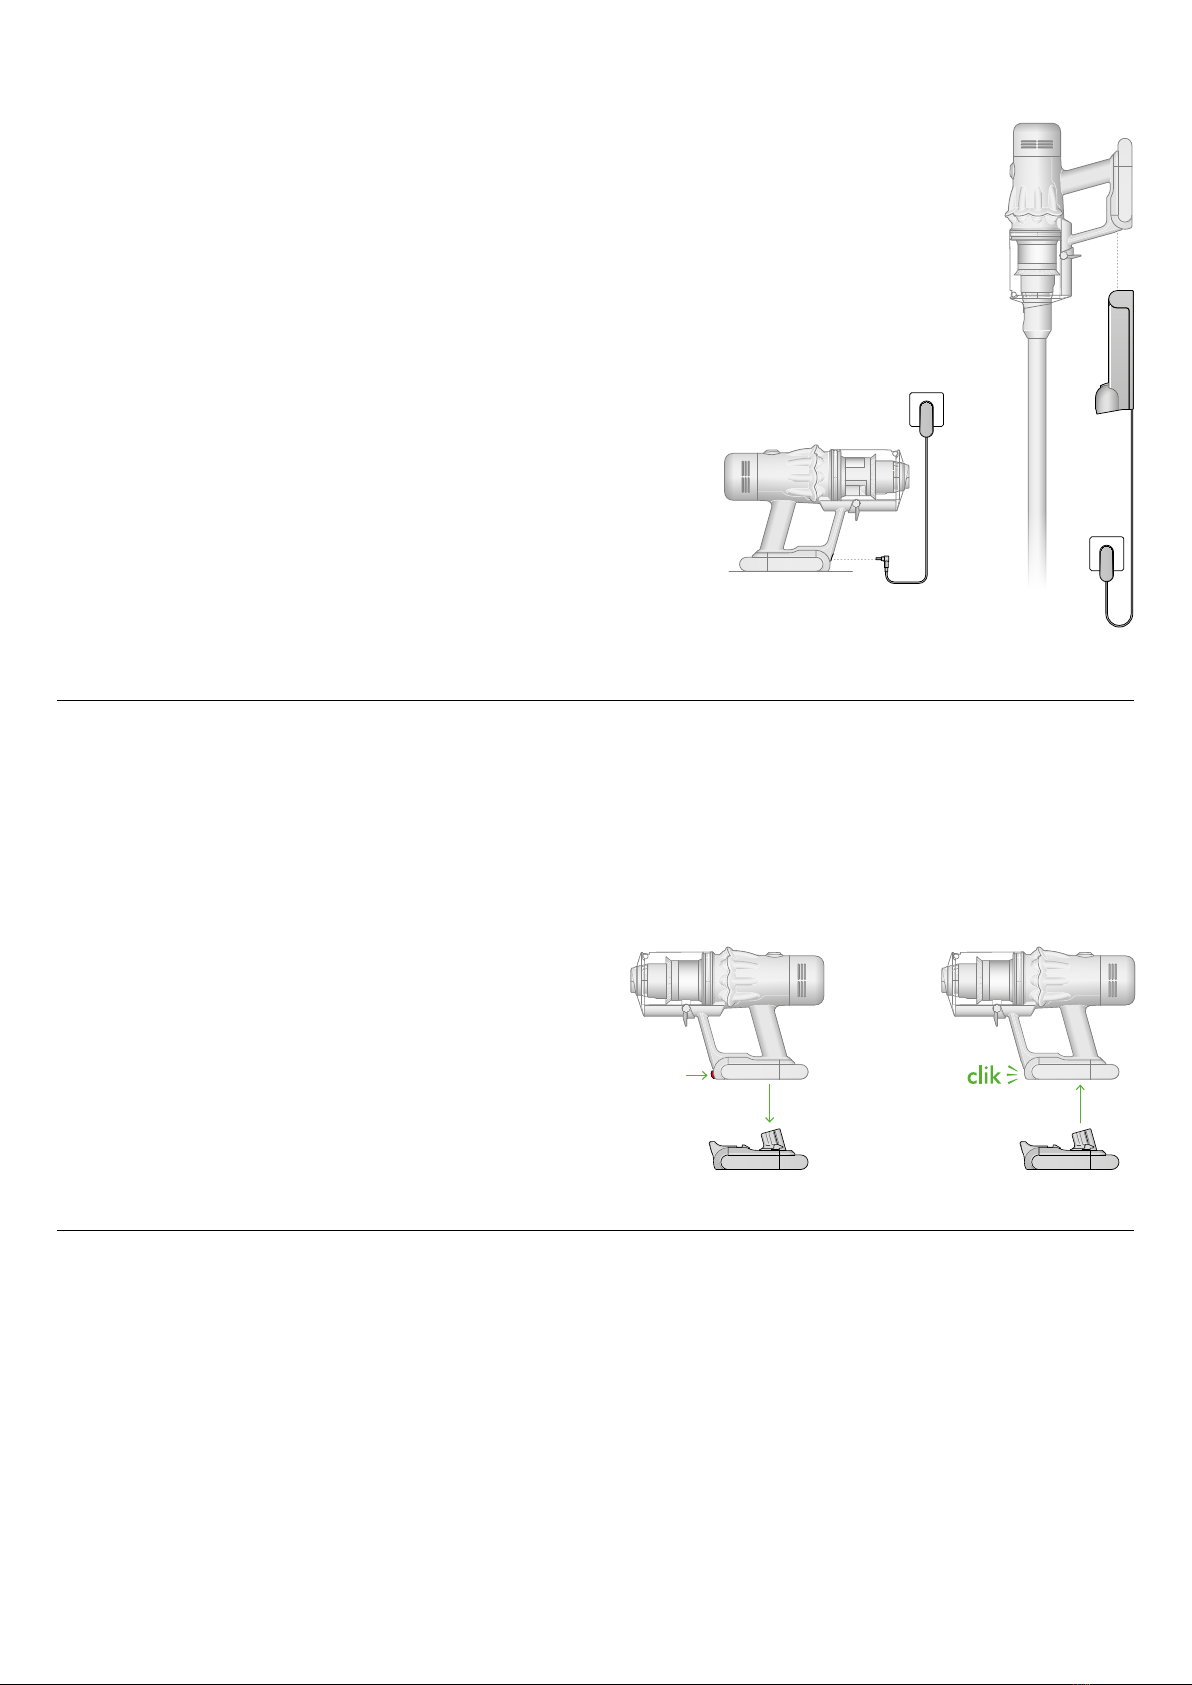
The charger connected from
thepower supply directly
into the front of the battery.
Arrows showing the location of the Battery release button and
the battery coming off the handle when the button is pressed.
The battery is then shown being replaced on the base of the
handle, clicking into place.
The charger connected
from the power supply
using the wall dock.