e-BLEACH infinity User manual

e-BLEACH manual

Table of Contents
Introduction .........................................................................3
General description and warnings .............................................. 3
Introduction.............................................................................. 3
e-BLEACH - infinity .................................................................... 3
e-BLEACH - 10x4....................................................................... 4
Safety instructions ..................................................................... 5
Operation Determinations........................................................... 5
Exclusion of liability: .................................................................. 6
Online resources ........................................................................ 6
Mounting the device .............................................................7
Remove Chip from existing guide ............................................... 7
The original Guide ..................................................................... 7
Push in the hooks to loosening the chip cover................................ 8
Remove the chip cove ................................................................ 8
Prepared guide.......................................................................... 9
Fix the e-BLEACH device by using the cover clip ...................... 10
Cut the clip..............................................................................10
Prepare the clip ........................................................................11
Insert e-BLEACH connector ........................................................12
Insert the clip ..........................................................................12
Prepared Guide ........................................................................13
Fix the e-BLEACH device by using glue (only if no cover clip
present) ................................................................................... 14
Attach e-BLEACH to the Lamp .................................................. 15
Attach Velcro to the Device........................................................15
Attach Velcro to the Lamp .........................................................16
Attach device to the lamp ..........................................................16
Attached device........................................................................17
Using the device .................................................................18
Remove Battery Protection ...................................................... 18
Reset Device (find out how many cycles are left on a 'e-BLEACH -
10x4') ...................................................................................... 19
Renew Device to the next cycle................................................ 20
e-BLEACH - infinity ...................................................................20
e-BLEACH - 10x4......................................................................20
Switch off the lamp or remove the guide from the lamp.................20
1. Press renew button and hold it pressed....................................20
2. Press the reset button shortly while keeping the renew button
pressed...................................................................................21
Finalize the renewal ..................................................................21
Replace Battery........................................................................ 22
Safety warning.........................................................................22
Open battery tray.....................................................................22
Insert CR2025 battery...............................................................23
Battery disposal .......................................................................23
Troubleshooting..................................................................24
Display shows "Replace Guide"................................................ 24
Display shows "Improper Guide" ............................................. 24

Introduction
General description and warnings
In this chapter you can find general information about the e-
BLEACH devices.
Introduction
Every person involved with the installation, operation and
maintanance of this device has to
- be qualified
- follow the instructions of this manual
- consider this manual to be part of the total product
- keep this manual to be part of the total product
- pass this manual on every further owner or user of the product
- download the latest version of the user manual from the Internet
e-BLEACH - infinity
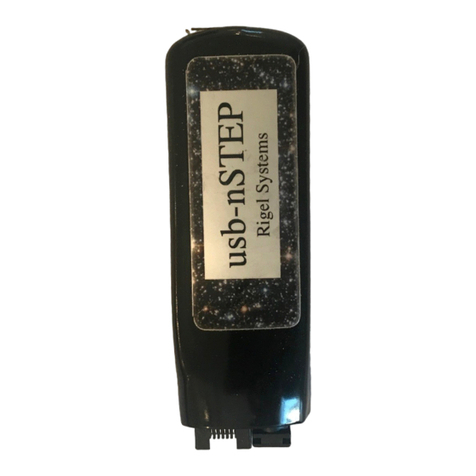
The 'e-BLEACH - infinity' is a replacement chip for the Guide of the
"ZOOM! Advanced Power" bleaching device. It is designed to enable
the lamp for test purposes. It is made in a way where you can
always reset the state of the chip to its four times 15 minutes of
usage. Like this it is possible to always use the Lamp without the
need to always exchange the Guides after using them for 60
minutes.

e-BLEACH - 10x4
The 'e-BLEACH - 10x4' is the little brother of the 'e-BLEACH -
infinity' for occasional users of the UV lamp. It is a lot cheaper but
in the same way limited to nine renew cycles. Like this it is possible
to enable the Lamp for ten hours. IT is also designed for people who
want to test the performance of the chip.

Safety instructions
The device has left our premises in absolutely perfect condition. In
order to maintain this condition and to ensure a safe operation, it is
absolutely necessary for the user to follow the safety instructions
and warning notes written in this user manual.
Keep away from heaters and other heating sources!
If the device has been exposed to drastic temperature fluctuation
(e.g. after transportation), do not switch it on immediately. The
arising condensation water might damage your device. Leave the
device switched off until it has reached room temperature.
Please note that damages caused by manual modifications on the
device or unauthorized operation by unqualified persons are not
subject to warrenty,
Keep away children and amateurs from the device and batteries!
Operation Determinations
Batteries are hazardous waste which need to be disposed of
appropriately. If the device is to be disposed, the batteries have to
be removed first.
Make sure that the poles are correct when inserting the batteries.
Never let batteries lying around openly as there is the danger that
these can be swallowed by children or domestic animals.
Immediately consult a doctor when batteries are swallowed!
Leaking or damaged batteries can cause irritations when getting
into contact with the skin. In this case use appropriate protective
gloves.
Make sure that the batteries cannot be short-circuited, thrown into
the fire and be charged. There is a danger of explosion.
Never put any liquids on the device or close to it. Should any liquid
enter the device nevertheless, disconnect from mains immediately
and remove the batteries. Please let the device be checked by a
qualified service technician before you operate it again. Any
damages caused by liquids having entered the device are not
subject to warranty!
When choosing the installation-spot, please make sure that the
device is not exposed to extreme heat, moisture or dust. There
should not be any cables lying around. You endanger your own and
the safety of others!
Do not operate the device in extremely hot (more than 35° C) or
extremely cold (less than 5° C) surroundings. Keep away from
direct insulation (particularly in cars) and heaters.
Operate the device only after having familiarized with its functions.
Do not permit operation by persons not qualified for operating the
device. Most damages are the result of unprofessional operation!
If the device will not be used for a longer period of time, remove
the batteries in order to avoid battery leakage.

Never use solvents or aggressive detergents in order to clean the
device! Rather use a soft and damp cloth.
Please consider that unauthorized modifications on the device are
forbidden due to safety reasons!
If this device will be operated in any way different to the one
described in this manual, the product may suffer damages and the
guarantee becomes void. Furthermore, any other operation may
lead to dangers like short- circuit, burns, electric shock, etc.
Exclusion of liability:
We are not liable for any property damage or damage to persons.
This device is designed only for test purposes or demonstration.
Online resources
On the website http://www.e-bleach.com you will find always the
newest version of this manual in the PDF format and additional
video tutorials.
Check out the website and feel free to contact us via e-Mail to

Mounting the device
Remove Chip from existing guide
In this section it is explained how you prepare your Guide to work
with an e-BLEACH chip
The original Guide
Your original Guide contains a microchip on a circuidboard which
has to be replaced with the e-BLEACH connectorboard.

Push in the hooks to loosening the chip cover
The circuitboard is held into the guide by a little cover which is
clipped into the guide. This cover can be removed by firmly pressing
against the hook which is marked in the picture (there are two
hooks - one on each side of the chip)
Remove the chip cove

Turn around the Guide to finally remove the cover by sliding a
screwdriver in the gap and lift the cover.
Prepared guide
Now you have your guide ready to insert the e-Bleach connector
board.

Fix the e-BLEACH device by using the cover clip
There are several ways to finally fix your e-BLEACH device in the
plastic of an existing Guide.
The best way to do this is by using the removed cover clip like
explained in this section.
Cut the clip
Use Scissors or a side cutter to cut the clip you removed before into
two pieces.

Prepare the clip
Take the plastic cover you removed before from the guide and cut it
with a tool like a (saw; side cutter; cutting wheel; scissors; etc)
in two pieces like illustrated in the image. The important piece is the
part having the hooks.

Insert e-BLEACH connector
Insert the connector board of the e-BLEACH device like displayed in
the picture.
Insert the clip
Clip in the left over piece of the plastic cover clip. It should go all
the way in and hold the connector board firmly inside the Guide.

Prepared Guide
Now the device should look like in the above picture and be ready
to be connected to the Lamp.

Fix the e-BLEACH device by using glue (only if no cover
clip present)
If you lost your cover clip or it was broken during the preperation
process you can also fix the connector board of the e-BLEACH
device using any kind of glue.
Just insert the connector board inside the guide and fix it by putting
glue to the marked locations and let it dry. The connector board
needs to hold firmly inside the plastic to assure the faultiless use of
the e-BLEACH chip.

Attach e-BLEACH to the Lamp
Attach Velcro to the Device
Attach one part of the Velcro pad included in the package to the
device.

Attach Velcro to the Lamp
The matching Velcro pad needs to be fixed on the downside of the
Lamp. You can position it using the e-BLEACH device to match the
cable length.
Attach device to the lamp
From now on you can attach and detach the e-BLEACH device easily
to the Lamp.

Attached device
The picture shows the Lamp with the properly mounted e-BLEACH
chip.

Using the device
Remove Battery Protection
Before using the e-BLEACH device the battery safer foil has to be
removed.
For storage and unwanted battery discharging the battery is
protected by foil which has to be removed before the chip can be
used. Just pull out the foil and press the RESET button on the
device. If you want to preserve your battery at times, where you
don't use the Lamp you can put the foil back in by removing the
Battery and slide it in covered from the foil. This step (reprotecting
the battery) should not be necessary.

Reset Device (find out how many cycles are left on a 'e-
BLEACH - 10x4')
To see how many sessions are left on a 'e-BLAECH - 10x4' just
press the reset button short and see the red LED.
After pressing the reset button the LED will first doubleflash. Then it
will flash as many times as you can renew the device. Like this you
can count the flashes and check how many cycles are left on the
device. On a new device this will be nine times.
When the device was renewed nine times you will only see the
doubleflash and the renewal will not be possible anymore.

Renew Device to the next cycle
Reading "REPLACE GUIDE" in the display after using it for four
sessions requieres a renew procedure which is described in this
manual chapter.
e-BLEACH - infinity
Having the 'e-BLEACH - infinity' you can renew your device as often
as you like. Even if you only used the device for one session you
can always renew it to the full four sessions.
e-BLEACH - 10x4
Please be aware that the renewal process will decrement the
amount of cycles you have left on your device.
For security reasons you cannot loose a cycle if you do the renewal
process twice. But as soon you used the chip for at least one minute
with every renewal process you will loose the time and sessions still
available of your current cycle.
Switch off the lamp or remove the guide from the lamp
If you want to be safe please switch off the lamp or detach the
guide from the head of the lamp during the renewal process.
1. Press renew button and hold it pressed
This manual suits for next models
1
Table of contents
Popular Controllers manuals by other brands
Homematic IP
Homematic IP HmIP-BSM Installation instructions and operating manual
E-Transcontrol
E-Transcontrol TCM920 Configuration manual
Paratec
Paratec TE Series user manual
Davey
Davey Torrium2 Installation and operating instructions
Collamat
Collamat C9100 Technical handbook
DH Instruments
DH Instruments MOLSTIC-S Installation sheet
