E-Boda Sunny V38 User manual

Sunny V38 1 www.e-boda.ro
Languages
English. . . . . . . . . . . . . . . . . . . . . . . . . . . . . . . . . . . . . . . . . .2
Romanian. . . . . . . . . . . . . . . . . . . . . . . . . . . . . . . . . . . . . . .15
Bulgarian. . . . . . . . . . . . . . . . . . . . . . . . . . . . . . . . . . . . . . .28
Hungarian. . . . . . . . . . . . . . . . . . . . . . . . . . . . . . . . . . . . . .42

Sunny V38 2 www.e-boda.ro
Smartphone Sunny V38
Quick Start Guide

Sunny V38 3 www.e-boda.ro
DO NOT OPEN COVER TO PREVENT RISK OF ELECTRIC SHOCK.
NOT INCLUDED PARTS THAT CAN BE REPAIRED BY THE USER.
FOR SERVICE CONSULT QUALIFIED PERSONNEL.
Symbol with lightning flash with arrowhead, within an equilateral triangle is
intended to alert the user to the presence of uninsulated dangerous voltage
inside the product that may be of sufficient magnitude to constitute a risk of
electric shock.
Exclamation point within an equilateral triangle is intended to alert the user
to the presence instructions for use and maintenance (servicing) instructions
in the literature accompanying the appliance.
WARNING
TO PREVENT THE RISK OF FIRE OR ELECTRIC SHOCK, DO NOT EXPOSE THIS
UNIT TO RAIN OR MOISTURE.
CAUTION
TO PREVENT RISK OF ELECTRIC SHOCK, MAKE SURE THE PLUG IS
INSERTED INTO THE WALL OUTLET.

Sunny V38 4 www.e-boda.ro
IMPORTANT SECURITY MEASURES
All leadless product offered by our company are in conformity with the
European Law Directive about the Restriction of Hazardous Substances
(RoHS), meaning that our production processes and products are strictly
„leadless” and withour the hazardous substances mentioned in the
directive.
The cut sign on the garbage bin symbolizes that within the European
Uniunion the product must be recycled separately at the end of its life. This
applies to your product and all other periferics marked with this symbol. Do
not dispose of these products as unsorted garbage. Contact your local
dealer for recycling procedures for this equipment.
LEGAL STATEMENTS
We reserve the reight to modify or eliminate any content in this manual at any momrent. We do not
guarantee and assume any legal liability or responsibility for the accuracy, completeness or use of this
manual. The content of this manual can be modified without any notice in advance.
The screenshots used in this manual are for illistrative purpose only and can not be representative for
the real product.
RECOMMENDATIONS
•AVOID DUSTY LOCATIONS: Excessive dust accumlation may cause malfunctions.
•DO NOT EXPOSE TO MOISTURE: Exposing the unit to water presents a high risc of
electrocution.
•DO NOT DROP OR SUBJECT TO SHOCK: Dropping the product might damage the internal
components.
•DO NOT OPEN THE COVER: Inside are pieces that cannot be fixed by the user.
TRADEMARKS
Android™ is a trademark registered by Google.
Microsoft™ and Windows™are trademarks registered by Microsoft Corporation.
Author rights © of all applications belong to their specific owners.
Sunny V38 5 www.e-boda.ro
Getting Started
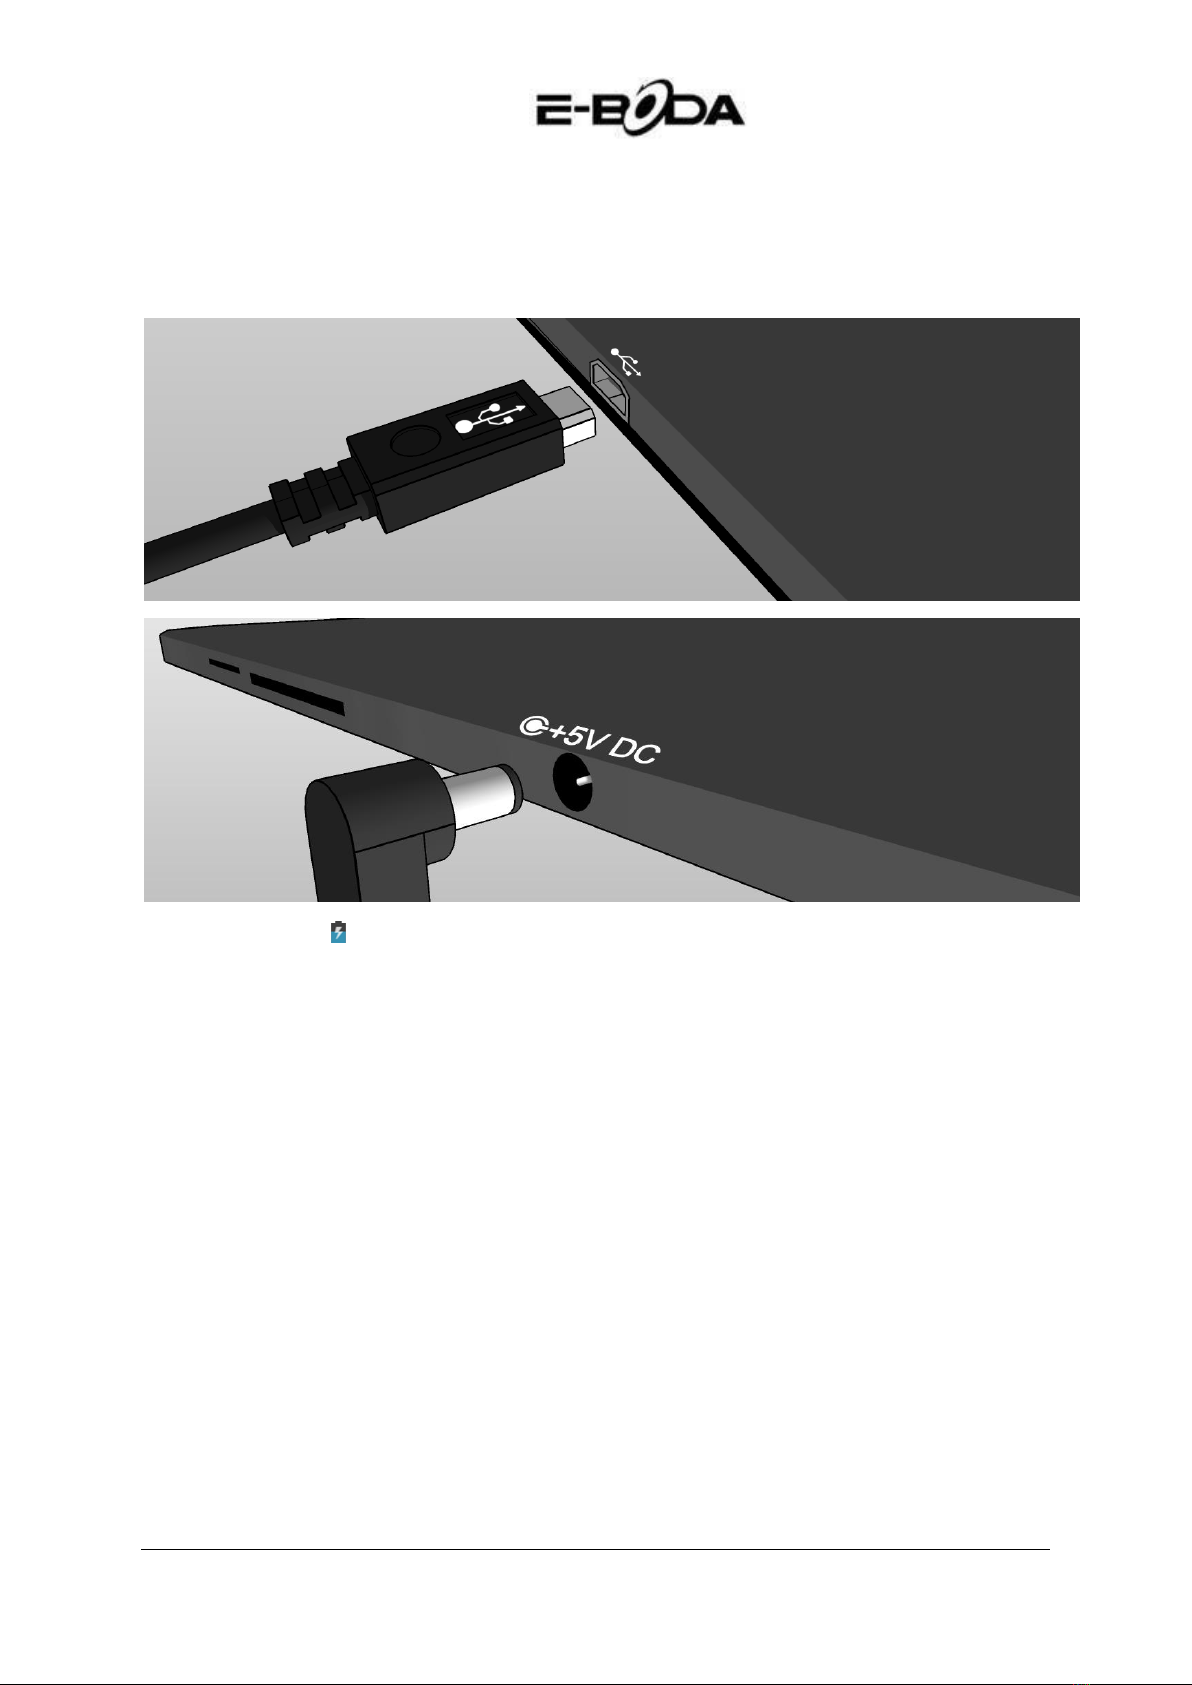
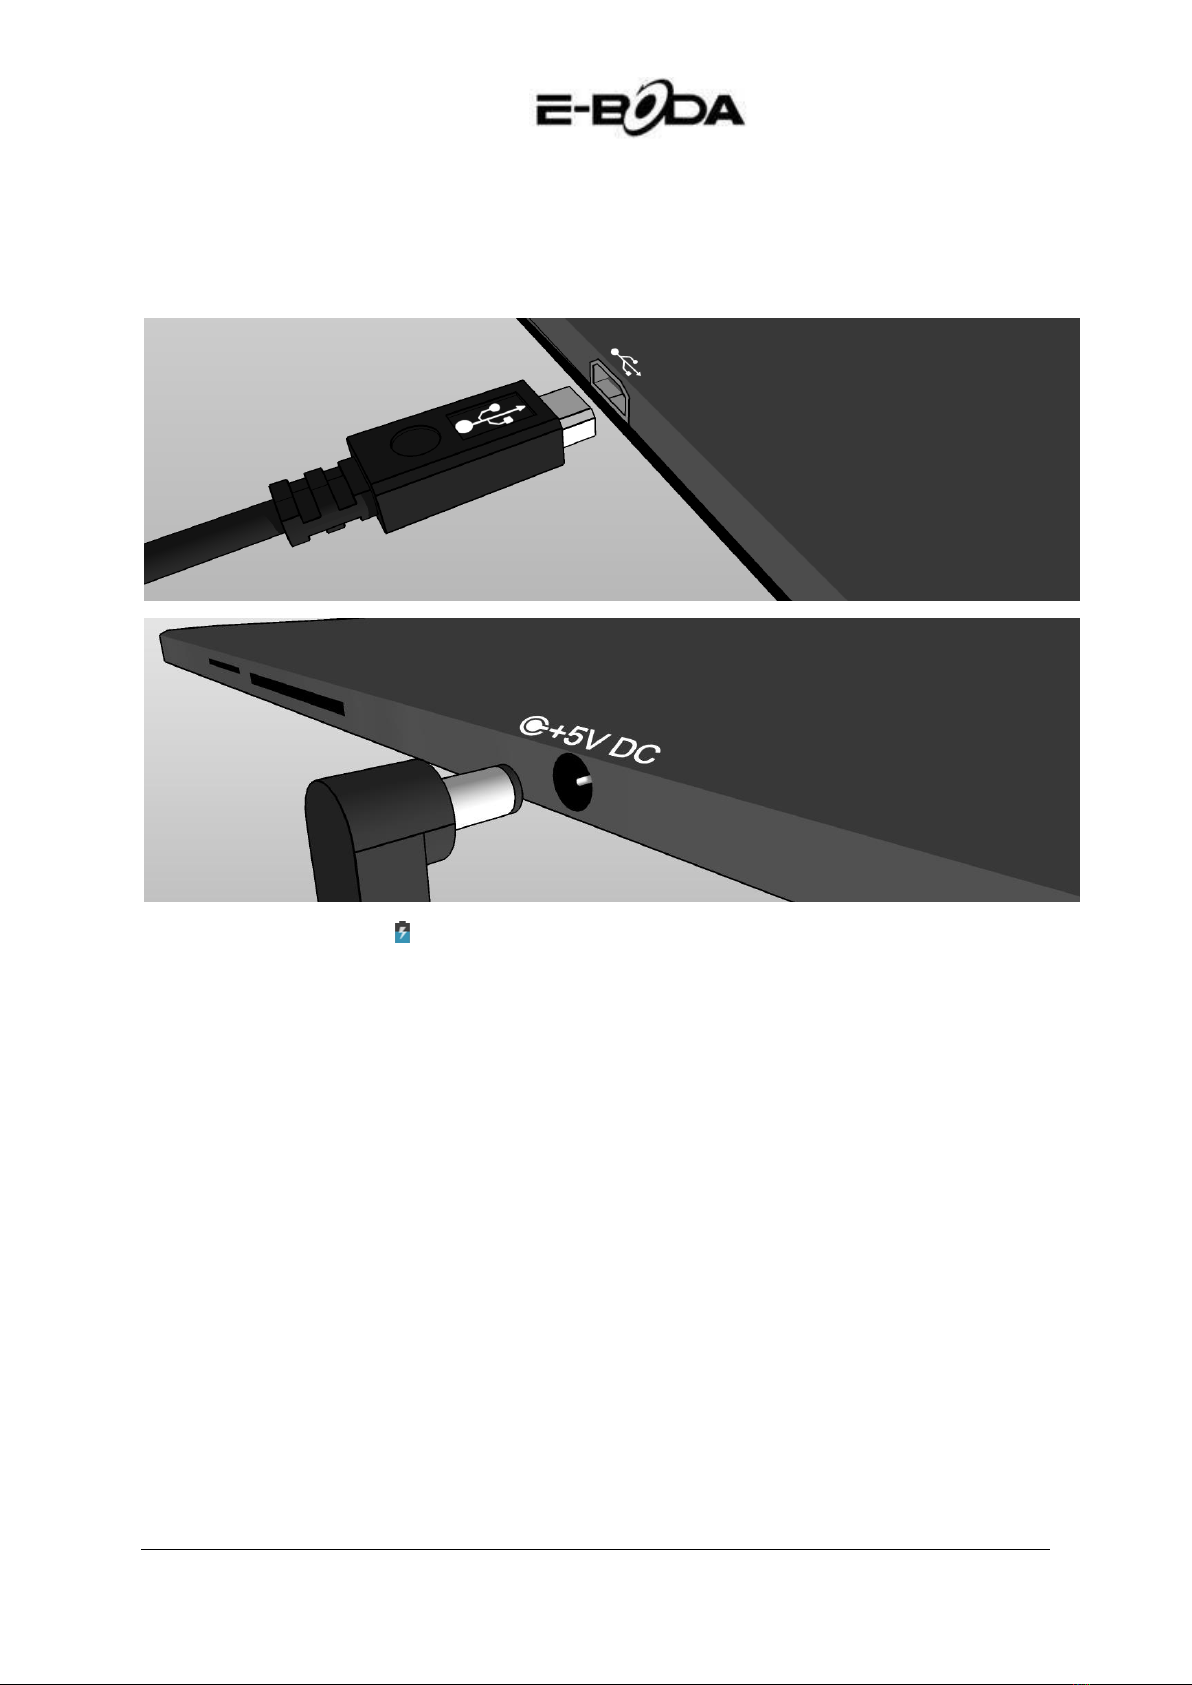
1. Charge your smartphone by plugging in the power adapter into an electrical outlet and
connecting the cable to the USB/Power Port. You can also charge your device or transfer
data to your device by connecting the USB cord to a computer’s USB port.
2. A charging icon ( ) in the center of your Smartphone screen indicates that the battery is
charging. When the battery is fully charged, the charge indicator will turn green.
Tip: You can use your device while it charges.
3. Power your Smartphone on by pressing and holding the power button. After your device
starts up, you can open “User’s Guide” placed on the Home screen to help familiarize you
with your Smartphone’s capabilities.
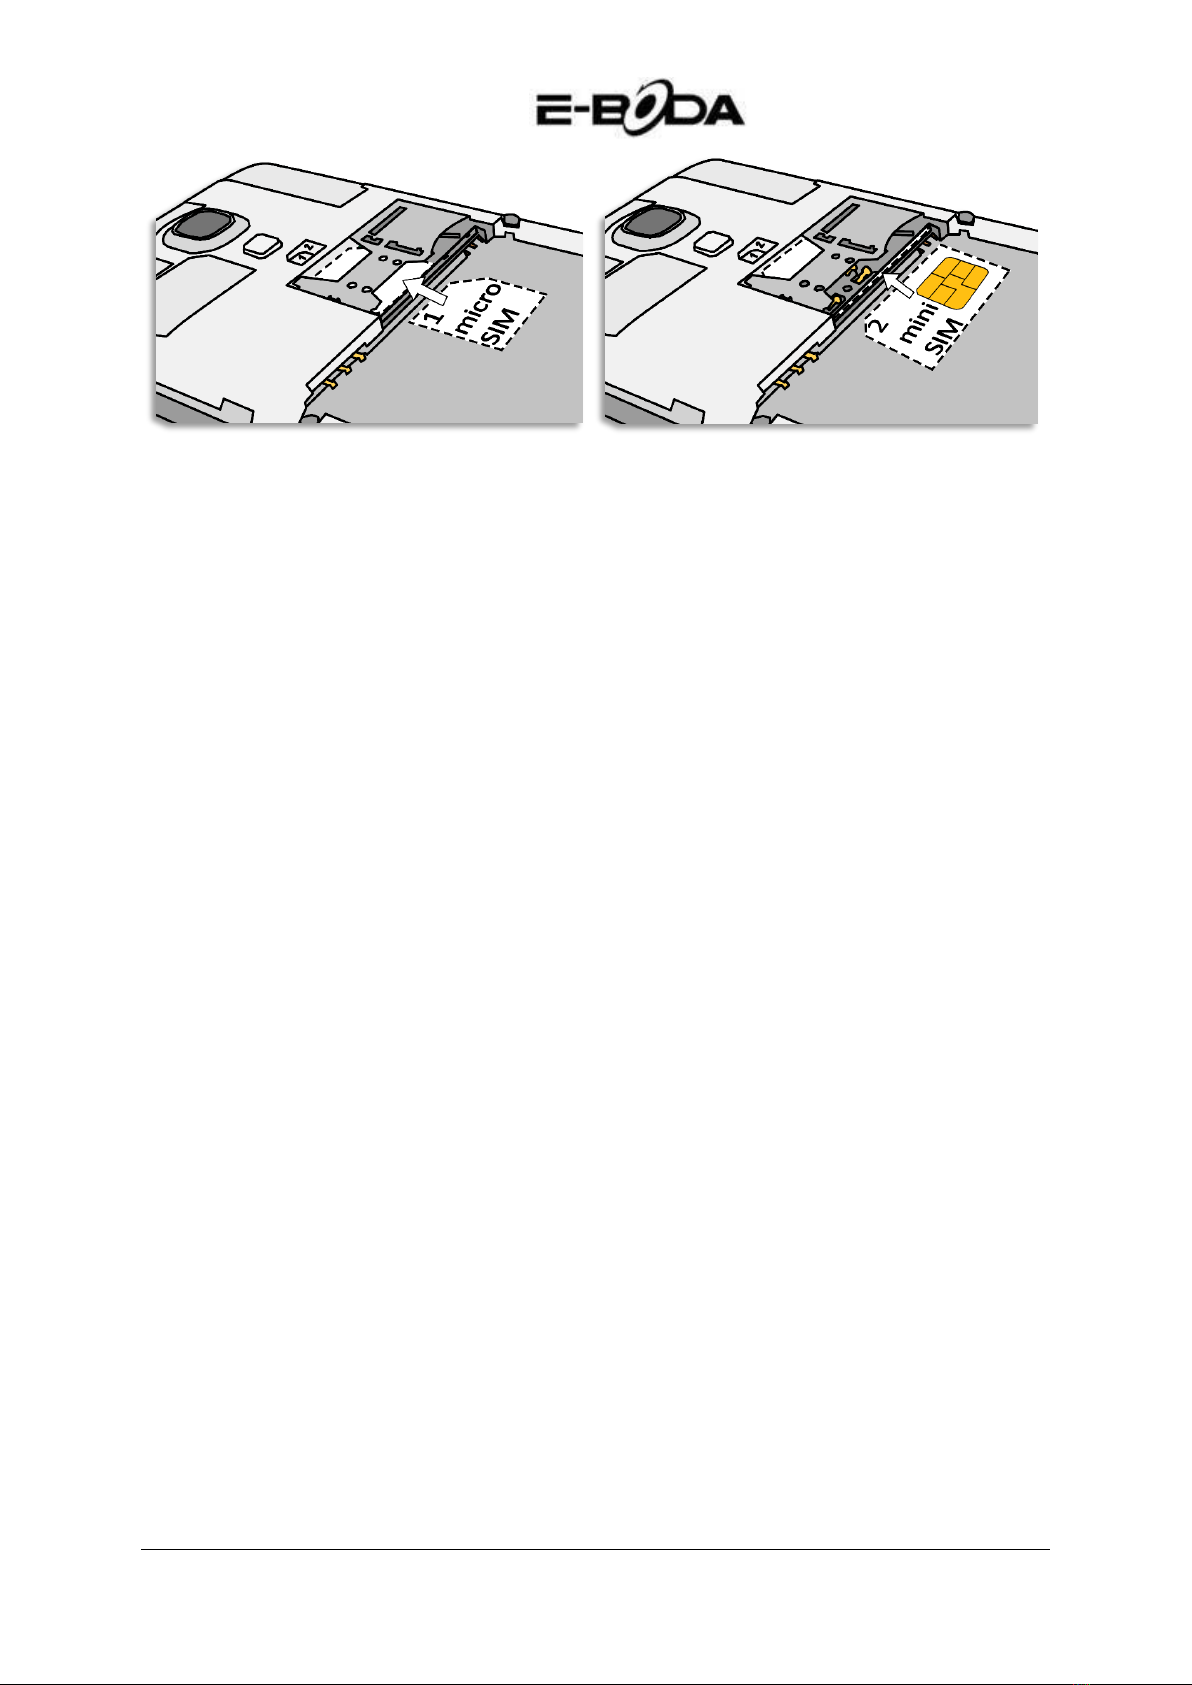
Inserting your miniSIM, microSim and microSD cards
Important: Use standard microSIM and miniSIM only.
1. With your finger, open the back cover from the bottom. Gently detach the back cover
from the bottom and sides to remove it.
2. Remove the battery first before inserting the miniSIM or microSIM.
Sunny V38 6 www.e-boda.ro
3. With the microSIM card’s gold contacts facing down and its cut-off corner facing right,
insert it into the microSIM card slot and push it completely inside the slot.
4. With the miniSIM card’s gold contacts facing up and its cut-off corner facing left, insert it
into the miniSIM card slot and push it completely inside the slot.
5. You can insert your microSD card into the storage card slot with its gold contacts facing
down and push it in until it clicks into place.
6. Reinsert the battery.
7. To replace the back cover, align it onto the top part of the phone, and press the sides and
the bottom part of the cover to lock it into place.
Charge the battery
The battery in your phone hasn’t been charged yet. Please use the supplied power adapter
to do a full charge before you start using you phone. Also, please don’t try to take your
phone apart. (If you do, it may invalidate your warranty.)

Sunny V38 7 www.e-boda.ro
Getting around
ITEM
INFO
1 - DISPLAY
The screen of your device
2 - FRONT SPEAKER
Used in calls
3 - CAMERA
Front camera
4 - VOLUME UP
Turns up the speaker volume
5 - VOLUME DOWN
Turns down the speaker volume
6 - OPTIONS
Options menu button
7 - HOME BUTTON
Displays the Home Screen
8 - BACK
Retraces your steps
9 - APP DRAWER
Opens the “All applications” menu
10 - POWER SWITCH
Powers on, sleeps or wakes your Smartphone when
pressed
11 - FLASH
Lights up when taking pictures
12 - SPEAKER
Main speaker
13 - USB PORT
Micro USB port - connects your device to PC / battery
charging port
14 - 3.5mm JACK
Audio input / output port
15 - CAMERA
Back camera
16 - MICROPHONE
Audio input

Sunny V38 8 www.e-boda.ro
Getting connected
All Smartphone devices have Wi-Fi connectivity built-in and also include 3G connectivity.
Your smartphone includes 3G connectivity, you should check the “Access Point Names”
under “Mobile networks” after tapping the “More…” menu under “Wireless and networks”
category in “Settings”. You can find the APN (Access Point Names) settings on our website
or on your network operator’s website. If you see any solid bars in the network status
indicator ( ) in the upper right corner of your Smartphone screen, your device is already
connected to the internet.
If your device is Wi-Fi-only, or you would like to set up a Wi-Fi connection for your Wi-Fi and
3G capable device, follow the steps below.
1. Press the Home button on your device, then the App Drawer button.
2. Navigate to “Settings” and select it from the list.
3. Select “Wi-Fi”, slide the “OFF” switch to the right until it displays “ON” and it will display
available networks.
4. Select a public or private Wi-Fi network. Private networks are shown with a lock icon and
will require you to enter a password.
Getting registered
You can easily register your device to a Gmail account by following the steps below:
1. Navigate to “Settings”.
2. Scroll down to the “Accounts” section and select “Add account”.
3. Select “Google” in the popup menu that appeared.
4. If you do not have an account, select “New”. If you already have an account skip to step 9
in this list.
5. Enter your first and last name in the required fields and tap the right arrow.
6. The “Choose username” menu will appear. Write your desired username in the text field
and tap the right arrow. If the username is not available you will be able to try another
username and even choose from a list of suggestions. After selecting a new username tap
“Next”.
7. Create a password for your account and re-type it in the second field. Tap the right arrow
to continue.
8. Add recovery information for your account: a security question and a recovery email
address.

Sunny V38 9 www.e-boda.ro
9. You will be prompted to join Google+, a socialization network. You can skip this step and
join at a later time, since it is not mandatory to set up an account.
10. You will be prompted to set up Google Wallet and add your credit card information. You
can skip this step since it is not mandatory to set up an account.
11. In the Backup you can choose to back up your Smartphone data to you Google Account.
Tap the right arrow after making your decision. This is the final step in setting up your
Google Account.
Tip: To install new apps open the App Drawer, select “Google Play Store” from the list and
search for the desired app in the “Search” field.
Contacting us
For support questions, troubleshooting, or help with your Smartphone, please contact E-
Boda Customer Service.
Online: www.e-boda.ro/e-boda-service-center
E-mail: [email protected]
Phone: 031.4253.775 - Mobile: 0724.282.258 (charges will apply).
Additional information
The Smartphone User’s Guide is available on http://e-boda.ro/download.

Sunny V38 10 www.e-boda.ro
Limited warranty
This warranty for the Smartphone Device is provided by E-Boda Distribution S.R.L. on Str.
Oxigenului nr. 2B, com. Cernica, Jud. Ilfov, Romania. The provider of this warranty is
sometimes referred to herein as in “we”.
We warrant the Device against the defects in materials and workmanship under ordinary
consumer use for two years from the date of original retail purchase. During this warranty
period, if a defect arises in the Device, and you follow the instructions returning the Device,
we will, at our option and to the extent permitted by law, either (i) repair the Device using
either new or refurbished parts, (ii) replace the Device using either new or refurbished
parts, or (iii) refund you to all or part of the purchase price of the Device. This limited
warranty applies to any repair, replacement part or replacement Device for the remainder
of the original warranty period. All replaced parts and Devices for which a refund is given
shall become our property. This limited warranty applies only to the hardware components
of the Device that are not subject to accident, misuse, neglect, fire or external causes,
alterations, repair or commercial use.
Instructions. For specific instructions about how to obtain warranty service for your Device,
please contact Customer Service using the contact information provided in this guide. In
general, you will need to deliver your Device for Warranty service, it is your responsibility to
back up any data, software, or other materials you may have stored or preserved on your
Device. It is possible that such data, software or other materials will be lost or reformatted
during service, and we will not be responsible for any such damage or loss.
Environmental requirements:
Operating ambient temperature: 0˚C to 35˚C.
Storage temperature (turned off): -10˚C to 45˚C.
Relative humidity: 5% to 95% noncondensing.
Temperatures and conditions of use. Operate the device where the temperature is
between 0˚C and 35˚C. Low or high temperature conditions might temporarily shorten
battery life. Store the device where the temperature is between -10˚C and 45˚C. Don’t leave
the device in your car, because the temperatures in parked cars can exceed this range.
When using the device or charging the battery, it is normal for it to get warm. The exterior
of the device functions as a cooling surface that transfers heat from inside the device to the
cooler air outside.
Conditions and activities that may cause the device to alter performance and behavior
include:
Leaving the device in a car on a hot day.
Leaving the device in direct sunlight for an extended period of time.
Using certain features in hot conditions or direct sunlight for an extended period of
time, such as GPS tracking or navigation in a car, or playing a graphics-intensive
game.

Sunny V38 11 www.e-boda.ro

Sunny V38 12 www.e-boda.ro
Specifications E-Boda Sunny V38
Hardware
CPU
Manufacture
Mediatek
Model
MT 6572
Type
Cortex™-A7 Dual Core
Architecture
ARM
Frequency
1.2Ghz
GPU
PowerVR™
mali400
RAM
DDR 2
512M
ROM
4G intern
WI-FI
802,11 B/G/N
3G WCDMA Band
2100MHz/900MHz
SIM slot to be selected according
to the service.
2G GSM Band
850/900MHz/1800MHz/1900MHz
Data Segment
HSDPA, HSUPA
G Sensor
3 axis
Bluetooth
Version
4,0
Profile
AVRCP, A2DP, SPP, DUN, OPP
Display
Type
IPS LCD 3,75" (9,52cm)
Resolution
480*800px, 240DPI (WVGA 5/3)
Touch
5 Points
Structure
G+G
Back lighting
LED Technology
Power
*Battery
Capacity
3,7V / 1000mAh (3,70Wh)
3G Call
330 Minutes
* Range in ideal conditions
2G Call
420 Minutes
ST/BY
Up to 5 days (120 hours)
Adapter
220V AC/50-60Hz --- 5V DC 1000mA
Socket & Connector
USB port
Compatible to ver. 2.0/1.1
TF Card
Up to 32G
Earphone jack 3,5"
Up to 32Ω
Camera
Frontala
Hardware
VGA, 0,3M, 640x480px
Principala
Hardware
3.2M, 2048x1536px
* The battery lasting depends on the user settings, usage and charge cycle.
The device performance depends on user installed applications.
Software
OS
Android™ 4.2
Searching engine
Installed
Video support
H.264, VC-1, MPEG-2, MPEG4, XviD/DivX, Real
8\9\10, AVI, RM, RMVB, PMP, FLV, MP4, M4V, VOB, WMV,
3GP, MKV
Audio support
MP3,WMA,WAV,OGG,FLAC,ALAC,APE,AAC,AC-3
Sunny V38 13 www.e-boda.ro
Picture support
JPEG,GIF,PNG,BMP
Office support
DOC/XLS/PPT/PDF/TXT
Games support
OpenGL 2.0
E-mail
Exchange, IMAP, POP3, SMTP
CE marking is a mandatory conformity mark for products placed on the market in
the European Economic Area. CE Marking on a product ensures that the product
complies with the essential requirements of the applicable EC directives.
This product is marked with distinctive selective sorting electronic waste. This
symbol indicates that the product should be supported by a system of selective
collection of waste according to EU Directive 2002/96/EC, so that it can be
recycled or dismantled to minimize environmental impact.
Attention! Electronic products unsorted selectively affect the environment and human health,
as they may contain hazardous substances.
BATTERIES:
Attention!
It is forbidden to throw batteries in the trash. Dispose of used batteries recycling centers.
Incorrect use of batteries may cause leakage or corrosion.
Do not install batteries in the wrong direction.
It is dangerous to charge / strike / open or short-circuit the batteries.
Do not leave used batteries in the product.
If you do not use the product longer, remove the batteries. Change the batteries when the
clock is not working properly.
If you spill battery fluid inside the product clean and replace the batteries.
The batteries contained in the package does not contain heavy metals.
ROHS (Restriction on Hazardous Substances). This directive is a
regulation that was implemented on July 1, 2006 and relates to
restrictions on the marketing of products and electrical and electronic
equipment containing hazardous substances such as lead, hexavalent
chromium, cadmium, polibromatul biphenyl (PBB), diphenyl ethers polibromuratiat (PBDE).

Sunny V38 14 www.e-boda.ro
Smartphone Sunny V38
Ghid de pornire rapida
Sunny V38 15 www.e-boda.ro
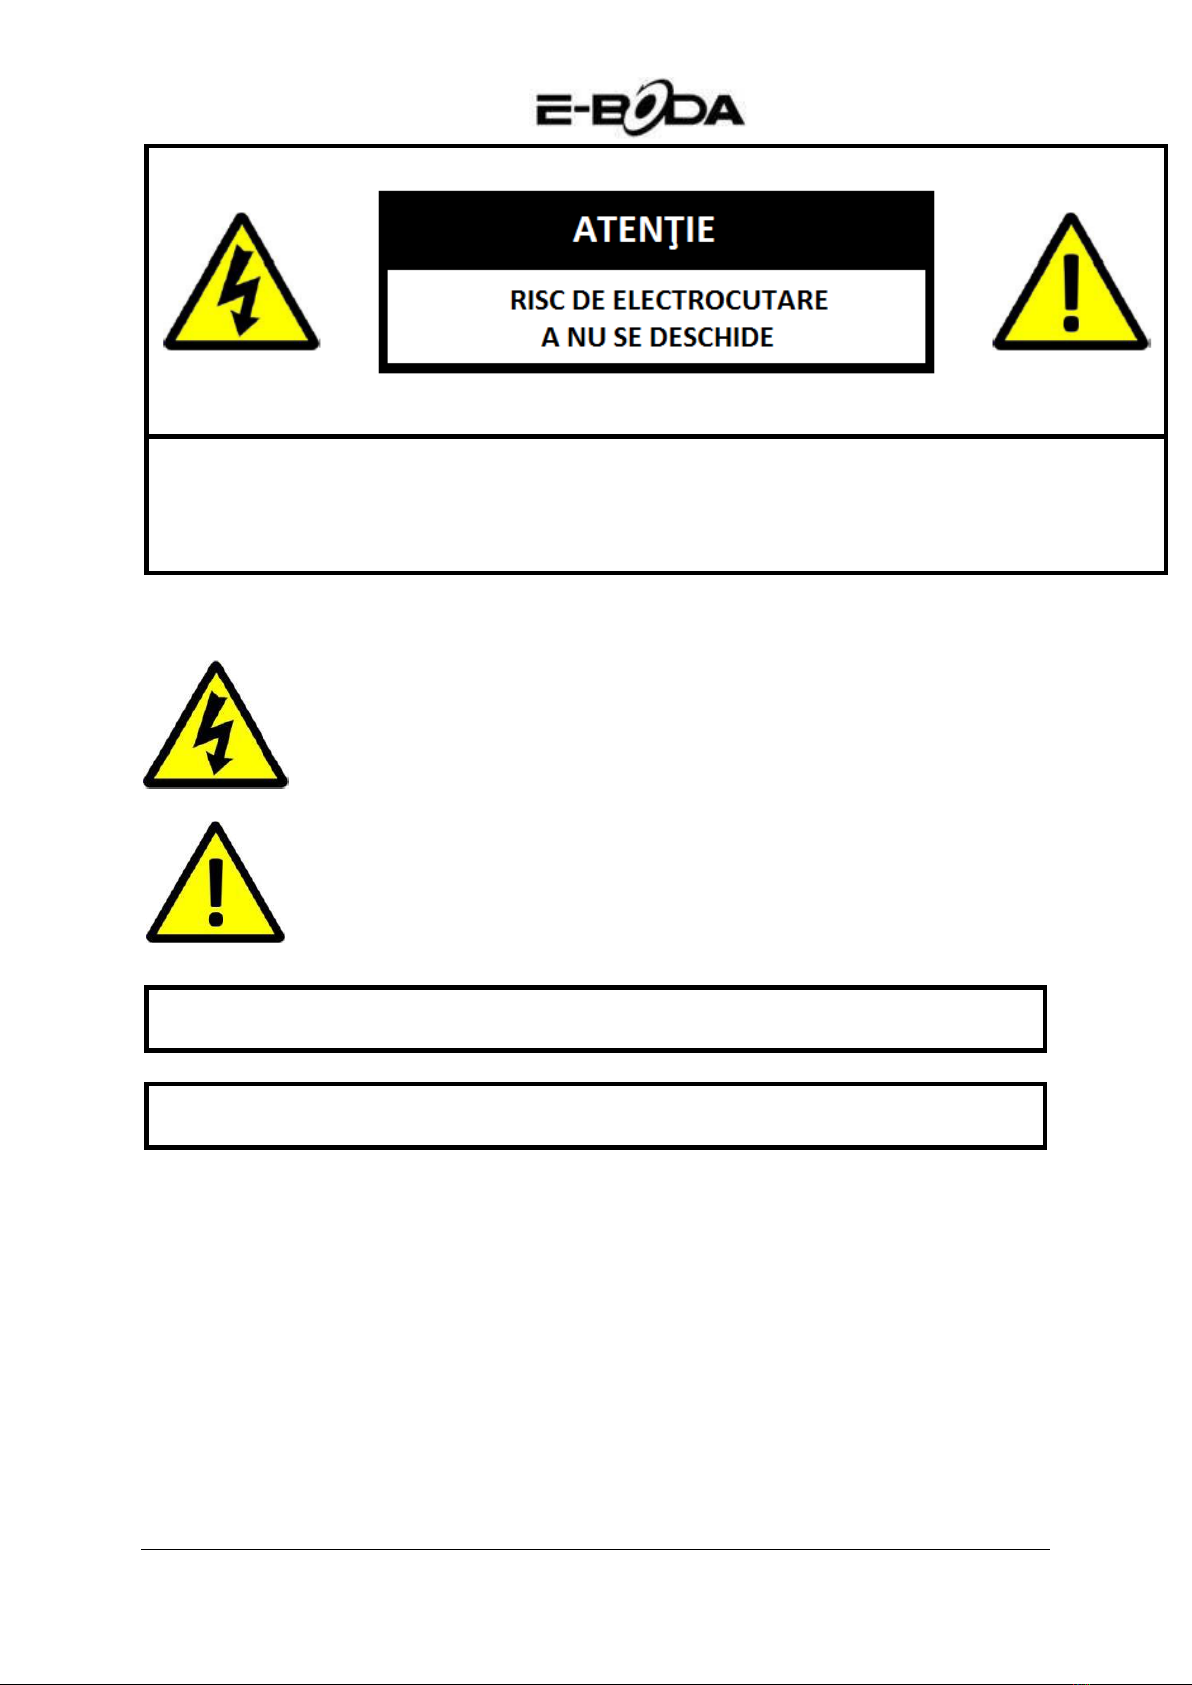
A NU SE DESCHIDE CAPACUL PENTRU A PREVENI RISCUL UNUI ȘOC ELECTRIC.
NU SUNT INCLUSE PIESE CARE POT FI DEPANATE DE CĂTRE UTILIZATOR.
ADRESAȚI-VĂ PERSONALULUI CALIFICAT PENTRU SERVICE.
Simbolul cu fulger cu vârf de săgeată, încadrat într-un triunghi echilateral,
are scopul de a alerta utilizatorul cu privire la prezența unei tensiuni
periculoase neizolate în interiorul produsului care pot fi de o valoare
suficientă pentru a constitui un risc de electrocutare.
Punctul de exclamație din interiorul triunghiului echilateral are rolul de a
alerta utilizatorul despre prezența instrucțiunilor de utilizare și de întreținere
(service) în literatura care însoțește aparatul.
AVERTIZARE:
PENTRU A PREVENI PERICOLUL DE INCENDIU SAU DE ELECTROCUTARE,
NU EXPUNEȚI UNITATEA LA PLOAIE SAU UMEZEALĂ.
ATENȚIE:
PENTRU A PREVENI RISCUL DE ŞOC ELECTRIC, ASIGURAȚI-VĂ CĂ
ȘTECHERUL ESTE INTRODUS ÎN PRIZA PRINCIPALĂ.
Sunny V38 16 www.e-boda.ro
MĂSURI IMPORTANTE DE PROTECȚIE
Toate produsele fără plumb oferite de companie sunt în conformitate cu
cerințele din Directiva Legii Europene privind Restricția Substanțelor
Periculoase (RoHS), ceea ce înseamnă că procesele noastre de producție și
produsele sunt strict ”fără plumb” și fără substanțele periculoase
menționate în directivă.
Semnul tăiat de pe recipientul pentru deșeuri simbolizează că în cadrul
Uniunii Europene, produsul trebuie reciclat separat la sfârșitul duratei de
viață a produsului. Acest lucru se aplică produsului dvs. și oricăror periferice
marcate cu acest simbol. Nu aruncați aceste produse ca deșeuri municipale
nesortate. Contactați dealerul dvs. local pentru procedurile de reciclare
pentru acest echipament.
PRECIZĂRI LEGALE
Ne rezervăm dreptul de a modifica sau elimina orice conținut din acest manual în orice moment. Nu
garantăm și nu ne asumăm nicio răspundere juridică sau responsabilitate pentru acuratețea,
completitudinea sau utilitatea acestui manual. Conținutul acestui manual se poate modifica fără
notificare prealabilă.
Capturile de ecran sunt prezentate doar în scop ilustrativ și nu pot fi reprezentative pentru produsul
real.
RECOMANDĂRI
•A SE EVITA LOCAȚIILE PRĂFOASE: Acumularea excesivă de praf poate cauza nefuncționarea
unității
•A NU SE EXPUNE LA UMEZEALĂ: Expunerea unității la apă prezintă un risc ridicat de
electrocutare.
•A NU SE SCĂPA PRODUSUL: Scăparea produsului ar putea defecta componentele interne.
•A NU SE DESCHIDE CARCASA: În interior nu sunt piese care pot fi depanate de către utilizator.
MENȚIONĂRI MARCĂ COMERCIALĂ
Android™ este marcă comercială Google.
Microsoft™ și Windows™ sunt mărci înregistrate ale Microsoft Corporation.
Drepturile de autor © ale tuturor aplicațiilor aparțin de proprietarii acestora.
Sunny V38 17 www.e-boda.ro
Pornire
1. Incarcati Smartphone-ul prin introducerea incarcatorului in priza si conectarea mufei de
incarcare in portul de incarcare/portul USB al Smartphone-ului. De asemenea Smartphone-
ul dvs. se poate incarca si transfera date prin conectarea la portul USB al unui computer.
2. O iconita de incarcare ( ) in centrul ecranului Smartphone-ului indica incarcarea. Cand
acumulatorul este incarcat complet, indicatorul se va umple complet.
Sfat: Puteti folosi Smartphone-ul in timp ce se incarca.
3. Porniti Smartphone-ul prin apasarea butonului de pornire timp de maxim 5 secunde.
Dupa ce porneste, puteti deschide ghidul utilizatorului (“User’s Guide”) prezent pe ecranul
de pornire pentru a va familiariza cu produsul.
Inserarea cartelelor microSIM si miniSIM
Important: Folositi doar cartele microSIM si miniSIM standard.
1. Folosind degetul, deschideti carcasa din spate de jos. Detasati usor carcasa de la baza si
din parti pentru a o detasa.
2. Inlaturati bateria inainte de introducerea SIM-urilor.

Sunny V38 18 www.e-boda.ro
3. Introduceti cartela microSIM in slotul 1 cu contactele aurite in jos si coltul taiat in dreapta.
4. Introduceti cartela miniSIM in slotul 2 cu contactele aurite in sus si coltul taiat in stanga.
5. Puteti insera un card microSD in slotul dedicate cu contactele aurite in jos.
6. Reinserati bateria.
7. Pentru a atasa carcasa, aliniati-o in partea de sus a telefonului si apasati in parti si la baza
pana face click si se aseaza in loc.
Incarcati bateria
Bateria din telefonul dvs. nu a fost inca incarcata. Folositi alimentatorul din pachet pentru a
efectua o incarcare completa a telefonului inainte de utilizare. De asemenea, va rugam sa nu
incercati sa demontati telefonul. (Facand asta puteti pierde garantia.)

Sunny V38 19 www.e-boda.ro
Familiarizare
ITEM
INFO
1 - DISPLAY
Ecranul smartphone-ului
2 - DIFUZOR FRONTAL
Utilizat in apeluri
3 - CAMERA
Camera frontal
4 - VOLUME +
Mareste volumul audio
5 - VOLUME -
Micsoreaza volumul audio
6 - OPTIUNI
Deschide meniu optiuni
7 - HOME
Pagina personala
8 - INAPOI
Revenire la ecranul anterior
9 - APLICATII DESCHISE
Afiseaza aplicatiile deschise
10 - POWER
Buton de pornire, oprire si stand-by
11 - FLASH
Folosit in aplicatia “Camera”
12 - DIFUZOR
Difuzor principal
13 - PORT USB
Port micro USB - conectare la computer / incarcare
acumulator
14 - JACK 3.5mm
Port de intrare/iesire audio
15 - CAMERA
Camera spate
16 - MICROFON
Intrare sunet

Sunny V38 20 www.e-boda.ro
Conectare
Toate Smartphone-urile au conectivitate Wi-Fi si 3G incorporate
Daca Smartphone-ul dvs. include conectivitate 3G, ar trebui sa verificati setarile retelei
mobile: in setari deschideti meniul “Mai multe...” din categoria “Wireless si retele”, dupa
care selectati “Retele mobile”, “Numele punctelor de acces” si adaugati setarile APN.
Acestea pot fi gasite pe websitul nostru sau pe cel al operatorului de retea al cartelei
folosite. Daca apar bari solide in indicatorul de status al retelei ( ) in coltul din dreapta sus
al Smartphone-ului, atunci e deja conectata la internet.
Daca Smartphone-ul dvs. are decat Wi-Fi sau doriti sa conectati Smartphone-ul 3G la o retea
Wi-Fi, urmariti pasii de mai jos:
1. Apasati butonul “Home”, dupa care butonul “Meniu aplicatii”.
2. Selectati “Setari” din lista deschisa.
3. Alegeti “Wi-Fi”, trageti de bara gri spre dreapta si se va face albastra, dupa care vor fi
afisate retelele disponibile.
4. Selectati o retea Wi-Fi publica sau privata. Retelele private au un lacat langa iconita de
semnal si necesita introducerea unei parole.
Inregistrare
Va puteti inregistra cu usurinta Smartphone-ul la un cont Gmail urmarind pasii de mai jos:
1. Intrati in “Setari”.
2. Sub categoria “Conturi” selectati “Adaugati un cont”.
3. Alegeti “Google” din lista deschisa.
4. Daca nu aveti deja un con, selectati “Nou”. Daca deja aveti un cont, cititi pasul 9 din
aceasta lista.
5. Introduceti prenumele si numele in campurile de text, dupa care atingeti sageata din
dreapta.
6. S-a deschis meniul “Alegeti un nume de utilizator”. Scrieti numele dorit in campul pentru
text si continuati. Daca numele de utilizator nu este disponibil puteti incerca altul si chiar
alege dintr-o lista de sugestii. Dupa alegerea unui nume de utilizator atingeti sageata din
dreapta.
7. Creati o parola pentru cont si rescrieti parola in al doilea camp. Apasati sageata din
dreapta pentru a continua.
8. Adaugati informatii de recuperare pentru cont: o intrebare de securitate si o adresa de
mail pentru recuperare.
Other manuals for Sunny V38
1
Table of contents
Languages:
Other E-Boda Cell Phone manuals


