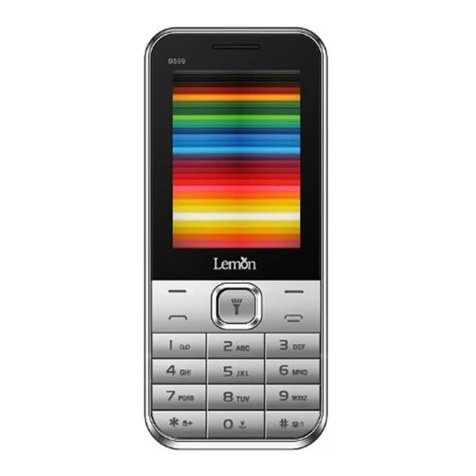
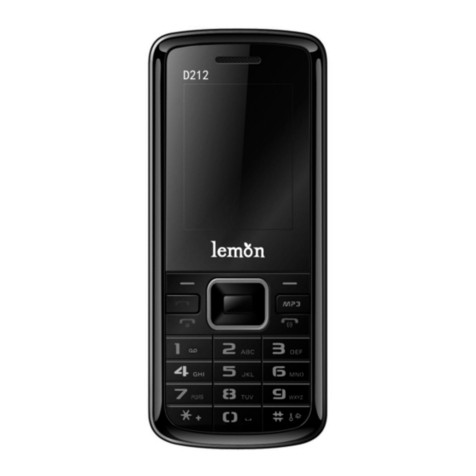
Lemon B189 User manual

Lemon B189
User Manual

Page 2
@2014. All rights are reserved. No part of this document may be reproduced
without permission. All trademarks and brand names mentioned in this
publication are property of their respective owners.
While all efforts have been made to ensure the accuracy of all contents in this
manual, we assume no liability for errors or omissions or statements of any
kind in this manual, whether such errors or omissions or statements resulting
from negligence, accidents, or any other cause. The contents of this manual
are subject to change without notice.
Protect our environment! We strive to produce products in compliance with
global environmental standards. Please consult your local authorities for
proper disposal.
Note: User’s Manual is Just to guide the user about the functionality of the
phone. This does not seem any certificate of technology. Some functions may
vary due to modifications and up gradations of software or due to print
mistake.
SAFETY PRECAUTIONS

Page 3
Before using your phone, please read the following important information to
eliminate or reduce any possibility of causing damage and personal injury
Do not use wireless phones while driving.
Switch off wireless devices in aircraft. The signal may cause interference.
Using them on aircraft is illegal.
Do not use mobile phones where blasting is in progress.
Follow regulations and rules strictly.
Do not use mobile phones at a refueling point.
Don’t use near fuel or chemicals
Follow regulations or rules in hospital and health care facilities.
Switch phone off near medical equipment.
All wireless devices may get interference that could affect performance.
Only qualified service personnel can install or repair this device.
Use only approved accessories and batteries.
Use only in normal conditions.
Do not expose your phone to extreme high temperatures above
+60°(+140°F). Do not use anything static to clean your phone.
Ensure the phone is turned on and in service.
Enter the emergency number, then press Pick Up key.
Give your location. Do not end the call until told to do so.

Page 4
Improper use will invalidate the warranty! These safety instructions also apply
to original accessories.
a) Use a wireless hands-free system (headphone, headset) with a low power
Blue tooth emitter.
b) Make sure the cell phone has a low SAR.
c) Keep your calls short or send a text message (SMS) instead. This advice
applies especially to children, adolescents and pregnant women.
d) Use cell-phone when the signal quality is good.
e) People having active medical implants should preferably keep the cell
phone at least 15 cm away from the implant.

Page 5
Table of Contents
1Welcome ......................................Error! Bookmark not defined.
2Know Your Phone ..................................................................... 8
2.1 Insert SIM Card 8
2.2 Insert SIM Card 8
2.3 Insert Memory Card 8
3Basic Operations ...................................................................... 9
3.1 Switch Phone ON/OFF 9
3.2 Unlock the phone 9
3.3 Make a call 9
3.4 Choose User Profiles 9
4Notable Features .................................................................... 10
4.1 Secure your Phone 10
4.2 Blacklist and Whitelist 10
4.3 Manage Your Files 10

Page 6
4.4 Connect to Internet 11
5Phonebook ............................................................................. 11
5.1 Add New Contacts 11
5.2 Send SMS 11
5.3 Call a Contact 11
5.4 Delete Contacts 12
5.5 Delete multiple contacts 12
5.6 Delete Phone contacts 12
5.7 Delete SIM1 contacts 12
5.8 Delete SIM2 contacts 12
5.9 Move contacts 12
5.10 Add to Blacklist 13
5.11 Import/Export Contacts 13
5.12 Send vCard 13
5.13 Others 13
5.14 Groups 14
6Messages................................................................................ 14
6.1 Write message 14
6.2 Use message Templates 14
6.3 Voice mail server 14
6.4 Settings 15
6.5 Delete all 15

Page 7
6.6 Message capacity 15
7Call logs ..................................................................................15
8Settings .................................................................................. 16
9Multimedia............................................................................. 16
9.1 Camera 16
9.2 Video Recorder 17
9.3 Image Viewer 17
9.4 Audio player 17
9.5 Video player 18
9.6 Voice Recorder 18
9.7 FM radio 18
9.8 Games 18
10 File Manager .......................................................................... 19
11 Organizer................................................................................19
11.1 Calendar 19
11.2 Alarm 19
11.3 Calculator 19
11.4 Flashlight 19
11.5 Bluetooth 19
11.6 World clock 19
12 Services ..................................................................................20
13 Lemon Twist ...........................................................................20

Page 8
1
1
K
Kn
no
ow
w
Y
Yo
ou
ur
r
P
Ph
ho
on
ne
e
1
1.
.1
1
I
In
ns
se
er
rt
t
S
SI
IM
M
C
Ca
ar
rd
d
The B189 is a Dual SIM mobile phone allowing you to use two SIM Cards.
1. Switch off the mobile phone and remove the rear cover and battery.
2
2.
.2
2
I
In
ns
se
er
rt
t
S
SI
IM
M
C
Ca
ar
rd
d
1. Insert the SIM card correctly in the SIM slot(s).
2. Finally, insert the battery and replace the rear cover of the mobile
phone.
2
2.
.3
3
I
In
ns
se
er
rt
t
M
Me
em
mo
or
ry
y
C
Ca
ar
rd
d
1. Switch off the phone and remove the rear cover and the battery.
2. Insert the memory card into the slot.
3. Finally, insert the battery and the rear cover of the mobile phone.
Incompatible cards may damage the slot or corrupt the data stored in the
card.

Page 9
3
3
B
Ba
as
si
ic
c
O
Op
pe
er
ra
at
ti
io
on
ns
s
3
3.
.1
1
S
Sw
wi
it
tc
ch
h
P
Ph
ho
on
ne
e
O
ON
N/
/O
OF
FF
F
To switch ON/OFF your phone, press and hold the End key for a few
seconds.
3
3.
.2
2
U
Un
nl
lo
oc
ck
k
t
th
he
e
p
ph
ho
on
ne
e
If you do not use the phone for a while, the screen is replaced with a
locked screen.
1. Press any key to activate the screen.
2. Press Left key, and then press * key.
3
3.
.3
3
M
Ma
ak
ke
e
a
a
c
ca
al
ll
l
You can make a call in the following ways:
Enter the desired number in standby mode and press the
Call key to make the call.
Go to Menu > phonebook and then select and dial the
desired number.
Just press the Call key to dial the contacts listed in Call logs.
You can also dial a contact from the messages.
3
3.
.4
4
C
Ch
ho
oo
os
se
e
U
Us
se
er
r
P
Pr
ro
of
fi
il
le
es
s
M
Me
en
nu
u>
>
S
Se
et
tt
ti
in
ng
gs
s>
>
P
Pr
ro
of
fi
il
le
es
s

Page 10
You can choose your profile such as silent mode, Normal, Meeting,
Outdoor, Earphone and so on.
4
4
N
No
ot
ta
ab
bl
le
e
F
Fe
ea
at
tu
ur
re
es
s
4
4.
.1
1
S
Se
ec
cu
ur
re
e
y
yo
ou
ur
r
P
Ph
ho
on
ne
e
M
Me
en
nu
u
>
>
S
Se
et
tt
ti
in
ng
gs
s
>
>
S
Se
ec
cu
ur
ri
it
ty
y
>
>
P
Ph
ho
on
ne
e
L
Lo
oc
ck
ke
ed
d
Let you lock/unlock your phone via a security password which you can
change anytime.
The default security code to unlock the phone is 0000.
Note: After you activate the phone lock, you would be asked for a
password when you power on your phone next time.
4
4.
.2
2
B
Bl
la
ac
ck
kl
li
is
st
t
M
Me
en
nu
u
>
>
S
Se
et
tt
ti
in
ng
gs
s
>
>
S
Se
ec
cu
ur
ri
it
ty
y
>
>
B
Bl
la
ac
ck
kl
li
is
st
t
Blacklist undesired SMS senders and caller so that you do not receive
SMS and calling from them.
4
4.
.3
3
M
Ma
an
na
ag
ge
e
Y
Yo
ou
ur
r
F
Fi
il
le
es
s
M
Me
en
nu
u
>
>
F
Fi
il
le
e
M
Ma
an
na
ag
ge
er
r
You can view and manage your files available in the phone or memory
card from the gallery. You can rename, view details, move, delete files

Page 11
and so on via the File manager
4
4.
.4
4
C
Co
on
nn
ne
ec
ct
t
t
to
o
I
In
nt
te
er
rn
ne
et
t
M
Me
en
nu
u
>
>
S
Se
et
tt
ti
in
ng
gs
s>
>C
Co
on
nn
ne
ec
ct
ti
io
on
ns
s
You can connect to the Internet via GPRS connection.
To identify network data automatically based on your SIM card.
5
5
P
Ph
ho
on
ne
eb
bo
oo
ok
k
Your phonebook stores all your saved contacts for anytime use. Your
phonebook data can be stored in your SIM card or your phone memory.
You can manage your contacts from here.
M
Me
en
nu
u
>
>
P
Ph
ho
on
ne
eb
bo
oo
ok
k
5
5.
.1
1
A
Ad
dd
d
N
Ne
ew
w
C
Co
on
nt
ta
ac
ct
ts
s
M
Me
en
nu
u
>
>
p
ph
ho
on
ne
eb
bo
oo
ok
k>
>
L
Le
ef
ft
t
K
Ke
ey
y
>
>
N
Ne
ew
w
5
5.
.2
2
S
Se
en
nd
d
S
SM
MS
S
M
Me
en
nu
u
>
>
p
ph
ho
on
ne
eb
bo
oo
ok
k
>
>
O
OK
K
K
Ke
ey
y
>
>W
Wr
ri
it
te
e
m
me
es
ss
sa
ag
ge
e
>
>
S
SM
MS
S
5
5.
.3
3
C
Ca
al
ll
l
a
a
C
Co
on
nt
ta
ac
ct
t
M
Me
en
nu
u
>
>
p
ph
ho
on
ne
eb
bo
oo
ok
k
>
>
O
OK
K
K
Ke
ey
y
>
>
C
Ca
al
ll
l>
>V
Vo
oi
ic
ce
e
c
ca
al
ll
l
Allow you to make a call to the contact you are viewing. Or you can just
highlight a number and press the Call key.

Page 12
5
5.
.4
4
D
De
el
le
et
te
e
C
Co
on
nt
ta
ac
ct
ts
s
M
Me
en
nu
u
>
>
p
ph
ho
on
ne
eb
bo
oo
ok
k
>
>
O
OK
K
K
Ke
ey
y>
>
D
De
el
le
et
te
e
I
In
n
t
th
he
e
C
Co
on
nt
ta
ac
ct
ts
s
l
li
is
st
t,
,
s
se
el
le
ec
ct
t
t
th
he
e
e
en
nt
tr
ry
y
y
yo
ou
u
w
wa
an
nt
t
t
to
o
d
de
el
le
et
te
e.
.
5
5.
.5
5
D
De
el
le
et
te
e
m
mu
ul
lt
ti
ip
pl
le
e
c
co
on
nt
ta
ac
ct
ts
s
M
Me
en
nu
u
>
>
p
ph
ho
on
ne
eb
bo
oo
ok
k
>
>O
OK
K
K
Ke
ey
y>
>
D
De
el
le
et
te
e
m
mu
ul
lt
ti
ip
pl
le
e
I
In
n
t
th
he
e
C
Co
on
nt
ta
ac
ct
ts
s
l
li
is
st
t,
,
s
se
el
le
ec
ct
t
t
th
he
e
e
en
nt
tr
ry
y
y
yo
ou
u
w
wa
an
nt
t
t
to
o
d
de
el
le
et
te
e.
.
5
5.
.6
6
D
De
el
le
et
te
e
P
Ph
ho
on
ne
e
c
co
on
nt
ta
ac
ct
ts
s
M
Me
en
nu
u
>
>
p
ph
ho
on
ne
eb
bo
oo
ok
k
>
>
O
OK
K
K
Ke
ey
y>
>
D
De
el
le
et
te
e
P
Ph
ho
on
ne
e
I
In
n
t
th
he
e
C
Co
on
nt
ta
ac
ct
ts
s
l
li
is
st
t,
,
s
se
el
le
ec
ct
t
t
th
he
e
e
en
nt
tr
ry
y
y
yo
ou
u
w
wa
an
nt
t
t
to
o
d
de
el
le
et
te
e
i
in
n
p
ph
ho
on
ne
e.
.
5
5.
.7
7
D
De
el
le
et
te
e
S
SI
IM
M1
1
c
co
on
nt
ta
ac
ct
ts
s
M
Me
en
nu
u
>
>
p
ph
ho
on
ne
eb
bo
oo
ok
k
>
>
O
OK
K
K
Ke
ey
y>
>
D
De
el
le
et
te
e
S
SI
IM
M1
1
I
In
n
t
th
he
e
C
Co
on
nt
ta
ac
ct
ts
s
l
li
is
st
t,
,
s
se
el
le
ec
ct
t
t
th
he
e
e
en
nt
tr
ry
y
y
yo
ou
u
w
wa
an
nt
t
t
to
o
d
de
el
le
et
te
e
i
in
n
S
SI
IM
M1
1.
.
5
5.
.8
8
D
De
el
le
et
te
e
S
SI
IM
M2
2
c
co
on
nt
ta
ac
ct
ts
s
M
Me
en
nu
u
>
>
p
ph
ho
on
ne
eb
bo
oo
ok
k
>
>
O
OK
K
K
Ke
ey
y>
>
D
De
el
le
et
te
e
S
SI
IM
M2
2
I
In
n
t
th
he
e
C
Co
on
nt
ta
ac
ct
ts
s
l
li
is
st
t,
,
s
se
el
le
ec
ct
t
t
th
he
e
e
en
nt
tr
ry
y
y
yo
ou
u
w
wa
an
nt
t
t
to
o
d
de
el
le
et
te
e
i
in
n
S
SI
IM
M2
2.
.
5
5.
.9
9
M
Mo
ov
ve
e
c
co
on
nt
ta
ac
ct
ts
s
M
Me
en
nu
u
>
>
p
ph
ho
on
ne
eb
bo
oo
ok
k
>
>
O
OK
K
K
Ke
ey
y>
>
M
Mo
ov
ve
e

Page 13
I
In
n
t
th
he
e
C
Co
on
nt
ta
ac
ct
ts
s
l
li
is
st
t,
,
s
se
el
le
ec
ct
t
t
th
he
e
e
en
nt
tr
ry
y
y
yo
ou
u
w
wa
an
nt
t
t
to
o
m
mo
ov
ve
e
t
to
o
S
SI
IM
M
o
or
r
p
ph
ho
on
ne
e.
.
5
5.
.1
10
0
A
Ad
dd
d
t
to
o
B
Bl
la
ac
ck
kl
li
is
st
t
M
Me
en
nu
u
>
>
P
Ph
ho
on
ne
eb
bo
oo
ok
k
>
>
O
OK
K
K
Ke
ey
y
>
>
A
Ad
dd
d
t
to
o
b
bl
la
ac
ck
kl
li
is
st
t
Allow you to black list selected numbers. In this case the contact will be
blocked from calling you up.
5
5.
.1
11
1
I
Im
mp
po
or
rt
t/
/E
Ex
xp
po
or
rt
t
C
Co
on
nt
ta
ac
ct
ts
s
M
Me
en
nu
u
>
>
p
ph
ho
on
ne
eb
bo
oo
ok
k
>
>
O
OK
K
K
Ke
ey
y
>
>
I
Im
mp
po
or
rt
t/
/E
Ex
xp
po
or
rt
t
Y
Yo
ou
u
c
ca
an
n
c
co
op
py
y,
,
I
Im
mp
po
or
rt
t
o
or
r
E
Ex
xp
po
or
rt
t
c
co
on
nt
ta
ac
ct
ts
s
e
en
nt
tr
ri
ie
es
s
s
st
to
or
re
ed
d
i
in
n
t
th
he
e
S
SI
IM
M
c
ca
ar
rd
d
t
to
o
t
th
he
e
p
ph
ho
on
ne
e
m
me
em
mo
or
ry
y
a
an
nd
d
v
vi
ic
ce
e-
-v
ve
er
rs
sa
a.
.
5
5.
.1
12
2
S
Se
en
nd
d
v
vC
Ca
ar
rd
d
M
Me
en
nu
u
>
>
p
ph
ho
on
ne
eb
bo
oo
ok
k
>
>O
OK
K
K
Ke
ey
y
>
>
S
Se
en
nd
d
v
vC
Ca
ar
rd
d
Allow you to send vCard to other numbers and export vCard.
5
5.
.1
13
3
O
Ot
th
he
er
rs
s
S
Sp
pe
ee
ed
d
d
di
ia
al
l
M
Me
em
mo
or
ry
y
s
st
ta
at
tu
us
s
M
Me
en
nu
u
>
>
p
ph
ho
on
ne
eb
bo
oo
ok
k
>
>
O
OK
K
K
Ke
ey
y
>
>O
Ot
th
he
er
rs
s>
>
M
Me
em
mo
or
ry
y
s
st
ta
at
tu
us
s
Check the memory status of SIM, and Phone.

Page 14
5
5.
.1
14
4
G
Gr
ro
ou
up
ps
s
Menu> phonebook > Groups
Press the Left/Right navigation key to access the Group tab. Set up a
list of numbers with similar preferences such as ringtone, profile etc.
6
6
M
Me
es
ss
sa
ag
ge
es
s
6
6.
.1
1
W
Wr
ri
it
te
e
m
me
es
ss
sa
ag
ge
e
M
Me
en
nu
u
>
>
M
Me
es
ss
sa
ag
ge
es
s
>
>
W
Wr
ri
it
te
e
m
me
es
ss
sa
ag
ge
e
>
>
N
Ne
ew
w
S
SM
MS
S
You can compose and send SMS . Pressing the
L
Le
ef
ft
t
K
Ke
ey
y
during/after
composing the message gives you a host of messaging features
.
.
6
6.
.2
2
U
Us
se
e
m
me
es
ss
sa
ag
ge
e
T
Te
em
mp
pl
la
at
te
es
s
Menu > Messages > Templates
Enter into preset message templates and use them. These preset
templates can save you time if the theme of your message is the same as
those existing in the template.
6
6.
.3
3
V
Vo
oi
ic
ce
e
m
ma
ai
il
l
s
se
er
rv
ve
er
r
Menu > Messages > Voice mail server
You can activate voicemail service to redirect your incoming calls (based
on your call settings) to a voicemail server and retrieve them later via

Page 15
SMS alerts.
To divert incoming calls to a voicemail server, go to Settings>Phone tab >
Call Divert> Voice> (choose the desired call divert condition)> Activate>
Phone Number/Voicemail Number.
6
6.
.4
4
S
Se
et
tt
ti
in
ng
gs
s
M
Me
en
nu
u
>
>
M
Me
es
ss
sa
ag
ge
es
s
>
>
O
Op
pt
ti
io
on
ns
s>
>S
Se
et
tt
ti
in
ng
gs
s
You can set your desired parameters for SMS, push message and Others.
6
6.
.5
5
D
De
el
le
et
te
e
a
al
ll
l
You can choose all messages in the Inbox or others to delete.
6
6.
.6
6
M
Me
es
ss
sa
ag
ge
e
c
ca
ap
pa
ac
ci
it
ty
y
M
Me
en
nu
u
>
>
M
Me
es
ss
sa
ag
ge
es
s
>
>O
Op
pt
ti
io
on
ns
s>
>
M
Me
es
ss
sa
ag
ge
e
c
ca
ap
pa
ac
ci
it
ty
y
View the memory status of your SMS .
7
7
C
Ca
al
ll
l
l
lo
og
gs
s
M
Me
en
nu
u
>
>
C
Ca
al
ll
l
L
Lo
og
gs
s
Tip: Directly access the call History of by pressing the Call key in idle
mode.
The Call History lists the calls you have recently dialed, received,
missed for SIM1 and SIM 2

Page 16
8
8
S
Se
et
tt
ti
in
ng
gs
s
Choose various preferences to customize your handset according to your
requirements. You can set:
8.1 Call settings
8.2 Phone Settings includes Restore factory settings. Auto call
recorder is also available which is used to record all incoming
and outgoing calls.
8.3 Display
8.4 Security: Mobile tracker password is 000000
8.5 Profiles
8.6 Connections
9
9
M
Mu
ul
lt
ti
im
me
ed
di
ia
a
9
9.
.1
1
C
Ca
am
me
er
ra
a
M
Me
en
nu
u
>
>
C
Ca
am
me
er
ra
a
Press the left key in camera mode to choose various settings
Shortcut keys: Press the number keys on the phone’s keypad to choose
various settings.

Page 17
9
9.
.2
2
V
Vi
id
de
eo
o
R
Re
ec
co
or
rd
de
er
r
Menu > Multimedia > Video Recorder
Press the OK Key to start recording.
You can press
O
Op
pt
ti
io
on
ns
s
switch to Camera and vice versa.
You can also press Options key to choose memory
Press Left key to choose various settings
Shortcut keys: Press the number keys as shortcuts on the phone’s keypad
to choose various video settings.
9
9.
.3
3
I
Im
ma
ag
ge
e
V
Vi
ie
ew
we
er
r
M
Me
en
nu
u
>
>
M
Mu
ul
lt
ti
im
me
ed
di
ia
a
>
>
I
Im
ma
ag
ge
e
V
Vi
ie
ew
we
er
r
Let you to view your saved images. You can also send the images via
Bluetooth or use it as contact icon or wallpaper, etc.
9
9.
.4
4
A
Au
ud
di
io
o
p
pl
la
ay
ye
er
r
M
Me
en
nu
u
>
>
A
Au
ud
di
io
o
p
pl
la
ay
ye
er
r
The phone comes with an inbuilt Music that plays all your favorite songs
stored in the phone memory or memory card.
While in music mode, press the Left key to choose various
music options
Adjust Volume: Press Up and Down keys to adjust volume.

Page 18
9
9.
.5
5
V
Vi
id
de
eo
o
p
pl
la
ay
ye
er
r
M
Me
en
nu
u
>
>
V
Vi
id
de
eo
o
P
Pl
la
ay
ye
er
r
Let you play videos stored in your phone or memory card.
9
9.
.6
6
V
Vo
oi
ic
ce
e
R
Re
ec
co
or
rd
de
er
r
M
Me
en
nu
u
>
>
M
Mu
ul
lt
ti
im
me
ed
di
ia
a
>
>
V
Vo
oi
ic
ce
e
r
re
ec
co
or
rd
de
er
r
You can record surrounding sounds using this feature
9
9.
.7
7
F
FM
M
r
ra
ad
di
io
o
M
Me
en
nu
u
>
>
M
Mu
ul
lt
ti
im
me
ed
di
ia
a
>
>
F
FM
M
r
ra
ad
di
io
o
Your phone comes with an FM radio to let you listen to FM channels.
Go to Options> Search Channels> Auto Search to fill up
the channels.
Press the number keys on your keypad in accordance to
the channel list.
Press OK key to start/stop the radio.
Press the Up or Down key to increase/decrease the
volume.
Press the Left key for various radio options.
9
9.
.8
8
G
Ga
am
me
es
s
To access Tetris and so on MRP store

Page 19
1
10
0
F
Fi
il
le
e
M
Ma
an
na
ag
ge
er
r
Some of file processing, check the memory status.
1
11
1
O
Or
rg
ga
an
ni
iz
ze
er
r
1
11
1.
.1
1
C
Ca
al
le
en
nd
da
ar
r
Calendar: Lets you view the calendar and schedule tasks on selected
dates.
1
11
1.
.2
2
A
Al
la
ar
rm
m
Alarm: Lets you schedule alarms with the required settings.
1
11
1.
.3
3
C
Ca
al
lc
cu
ul
la
at
to
or
r
Calculator: Use the calculator.
1
11
1.
.4
4
F
Fl
la
as
sh
hl
li
ig
gh
ht
t
Flashlight : You can turn on/off the Flashlight in this menu.
1
11
1.
.5
5
B
Bl
lu
ue
et
to
oo
ot
th
h
You can use Bluetooth transport files and MP3,also listen MP3 call.
1
11
1.
.6
6
W
Wo
or
rl
ld
d
c
cl
lo
oc
ck
k
World Clock: Lets you view time across the major cities of the world

Page 20
1
12
2
S
Se
er
rv
vi
ic
ce
es
s
To access this menu, enter the Main Menu in the standby mode and then
select Internet. You can use the network-related services with this function
1
13
3
L
Le
em
mo
on
n
T
Tw
wi
is
st
t
Customer service menu
I
IN
NF
FO
O
R
RE
EG
GA
AR
RD
DI
IN
NG
G
S
SE
ER
RV
VI
IC
CE
E
C
CE
EN
NT
TE
ER
RS
S
Service Center No: 09611124269
To know your nearest Lemon service center please send SMS to 09611124269
with below mentioned format.
Format to send SMS: LEMON SER <YOUR AREA PIN CODE>
In return to it you will receive SMS containing address for LEMON SERIVCE
CENTER nearest to you.
For example: If you want to know service center for Noida, Sector -2, 201301.
Write SMS as: LEMON SER 201301 & Send it to 09611124269.
Note : Kindly give one space each between keywords & Area Pin No while
sending SMS.
Table of contents
Other Lemon Cell Phone manuals

Lemon
Lemon TRIO 320 User manual

Lemon
Lemon DUO 319 User manual

Lemon
Lemon MB1 Trio 360 User manual

Lemon
Lemon iQ 505 User manual

Lemon
Lemon F101 User manual

Lemon
Lemon W100 User manual

Lemon
Lemon D226 User manual

Lemon
Lemon TRIO 323 User manual

Lemon
Lemon Duo339 Super User manual

Lemon
Lemon IT 828 User manual