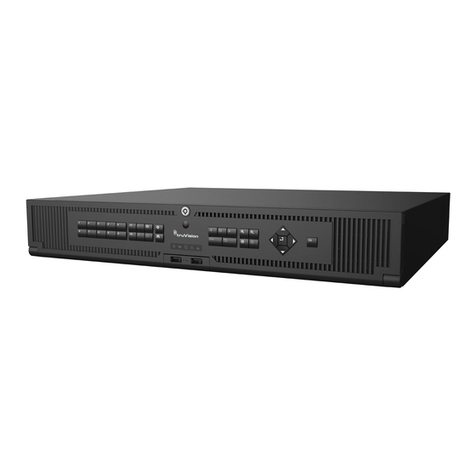
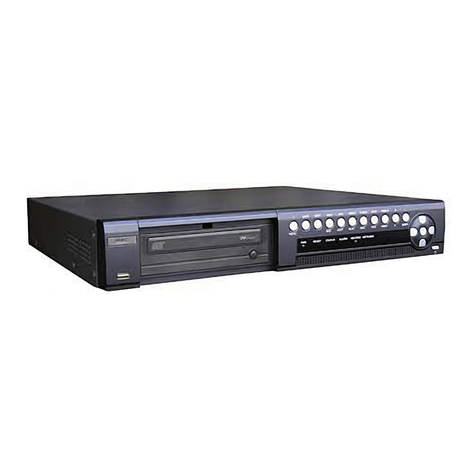
E-castle EOS?9604 User manual

EOS960H DVR
USER’s MANUAL
RoHS
Version20140620

ImportantSafetyInstructions
ReadandKeeptheseinstructions
Heedallwarnings
Followalltheinstructions
DonotusethisapparatusnearwaterandCleanonlywithdrycloth
Donotinstallnearanyheatsourcessuchasradiators,heatregisters,orotherapparatusthatproduceheat
Protectthepowercordfrombeingwalkedonorpinchedparticularlyatplugs,conveniencereceptacles,and
thepointwheretheyexitfromtheapparatus.
Unplugthisapparatus.Whenacartisused,usecautionwhenmovingthecart/apparatuscombinationto
avoidinjuryfromtip‐over.
TOREDUCETHERISKOFELECTRICSHOCK,DONOTREMOVE.
NOUSER‐SERVICEABLEPARTSAREINSIDE.REFERSERVICINGTOQUALIFIEDSERVICEPERSONNEL.
.
FCCForClassAdigitaldevice
ACLASSAdigitaldevicethatcomplieswithParts15oftheFCCRules.
Operationissubjecttothefollowingtwoconditions.
1. Thisdevicemaynotcauseharmfulinterference,and
2. Thisdevicemustacceptanyinterferencereceived,
Includinginterferencethatmaycauseundesiredoperations.
Thelightningflashwithanarrowheadsymbolwithinanequilateraltriangleis
intendedtoalerttheusertothepresenceofuninsulated“dangerousvoltage”
withintheproduct’senclosurethatmaybeofsufficientmagnitudetoconstitutea
riskofelectricshocktopersons.
Theexclamationpointwithinanequilateraltriangleisintendedtoalerttheuserto
presenceofimportantoperatingandmaintenance(Servicing)instructionsinthe
literatureaccompanyingtheappliance

‐3‐
FEATURES
This960HDVRallowsuserstohavevideosurveillancebothinliveandplayback.
H.264compression
HDMI,VGAoutputs,andcompositeout(LiveorSpot)
Individualchannelsetupforrecording&networkstream(resolution/framerate)
Eventtext+imagenotificationtoFTPserverandE‐mailaddress
Easynetwork:UPNP(Universalplug&play)support
Usercontrol:Upto20userscanbegeneratedwithvariousaccessauthority
Calendar/Timesearch&Thumbnailsearch&POSsearch
Smartphoneapplication(Live,PTZ,Search)
E‐SATAissupported
Mirrorandauto‐backupissupported
BNCprogrammablespotouts
Upto4internalSATAHDD
OpticalDriverissupported

‐4‐
INDEX
1. Product introduction
1.1. Packing ∙∙∙∙∙∙∙∙∙∙∙∙∙∙∙∙∙∙∙∙∙∙∙∙∙∙∙∙∙∙∙∙∙∙∙∙∙∙∙∙∙∙∙∙∙∙∙∙∙∙∙∙∙∙∙∙∙∙∙∙∙∙∙∙∙∙∙∙∙∙∙∙∙∙∙∙∙ 7
1.2. Front ∙∙∙∙∙∙∙∙∙∙∙∙∙∙∙∙∙∙∙∙∙∙∙∙∙∙∙∙∙∙∙∙∙∙∙∙∙∙∙∙∙∙∙∙∙∙∙∙∙∙∙∙∙∙∙∙∙∙∙∙∙∙∙∙∙∙∙∙∙∙∙∙∙∙∙∙∙ 8
1.3. Rear ∙∙∙∙∙∙∙∙∙∙∙∙∙∙∙∙∙∙∙∙∙∙∙∙∙∙∙∙∙∙∙∙∙∙∙∙∙∙∙∙∙∙∙∙∙∙∙∙∙∙∙∙∙∙∙∙∙∙∙∙∙∙∙∙∙∙∙∙∙∙∙∙∙∙∙∙∙ 9
2. Installation
2.1. Installing HDD ∙∙∙∙∙∙∙∙∙∙∙∙∙∙∙∙∙∙∙∙∙∙∙∙∙∙∙∙∙∙∙∙∙∙∙∙∙∙∙∙∙∙∙∙∙∙∙∙∙∙∙∙∙∙∙∙∙∙∙∙∙∙∙∙∙∙∙∙∙∙∙∙∙∙∙∙∙
11
2.2. How to connect devices to Product ∙∙∙∙∙∙∙∙∙∙∙∙∙∙∙∙∙∙∙∙∙∙∙∙∙∙∙∙∙∙∙∙∙∙∙∙∙∙∙∙∙∙∙∙∙∙∙∙∙
12
2.2.1. Front ∙∙∙∙∙∙∙∙∙∙∙∙∙∙∙∙∙∙∙∙∙∙∙∙∙∙∙∙∙∙∙∙∙∙∙∙∙∙∙∙∙∙∙∙∙∙∙∙∙∙∙∙∙∙∙∙∙∙∙∙∙∙∙∙∙∙∙∙∙∙∙∙∙∙∙∙∙
12
2.2.2. Rear ∙∙∙∙∙∙∙∙∙∙∙∙∙∙∙∙∙∙∙∙∙∙∙∙∙∙∙∙∙∙∙∙∙∙∙∙∙∙∙∙∙∙∙∙∙∙∙∙∙∙∙∙∙∙∙∙∙∙∙∙∙∙∙∙∙∙∙∙∙∙∙∙∙∙∙∙∙ 12
2.2.3. Connection of main devices ∙∙∙∙∙∙∙∙∙∙∙∙∙∙∙∙∙∙∙∙∙∙∙∙∙∙∙∙∙∙∙∙∙∙∙∙∙∙∙∙∙∙∙∙∙∙∙∙∙∙∙∙∙∙
12
3. How to sart DVR
3.1. Turning on ∙∙∙∙∙∙∙∙∙∙∙∙∙∙∙∙∙∙∙∙∙∙∙∙∙∙∙∙∙∙∙∙∙∙∙∙∙∙∙∙∙∙∙∙∙∙∙∙∙∙∙∙∙∙∙∙∙∙∙∙∙∙∙∙∙∙∙∙∙∙∙∙∙
3.2. Remote control ∙∙∙∙∙∙∙∙∙∙∙∙∙∙∙∙∙∙∙∙∙∙∙∙∙∙∙∙∙∙∙∙∙∙∙∙∙∙∙∙∙∙∙∙∙∙∙∙∙∙∙∙∙∙∙∙∙∙∙∙∙∙∙∙∙∙∙∙∙∙∙∙∙∙∙∙
3.3. MOUSE ∙∙∙∙∙∙∙∙∙∙∙∙∙∙∙∙∙∙∙∙∙∙∙∙∙∙∙∙∙∙∙∙∙∙∙∙∙∙∙∙∙∙∙∙∙∙∙∙∙∙∙∙∙∙∙∙∙∙∙∙∙∙∙∙∙∙∙∙∙∙∙∙∙∙∙∙∙∙∙
15
15
16
3.4. Key Operation ∙∙∙∙∙∙∙∙∙∙∙∙∙∙∙∙∙∙∙∙∙∙∙∙∙∙∙∙∙∙∙∙∙∙∙∙∙∙∙∙∙∙∙∙∙∙∙∙∙∙∙∙∙∙∙∙∙∙∙∙∙∙∙∙∙∙∙∙∙∙∙∙∙∙∙ 16
3.4.1. MENU ∙∙∙∙∙∙∙∙∙∙∙∙∙∙∙∙∙∙∙∙∙∙∙∙∙∙∙∙∙∙∙∙∙∙∙∙∙∙∙∙∙∙∙∙∙∙∙∙∙∙∙∙∙∙∙∙∙∙∙∙∙∙∙∙∙∙∙∙∙∙∙∙∙∙∙∙∙∙∙
16
3.4.2. ZOOM ∙∙∙∙∙∙∙∙∙∙∙∙∙∙∙∙∙∙∙∙∙∙∙∙∙∙∙∙∙∙∙∙∙∙∙∙∙∙∙∙∙∙∙∙∙∙∙∙∙∙∙∙∙∙∙∙∙∙∙∙∙∙∙∙∙∙∙∙∙∙∙∙∙∙∙∙∙∙∙
17
3.4.3. OSD ∙∙∙∙∙∙∙∙∙∙∙∙∙∙∙∙∙∙∙∙∙∙∙∙∙∙∙∙∙∙∙∙∙∙∙∙∙∙∙∙∙∙∙∙∙∙∙∙∙∙∙∙∙∙∙∙∙∙∙∙∙∙∙∙∙∙∙∙∙∙∙∙∙∙∙∙∙∙∙
17
3.4.4. Sequence Mode ∙∙∙∙∙∙∙∙∙∙∙∙∙∙∙∙∙∙∙∙∙∙∙∙∙∙∙∙∙∙∙∙∙∙∙∙∙∙∙∙∙∙∙∙∙∙∙∙∙∙∙∙∙∙∙∙∙∙∙∙∙∙∙∙∙∙∙∙∙∙∙
17
3.4.5. Channel secletion ∙∙∙∙∙∙∙∙∙∙∙∙∙∙∙∙∙∙∙∙∙∙∙∙∙∙∙∙∙∙∙∙∙∙∙∙∙∙∙∙∙∙∙∙∙∙∙∙∙∙∙∙∙∙∙∙∙∙∙∙∙∙∙∙∙∙∙∙∙
17
3.5. Log In ∙∙∙∙∙∙∙∙∙∙∙∙∙∙∙∙∙∙∙∙∙∙∙∙∙∙∙∙∙∙∙∙∙∙∙∙∙∙∙∙∙∙∙∙∙∙∙∙∙∙∙∙∙∙∙∙∙∙∙∙∙∙∙∙∙∙∙∙∙∙∙∙∙∙∙∙∙∙∙
17
3.6. Screen Layout ∙∙∙∙∙∙∙∙∙∙∙∙∙∙∙∙∙∙∙∙∙∙∙∙∙∙∙∙∙∙∙∙∙∙∙∙∙∙∙∙∙∙∙∙∙∙∙∙∙∙∙∙∙∙∙∙∙∙∙∙∙∙∙∙∙∙∙∙∙∙∙∙∙∙∙∙
18
3.6.1. Icons in Live Mode ∙∙∙∙∙∙∙∙∙∙∙∙∙∙∙∙∙∙∙∙∙∙∙∙∙∙∙∙∙∙∙∙∙∙∙∙∙∙∙∙∙∙∙∙∙∙∙∙∙∙∙∙∙∙∙∙∙∙∙∙∙∙∙∙∙∙
18
3.6.2. Icons in playback Mode ∙∙∙∙∙∙∙∙∙∙∙∙∙∙∙∙∙∙∙∙∙∙∙∙∙∙∙∙∙∙∙∙∙∙∙∙∙∙∙∙∙∙∙∙∙∙∙∙∙∙∙∙∙∙∙∙∙∙∙∙
19

‐5‐
4. MENU
4.1. How to open MENU ∙∙∙∙∙∙∙∙∙∙∙∙∙∙∙∙∙∙∙∙∙∙∙∙∙∙∙∙∙∙∙∙∙∙∙∙∙∙∙∙∙∙∙∙∙∙∙∙∙∙∙∙∙∙∙∙∙∙∙∙∙∙∙∙∙∙∙∙∙∙ 21
4.2. Set up ∙∙∙∙∙∙∙∙∙∙∙∙∙∙∙∙∙∙∙∙∙∙∙∙∙∙∙∙∙∙∙∙∙∙∙∙∙∙∙∙∙∙∙∙∙∙∙∙∙∙∙∙∙∙∙∙∙∙∙∙∙∙∙∙∙∙∙∙∙∙∙∙∙∙∙∙∙∙∙∙
21
4.2.1. Display ∙∙∙∙∙∙∙∙∙∙∙∙∙∙∙∙∙∙∙∙∙∙∙∙∙∙∙∙∙∙∙∙∙∙∙∙∙∙∙∙∙∙∙∙∙∙∙∙∙∙∙∙∙∙∙∙∙∙∙∙∙∙∙∙∙∙∙∙∙∙∙∙∙∙∙∙∙∙∙∙ 22
4.2.2. Camera ∙∙∙∙∙∙∙∙∙∙∙∙∙∙∙∙∙∙∙∙∙∙∙∙∙∙∙∙∙∙∙∙∙∙∙∙∙∙∙∙∙∙∙∙∙∙∙∙∙∙∙∙∙∙∙∙∙∙∙∙∙∙∙∙∙∙∙∙∙∙∙∙∙∙∙∙∙∙∙ 23
4.2.3. Record ∙∙∙∙∙∙∙∙∙∙∙∙∙∙∙∙∙∙∙∙∙∙∙∙∙∙∙∙∙∙∙∙∙∙∙∙∙∙∙∙∙∙∙∙∙∙∙∙∙∙∙∙∙∙∙∙∙∙∙∙∙∙∙∙∙∙∙∙∙∙∙∙∙∙∙∙∙∙∙ 27
4.2.4. Event ∙∙∙∙∙∙∙∙∙∙∙∙∙∙∙∙∙∙∙∙∙∙∙∙∙∙∙∙∙∙∙∙∙∙∙∙∙∙∙∙∙∙∙∙∙∙∙∙∙∙∙∙∙∙∙∙∙∙∙∙∙∙∙∙∙∙∙∙∙∙∙∙∙∙∙∙∙∙∙
28
4.2.5. Storage ∙∙∙∙∙∙∙∙∙∙∙∙∙∙∙∙∙∙∙∙∙∙∙∙∙∙∙∙∙∙∙∙∙∙∙∙∙∙∙∙∙∙∙∙∙∙∙∙∙∙∙∙∙∙∙∙∙∙∙∙∙∙∙∙∙∙∙∙∙∙∙∙∙∙∙∙∙∙∙
31
4.2.6. Network ∙∙∙∙∙∙∙∙∙∙∙∙∙∙∙∙∙∙∙∙∙∙∙∙∙∙∙∙∙∙∙∙∙∙∙∙∙∙∙∙∙∙∙∙∙∙∙∙∙∙∙∙∙∙∙∙∙∙∙∙∙∙∙∙∙∙∙∙∙∙∙∙∙∙∙∙∙∙∙
33
4.2.7. System ∙∙∙∙∙∙∙∙∙∙∙∙∙∙∙∙∙∙∙∙∙∙∙∙∙∙∙∙∙∙∙∙∙∙∙∙∙∙∙∙∙∙∙∙∙∙∙∙∙∙∙∙∙∙∙∙∙∙∙∙∙∙∙∙∙∙∙∙∙∙∙∙∙∙∙∙∙∙∙
36
4.3. Search ∙∙∙∙∙∙∙∙∙∙∙∙∙∙∙∙∙∙∙∙∙∙∙∙∙∙∙∙∙∙∙∙∙∙∙∙∙∙∙∙∙∙∙∙∙∙∙∙∙∙∙∙∙∙∙∙∙∙∙∙∙∙∙∙∙∙∙∙∙∙∙∙∙∙∙∙∙∙
40
4.3.1. Time search ∙∙∙∙∙∙∙∙∙∙∙∙∙∙∙∙∙∙∙∙∙∙∙∙∙∙∙∙∙∙∙∙∙∙∙∙∙∙∙∙∙∙∙∙∙∙∙∙∙∙∙∙∙∙∙∙∙∙∙∙∙∙∙∙∙∙∙∙∙∙∙∙∙∙∙∙
40
4.3.2. Event search ∙∙∙∙∙∙∙∙∙∙∙∙∙∙∙∙∙∙∙∙∙∙∙∙∙∙∙∙∙∙∙∙∙∙∙∙∙∙∙∙∙∙∙∙∙∙∙∙∙∙∙∙∙∙∙∙∙∙∙∙∙∙∙∙∙∙∙∙∙∙∙∙∙∙∙
40
4.3.3. Thumbnail search ∙∙∙∙∙∙∙∙∙∙∙∙∙∙∙∙∙∙∙∙∙∙∙∙∙∙∙∙∙∙∙∙∙∙∙∙∙∙∙∙∙∙∙∙∙∙∙∙∙∙∙∙∙∙∙∙∙∙∙∙∙∙∙∙∙∙∙∙
40
4.3.3. Thumbnail search ∙∙∙∙∙∙∙∙∙∙∙∙∙∙∙∙∙∙∙∙∙∙∙∙∙∙∙∙∙∙∙∙∙∙∙∙∙∙∙∙∙∙∙∙∙∙∙∙∙∙∙∙∙∙∙∙∙∙∙∙∙∙∙∙∙∙∙∙
40
4.3.4. Search by POS ∙∙∙∙∙∙∙∙∙∙∙∙∙∙∙∙∙∙∙∙∙∙∙∙∙∙∙∙∙∙∙∙∙∙∙∙∙∙∙∙∙∙∙∙∙∙∙∙∙∙∙∙∙∙∙∙∙∙∙∙∙∙∙∙∙∙∙∙∙ 41
4.3.5. Backup ∙∙∙∙∙∙∙∙∙∙∙∙∙∙∙∙∙∙∙∙∙∙∙∙∙∙∙∙∙∙∙∙∙∙∙∙∙∙∙∙∙∙∙∙∙∙∙∙∙∙∙∙∙∙∙∙∙∙∙∙∙∙∙∙∙∙∙∙∙∙∙∙
41
4.3.6. Playback mode ∙∙∙∙∙∙∙∙∙∙∙∙∙∙∙∙∙∙∙∙∙∙∙∙∙∙∙∙∙∙∙∙∙∙∙∙∙∙∙∙∙∙∙∙∙∙∙∙∙∙∙∙∙∙∙∙∙∙∙∙∙∙∙∙∙∙∙∙∙∙ 42
4.4. Others ∙∙∙∙∙∙∙∙∙∙∙∙∙∙∙∙∙∙∙∙∙∙∙∙∙∙∙∙∙∙∙∙∙∙∙∙∙∙∙∙∙∙∙∙∙∙∙∙∙∙∙∙∙∙∙∙∙∙∙∙∙∙∙∙∙∙∙∙∙∙∙∙∙∙
42
4.4.1. PTZ ∙∙∙∙∙∙∙∙∙∙∙∙∙∙∙∙∙∙∙∙∙∙∙∙∙∙∙∙∙∙∙∙∙∙∙∙∙∙∙∙∙∙∙∙∙∙∙∙∙∙∙∙∙∙∙∙∙∙∙∙∙∙∙∙∙∙∙∙∙∙∙∙∙∙∙∙∙∙∙∙∙ 42
4.4.2. Audio ∙∙∙∙∙∙∙∙∙∙∙∙∙∙∙∙∙∙∙∙∙∙∙∙∙∙∙∙∙∙∙∙∙∙∙∙∙∙∙∙∙∙∙∙∙∙∙∙∙∙∙∙∙∙∙∙∙∙∙∙∙∙∙∙∙∙∙∙∙∙∙∙∙∙∙∙∙∙∙∙∙
43
4.4.3. SPOT ∙∙∙∙∙∙∙∙∙∙∙∙∙∙∙∙∙∙∙∙∙∙∙∙∙∙∙∙∙∙∙∙∙∙∙∙∙∙∙∙∙∙∙∙∙∙∙∙∙∙∙∙∙∙∙∙∙∙∙∙∙∙∙∙∙∙∙∙∙∙∙∙∙∙∙∙∙∙∙∙ 43
4.4.4. Log View ∙∙∙∙∙∙∙∙∙∙∙∙∙∙∙∙∙∙∙∙∙∙∙∙∙∙∙∙∙∙∙∙∙∙∙∙∙∙∙∙∙∙∙∙∙∙∙∙∙∙∙∙∙∙∙∙∙∙∙∙∙∙∙∙∙∙∙∙∙∙∙∙∙∙∙∙∙∙∙∙
43
4.4.5. OSD OFF ∙∙∙∙∙∙∙∙∙∙∙∙∙∙∙∙∙∙∙∙∙∙∙∙∙∙∙∙∙∙∙∙∙∙∙∙∙∙∙∙∙∙∙∙∙∙∙∙∙∙∙∙∙∙∙∙∙∙∙∙∙∙∙∙∙∙∙∙∙∙∙∙∙∙∙∙∙∙∙
43
4.4.6. REC ∙∙∙∙∙∙∙∙∙∙∙∙∙∙∙∙∙∙∙∙∙∙∙∙∙∙∙∙∙∙∙∙∙∙∙∙∙∙∙∙∙∙∙∙∙∙∙∙∙∙∙∙∙∙∙∙∙∙∙∙∙∙∙∙∙∙∙∙∙∙∙∙∙∙∙∙∙∙∙∙
44
4.4.7. Log Out ∙∙∙∙∙∙∙∙∙∙∙∙∙∙∙∙∙∙∙∙∙∙∙∙∙∙∙∙∙∙∙∙∙∙∙∙∙∙∙∙∙∙∙∙∙∙∙∙∙∙∙∙∙∙∙∙∙∙∙∙∙∙∙∙∙∙∙∙∙∙∙∙∙∙∙∙∙∙∙∙
44
5. Specificaiton ∙∙∙∙∙∙∙∙∙∙∙∙∙∙∙∙∙∙∙∙∙∙∙∙∙∙∙∙∙∙∙∙∙∙∙∙∙∙∙∙∙∙∙∙∙∙∙∙∙∙∙∙∙∙∙∙∙∙∙∙∙∙∙∙∙∙∙∙∙∙∙∙∙∙∙∙∙∙∙∙∙
45
6. Trouble shooting ∙∙∙∙∙∙∙∙∙∙∙∙∙∙∙∙∙∙∙∙∙∙∙∙∙∙∙∙∙∙∙∙∙∙∙∙∙∙∙∙∙∙∙∙∙∙∙∙∙∙∙∙∙∙∙∙∙∙∙∙∙∙∙∙∙∙∙∙∙∙∙∙∙∙∙∙∙
47

‐6‐
1.Introduction

‐7‐
1.1. Packing
Whenyoufirstopentheproduct,pleasecheckoutwhetherthereareallcontentsasfollows.
Ifanyoftheseitemsismissingordamaged,pleasecontactyoursupplierimmediatelybeforeusingtheproduct.
AsOptionalMouseandHDDDrivecouldbeincludedorexcludedinpackingaccordingtoseller’soption,they
mustbecheckedbeforeDVRisused.
DVRProductRemotecontrol&Battery(AAA)
Power(AdaptorandPowercable)SoftwareCD
QuickSetupGuideHDDSATA&Powercable
-SATAcable:5pcs
-Powercable:2pcs
USBMouse(Option)ScrewstoinstallHDD&DVDBracket
-Total20Pcs
HDD(Option)
*.Capacityandinstallationstatuscouldbedifferenctaccordingtoseller’ssalesmethod.
QuickSetupGuide

‐8‐
67
1 2
5
3
4
1.2Front
1 DVD Writer
DVD Writer Door
2
Direction Move the Curosor in MENU
SEL Select Items
■
◀◀
▶I
▶▶
For Playback
Stop playback
Fast backward playback
Step backward(Playback the previous frame in pause mode)
Play and pause
Fast forward playback
Step forward(Playback the next frame in pause mode)
3 Numeric Keys
Select Cameras or Input Numbers
4 DVD Eject
DVD Door Eject
5 IR sensor/LED
POWER LED : POWER ON -> LED ON
NET LED : Network connected to DVR -> LED ON
REC LED : Recording -> LED ON
6
MENU Go to System setup MENU
REC Start/Stop recording
MODE Screen Division Mode
SEARCH Search recording file during playback mode
7 USB PORT
USB Devices(Mouse, Memory Stick, HDD) can be connected

‐9‐
1.3 REAR
z4 Channel DVR
z8 Channel DVR
z16 Channel DVR
1 e-SATA External SATA
2 Audio Out Audio output (RCA)
3 Audio In Audio Input Connection (RCA)
4 CAMERA in Video Camera Connection (BNC)
5 SPOT /TV Live or SPOT out (BNC)
6 HDMI HDMI output (HDMI type-C)
7 VGA VGA or LCD mitor (D-SUB 15p)
8 Ethernet Cable Modem, Ethernet 10/100 Base-T (RJ-45)
9
Terminal Block RS-485 / Sensor In / Relay out / POS 1
10 CONFIG NTSC/PAL HD/XGA (DIP S/W, 2-pin)
11 DC 12V Power 5.83AAdaptor
1 2 34
5 6 7 8 9 1011
5 6 7 8 9 1011
1
2 3 4
5 6 7 8 9 10112 3 4
1

‐10‐
2.Installation

‐11‐
2.1.InstallingHDD
IfHDDisnotinstalledinDVRwhichyoupurchased,PleaseinstallHDDfirstinsideit.
four(4)internalHDDoroneDVD&twoHDDcanbeinstalledinsideDVR.
Pleasepreparecablesandscrewsbeforeinstallation.
Pleasebecarefulnottobeharmedbysharpedgesoftheproducts
PleasefollowthebelowstepstoinstallHDDinsideDVRwithoutdifficulty.
(1) Loosen screws on both sides and back to
detach the product cover.
(2) Lift the end of top cover and pull out from
product.
(3) Loosen screws of HDD bracket to detach from
product. Put HDD in HDD bracket and tighten
supplied 4 HDD screws to bracket.
(4) Restore HDD bracket to product and
connect HDD power cable and data
cable to HDD.
(5) Insert top cover to product as side picture
and tighten screws again.
1 2
2 1

‐12‐
2.2.HowtoconnectDevicestoproduct
2.2.1.Front
2.2.2.Rear
2.2.3.Connectionofmaindevices
1)Adaptor
Theadaptorsuppliedtogetherwithproductissurelyused.
OtheradaptorcandoseriousharmstoDVR,whichcausesproblemstoDVR,itcouldbenotrepairedor
theextracostcouldbechargedforrepairment.
2)Camera
Connect video signal cable shaped as BNC into [CAMERA IN] port on rear of the product.
IncasethatcameaisconnectedtoDVRduringpoweron,whichmaycauseseriousproblemtoDVR,
ThereforepleaseconnectcameratoDVRduringpowr‐offofDVR.
. . . . . .
. . . . . . . . . . .

‐13‐
3)Audio,Sensor,Alarm,andRS‐485
PleasereferthepreviouspagetoconnectdevicestoDVRs.
SensordeviceshouldbeconnectedtoSandGport.
AlarmdevicesshouldbeconnectedtoAandGport.
ThetypeofAlarm(NC/NO)shouldbeusedselectedinDVRMENUinaccordancewithalarmdevice.
PTZcameraorkeyboardcontrolisconnectedtoRS‐485(+,‐)port.Devicedoesn’tworkwhenthepolarityis
wrong.Pleasebecarefulnottoconnectittodifferentpolarity.
4)VideoOut
3kindsofVideo(HDMI,VGA,BNC)aresupportedbyDVRs.BNCisusedforLiveorSpot
WhenVideooutisconnectedtoVGAportofMonitor,themonitor1920*1080or1024*768.
PleasecheckCONFIGS/WinrearsideforHD(1920*1080)orXGA(1024*768)
5)E‐SATA
SomebrandofE‐SATAHDDRackarenotsupported.
PleaseaskorcheckwhetherHDDRackissupportedornotbeforeusage.
6)USBPort
USBMouse,USBmemorystick,USBHDD,orexternalODDdrivecanbeconnectedtoUSBport.
ExternalUSBODDdoesn’tsupportmultisessionformat,pleasechecktheCDcapacityandbackupdata
capacityfirstbeforeyoubackuprecordeddatatoCD.
7) EthernetPort
ItisusedtoconnectDVRtoPCorinternet.

‐14‐
3.HowtostartDVR

‐15‐
PLEASEMAKESURETHATTHEHDDMUSTBEINSTALLEDATFIRSTFORRECORDINGBEFOREUSINGDVR.
3.1.Turningon
Thereisnoanypowerswitch,thereforepleaseconnectalldevicestoDVRbeforeDVRisturnedon.
ByconnectingtheAdaptorincludedinBoxtoDVR,itisturnedon.
3.2.Remotecontrol
1
3
4
7
6
8
10
11
9
13
12
14
17
22
19 16
15
2
5
21 23 24
18
20
1)REC:Instantrecordbutton
2)DVRID:selectingcontrolledDVR
3)Numberbutton:Inputchannelnumber
4)AUDIO:AudioON/Mute
5)BACKUP:Accessdirectlytobackupmenu
6)MENU:Accesstomainmenu
7)OSD:ShoworHideOSD
8)PTZ:ControlPan/Tilt/Zoomcamera.
9)Z/F:Accesstodigitalzoommode
10)Direction(▲,▼,◀,▶)&ENTER
11)SEARCH:Searchrecordedvideo
12)LOG:ShowrunningstatusofDVRsystem
13)◀◀:Reverseplay
14)▶I:PlayorPauseduringplayback
15)▶▶:Fastforwardplay
16)■:StopplaybackandgotoLivemode
17)SPOT:NotOperatedinthismodel
18)PIP:showPIPMode
19)POP:ShowPOPmode
20)SEQ:Showeachcamerarotation
21)Fullscreenmode
22)Quadscreenmode
23)9Divisionscreenmode:Operatedonlyfor8or16ch
24)16Divisionscreenmode:Operatedonlyfor16ch

‐16‐
3.3.MOUSE
AmouseisusedafterconnectedtoUSBterminalinfrontorrearwithoutinstallation.
Clickonleftbutton PopupLoginwindow/SelectingIcons/itsvalues
Selectingsub‐menuinsetupmenuandvaluesineachmenu
Clickonrightbutton PopupMainMenu/Backfrommenutolivemode
DoubleclickonleftbuttonChangeonechtomultichormultichtoonechmode.
3.4.KeyOperation
3.4.1.MENU
FunctionRemotecontrolFrontKeyMOUSE
PopupMenuPress<MENU>KeyPress<MENU>KeyClickonrightbutton
Move&
Selecting
Move:▲,▼,◀,▶
Selecting:<ENTER>Key
Move:▲,▼,◀,▶
Selecting:
Selectingbyclickonleft
button
3.4.2 ZOOM
Upto10timesdigitalzoomissupported.
Zoomfunctionworksjustinonechannelmode,pleasechangechannelmodetoonechannelfirst.
FunctionRemotecontrolFrontKeyMOUSE
ZOOMStartPress<Z/F>KeyPress<ZOOM>KeyClickIconinthemiddleof
upperscreen
Selecting.Selectingoneareabypress
<ENTER>Keyonetime,
multiareasareselectedby
directionkey.
.Zoomingtheareabypress
<ENTER>Key
Selectingareaby ,
multiareacanbe
selectedbydirection
key
.Zoomingtheareabypress
Clickonleftbuttononthearea.
Themultiareasareselectedby
dragduringclicking.
Theareasarezoomedby
unclick
GobackPress<MENU>Key Press<MENU>Key Clickonrightbutton
Normalscreen Digitalzoommode

‐17‐
3.4.3.OSD
ItisusedtoappearordisappearinformationofcamerasandICONSinscreen.
Press<OSD>keyinremotecontrol,orclick<OSD>inMainmenutouseOSDfunction.
3.4.4.SequenceMode
IfyoupressSEQbuttoninFullscreensplit,screenwillrotateautomatically
Defaultvalueofcannelrotatingintervalis2seconds,whichcanbechangedfrom0to99second.
The”0”intervaltimeskiptheselectedchannelwithoutdisplay.
3.4.5.ChannelSelection
FunctionRemotecontrolFrontKeyMOUSE
ChannelSelectionPressMode,orNumerickey PressMODEkeyclickinscreen
1channelmode PressKey,orchannel
numberkey
PresskeyDoubleclickthechannel
numbermode
4channelmodePressKey,PressKey,Selectin
9channelmodePressKey PressKeySelectin
16channelmodePressKey PressKeySelectin
3.4.6.SEARCH
Therecordeddatacanbesearchedandplaybackedwiththefollowingkeys.
FunctionRemotecontrolFrontKeyMOUSE
SearchMenuPressSEARCHkey PressSEARCHkeyclickinscreen
Play/PAUSEPressKeyPresskeyClick,Icon
STOPPressKey,PressKeyClickIcon
RW/FFPress,Key Press,Keyor
UseJog‐shuttle:
Click,Icon
3.5. Login
TheLog‐inwindowwillpopupafterbootingisover.
Pleasemovethepointerintopasswordwindowwithmouseorup/downkeyofremotecontroller,andthen
pressenterbuttoninremotecontrolorrightbuttonofmouse.

‐18‐
Pleaseenterdefaultpassword(0000)inpasswordwindow,andclickOKiconandthenLOGINicon.
ItisreadytobeaccessabletoDVR.
Ifyouwanttochangepassword,pleasereferthe[MENU‐SETUP‐SYSTEM‐USER].
3.6. ScreenLayout
Youcanseethebelowitemsaccordingtoyourselectiononfunction.
3.6.1. IconsinLiveMode
InLivedisplaymode,iconswillbeindicatedtonotifythesystemmodeorstatus.
Belowaretheiconcategories,whichareindicatedonthemonitor.
IconforsystemIconforeachchannel
Selectsspecific1chwithfullscreenWhenMotionDetected
Screen‐DivisionmodeWhenSensorActivated
Checkauto‐backupwithexternalUSB
HDD(status,capacity)Channelwithaudioconnected
HDDcapacityusagestatusWhenPTZmodeentered
WhenUSBmemorystick&HDDis
insertedintoDVRWhenchannelisrecording
WhenDVRisconnectedvianetworkWhenpanicrecordisactivated
WhenDVRisnotconnectedvianetwork Iconinfullscreenmode
SystemIDforremotecontrol Channelsequencemode
InstantPlayback(10sec,30sec,1min,
3min,5min,10minago)Digitalx10Zoom
Start/stopPanic(manual)record

‐19‐
3.6.2. Iconsinplaybackmode
Insearchmode,thestatuswillbeshownintheuppersideofscreen.Youcancontrolplaybackusingthe
buttons.
ICONNameDescription
Currentstatus
Thisiconshowsthecurrentstatusinplayback.
Ifyouselect▶,themarkwillbe▶,
Ex)IfyouselectFF(fast‐forward),▶▶willbeshown.
BackwardSelectbackwardandcontrolspeed(x2,x4,x8,x32andx128)
Inpausestatus,thisbuttonmovesframebyframereversely
PlayPlaybutton.Selectthisbuttoninpausemode
PausePausebutton.Selectthisbuttoninplay,rewindorFFmode.
FastForwardSelectfast‐forwardandcontrolthespeed(x2,x4,x8,x32andx128)
Inpausestatus,thisbuttonmovesframebyframeforward.
StopStoptheplaybackandgotoLivemode
Menubuttonalsostopplaying.
SearchmenuSelectingthisbutton,theSearchsub‐menuwillpopup
DigitalzoomDigitalzoombuttoninplayback.Selectthisbuttonto1chfullscreenmode
PlayspeedIndicatesspeedofrewindorfast‐forward
Backup Accesstobackupfunction
BookmarkstartDuringplayback,clickthisIconandstartingtimeissavedforbookmarklist
BookmarkstopClickthisIconandbookmarkendingtimeissavedforbookmarklist
TimeBarPlaybacktimeThecolormeanswhetherthedataisrecordedornotinthetime
Clickthetimebymouse,thedataofthetimeisdisplayed

‐20‐
4.MENU
This manual suits for next models
3
Table of contents
Popular DVR manuals by other brands
Swann
Swann ADVANCED-SERIES H.264 user manual
Samsung
Samsung SVR-1630 installation manual
AVYCON
AVYCON AVR-HT504A-1T quick start guide
Component Solution Services
Component Solution Services Verity REC02U Install manual

Safety Basement
Safety Basement SB-SG900F instruction manual

NUUO
NUUO SCB-IP-P04 user manual
