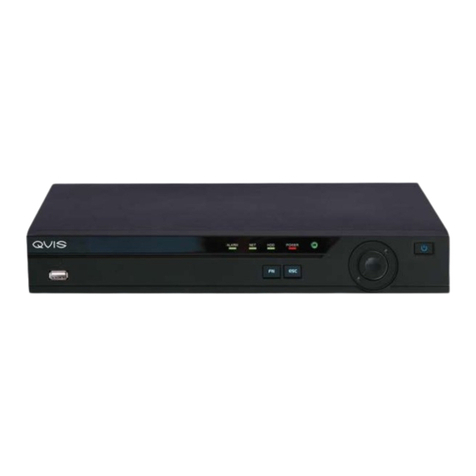
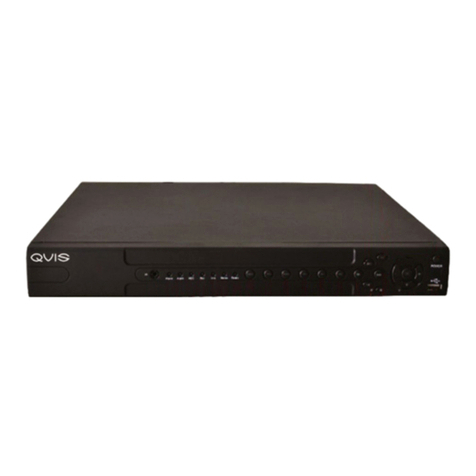
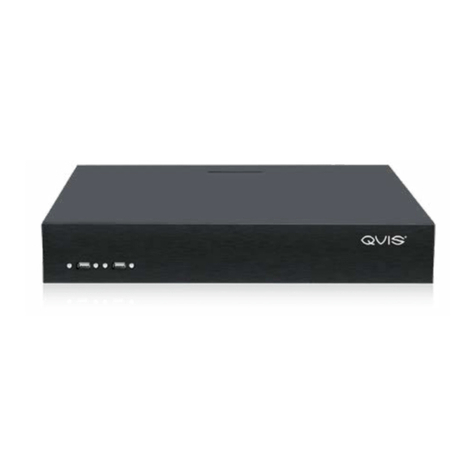
Qvis Cyborg Mini Hybrid T9 G620 Instruction manual

©Copyright Qvis Labs. All soware and documentation rights reserved.
Manual updated January 2014
1
Cyborg Mini Hybrid
T9/16 G620 Mini NVR
Quick Users Guide
®
L A B S
© Copyright Qvis Labs. All software and documentation rights reserved.
Manual updated January 2014

©Copyright Qvis Labs. All soware and documentation rights reserved.
Manual updated January 2014
2
The Qvis Cyborg Mini Hybrid / T9-G620 Mini
NVR / T16-G620 Mini NVR combines the very
best of traditional surveillance functionality
with state-of-the-art web technologies to
create a video solution that is a web server
with integrated video management.
The intuitive user interface provides an efcient
work ow so that you can monitor your property
or person(s) effectively. All recorded footage
can easily be scrutinised in high detail using
the range of digital tools provided.
This “Quick Users Guide” briey describes many
of the Qvis DVR’s features.
Welcome

©Copyright Qvis Labs. All soware and documentation rights reserved.
Manual updated January 2014
3
Contents
Secon Title Page Number
QR Codes for Cyborg & Terminator 4
Hardware Requirements 5
Startup Procedure 5-6
Shutdown Procedure 7
Taskbar Buons 8
Desktop Screen Management 8
Video Playback Interface 9
Logging in: Playback 9-10
Logging in: Instant Playback 11
Breakdown&Explanaon 12-13
Selecng&ArrangingCameras 14-16
PlaybackTimeline 17-18
IncidentsRecords:RecordListMenu 19-20
IncidentsRecords:AutoSetup 21
IncidentsRecords:Backup 22-23
MoonExclusionSearchonPlayback 24
Schedule 25-28
PTZ 29-30
EPTZ 31
EPTZ: Using EPTZ On Backup Video Footage 32-34
PTZ Cameras and Accessories 35
Sengs 36-37
IP Cameras 37-43
AnalogCameras 44-46
DVR47-50
Network 51-52
User53-55
Alarm56-58
Info59-60
Update61
Support62
Technical Remote Assistance 63
Recovery 64
Noce 65
Limitaon of Liability 65

©Copyright Qvis Labs. All soware and documentation rights reserved.
Manual updated January 2014
4
QR Codes for Cyborg & Terminator ranges
QR Codes (Quick Response Code) are similar to barcodes but incorporate
a matrix style paern to store informaon. They are a quick way to obtain
informaon with the use of a smart phone (Apple, Android, Blackberry,
Windows operang systems) with a QR code scanner app.
If you wish to view the product details and have a smart phone with the
appropriate app, please scan either codes below to be linked to the product web
pages for full informaon on them.
CYBORG MINI HYBRID
T9/16 G620 MINI NVR
Or alternavely please visit:
www.adata.co.uk

©Copyright Qvis Labs. All soware and documentation rights reserved.
Manual updated January 2014
5
Hardware Requirements
Before you are able to fully use the DVR IP & Anologue camera systems you need to make
sure you have the correct peripheral hardware connected.
Below is a list of devices you will need to connect to the DVR before camera footage
monitoring is able. You will need to connect them before powering up the DVR.
Monitor - any computer monitor with a VGA or HDMI connecon.
Mouse - Either PS2 or USB connecons.
Keyboard (oponal) - only takes a USB connector.
USB Flash memory storage device - This to store and transfer selected video clips.
USB Hard drive - If you require more memory storage than the USB ash device.
PELCO Standard Anologue PTZ Cameras: Non-PELCO cameras will not be compable.
Startup Procedure
Connect surveillance cameras to one or more of the DVR’s BNC connectors found at the
end of the cable aached to the back of the DVR.
Note: Do not mix and match NTSC and PAL cameras. The Qvis DVR is designed to handle only
one video standard at a me. NTSC and PAL are video footage standards, which are used all
around the world. Each country uses one or the other but not both. NTSC captures video at
29.7 frames per second, whilst PAL captures at 25 frames per second (the UK uses PAL as its
standard).
Before powering on the DVR, ensure that the display, network cable, mouse, and keyboard
(oponal) are all properly connected to the unit.
Power on display/monitor.
Power on the DVR and wait about 60 seconds for system to boot up.
1
2
3
4

©Copyright Qvis Labs. All soware and documentation rights reserved.
Manual updated January 2014
6
Startup Proceedure (connued)
When the DVR has fully booted, the rst image that will be displayed on the monitor
will be mul-led video monitor window (as shown below). This will display the video
feeds from all the cameras you currently have connected to the DVR/NVR/Hybrid
device.
5
Note: In order to view one camera video feed at a me at full screen size, use the mouse to
hover over the video feed you would like to view in full screen, double click the le mouse
buon and the le will expand to the size of the screen (as shown below). To return to the
mul-led video monitor window, double click the le buon, once again, but this me in
the middle of the screen.

©Copyright Qvis Labs. All soware and documentation rights reserved.
Manual updated January 2014
7
You can shutdown the DVR at any point during use, as long as you have completed using the
interface and/or you understand that your CCTV security system will be fully shutdown and
oine once you have instructed the system to switch o. This includes any recording of the
video feeds from the cameras aached to the device/system.
Firstly hover the cursor over the boom of the interface area . This will allow the hidden
‘Toolbar’ to appear giving you four buon opons to choose from.
Go to the ‘Toolbar’ at the boom of the screen and click on the ‘Qvis DVR shutdown’
icon:
A pop up window will ask if you are sure you would like to shutdown, select ‘Yes’ and the
system will iniate shut down procedures.
The Qvis DVR is an embedded Linux computer running complex video soware. As with all
computers, their integrity is maintained beer if they are formally shut down, rather than
having their power abruptly removed. In addion to allowing the operang system to clean
up, the recorded video streams can be properly closed, among other acvies.
Note: Linux is a type of operang system like Microso Windows. It is mainly used on network
systems for its simple, reliable and ecient setup.
Shutdown Procedure
1
2
3

©Copyright Qvis Labs. All soware and documentation rights reserved.
Manual updated January 2014
8
Taskbar Buons
Much like a standard home PC, the Qvis DVR has a taskbar along the boom of the screen
containing a few useful buons.
Boom Right Corner:
This is not used during normal DVR operaon,
it is somemes used during a support call.
Clicking on this buon will bring up the ‘Team
Viewer’ remote connecon soware, so that
our technical support team can help you solve
any issues or queries.
NOTE: This is only used for support. Use the
‘QVIS Viewer’ applicaon suite for normal
remote video viewing and DVR access.
This buon will close all windows and restart
the DVR. Clicking here will bring up a dialog
box. Click “OK” to connue with the restart
process, or click “Cancel” to connue working
with the DVR.
This buon will close all windows and shut
down the DVR. Clicking here will bring up a
dialog box. Click “OK” to connue with the
shutdown process, or click “Cancel” to
connue working with the DVR.

©Copyright Qvis Labs. All soware and documentation rights reserved.
Manual updated January 2014
9
Video Playback Interface
The ‘Video Control Panel’ does not
contain video playback controls anymore.
This secon shows how to successfully login to access the playback interface. There are
two ways to access the Playback interface. Either via the ‘Playback’ or ‘Instant Playback’
opons.
In order to access the Playback interface you need to rstly right
click anywhere on the camera monitoring screen. This will bring up
the opons as shown to the right.
Select ‘Playback’ (highlighted by the red box) and you will then be
asked to input your login details (see next page).
Logging In: Playback
1
2

©Copyright Qvis Labs. All soware and documentation rights reserved.
Manual updated January 2014
10
Video Playback Interface
Type in your ‘User Name’
& ‘Password’ when the
login screen and keyboard
appears.
Once you have successfully logged in you should see the playback
interface, as shown below.
You will see that there are no cameras populang the video
playback secon (highlighted by the red box) on the interface.
Please go to Page 12 ‘Video Playback Interface: Breakdown &
Explanaon’ for instrucons on how to use the interface.
Logging In: Playback
3
4

©Copyright Qvis Labs. All soware and documentation rights reserved.
Manual updated January 2014
11
Video Playback Interface
This second method allows you to eciently and quickly playback footage from a
parcular camera. Meaning that when you login into the playback interface, the
camera you have selected will already be displaying in the video playback secon of
the interface.
Firstly decide which camera you would like
to view footage from, and right click on
the top of that camera le.
Find the opon ‘Instant Playback’ and
hover the cursor over it to bring up the
next set of opons (highlighted in the red
box on the right).
Select how far back you want to go,
up to 30 minutes instantly, and then any
me/day desired once in playback.
When you have selected how far you
want to go back, you will be asked to login
(please see example on Page 10). Once
logged in you will be able to playback that
parcular camera’s footage.
Logging In: Instant Playback
1
2
3
4

©Copyright Qvis Labs. All soware and documentation rights reserved.
Manual updated January 2014
12
Breakdown & Explanaon
Video Playback Interface
1 2 3 4 5 6 7
1 = Full screen
2 = 2x2 ling
3 = 3X3 ling
4 = 4X4 ling
5 = 5X5 ling
6 = 6X6 ling
7 = Populate les (All connected
cameras will be shown on
les. Maximum of 36 les)
View all Analogue and IP cameras on your
DVR/NVR (up to 36 cameras).
Select ling view for playback
Select which month and day you would like to playback footage
from. Your HDD size will determine how far back in the past you
can go.
Calendar
This will show thumbnails of what cameras are connected to the
DVR/NVR. You can drag and drop these in to the les to view.
Select Cameras For Playback
This chapter will explain the step by step process of playing back recorded footage and then
to examine it for moon incidents.
1
2
3

©Copyright Qvis Labs. All soware and documentation rights reserved.
Manual updated January 2014
13
Video Playback Interface
This will show each camera’s (currently
displaying on one of the les above)
levels of moon acvity during a set
me frame.
Please turn to Page 17 to see full
explanaon on how to use this.
Acvity Timeline
Highlight the camera shown on the
les by clicking on it. Use the playback
controls to rewind, fast-forward, pause,
resume, and step forward video footage.
You can also select the precise me and
date of the footage you wish to view.
Using the Playback Controls and Time &
Date Selecon
By clicking this buon you will be able
to create an incident record list, so you
can refer back to it when you want to re-
examine recorded footage. Please go to
Pages 19-20 for a full explanaon.
The buon next to it will allow you to
back-up the record list you have created.
Please go to Pages 22-23 for a full
explanaon.
Incidents Records and Incident Records
Backup
Incident
Records
backup
button
Breakdown & Explanaon
4
5
6

©Copyright Qvis Labs. All soware and documentation rights reserved.
Manual updated January 2014
14
Video Playback Interface
To view their recorded footage within the playback interface, there are numerous ways to
select and arrange the connected cameras. Giving you this exibility will allow you to setup
and tailor the interface towards your preferred way of viewing the recorded video footage.
Below are a list of the ways in which to view video in the playback monitor:
METHOD 1: Double click a thumbnail to automacally place in the rst empty le.
METHOD 2: Select a le with a le click and then double click a thumbnail.
Double Click
Select le Double click camera thumbnail
Selecng and Arranging Cameras
1
2

©Copyright Qvis Labs. All soware and documentation rights reserved.
Manual updated January 2014
15
METHOD 1: Double click a thumbnail to automacally place in the rst empty le.
Selecng and Arranging Cameras
Video Playback Interface
Hold down le mouse buon over
camera le you wish to move to a
new le.
This icon should appear when you
are moving the camera over to the
new le:
METHOD 3: Drag a thumbnail onto a specic le, by holding down the le mouse buon
over the thumbnail, moving it to the le, and then releasing the le mouse buon.
DRAG
METHOD 4: Rearrange a camera by dragging to the desired le.
Release mouse buon when the
cursor is above the le you are
moving the camera to.
The camera footage should now
appear in the new le.
DRAG
1
2

©Copyright Qvis Labs. All soware and documentation rights reserved.
Manual updated January 2014
16
Selecng and Arranging Cameras
Video Playback Interface
METHOD 5: Remove a camera by dragging it outside the video monitoring area.
METHOD 6: Click upper right icon to display all cameras.
DRAG

©Copyright Qvis Labs. All soware and documentation rights reserved.
Manual updated January 2014
17
Video Playback Interface
Playback Timeline
As part of the newly updated intuive playback interface is the incident meline. This is
found at the boom of the playback interface and allows you to search for specic incidents
within a specic me frame. The meline will display detected movement as green level
bars during a 24 hour period. This chapter will show you how to use it.
Timeline is highlighted by the red box below:
For each camera displayed within each video le, an incident meline will appear in the
secon at the boom of the playback interface. Use the scroll bar to nd the camera
footage meline you want.
Firstly select the day on the calendar you wish to view the
video footage from. The meline(s) will then display any
movement acvity.

©Copyright Qvis Labs. All soware and documentation rights reserved.
Manual updated January 2014
18
Video Playback Interface
Playback Timeline
The meline(s) can be zoomed into by using the mouse wheel so that you are able to view a
more decisive me period of incident acvity. You need to have the mouse cursor over the
meline secon in order to zoom in.
You can also start playback from a parcular camera at a parcular me by clicking on the
meline and then the meline will be automacally updated.
By using the sengs to change the me periods for the meline, you will be able to
scrunise footage data in greater detail and eciency.
Each green column represents a level of
moon acvity*. Tall and numerous columns
represent a high level of moon caught by the
camera(s).
*varyingmoonlevelsareonlydisplayedandrecordedwhenusingselectedQVIScameras.Otherwisethemeline
willonlyshowwhenvideowasrecorded,andnotcolumnsdepicngdierentlevelsofmoon.
Use the scroll bar on
the boom to pan le/
right in the meline.
Use the scroll bar
on the right to move
between cameras.
You can also use the mouse scroll wheel to zoom in/out of the meline, when you have the
cursor hovering over it.

©Copyright Qvis Labs. All soware and documentation rights reserved.
Manual updated January 2014
19
This chapter will explain how to create an incident record list. The next chapter will show
you how to back up this list’s video footage to an external data storage device.
Following on from ‘Incidents Records and Incident Records Backup’ on Page 13; when you
click on the ‘Incidents’ buon (located just above the camera footage meline viewer) the
‘Incident Viewer’ window will appear:
The incident viewer will allow
you to index parcular incidents
caught on one or more cameras.
It will display the start & end
mes of each recorded incident
and which camera captured
the footage. You can also give
the incident a unique reference
name to help you to disnguish
between each of them.
Click on the ‘New’ buon at the
boom of the window (shown in
the red box to the le) to add a
new incident to the list.
Video Playback Interface
Incident Records: Records List Menu
1
2

©Copyright Qvis Labs. All soware and documentation rights reserved.
Manual updated January 2014
20
Video Playback Interface
Incident Records: Records List Menu
The window, shown on the right, will
appear aer clicking on the ‘New’
buon.
To index or edit an incident record,
select which camera the incident was
caught on.
Then input the precise date and me
of the incident in to the ‘Incident
Start Time’ and ‘Incident End Time’
input tabs. You will need to refer to
the meline bar to nd the precise
me & date of incident.
To give the indexed incident a name,
you can either allow the interface to
automacally create a unique one
or you can manually create a desired
name.
Once you have lled in all the elds
click the ‘OK’ buon and you will
now be able to see the indexed
incident on the incident viewer.
You will also be able to amend any
details of each indexed incident by
selecng the parcular incident
name and then clicking the ‘Edit’
buon at the boom of the window.
3
4
5
6
7
8
Table of contents
Other Qvis DVR manuals

Qvis
Qvis IAPOLLO HDRT HD User manual

Qvis
Qvis Izeus hdcvi dvr User manual

Qvis
Qvis APOLLO PRO DC LX User manual

Qvis
Qvis Pioneer Quattro User manual

Qvis
Qvis Qvis DVR series User manual

Qvis
Qvis ZEUS LX HD User manual

Qvis
Qvis Quattro User manual

Qvis
Qvis Pioneer-4 User manual

Qvis
Qvis ATLANTIS 1U User manual

Qvis
Qvis DVR User manual

Qvis
Qvis LX ZEUS LITE 1 U User manual

Qvis
Qvis APOLLOC4-500 User manual

Qvis
Qvis LX Apollo series Instruction manual

Qvis
Qvis I-APOLLOS-32 User manual

Qvis
Qvis Real Time 4/8 Channel 960H DVR User manual

Qvis
Qvis APOLLO 32 LX User manual

Qvis
Qvis ATLANTIS 1U User manual

Qvis
Qvis TERMINATOR G620 User manual

Qvis
Qvis ZEUS LITE LX 16 Ch User manual

Qvis
Qvis Iapollo SMART dvr User manual