E-Core Ebb Motivate User manual

www.ecoreathletic.com 1
Ebb Motivate and Flow Motivate
Woven Vinyl Rolls
Technical Manual
Installation · Maintenance · Warranty
Manufactured in the U.S.A. by
Installation
Job Site Conditions 2
Subfloors 2
Subfloor Preparation 2
Storage & Handling 3
Installation 3
Seam Sealing 5
Maintenance
Floor Protection and Jobsite Requirements 6
Cleaning Procedures 6
Deep Cleaning Chart 7
Warranty
Warranty 8
Revised on 22Feb2022
Supersedes all previous versions.
Check website for updates and

www.ecoreathletic.com 2
Ebb Motivate and Flow Motivate Technical Manual
Installation
I. Jobsite Conditions
1. Installation should not begin until after all other trades are finished in the area. If the job requires other
trades to work in the area after the installation of the floor, the floor should be protected with an
appropriate cover.
2. Areas to receive flooring should be weather tight and maintained at a minimum uniform temperature of
65°F (18°C) for 48 hours before, during, and after the installation.
II. Subfloors
1. Ebb Motivate and Flow Motivate may be installed over concrete, Portland- based patching and leveling
materials, and wood.
NOTE: Gypsum-based patching and leveling compounds are not acceptable.
2. Wood Subfloors – Wood subfloors should be double constructed, rigid and free from movement with a
minimum of 18 inches of well-ventilated air space below.
3. Underlayments – The preferred underlayment panel is American Plywood Association (APA)
underlayment grade plywood, minimum thickness of 1/4-inch, with a fully sanded face.
NOTE: Particleboard, chipboard, Masonite and lauan are not considered to be suitable
underlayments.
3. Concrete Floors – Concrete shall have a minimum compressive strength of 3000 psi. New concrete slabs
should cure for a minimum of 28 days before installing. Concrete must be fully cured and permanently dry.
III. Subfloor Requirements and Preparation
1. Subfloors shall be dry, clean, smooth, level, and structurally sound. They should be free of dust, solvent,
paint, wax, oil, grease, asphalt, sealers, curing and hardening compounds, alkaline salts, old adhesive
residue, and other extraneous materials, according to ASTM F710.
2. Subfloors should be smooth to prevent irregularities, roughness, or other defects from telegraphing
through the new flooring. The surface should be flat to the equivalent of 3/16˝ (4.8 mm) in 10´ (3.0 m).
3. Mechanically remove all traces of old adhesives, paint, or other debris by scraping, sanding, or scarifying
the substrate. Do not use solvents. All high spots shall be ground level and low spots filled with an
approved Portland-based patching compound.
4. All saw cuts (control joints), cracks, indentations, and other non-moving joints in the concrete must be
filled with an approved Portland-based patching compound.
5. Expansion joints in the concrete are designed to allow for expansion and contraction of the concrete. If a
floor covering is installed over an expansion joint, it will likely fail in that area. Use expansion joint covers
designed for resilient flooring.
6. Always allow patching materials to dry thoroughly and install according to the manufacturer’s instructions.
Excessive moisture in patching material may cause bonding problems or a bubbling reaction with the
E-Grip III adhesive.
HAZARDS:
SILICA WARNING – Concrete, floor patching compounds, toppings, and leveling compounds can contain
free crystalline silica. Cutting, sawing, grinding, or drilling can produce respirable crystalline silica (particles 1-
10 micrometers). Classified by OSHA as an IA carcinogen, respirable silica is known to cause silicosis and
other respiratory diseases. Avoid actions that may cause dust to become airborne. Use local or general
ventilation or provide protective equipment to reduce exposure to below the applicable exposure limits.

www.ecoreathletic.com 3
Ebb Motivate and Flow Motivate Technical Manual
ASBESTOS WARNING – Resilient flooring, backing, lining felt, paint, or asphaltic “cutback” adhesives can
contain asbestos fibers. Avoid actions that cause dust to become airborne. Do not sand, dry sweep, dry
scrape, drill, saw, bead blast, or mechanically chip or pulverize. Regulations may require that the material be
tested to determine the asbestos content. Consult the document “Recommended Work Practices for
Removal of Existing Resilient Floor Coverings” available from the Resilient Floor Covering Institute.
LEAD WARNING – Certain paints can contain lead. Exposure to excessive amounts of lead dust presents a
health hazard. Refer to applicable federal, state, and local laws and the publication “Lead Based Paint:
Guidelines for Hazard Identification and Abatement in Public and Indian Housing” available from the United
States Department of Housing and Urban Development.
7. Moisture must be measured using the RH Relative Humidity test method per ASTM F2170 standard.
Moisture content should not exceed the allowable limit of the selected Ecore adhesive, or installation
should not proceed until the situation has been corrected.
8. In the event that a moisture mitigation system is required, it must conform to the ASTM F3010 Standard
Practice for Two-Component Resin Based Membrane Forming Moisture Mitigation Systems for use Under
Resilient Floor Coverings.
9. Perform pH tests on all concrete floors. If greater than the allowable limit of the selected Ecore adhesive,
neutralize prior to installation.
10. Adhesive bond tests should be conducted in several locations throughout the area. Glue down 3´ x 3´
test pieces of the flooring with the recommended adhesive and trowel. Allow to set for 72 hours before
attempting to remove. A sufficient amount of force should be required to remove the flooring and, when
removed, there should be adhesive residue on the subfloor and on the back of the test pieces.
IV. Material Storage and Handling
1. Material should be delivered to the job site in its original, unopened packaging with all labels intact.
2. Material must be stored in a climate-controlled environment not to exceed 85°F (30°C)
3. Note: Shipping pallets, cradles, banding, etc. are not intended for storage. Store on end. Storing lying
down may cause permanent welting. Store on a clean, dry, smooth surface.
4. It is normal for Ebb Motivate and Flow Motivate to exhibit light or dark shading, especially at seams.
5. Inspect all materials for visual defects before beginning the installation. No labor claim will be
honored on material installed with visual defects. Verify the material delivered is the correct style,
color, and amount. Any discrepancies must be reported immediately before beginning installation.
6. The material and adhesive must be acclimated at room temperature for a minimum of 48 hours before
starting installation.
NOTE: DO NOT sharply fold or crease the material during handling or installation. This can result
in permanent visual damage to the wear layer which is not covered under warranty.
V. Installation – Roll Direction
1. PLEASE NOTE: Unroll and install Ebb Motivate and Flow Motivate in the same direction.

www.ecoreathletic.com 4
Ebb Motivate and Flow Motivate Technical Manual
VI. Installation – Laying out materials
1. Assume that the walls you are butting against are not straight or square. Using a chalk line, make a
starting point for an edge of the flooring to follow. The chalk line should be set where the first seam will
be located.
2. Lay the rolls on the floor in a way that will use your cuts efficiently. Cut all rolls at the required length,
including enough to run up the wall a couple inches.
3. If end seams are necessary, they should be staggered on the floor and overlapped approximately 2”.
End seams will be trimmed after acclimation period using a square to ensure they fit tightly without
gaps.
4. After allowing proper acclimation and rough cuts are made, you may begin the installation.
5. Align the first edge to the chalk line.
Note: it is very important that the first seam is perfectly straight.
6. Position the second roll. Edges should fit snug with no visual gaps. Care should be taken to not over
compress the seam. Over compressed seams will cause peaking.
7. Repeat for each consecutive sheet necessary to complete the area or those rolls that will be installed
that day.
VII. Installation – Adhesive Application
1. After performing the above procedures, begin the application of the adhesive. We recommend E-Grip
III, a one-component moisture-cured polyurethane adhesive. E-Grip III should not be mixed. It is
specially formulated for use right out of the pail. Apply E-Grip III to the substrate using a 1/16˝ square-
notched trowel.
2. Do not allow adhesive to be forced up into the seam or this will interfere with sealing the seams and
create a discolored line at the seam.
3. Fold over the first drop along the wall (half the width of the roll). Rolls are 6 feet wide, so when roll is
folded over this will leave an exposed area of substrate that is 3 feet wide.
4. Spread the adhesive, taking care not to spread more E-Grip III than can be covered with flooring within
30 minutes. The open time of the adhesive is 30–40 minutes at 70°F and 50% relative humidity.
NOTE: Temperature and humidity affect the open time of the adhesive. Temperatures above 70°F and/or
relative humidity above 50% will cause the adhesive to set up more quickly. Temperatures below 70°F
and/or relative humidity below 50% will cause the adhesive to set up more slowly. The installer should
monitor the on-site conditions and adjust the open time accordingly.
NOTE: Do not allow E-Grip III to cure on your hands or the flooring. Immediately wipe off excess adhesive
with a rag dampened with mineral spirits! Cured adhesive is very difficult to remove from hands. We
strongly suggest wearing gloves while using E-Grip III.
5. Lay the flooring into the wet adhesive. Do not allow the material to “flop” into place; this may cause air
entrapment and bubbles beneath the flooring.
6. Immediately roll the floor with a 75–100 lb. roller to ensure proper adhesive transfer. Overlap each pass
of the roller by 50% of the previous pass to ensure the floor is properly rolled. Roll the width first and
then the length. Roll again within the first 60 minutes.
7. Fold over the second half of the first roll and half the width of the second roll. Taking roll widths into
account, this will provide an exposed area of substrate that is 6 feet wide. Spread the adhesive, roll the
flooring, and repeat for each consecutive drop.
8. Continue the process for each consecutive drop. Work at a pace so that you are always folding material
back into wet adhesive bed.
NOTE: Never leave adhesive ridges or puddles. They will telegraph through the material.

www.ecoreathletic.com 5
Ebb Motivate and Flow Motivate Technical Manual
9. Hand roll all seams after the entire floor has been rolled.
10. Allow adhesive to cure, keeping traffic off the floor for a minimum of 24 hours. Floor should be free from
light rolling loads for a minimum of 72 hours.
VIII. Seam Sealing
1. Seal seams immediately after installation. Wait 24 hours after sealing seams before returning furniture
or appliances to room.
2. Seam sealer options:
Infuze Universal Seam Sealer by Taylor Adhesive
o No additional applicator needed.
o Coverage 140-150 LF
o Non-flammable
Clean all seams and remove any dust and adhesive.
Use painter’s tape on both sides of the seam to keep sealer off the face of the
woven vinyl.
For Infuze sealer, apply and remove excess sealer with spatula.
Remove tape.
Allow seam seal to cure without traffic for a minimum of 24 hours.
Mannington MSS 20 (#832202) Standard Gloss Sealer (1pint can) and one of the following
applicators:
o Mannington VST-96 Professional Applicator Kit (#832204) ordered with seam sealer, or
o #460 Vinyl Sealer Bottle from Crain Cutter Co. Order at https://www.craintools.com/vinyl
o Note: Flammable. Follow all precautions listed on container and SDS information
Clean all seams and remove any dust and adhesive.
Use painter’s tape on both sides of the seam to keep sealer off the face of the
woven vinyl.
Apply seam sealer and remove tape.
Allow seam seal to cure without traffic for a minimum of 24 hours.
Armstrong S-500 Seam Coating kit (20 ml / 0.7 ounces with deglosser)
o Applicator bottle included in kit
o S-500 kit coverage = 50-60 LF
o Note: Flammable. Follow all precautions listed on containers and SDS information
Clean all seams and remove any dust and adhesive.
Use painter’s tape on both sides of the seam to keep sealer off the face of the
woven vinyl.
Apply seam sealer and remove tape.
Allow seam seal to cure without traffic for a minimum of 24 hours.

www.ecoreathletic.com 6
Ebb Motivate and Flow Motivate Technical Manual
Maintenance
It is the Specifier’s responsibility to:
Mandate covering and protection of floor from damage and construction debris until construction is complete.
Assign to the appropriate party responsibility for the initial cleaning of floor following published procedures.
Ecore recommends our environmentally friendly line of maintenance products, including E-Cleaner.
It is the General Contractor’s responsibility to provide:
A building or installation area that is fully enclosed from the elements, e.g., finished roof, windows, doors, etc.
Temperature that is climate controlled with a minimum uniform temperature of 65° F for 48 hours prior to, during,
and after the flooring installation, for acclimation of flooring materials.
Protection for those areas of the flooring that are subject to direct sunlight through doors or windows by having
the doors or windows covered for such time until the installation of the material is complete.
Protection for flooring from damage and construction debris by using an appropriate floor covering until such
time that the recommended initial cleaning may be performed.
NOTE: Rubber feet or rubber mats may cause permanent staining to vinyl surfaces. Ecore does not
recommend placing equipment with rubber feet or rubber-backed mats on vinyl floors.
Cleaning Procedures
1. Daily Maintenance
The floor covering should be regularly vacuumed. A vacuum cleaner with strong suction and soft
brushes that loosen the dirt while removing it at the same time is recommended. To achieve the best
results from your vacuum, follow the instructions from the Centers for Disease Control and Prevention
(CDC): https://www.cdc.gov/healthywater/emergency/cleaning-sanitizing/household-cleaning-
sanitizing.html
2. Preventive Maintenance Considerations
It is suggested that a walk-off mat is used to reduce the number of soils and other foot-borne impurities
that may be carried into the Woven Vinyl Flooring space. Adequate floor protectors are required to
protect against wear from chairs or other furniture. The recommended castors are those with wide
surface areas, similar to castors made for hard surface flooring. To protect the seams and joints, chair
pads are required.
3. Spot Cleaning
Remove stains as soon as possible to avoid setting of the spill. Spot removal is best handled in the
following steps. First, the largest portion of the spill should be removed by blotting or wiping up. During
this step, be careful not to apply so much pressure that the stain spreads.
(1) Watery spills should be blotted with a clean cloth or paper towels to remove.
(2) Solid spills should be scraped using a blunt scraper, brushed with a medium-bristle brush to loosen
the embedded material, and finally vacuumed to remove the solid particles.
www.ecoreathletic.com 7
Ebb Motivate and Flow Motivate Technical Manual
(3) Semi-solids (soft foods, mud, etc.) should be allowed to dry, then aggressively brushed with a
medium bristle brush, and vacuumed away.
Once the spill has been removed, the rest can be treated and removed using a general spot cleaner.
Spot Shot™ aerosol is an effective spot cleaner choice. It can be sprayed directly on the spill, worked
in with a brush for 1 to 2 minutes, and blotted away. When the stain is fully removed, spray a small
amount of water on the area and blot to remove the water with a paper towel.
For difficult stains, we recommend spot cleaning with Clorox Clean-Up™ directly to the spill. Allow the
cleaning product to remain on the flooring for 3-5 minutes. Then use a soft brush to scrub the stain and
blot the stain with a sponge or clean towel to complete the cleaning process. Depending on the age
and severity of the stain, this cleaning process may need to be repeated.
4. Periodic Deep Cleaning
Depending on the level of traffic, Ebb Motivate and Flow Motivate may require deeper cleaning. If this
occurs, warm water extraction is recommended to effectively clean the floor. (DO NOT STEAM CLEAN
FLOOR)
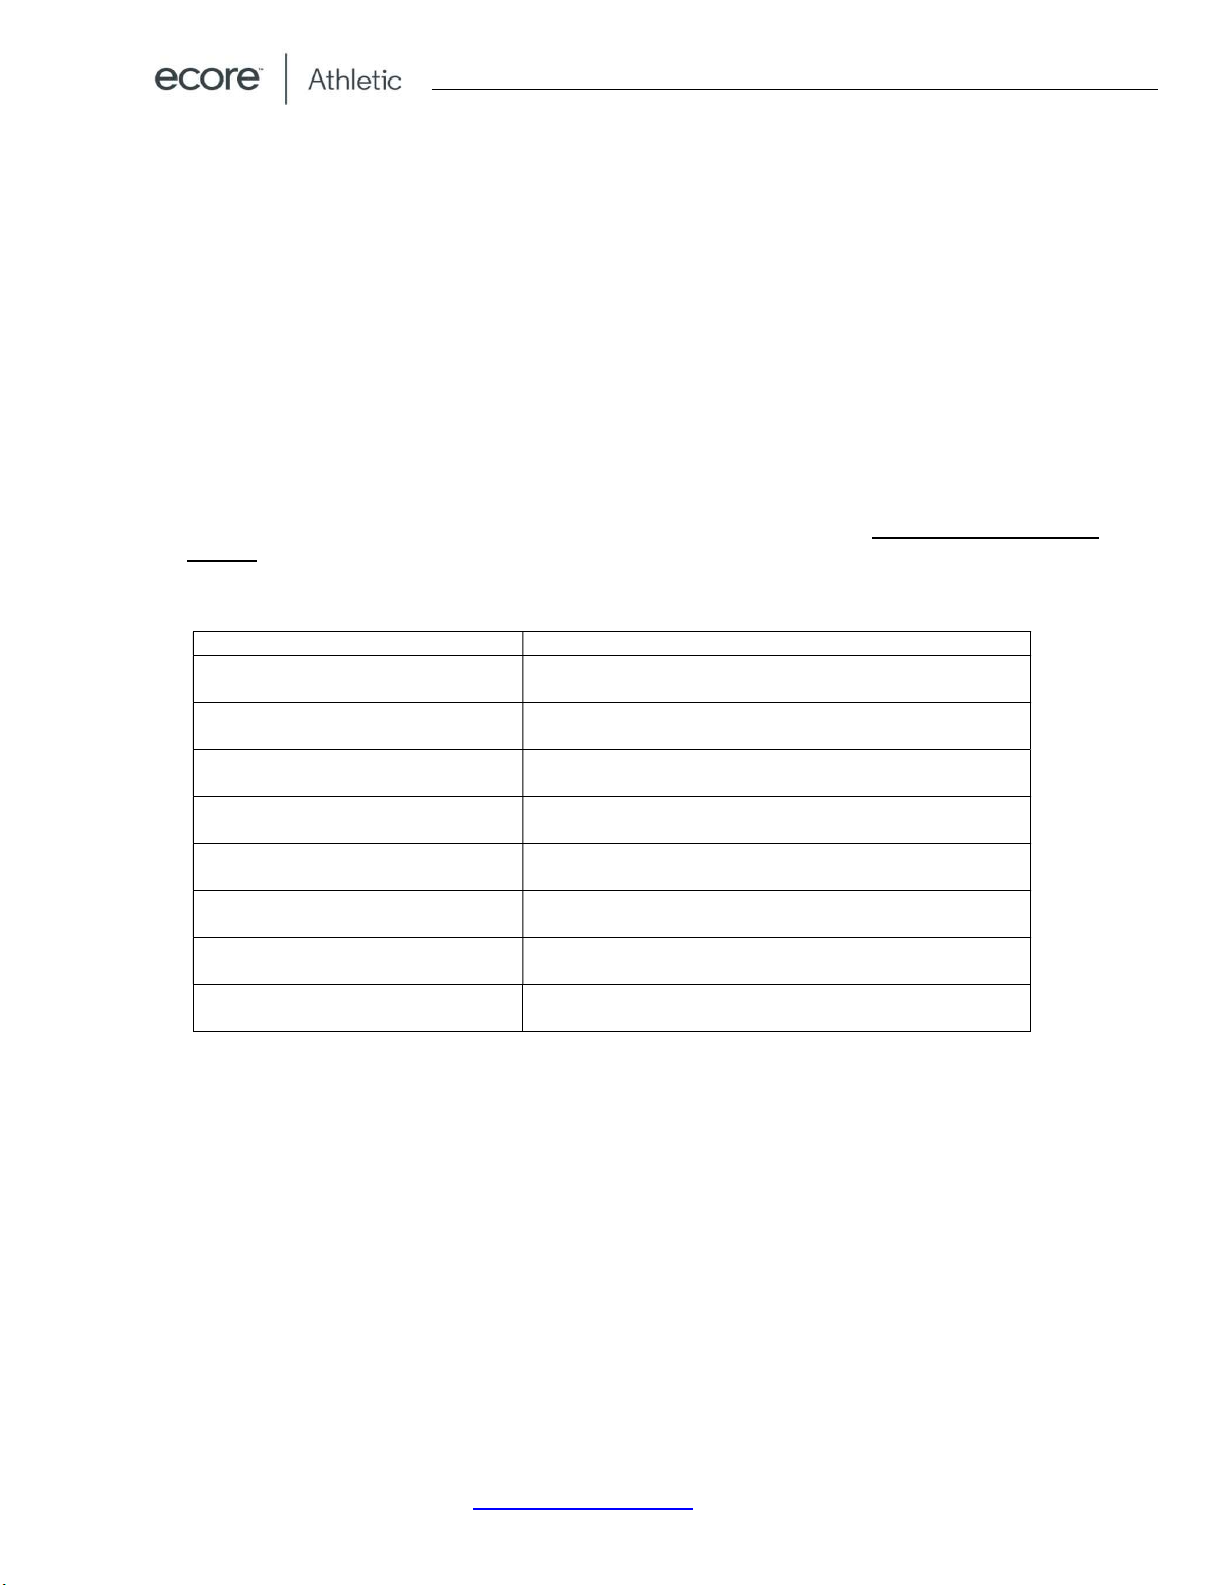
Stain Solution
Oily – Greasy Stains Hot soapy water
Red Fruits Water
Blood Saline solution or diluted chlorine bleach
Hot Drinks Hot water
Cold Drinks Water
Food Soapy water
Marks from Shoes Rub vigorously with a dry cloth
Chewing Gum Freeze spray
www.ecoreathletic.com 8
Ebb Motivate and Flow Motivate Technical Manual
Warranty
Ecore guarantees our Ebb Motivate and Flow Motivate woven vinyl products to be free from defects in
workmanship and materials affecting wearing properties, and to meet their published specifications at time of
manufacturing, for a period of 5 years from the date of installation, provided that the product has been installed
in accordance with the installation instructions issued by us.
Any defect must be notified to us in writing, and we reserve the right to inspect and investigate any alleged
defect. If after this investigation we consider the material to be defective, at the discretion of Ecore, the sole
remedy against the seller will be to repair, to replace, or to issue a credit not exceeding the selling price of the
defective goods. If product is no longer available, Ecore reserves the right to substitute similar product of equal
value and/or quality.
This warranty does not cover:
1. Light or dark shading, especially at seams.
2. Excessive Moisture
3. Chemical Reaction
4. Corrosion
5. Extremes in temperature
6. Abnormal usage above which the product is specified
7. Wear from chairs or other furniture without proper floor protectors
8. Indentations, burns, scratches or surface damage caused by improper maintenance, misuse,
negligence, spike heeled shoes, rolling loads, caster wheels, pebbles, sand, or other abrasive materials
9. Sub-floor irregularities causing premature wear
10. Dissatisfaction due to improper installation and/or maintenance
11. Labor on material installed with obvious defects
12. Labor costs on repair or replacement material
13. Discoloration or bond failure because of unapproved adhesives or improper substrate preparation
14. Staining or discoloration caused by rubber feet, rubber castors, rubber-backed mats, asphalt, driveway
sealers, etc.
15. Damage resulting from unapproved floor care products
16. Purchase of “seconds”, “remnants”, or other (non-first quality) flooring materials
These warranties are in lieu of any other warranty expressed or implied. Ecore shall not be liable for any
incidental or consequential damages which may result from a defect. Some states do not allow the exclusion or
limitation of incidental or consequential damages, so the above limitation or exclusion may not apply to you.
These warranties give you specific rights, and you may also have rights which may vary from state to state. To
know what your legal rights are in your state, consult your local or state Consumer Affairs Office or your State
Attorney General. For the latest warranty information, please see www.ecoreathletic.com .
866.795.2732 - www.ecoreathletic.com
Manufactured in the U.S.A. by
715 Fountain Ave – Lancaster, PA 17601
©2022 All designs and colors are copyrighted by Ecore.
This manual suits for next models
1
Table of contents
Other E-Core Fitness Equipment manuals


Popular Fitness Equipment manuals by other brands


Goalsetter Systems
Goalsetter Systems GS Wall Mount Installation & owner's instructions

Stairmaster
Stairmaster 8G Gauntlet owner's manual

Crivit
Crivit Swing-Stepper Instructions for use

Kompernass
Kompernass KH 2283 instruction manual

Beurer
Beurer EM 59 Heat Instructions for use

Balanced Body
Balanced Body Cadillac manual


