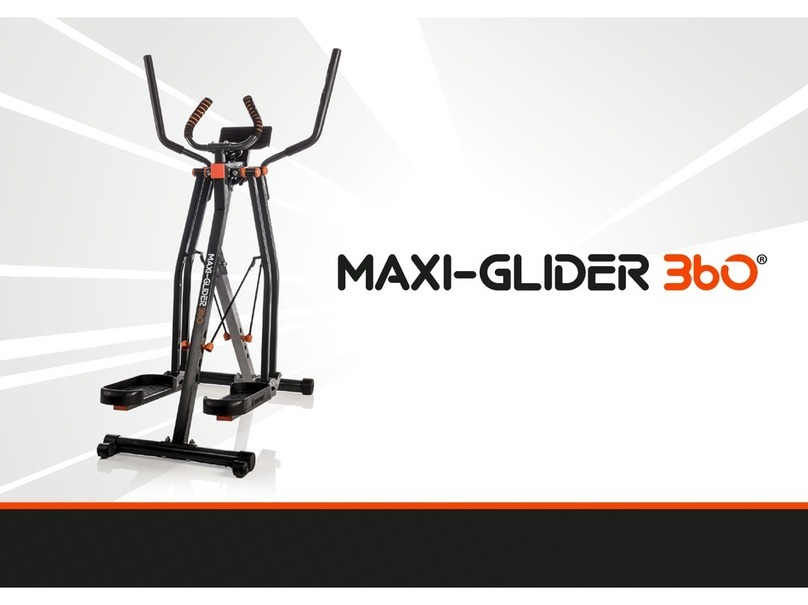
New Image Maxi-Glider 360 User manual

ASSEMBLY AND USER GUIDE
VERSATILE TOTAL BODY WORKOUT SOLUTION
To help you get started visit:
newimagefitness.co.uk
DOWNLOAD THE
NEW IMAGE FITNESS
APP TODAY

We’re passionate about helping you be fit, strong and active!
Whatever your fitness goal, New Image has a range of unique
and easy-to-use fitness solutions to help you be your best.
We know getting started is sometimes the hardest part so we
design all our products to be simple, fun to use and effective.
We hope you enjoy your new Maxi Glider and would love to hear
your experiences. Check out our social channels and take a look
at YouTube for videos, tips and workouts.
to New Image
WELCOME
• Watch exclusive workout videos
• Ask questions to our thriving community
• Check out our nutritional tips and tricks
To find out more about the New Image range of fitness
equipment, tools
and accessories to help you achieve your goals, visit
newimagefitness.co.uk
Join the conversation...
Track your fitness & access all your
workout videos for our New Image range
wherever & whenever you want!
Download the app...


The Maxi-Glider 360®is a versatile and low-
impact workout device that targets your lower
body and core.
The introduction of moving handles ensures
a full body workout that recruits even more
muscles. Gripping the stationary handles is
easier but it’s important to remember that the
more muscles you use, the more calories you’ll
burn.
The Maxi-Glider 360 has been engineered to
be simple to use. Just choose your resistance
level, jump on and get moving.
The following pages will help you get the most
out of your Maxi-Glider 360.
Congratulations on purchasing
your new Maxi Glider!
WHAT’S IN THE BOX:
1pc
1pc
4 PCS
4PCS
1pc 4 PCS
4PCS
1pc
2 PCS
6PCS
1pc
9

Step 1
Stand the main frame
upright and careully spread
apart the A-frame legs.
Insert and screw into place
the star shaped knob into
the centre of the frame as
labelled until firmly fixed in
place. Take caution as this
will be unstable at this point.
Remove the pin locks and
fold out the foot pedal
brackets. Return pin locks
to the hole for storage once
pedals are folded out.
1
4
3
2
9
QUICK-START GUIDE:
Everything you need to assemble your Maxi-Glider 360 is in your pack.
Follow these steps to build it:
Step 2
Attach feet using screws, washers
and nuts included, ensuring the rear
foot has the wheel facing outwards.
Attach foot pedals to the brackets
using supplied screws with the New
Image branding facing outwards.
Use tools &
12 11

x4 (2 per leg)
Step 3
Taking caution, hold out the legs
horizontally and insert the 4 leg
width stoppers 1 by 1. 1 stopper per
leg in each of the respective holes.
This can be done with the product
upright or laid on the floor to avoid
any risk of finger entrapment.
Step 4
Attach the tablet holder and
insert the two fixing screws
supplied using tool provided.
Insert the bungee plugs into the
desired holes, 1 in each side of
the legs (4 total).
Align the the plug shape with
the hole, insert and rotate 90
degrees to lock into position.
Use tool 10

7
8
Step 5
Attach the stationary handle and
insert the provided screws and
washers and tighten into place with
the allen key tool.
Use tool
Step 6
Connect the 2 heart rate sensors
to their respective ends. Then
insert the jack into the back
of the monitor. once in place,
attach the monitor the slide
on bracket and store the wires
neatly to one side of the unit.
10

Step 7
Attach the handles using the
bolts and washers provided
using the allen key tool.
Ensure handles are aligned
properly and bolts are fully
tightened.
Use tool
Storage and Transport
Before transport or storage,
re-lock the pedals in the folded
position.
To do this fold up the pedals
and swing back the moving
legs until they are parralell with
the back leg of the A-frame.
This will help align the locking
holes. Ensure the pin lock is
removed before doing this.
Once parallel, insert the
pin-lock from the outside face
through the designated hole
and find the corresponding
hole in the metal tube. This
should then lock the pedals in
place.
To complete folding for
storage, remove the locking
knob from the A-frame and fold
the front leg flat. This will make
the unit most compact and
easy to store.
7
8
10

Access to all your
workout videos
NEW IMAGE APP
DOWNLOAD THE NEW
IMAGE FITNESS APP TODAY
Track your fitness & access all your
workout videos for our New Image range
wherever & whenever you want!

1.1 Working frequency: This wireless transmitter is a Bluetooth
4.2 device. The working frequency is 2.4GHZ.
1.2 To ensure the data record is real and effective at the mobile device
end, the wireless transmitter records and sends the data of the user
to a mobile device APP only when Bluetooth computer and the mobile
device are connected. First connect the APP to the Bluetooth computer
before starting exercise to ensure the data is recording correctly
1.3 The computer will go into Sleep mode if it receives no signal input in 2
minutes. In Sleep mode, computer is unavailable for the mobile device. At
this time, consumers need to press the button to wake up the computer.
1.4 The Bluetooth of the computer is off by default. Before connecting the
app, please press any button of the computer to turn on the Bluetooth.
1.5 If no app is connected within 60 seconds after Bluetooth is turned on, and the
button is not pressed, the Bluetooth of the computer will be turned off again.
1.6 When the computer is successfully connected to the app, the computer
will turn off the display and all data will be displayed on the app.
1.7 After connecting the app, if you need to reuse the computer, you need
to exit the app and turn off the Bluetooth of the mobile phone.
2.1 Requirements for Mobile device APP Installation: New Image Fitness App
2.1.1 IOS mobile device system should be no lower than IOS11 version
and support Bluetooth 4.2, iPhone 5S and beyond.
2.1.2 For Android, a system no lower than 5.0 is required and
the mobile device shall support Bluetooth 4.2.
FUNCTIONS OF THE BLUETOOTH:
APP OPERATING INSTRUCTIONS:

2.2 Mobile device end APP download:
2.2.1 Scan the 2D QR code to
download and install APP:
2.2.2 Download software from Mobile
device App Store, enter New Image
Fitness, select the application with
the following icon and download:
2.3 Click the New Image Fitness icon on the desktop
of the mobile device, access into APP:
2.3.1 After installation of the APP, the user needs to enter his/
her physical indexes: age, height, and weight in Set up.
Add Name & gender on the view profile section.
2.3.2 Follow further instructions within the app to operate functions

FUNCTIONAL BUTTON:
MODE –Push down to
select functions.
SET – To set the values of time, count
and calories when not in scan mode.
RESET – Push down to reset
time, count and calories.
FUNCTIONS OF THE COMPUTER :
NOT CONNECTED TO NEW IMAGE FITNESS MAP
FUNCTIONS AND OPERATIONS:
1. SCAN: Press the “MODE” button to select the function to “TIME”,
at which time the “SCAN” words appear on the left of the
monitor and monitor will rotate through all the 6 functions:
Time, count, total count, calories, RPM and pulse. Each display
will be hold 6 seconds. In the process of cyclic display of Each
function, press “MODE” button once to make the “SCAN”
disappear in any function mode to display this function. If you
want to return to “SCAN” again, press the “MODE” button to
select the function to “TIME”. In “SCAN” mode, the “SCAN”
word on the left of the monitor flashes continuously.
2. TIME: Display the time from exercise start to end.
3. COUNT: Display the number of counts from exercise start to end.
4. TOTAL
COUNT:
Display the total number of counts of accumulated exercise.
(After the battery is reinstalled, the value will return to zero.)
5. CALORIES: Display the calories burned from exercise start to end.
6. COUNT/
MIN (RPM):
Automatically accumulates the workout counts per minute.
7. PULSE: Measure the user’s heart rate. Press the button to
switch to the pulse function and hold the two heartbeat
sensors in both hands to measure the heart rate.
Remark: During the process of pulse measurement, because of the contact
jamming, the measurement value may be higher than the virtual pulse
rate during the first 2~3 seconds, then will return to normal level. The
measurement value cannot be regarded as the basis of medical treatment.

NOTE:
1. If the battery symbol on the display lights up, please replace the battery.
2. The monitor will automatically shut off if there is no signal received after 2minutes.
3. The monitor will be auto powered on when starting
to exercise push button signal in.
4. When you stop exercising for 4 seconds, the display will stop calculating
and a”STOP”will be displayed on the screen. When you start exercising, the
display will automatically start calculating and the ”STOP” will disappear.
IF YOU WANT TO MODIFY THE TARGET DATA AFTER THE SETTING PROCESS
OR COMPLETION, PRESS “RESET” BUTTON DIRECTLY TO CLEAR ALL SETTINGS,
AND THEN RESET ACCORDING TO THE PREVIOUS DESCRIPTION.
TARGET TRAINING SETTINGS:
This computer has three target training modes: time, count and
calories (when switching to the target function, if there is “SCAN”
font flashing on the display, you need to press the “MODE” button
again to make the “SCAN” font disappear before setting)
1. TIME target
training mode:
First press the “MODE” button to switch to the “TIME” function,
and then press the “SET” button to set the target time (Press and
hold the set button to speed up the setting). When it reaches the
required time, stop the button. Then start to use the machine,
and the display will start to count down. When the countdown
reaches zero, the time function flashes to indicate the completion
of the training target. At this time, if you continue to train, the
computer will automatically start to count up from zero.
2. COUNT
target training
mode:
First press the “MODE” button to switch to the “COUNT”
function, and then press the “SET” button to set the target count
(Press and hold the set button to speed up the setting). When it
reaches the required count, stop the button. Then start to use
the machine, and the display will start to count down. When the
countdown reaches zero, the count function flashes to indicate
the completion of the training target, if you continue to train,
the computer will automatically start to count up from zero.
3. CALORIE
target training
mode:
First press the “MODE” button to switch to the “CAL”
function, and then press the “SET” button to set the target
calorie (Press and hold the set button to speed up the
setting). When it reaches the required calorie, stop the
button. Then start to use the machine, and the display will
start to count down. When the count down reaches zero,
the calorie function flashes to indicate the completion of
the training target. At this time, if you continue to train, the
computer will automatically start to count up from zero.

FUNCTION
SCAN Every 6 seconds
TIME 0:00~99:59
COUNT 0~9999TIMES
TOTAL COUNT 0~9999TIMES
CALORIES 0.0~999.9 CAL
RPM 0~999 TIMES/MIN
PULSE 60~240 BPM
BATTERY TYPE 2pcs of SIZE –AAor UM –3
OPERATING TEMPERATURE 0°C ~ +40°C
STORAGE TEMPERATURE -10°C ~ +60°C
FUNCTIONS OF THE COMPUTER:
CONNECTED TO NEW IMAGE FITNESS APP
MODE – Push down and hold until connecting moving symbol appears. Search for the
product in ‘APPS & DEVICES’ section of the New Image fitness app.
The computer screen will then go blank once connected. All functions can then be
controlled within the Mobile Device.
WARNING — This stationary training equipment is not suitable for
high accuracy purposes.
WARNING — Heart rate monitoring systems may be inaccurate. If
you feel faint stop exercising Immediately.

CHOOSE YOUR RESISTANCE AND GET STARTED:
1. Select your resistance level from 0 to 4 on each of the 4 legs.
2. For a consistant workout, ensure all 4 plugs are at the same level.
3. The higher the number, the greater the level of resistance and the harder
the workout.
4. Step onto the device, holding the stationary handles for balance.
5. Get moving.

THE SQUAT GLIDE
Glide, striding forwards and
backwards but bend at your
knees and hips until you feel
the burn in your glutes.
Resistance level: 0-3
Muscles worked:
Glutes, Calves, Quadriceps,
Hamstrings, Core, Chest,
Arms.
EXERCISES:
THE GLIDE /
THE MAXI GLIDE
Jump on, hold the stationary
handles and glide, striding
forwards and backwards with
alternate legs (The Glide).
For a total body workout,
use the moving handles
(The Maxi Glide).
Resistance level: 0-3
Muscles worked:
Quadriceps, Hamstrings,
Calves, Glutes, Chest, Arms.

THE SINGLE SIDE
Put your weight on one
leg and push the other out
to the side, pausing for a
second before dropping
back down. Do 10 and then
swap legs.
Resistance level: 0-4
Muscles worked: Hip exors,
Hip abductors, Glutes, Core
Duration: 1 minute per leg, 2-3
sets per workout
THE THIGH FLY / THE 360
Holding the stationary
handles, put your weight on
one leg and push the other
out to the side (The Thigh
Fly).
Or, move your leg round in a
circle and returning to centre
(The 360).
Resistance level:
3-4 Slow and Controlled
Muscles worked:
Hip exors, Hip abductors,
Glutes, Core.
THE MAXI PLANK / THE RODEO
Grip the moving handles and
lean forward, your feet pushing
backwards on the pedals. Hold
this position for as long as you can
(The Maxi Plank). Like riding a
horse! Hold the stationary handles
and move both legs forwards and
backwards at the same time from
your core (The Rodeo).
Resistance level:
0-4 Slow and Controlled
Muscles worked:
Core, Triceps, Chest.

THE SKATE
Move one leg forward and out
and one leg backward and out.
Resistance level: 0-3
Muscles worked:
Quadriceps, Hamstrings,
Calves, Glutes,
Core, Chest, Arms.
THE MAXI THIGH FLY /
THE MAXI 360
Holding the moving handles,
put your weight on one leg and
push the other out to the side,
pausing for a second before
dropping back down (The
Maxi Thigh Fly). Holding the
moving handles, move your leg
round in a circle and returning
to centre (The Maxi 360).
Resistance level:
3-4 Slow and Controlled
Muscles worked:
Hip exors, Hip abductors,
Glutes, Core, Arms.

THE DOUBLE 360
Hold the stationary handles and
bend slightly at the hips and
knees. Push both legs forward and
out to the sides, moving your legs
round in a circle and returning to
centre.
Resistance level:
3-4 Slow and Controlled
Muscles worked:
Hip exors, Hip abductors,
Glutes, Core.
THE CHEST FLY
Grip the moving handles and pull
your hands together, lifting your
legs up to the side with just your
upper body. Hold for 10 seconds
and relax. Repeat this 10 times.
Resistance level:
0-4 Slow and Controlled
Muscles worked:
Biceps, Chest, Core

THE IMPORTANCE OF MOVEMENT
We all should aim to be active at least once on a daily basis.
Doing this helps us:
• Maintain a healthy weight
• Maintain the ability to perform
everyday tasks
with ease
• Improve self-esteem
• Reduce symptoms of depression and
anxiety
There are many ways to approach
physical activity and exercise. 150
minutes of moderate intensity activity
per week split into 5 × 30 minute
sessions works well for some while
others would prefer 75 minutes of high
intensity activity (5 × 15 minutes). Your
lifestyle will ultimately determine your
options but for many of us time is the
key driver.
If you’re too busy to go to the gym, make
sure you have everything you need at
home and choose a time of day when
you have the most energy. Mix up your
workout to keep boredom at bay and
keep track of your progress – it will
help keep you motivated to see your
performance improving.
To find out more about the New Image®
range of fitness equipment, tools and
accessories to help you achieve your
goals, visit
newimagefitness.co.uk
Other manuals for Maxi-Glider 360
1
Table of contents
Other New Image Fitness Equipment manuals

New Image
New Image FITT CUBE User manual

New Image
New Image CYCLONE X3 User manual

New Image
New Image Core Magic User manual

New Image
New Image FITT CUBE User manual

New Image
New Image Maxi-Glider 360 User manual

New Image
New Image SlimCycle User manual

New Image
New Image FITT CUBE User manual

New Image
New Image FITT CURVE User manual

New Image
New Image Squat Magic User manual

New Image
New Image FITT ROW User manual