e-nova Axis User manual

I.
I. TTL Loupe Systems –Safety and Care
Instructions
Please read the instruction manual carefully before using your
Enova Loupes, light, or battery. Damages due to disregard of the
instructions within this manual are not covered under the warranty
policy of Enova Illumination.
1.1 Notes on Safety
-Improper use of oculars may result in damage or failure of glue,
resulting in loose or unattached ocular.
-Do NOT look directly into the sun or other intense light while
wearing loupes to avoid eye damage.
-Avoid vibration or shaking of loupes. This may result in loose or
unattached pieces.
-Proper use of the Loupe and Light systems requires parts from
Enova or licensed suppliers only.
1.2 Proper Usage
-Enova Loupes are designed for use in medical, dental, or
veterinary settings only. Enova Loupes are intended only to
enlarge your field of view during clinical or other medical
procedures.
1.3 Notes on Care
Proper care and usage of the products ensure their lifespan. Misuse,
disregard for instructions, or improper care may result in breakage or
deterioration of your Enova products.
-Handle loupes with care, and store in dust-free environment.
-Loupes are water and dust resistant but avoid prolonged contact
with water or submersion. Store in a dry place when not in use.
-Clean oculars and lenses with soap and water or Enova
approved cleaning products only and wipe with dry microfiber
cloth.
-Note: Use moistened cloth to clean. Do not spray disinfectant
directly onto lenses or oculars to avoid over-spray.
-Note: Avoid cleaners with alcohol on plastic frames. Can be
used on metal frames. Aggressive cleaners could damage
lenses.
4.8 Functional Overview of Activ™ Neck Battery and Charger
1. Activ™ neck battery
2. Touch sensor power button
3. Charging port
4. Power Pack mobile charger port
5. Mobile charger power output
4.9 Using the Activ™ Neck Battery
The Battery may not be fully charged when it arrives. We highly
recommend charging your Activ™ Neck Battery fully before first use.
-For mobile charger: plug the mobile charger into wall outlet. Then,
take the power output (4) and plug into the Activ™ Neck Battery (at
the input (3) on the bottom.)
LED Indicator shows status of charge.
-The LED will be illuminated solid green when battery is fully
charged.
-As battery life decreases, the LED will go through the following
sequence:
1. Flashes red when charging
2. Solid green when fully charged
3. Blinks red to indicate low battery. Light itself will also flash.
When light flashes, approximately 5 minutes of life left.
PP 1.5 Battery Pack: If the plus or minus capacitive touch buttons are
pressed, the LEDs will switch to show the brightness level. There are twelve
levels of brightness, but as you press plus or minus, the LED indicators will
go from FIVE green to ONE green to represent full brightness and lowest
brightness, respectively. For use only with clip-on loupe lights.
1
6

V. Warranty Information
This limited warranty covers the replacement of parts, repairs, and associated labor.
Except as otherwise set forth herein, Enova shall not be liable or responsible for any
other actions or damages (special, consequential, or incidental) related to the
products set forth herein. The purchaser is responsible for the return of the product to
Enova or to an authorized distributor and bears the costs of shipping and insurance.
All Enova products carry a 30-day money-back policy.
NOTE: As noted in the product sections of this manual, please carefully check
contents of package to ensure that your order is complete. Enova does not accept
responsibility for items claimed to be missing or damaged more than five business
days after receipt of product.
NOTE: Warranty only valid with proof of purchase from Enova Illumination or an
authorized Enova Product Dealer.
NOTE: All warranties are conditioned upon use of the products under normal
conditions and when used solely for the intended purpose (i.e. medical/clinical use in
a medical/clinical setting). We reserve the right to determine cause of breakage or
failure of all items.
LOUPE AND AXIS™ WARRANTY TERMS
Activ™ Neck Battery, charger, and accessories: 1-year limited warranty
Axis™ 2-year limited warranty on LED and housing; 1-year on cable
Enova Loupes: Limited lifetime warranty on manufacturer’s defects. All Enova Loupes
are warranted to be free of original defects in material and workmanship and to
perform in accordance with stated specifications.
Warranty Limitations (Conditions not covered):
-Loupe deterioration or failure due to improperly following instructions or use
outside of the intended setting.
-Scratches, dents, or nicks that occur after delivery of product.
-Product manufactured to incorrect specifications as supplied by purchaser of
product (e.g. incorrect or missing Rx).
-Attempts to repair product with persons/organizations other than Enova or
authorized dealers.
-Normal wear and tear.
-Use of non-recommended cleaning products will void the warranty.
Direct all questions or concerns about Enova’s Warranty, Products, or Service to the
number and addresses listed below. Enova’s normal hours of operation are M-F from
8am-5pm.
II. Through-the-Lens (TTL) Loupes
2.1 Upon arrival, check product for damages and report immediately.
Check packing slip to ensure all components of your Enova Loupe
through-the-lens system were properly packaged and delivered.
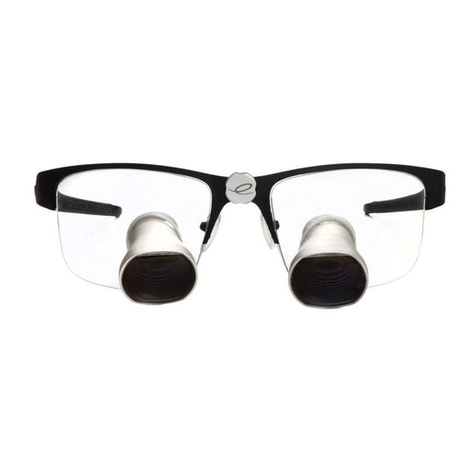
2.2 Functional Overview of TTL Loupes
1. Flexible temple-arm 3. Aircraft aluminum ocular
2. Magnetic adapter for Axis™ 4. Protective carrier lens
2.3 Technical Data
Magnification: 2.5-4.0 x depending on model
Weight: Varies- Approximately 66+ grams
2.4 Check Optics
Enova Loupes are custom designed for your eyes based on the specifications
and prescription (if applicable) you provided. There are no adjustments that
need to be made, as the product has been fit to your eye data already. Put on
loupes and view an object at your working distance to make sure the image is
sharp. There should be no issues, but if something doesn’t seem right, please
call Enova’s helpline to speak with us.
Note: Carefully pinch strap as shown to adjust. Failure to do so may result in a
broken strap.
5
2

3
4
IV. Axis™ LED Light System
Please read the instruction manual carefully before using your Enova
Headlight. Information on product use and care are stated here within.
Damages due to disregard of the instructions within this manual are not
covered under the warranty policy of Enova Illumination.
4.1 Notes on Safety
-Do not look directly into beam of LED light. There is the possibility of
eye injury.
-Use only Enova PP1.5 Battery Pack or Activ™ Neck Battery with
Axis™.
-LED Axis™ may get warm during use but will not get hot enough to
scald or injure.
4.2 Proper Usage
-Axis™ is designed for use in medical, dental, or veterinary settings
only. Axis™ is intended for use in combination with Enova Loupes,
or other loupes using verified Enova adapters.
4.3 Notes on Care
Proper care and usage of the products ensure their lifespan. Misuse,
disregard for instructions, or improper care may result in breakage or
over-wear of your Enova products.
-Handle LED system with care, and store in dust-free environment
-Clean LED system with disinfecting cloth, and wipe with dry
microfiber cloth.
-Note: Before cleaning, make sure LED system is entirely off and
unplugged from sources of power.
-Note: Use moistened cloth. Do not spray disinfectant directly onto
lenses or oculars.
-Note: Do not clean Axis™ with alcohol or other aggressive cleaners.
4.4 Upon arrival, check product for damages and report immediately.
- Check packing slip to ensure all components of your Axis™ system
were properly packaged. This includes the attachable light as well
as the power pack and charger.
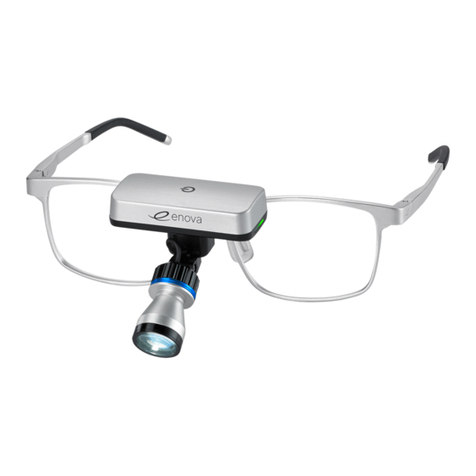
4.5 Functional Overview of Axis™
1. Flip-Up yellow Filter 4. Hinge for angle-adjustment
2. Cable for battery 5. Tightening filter (see below)
3. Magnetic adapter for loupe attachment
4.6 Technical Data
Lamp Type: High-performance LED
Color Temperature: 5300 Kelvin
Lux: 30,000 (at 12”/30cm)
Weight: 0.25 ounces/7 grams
4.7 Mounting your Axis™ Light
Below are instructions for how to mount your Axis™ on Enova TTL. For
instructions on how to mount your Axis™ on other loupe models, please
contact an Enova representative.
-Ensure that Loupe has magnetic adapter secured to frame, with
notches of magnet pointing in down.
-Take Axis™ with cable at the top, and gently secure the magnetic
adapter (3) to magnet on brim of loupe frame.
-Adjust angle of Axis™ such that it is co-axial with eyes and
illuminates the entire field of view through the loupe telescopes.
-Secure the cable to the fasteners on the temple arm of the glasses.
-Tighten hinge of filter (5) using provided screwdriver. Be gentle as
the components are very small. Tighten as you would a normal
screw, until filter moves up and down at your desired resistance.
WARNING: Do not Over-loosen filter, as small internal
components may be lost
4.8 Clean using provided Enova alcohol-free cleaner solution and provided
microfiber cloth.
Other e-nova Medical Equipment manuals

