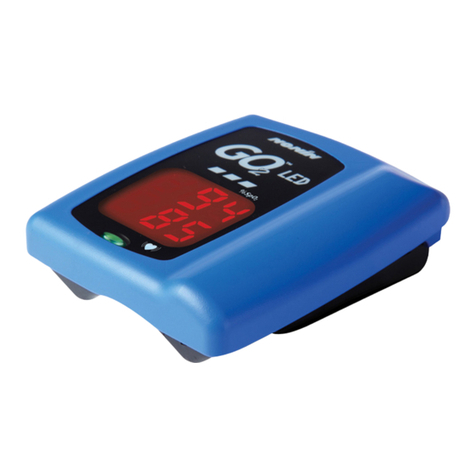
ChoiceMMed America Co MD300C2DS User manual

Fingertip Pulse Oximeter
MD300C2DS USER MANUAL Ver1.0
General Description
Oxygen Saturation is a percentage of Oxyhemoglobin (HbO2) capacity, compounded with oxygen, by all combinative hemoglobin (Hb) capacity in blood. In other words, it is
consistency of Oxyhemoglobin in blood. It is a very important parameter for the Respiratory Circulation System. Many respiratory diseases can result in oxygen saturation being
lowered in human blood. Additionally, the following factors can reduce oxygen saturation: Automatic regulation of organ dysfunction caused by Anesthesia, Intensive Postoperative
Trauma, injuries caused by some medical examinations. That situation might result in light-headedness, asthenia, and vomiting. Therefore, it is very important to know the oxygen
saturation of a patient so that doctors can find problems in a timely manner.
The fingertip pulse oximeter features low power consumption, convenient operation and portability. Place one fingertip into the photoelectric sensor for diagnosis and the pulse rate
and oxygen saturation will appear on the display. It has been proven in clinical experiments that it also features high precision and repeatability.
Measurement Principle
Principle of the oximeter is as follows: A mathematical formula is established making use of Lambert Beer Law according to Spectrum Absorption Characteristics of Reductive
hemoglobin (RHb) and Oxyhemoglobin (HbO2) in red and near-infrared zones. Operation principle of the instrument: Photoelectric Oxyhemoglobin Inspection Technology is adopted in
accordance with Capacity Pulse Scanning and Recording Technology, so that two beams of different wavelength of lights (660nm red and 905nm near infrared light) can be focused
onto a human nail tip through a clamping finger-type sensor. A measured signal obtained by a photosensitive element, will be shown on the oximeter’s display through process in
electronic circuits and microprocessor shown on the oximeter’s display through electronic circuits and a microprocessor.
Diagram of Operation Principle
1. Red and Infrared-ray Emission Tube
2. Red and Infrared-ray Receipt Tube
Precautions For Use
1.Before use, carefully read the manual.
2.Operation of the fingertip pulse oximeter may be affected by the use of an electrosurgical unit (ESU).
3.The fingertip pulse oximeter must be able to measure the pulse properly to obtain an accurate SpO2measurement. Verify that nothing is hindering the pulse measurement
before relying on the SpO2measurement.
4.Do not use the fingertip pulse oximeter in an MRI or CT environment.
5.Do not use the fingertip pulse oximeter in situations where alarms are required. The device has no alarms. It is not for continuous monitoring.
6.Do not use the fingertip pulse oximeter in an explosive atmosphere.
7.The fingertip pulse oximeter is intended only as an adjunct in patient assessment. It must be used in conjunction with other methods of assessing clinical signs and symptoms.
8.In order to ensure correct sensor alignment and skin integrity, the maximum application time at a single site for our device should be less than half an hour.
9.Do not sterilize the device using autoclaving, ethylene oxide sterilizing, or immersing the device in liquid. The device is not intended for sterilization.
10.Follow local ordinances and recycling instructions regarding disposal or recycling of the device and device components, including batteries.
11.This equipment complies with IEC 60601-1-2:2007 for electromagnetic compatibility for medical electrical equipment and/or systems. However, because of the proliferation of
radio-frequency transmitting equipment and other sources of electrical noise in healthcare and other environments, it is possible that high levels of such interference due to
close proximity or strength of a source might disrupt the performance of this device.
12.Portable and mobile RF communications equipment can affect medical electrical equipment.
13.This equipment is not intended for use during patient transport outside the healthcare facility
14.This equipment should not be used adjacent to or stacked with other equipment.
15.It may be unsafe to:
—use accessories、detachable parts and materials not described in the instructions for use
—interconnect this equipment with other equipment not described in the instructions for use
—disassemble, repair or modify the equipment.
16.These materials that contact with the patient’s skin contain medical silicone and ABS plastic enclosure are all pass the ISO10993-5 Tests for invitro cytotoxicity and
ISO10993-10 Tests for irritation and delayed-type hypersensitivity.
Contraindication
It is not for continuous monitoring.
Inaccurate measurements may be caused by
1. Significant levels of dysfunctional hemoglobin (such as carbonyl - hemoglobin or methemoglobin).
2. Intravascular dyes such as indocyanine green or methylene blue.
3. High ambient light. Shield the sensor area if necessary.
4. Excessive patient movement.
5. High-frequency electrosurgical interference and defibrillators.
6. Venous pulsations.
7. Placement of a sensor on an extremity with a blood pressure cuff, arterial catheter, or intravascular line.
8. The patient has hypotension, severe vasoconstriction, severe anemia, or hypothermia.
9. The patient is in cardiac arrest or is in shock.
10. Fingernail polish or false fingernails.
11. Weak pulse quality (low perfusion).
12. Low hemoglobin.
Product Features
1 Simple to operate and convenient to carry.
2 Small volume, light weight and low power consumption.
3 Dual color OLED displays SpO2, PR, Pulse bar, and waveform.
4 Level 1-10 adjustable brightness.
5 6 display modes.
6 2pcs AAA-size alkaline batteries; battery-low indicator.
Intended Use
The Fingertip Pulse Oximeter is only for sports and aviation use. It is ideal for use during sports activities, mountain climbing and piloting airplanes. It is not intended to diagnosis any
medical condition or to be used in medical applications.
Operation Instructions
1 Install two AAA batteries according to the Battery Installation instructions.
2 Place one of your fingers into the rubber opening of the pulse oximeter.
3 Press the switch button one time on front panel to turn the pulse oximeter on.
4 Keep your hands still for the reading. Do not shake your finger during the test. It is recommended that you do not move your body while taking a reading.
5 Read the data from the display screen.
6 After take out the finger, the measurement data displays in the screen for 5 seconds and then the pulse oximeter will power off automatically in 5 seconds.
7 Press the power switch for longer than one second, will adjust the brightness of the oximeter. There are 10 levels of brightness. The default is level four.
After turning on the Oximeter, each time you press the power switch, the Oximeter will switch to another display mode. There are 6 display modes shown as follows:
1. 2. 3. 4. 5. 6.
Front Panel
The pulse bar less than 30% indicates signal inadequacy and the displayed SpO2and pulse rate value is potentially incorrect.
Battery Installation
1. Install two AAA batteries into the battery compartment. Match the plus (+) and minus (-) signs in the compartment. If the polarities are not matched, damage may be caused to
the oximeter.
2. Slide the battery door cover horizontally along the arrow shown as the picture.
Notes:
Please remove the batteries if the pulse oximeter will not be used for long periods of time.
Please replace the battery when the power indicator starting flickering.
Using the Lanyard
1. Thread thinner end of the lanyard through the hanging hole.
2. Thread thicker end of the lanyard through the threaded end before pulling it tightly.
Warnings!
Keep the oximeter away from young children. Small items such as the battery door, battery, and lanyard are choking hazards.
Do not hang the lanyard from the device’s electrical wire.
Please notice that the lanyard which is tied to the oximeter may cause strangulation due to excessive length.
Maintenance and Storage
1. Replace the batteries in a timely manner when low voltage lamp is lighted.
2. Clean surface of the fingertip oximeter before it is used in diagnosis for patients.
3. Remove the batteries if the oximeter is not operated for a long time.
4. It is best to store the product in -20℃~+55℃and ≤93% humidity.
5. Keep in a dry place. Extreme moisture may affect oximeter lifetime and may cause damage.
6. Dispose of battery properly; follow any applicable local battery disposal laws.
Cleaning the fingertip pulse oximeter
Please use medical alcohol to clean the silicone touching the finger inside of oximeter with a soft cloth dampened with 70% isopropyl alcohol. Also clean the being tested finger using
alcohol before and after each test.
Do not pour or spray liquids onto the oximeter, and do not allow any liquid to enter any openings in the device. Allow the oximeter to dry thoroughly before reuse.
The fingertip pulse oximeter requires no routine calibration or maintenance other than replacement of batteries.
The use life of the device is five years when it is used for 15 measurements every day and 10 minutes per one measurement. Stop using and contact local service center if
one of the following cases occurs:
An error in the Possible Problems and solutions is displayed on screen.
The oximeter cannot be powered on in any case and not the reasons of battery.
There is a crack on the oximeter or damage on the display resulting readings cannot be identified; the spring is invalid; or the key is unresponsive or unavailable.
Specifications
1. Display Type
OLED display
2. SpO2
Display range: 0%~100%
Measurement range: 70%~100%
Accuracy: 70%~100%±2%; 0%~69% no definition
Resolution: 1%
ARMS Value Analysis
Item
70--100
90--100
80--<90
70--<80
#pts
231
82
89
60
Bias
0.03
-0.06
0.07
0.12
ARMS
1.07
0.92
1.13
1.18
Bland-Altman plot analysis of sampled data points on all subjects as below
A functional tester cannot be used to assess the accuracy of a pulse oximeter monitor or sensor. Clinical testing is used to establish the SpO2accuracy. The measured arterial
hemoglobin saturation value (SpO2) of the sensors is compared to arterial hemoglobin oxygen (SaO2) value, determined from blood samples with a laboratory CO-oximeter. The
accuracy of the sensors in comparison to the CO-oximeter samples measured over the SpO2range of 70%~100%. Accuracy data is calculated using the root-mean-squared (Arms
value) for all subjects, per ISO 9919:2005, Medical Electrical Equipment –Particular requirements for the basic safety and essential performance of pulse oximeter equipment for
medical use.
A functional tester is used to measure how accurately Fingertip Pulse Oximeter is reproducing the specified calibration curve and the PR accuracy.
The model of functional tester is Index2 FLUKE simulator and the version is 2.1.3.
3. Pulse Rate
Display range: 0bpm~250bpm
Measure range: 30bpm~250bpm
Accuracy: 30bpm~99bpm, ±2bpm; 100bpm~250bpm, ±2%
Resolution: 1bpm
4. Probe LED Specifications
Wavelength
Radiant Power
RED
660±3nm
3.2mw
IR
905±10nm
2.4mw
NOTE: The information about wavelength range can be especially useful to clinicians.
5. Power Requirements
Two AAA alkaline Batteries
Power consumption: Less than 25mA
Battery Life: Two AAA 1.5V, 800mAh alkaline batteries could be continuously operated as long as 16 hours.
6. Environment Requirements
Operation Temperature: 5℃~40℃
Storage/ Transport Temperature: -20℃~+55℃
Ambient Humidity: ≤80% no condensation in operation; ≤93% no condensation in storage/transport
Atmosphere pressure: 86kPa~106kPa
7. Equipment data update period
As shown in the following figure. Data update period of slower average is 8s.
8. Classification
According to the type of protection against electric shock: INTERNALLY POWERED EQUIPMENT;
According to the degree of protection against electric shock: TYPE BF APPLIED PART, (applied part: the rubber hole of the device);
According to the degree of protection against ingress of water: IPX1
According to the mode of operation: CONTINUOUS OPERATION
Declaration
Guidance and Manufacturer’s declaration – electromagnetic emissions-For all EQUIPMENT and SYSTEMS
Guidance and Manufacturer’s declaration - electromagnetic emission
The Pulse Oximeter is intended for use in the electromagnetic environment specified below. The customer or the user of Pulse Oximeter should assure that it is used in such an
environment.
Emission test
Compliance
Electromagnetic Environment – guidance
RF emissions CISPR 11
Group 1
The Pulse Oximeter uses RF energy only for its internal function. Therefore, its RF emissions are very low
and are not likely to cause any interference in nearby electronic equipment.
RF emissions CISPR 11
Class B
The pulse Oximeter is suitable for use in all establishments, including domestic establishments and those
directly connected to the public low-voltage power supply network that supplies buildings used for domestic
purposes.
Harmonic emissions
IEC 61000-3-2
Not Applicable
Voltage fluctuations/ flicker emissions
IEC 61000-3-3
Not Applicable
Guidance and Manufacturer’s declaration – electromagnetic immunity-For all EQUIPMENT and SYSTEMS
Guidance and Manufacturer’s declaration - electromagnetic immunity
The Pulse Oximeter is intended for use in the electromagnetic environment specified below. The customer or the user of the Pulse Oximeter should assure that it is used in such
an environment.
Immunity test
IEC 60601 test level
Compliance Level
Electromagnetic Environment – guidance
Electrostatic
Discharge (ESD)
IEC 61000-4-2
+/- 6kV contact
+/- 8kV air
+/- 6kV contact
+/- 8kV air
Floors should be wood, concrete or ceramic tile. If floor are covered with
synthetic material, the relative humidity should be at least 30%.
Power frequency (50/60 Hz) magnetic
field
IEC 61000-4-8
3A/m
3A/m
Power frequency magnetic fields should be at levels characteristics of a
typical location in a typical commercial or hospital environment.
Guidance and Manufacturer’s declaration – electromagnetic immunity-For all EQUIPMENT and SYSTEMS that are not LIFE-SUPPORTING
Guidance and Manufacturer’s declaration - electromagnetic immunity
The Pulse Oximeter is intended for use in the electromagnetic environment specified below. The customer or the user of the Pulse Oximeter should assure that it is used in such
an environment.
Immunity test
IEC 60601 test
level
Compliance Level
Electromagnetic Environment – guidance

Radiated RF
IEC 61000-4-3
3 V/m
80 MHz to 2.5 GHz
3 V/m
Portable and mobile RF communications equipment should be used no closer to any part of the Pulse
Oximeter, including cables, than the recommended separation distance calculated from the equation
applicable to the frequency of the transmitter.
Recommended separation distance
80 MHz to 800 MHz; 800 MHz to 2.5 GHz
Where P is the maximum output power rating of the transmitter in watts (W) according to the transmitter
manufacturer and d is the recommended separation distance in meters (m).
Field strengths from fixed RF transmitters, as determined by an electromagnetic site surveya, should be less
than the compliance level in each frequency range. b
Interference may occur in the vicinity of equipment marked with following symbol:
NOTE 1 At 80 MHz and 800 MHz, the higher frequency range applies.
NOTE 2 These guidelines may not apply in all situations, Electromagnetic propagation is affected by absorption and reflection structures, objects and people.
a Field strengths from fixed transmitters, such as base station for radio (cellular/cordless) telephones and land mobile radios, amateur radio, AM and FM radio broadcast and TV
broadcast cannot be predicted theoretically with accuracy. To assess the electromagnetic environment due to fixed RF transmitters, an electromagnetic site survey should be
considered. If the measured field strength in the location in which the Pulse Oximeter should be observed to verify normal operation. If abnormal performance is observed,
additional measurements may be necessary, such as reorienting of the relocating the Pulse Oximeter.
b Over the frequency range 150 kHz to 80 MHz, fields strengths should be less than 3 V/m
Recommended separation distances between portable and mobile RF communications equipment and
the EQUIPMENT or SYSTEMS - For all EQUIPMENT and SYSTEMS that are not LIFE-SUPPORTING
Recommended separation distances between
portable and mobile RF communications equipment and Pulse Oximeter
The Pulse Oximeter is intended for use in electromagnetic environment in which radiated RF disturbances are controlled. The customer or the user of the Pulse Oximeter can
help prevent electromagnetic interference by maintaining a minimum distance between portable and mobile RF communications equipment (transmitters) and the Pulse Oximeter
as recommended below, according to the maximum output power of the communications equipment.
Rated maximum output power of
transmitter (W)
Separation distance according to frequency of transmitter (m)
80 MHz to 800 MHz
800 MHz to 2.5 GHz
0.01
0.1167
0.2334
0.1
0.3689
0.7378
1
1.1667
2.3334
10
3.6893
7.3786
100
11.6667
23.3334
For transmitters rated at a maximum output power not listed above, the recommended separation distanced in meters (m) can be estimated using the equation applicable to the
frequency of the transmitter, where P is the maximum output power rating of the transmitter in watts (W) according to the transmitter manufacturer.
NOTE 1 At 80 MHz and 800 MHz, the separation distance for the higher frequency range applies.
NOTE 2 These guidelines may not apply in all situations. Electromagnetic propagation is affected by absorption and reflection from structures, objects and people.
Possible Problems and Solutions
Problems
Possible reason
Solution
SpO2or PR can not be shown
normally
1. Finger is not inserted correctly
2. Patient’s SpO2value is too low to be measured
1. Retry by inserting the finger
2. There is excessive illumination
3. Try some more times. If you can make sure no problem exist in
the product, please go to a hospital timely for exact diagnosis.
SpO2or PR is shown unstably
1. Finger might not be inserted deep enough.
2. Excessive patient movement
1. Retry by inserting the finger
2. Be calmness
The oximeter cannot be
powered on
1. No battery or low power of battery
2. Batteries might be installed incorrectly
3. The oximeter might be damaged
1. Please replace batteries
2. Please reinstall the batteries
3. Please contact with local customer service centre
Indication lamps are suddenly
off
1. The product is automatically powered off when no signal is detected longer
than 8 seconds
2. The battery power is too low to work
1. Normal
2. Replace the batteries
“Error3” or “Error4” is
displayed on screen
1. Err 3 means the red emission LED is damaged
2. Err 4 means the infra-red emission LED is damaged
1. Check the red emission LED
2. Check the infra-red emission LED
Error 6
Err 6 means the screen is failure
Please contact with local customer service centre
“Error7” is displayed on
screen
Err 7 means all the emission LED or reception diode is damaged.
Please contact with local customer service centre
Symbol Definitions
Symbol
Definition
Symbol
Definition
Type BF applied part.
Attention
Protected against dripping water.
﹪SpO2
Oxygen saturation
PR bpm
Pulse rate (BPM)
Low power indication
No SpO2Alarm
SN
Serial No.
Storage temperature and relative humidity
Follow instruction for use
Date of Manufacture
Authorized representative in the European community
European union approval
Manufacturer’s information
Waste electrical and electronic equipment
Box Contents
1. Fingertip pulse oximeter
2. One lanyard
3. Two AAA batteries
4. One instruction manual
5. One carrying pouch
Applicable Models
MD300C2DS MD300C2DS-6
LIMITED WARRANTY
1. Limited Warranty
This Limited Warranty is valid only if you purchased the product from a ChoiceMMed America Corporation(“ChoiceMMed”) authorized Reseller.
Customers can obtain the Limited Warranty to the applicable warranty period specified for different ChoiceMMed's products:
The warranty period of equipment is two years. The warranty period of accessories is six months.
1.1 ChoiceMMed warrants the software, mechanical and electronic components of this product to be free of defects in material and workmanship if used under normal operating
conditions.
If the product displays any defects within the specified warranty period and that defect is not excluded under clause 4, ChoiceMMed will either repair or replace the product using new
or reconditioned product or parts. In the event that ChoiceMMed decides to replace the entire product, this Limited Warranty shall apply to the replacement product for a new specified
warranty period from the date of replacing of the original product.
1.2 When a product or part is exchanged, any replacement item becomes your property and the replaced item becomes ChoiceMMed's property. Parts provided by us in fulfillment of
its warranty obligation must be used in products for which warranty service is claimed.
1.3 To obtain warranty service, you must deliver the product, freight collect, in either its original packaging or packaging providing an equal degree of protection, to the address
specified by ChoiceMMed. In accordance with applicable law, ChoiceMMed may require that you furnish proof of purchase details and/or comply with registration requirements before
receiving warranty service. It is your responsibility to backup any data, software, or other materials you may have stored or preserved on the product. It is likely that such data, software,
or other materials will be lost or reformatted during service, and ChoiceMMed will not be responsible for any such damage or loss.
2. Online Registration
Please do remember to register your new ChoiceMMed equipment, which can quickly be completed by visiting www.choicemmedamerica.com/register. We would ask that you read
the terms and conditions of our Limited Warranty carefully. If the product purchase is registered, this will help you obtain our full warranty service at a convenient and efficient way.
3. Warranty Service; Return Authorization Number
If you are not able to solve your issue, you need to contact us to request a Return Authorization (RA) Number. All inquiries must be accompanied by a description of the problem, the
RA number, and a copy of the original sales receipt.
RETURN ADDRESS: ChoiceMMed America Corporation C/O Keystone Industrial Park, 2558 Pearl Buck Rd, Suite 8A, Bristol, PA 19007
3.1 No returns can be accepted without a valid RA number.
3.2 Purchaser should not have to pay for freight if there is a warranty issue or a defect issue with the product
4. Warranty Limitations and Exclusions
4.1 This Limited Warranty does not cover consumable parts. These include, but are not limited to; display face, batteries, carrying case, lanyard, etc.
4.2 This Limited Warranty does not cover the product if it has been electronically or mechanically modified in any way provided that any modifications were not done by ChoiceMMed
or their authorized personnel. If the product needs to be modified or adapted in order to comply with applicable local technical or safety standards in any country which is not the
country for which the product was originally developed and manufactured, this modification / adaptation shall not be considered a defect in materials or workmanship. This Limited
Warranty does not cover any such modification / adaptation, regardless of whether it was carried out professionally or not. Under the terms of this Limited Warranty, ChoiceMMed shall
not be held responsible for any cost resulting from such a modification / adaptation provided that any modifications were not done by ChoiceMMed or their authorized personnel
4.3 Product damage or defects caused by the following conditions are not covered by this Limited Warranty:
4.3.1 improper handling, neglect or failure to operate the unit in compliance with the instructions given in user or service manuals
4.3.2 connection or operation of the unit in any way that does not comply with the technical or safety regulations applicable in the country where the product is used.
4.3.3 any Act of God or Nature (such accident, fire, flood, etc.) or any other condition that is beyond the control of ChoiceMMed.
4.4 Any repair or opening of the unit carried out by unauthorized personnel (including the user) will void the Limited Warranty completely.
4.5 Products which do not meet the terms of this Limited Warranty will be repaired exclusively at the buyer's expense. ChoiceMMed or its authorized service center will inform the
buyer of any such circumstance and request a written order to repair the product. In the event that the buyer fails to submit a written repair order within 6 weeks of notification,
ChoiceMMed reserves the right to dispose of the product in an appropriate, environmentally friendly manner.
5. Warranty Transferability
This Limited Warranty is extended exclusively to the original buyer (customer of authorized Reseller) and is not transferable to anyone who may subsequently purchase this product.
No other person (distributor, dealer, fulfiller, retailer etc.) shall be entitled to give any warranty promise on behalf of ChoiceMMed.
6. Other Warranty Rights and National Law
6.1 This Limited Warranty does not exclude or limit the buyer's statutory rights as a consumer in any way.
6.2 The Limited Warranty regulations mentioned herein are applicable unless they constitute an infringement of applicable statutory local laws.
6.3 This Limited Warranty does not detract from any statutory seller's obligations in regard to any lack of conformity of the product and any hidden defect.
7. Amendment
Warranty service conditions are subject to change with the approval of both parties.
Contact Information
Phone: 215 874 0458
Email: [email protected]
Distributed by:
ChoiceMMed America Corporation
Bristol, PA 19007
US Customer Service Site
ChoiceMMed America Corporation
C/O Keystone Industrial Park
2558 Pearl Buck Rd: Suite 8A
Bristol, PA 19007
Phone: (215)874-0458
www.choicemmedamerica.com
ChoiceMMed America Corporation
©2015 All RIGHTS RESERVED
Revised date: December 15, 2015
Other ChoiceMMed America Co Medical Equipment manuals
Popular Medical Equipment manuals by other brands
GE
GE GEH-ECG 1200 user guide
Access Sensor Technologies
Access Sensor Technologies UPAS v2 user manual
PamMobility
PamMobility SYNAGO 727T0045 Instructions for installation and use
Canon
Canon CXDI-1 Operation manual

Nasco Healthcare
Nasco Healthcare Infant Deluxe 101-130 instruction manual
eSight
eSight 3 user guide

