E-Pill MedSmart 995040 User manual

1
Instruction Manual
e-pill®MedSmart®Voice
Locked Automatic Pill Dispenser
Item: 995040
Carefully review and save this setup guide

2
Components
Medication Tray (x1)
SKU 992040
Locked Automatic Pill Dispenser (x1)
SKU 995040
Dosage Template Set (x1)
Not Available Separately
Key (x2)
SKU 995030
AA Battery (x4)
Not Available Separately
Power Cord (x1)
Not Available Separately

3
Introduction
The e-pill® MedSmart Voice locked automatic pill dispenser is designed to
remind and dispense pills according to the patient’s dosing schedule,
reminding by means of voice alarm and blinking lights. MedSmart Voice will
make the correct dose available at the correct time, keeping all other pills
secure via a locked lid.
We recommend that you always keep e-pill MedSmart Voice locked. Two keys
are included - one key for the caregiver and one key to be kept as a backup.
Note: e-pill MedSmart Voice is a locked pill dispenser, but it is not rated as being
tamperproof. It should NOT be used to administer pain medications or Schedule
II/III drugs.
How it Works
At dose time, the alarm will sound and the internal tray will rotate, making the
correct dose available. Turn the dispenser upside down to dispense - this will
release the correct dose and silence the alarm.
e-pill® MedSmart® Voice
Locked Automatic Pill Dispenser

4
SETUP –STEP 1
Powering On and Opening the Lid
1. Turn the pill dispenser upside down
2. Slide the battery door latch to unlock
3. Remove the battery door
4. Insert the included 4 AA batteries making sure that they are placed in
the correct direction
5. e-pill MedSmart Voice is now on
6. Replace the battery door and slide the door latch to its lock position
7. Keep the dispenser upside down and unlock its large round cover. To
unlock, insert the key into the silver lock. Turn the key a ¼ turn clockwise
(to the right). WARNING: Do not turn the key more than a ¼ turn when
unlocking or locking.
8. Turn MedSmart Voice right side up
9. Plug the power cord into the wall and into the dispenser
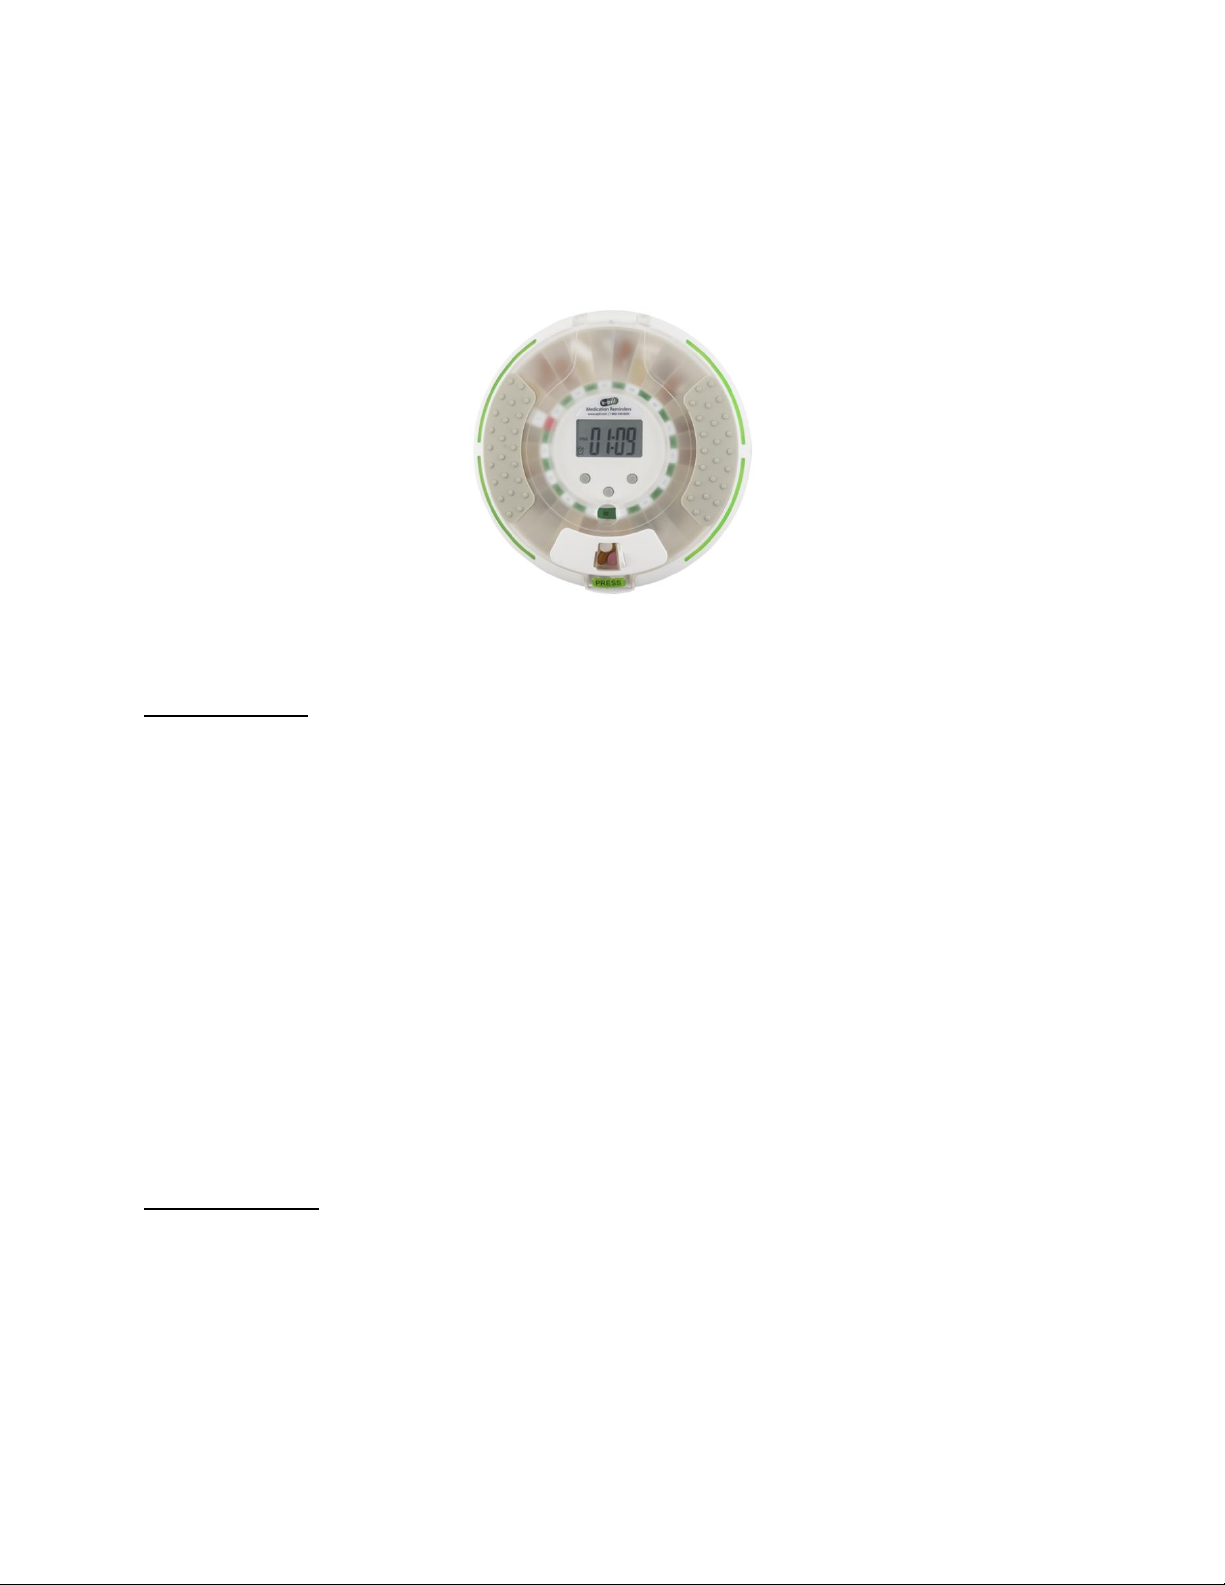
10. On the front of the lid, push the PRESS button down until you hear a
click. The door is now unlatched. Lift up to open.
Clock - Setting the Clock
1. Press and Hold button A for a few seconds until “:” stops blinking,
(located between the hours and minutes) then release
2. Press button B to advance the hours (note AM/PM)
3. Press button C to advance the minutes
4. Press button A to save. The “:” symbol will now blink
5. You’ll be confirmed with “Pill Dispenser Settings Updated”
6. Optional –Set the clock to use the 24-hour time format: e-pill MedSmart
Voice is set to use the 12-hour time format by default (AM/PM). To
switch to 24-hour format:
a. With the current time displayed, press button C to enter the
settings menu
b. Press button C again to switch between 12-hour (AM/PM) and 24-
hour time formats
c. Press button A to save

5
Alarms - Setting and Deleting Alarms
All alarms MUST be set in chronological order starting at 12 AM (midnight)
1. Press button A. “1” will appear next to the alarm clock symbol
2. To set the alarm time press button B for the hour (note AM/PM) and
button C for the minutes
3. Press button A to save and to advance to the next alarm
4. For Alarms 2 thru Alarm 6 continue as above
a. Button B for the hour, button C for the minutes, button A to save
5. Exit the Alarm Setting Mode by pressing button A repeatedly until the
current time is show (occurs after Alarm 6)
6. You’ll be confirmed with “Alarm Setup Successfully”
Alarms - Deleting an alarm
1. Press button A until you see the alarm you wish to delete
2. Press button B until --:-- is displayed (occurs after 11:00 p.m. or 23:00).
3. Exit the Alarm Setting Mode by pressing button A repeatedly until the
current time is show (occurs after Alarm 6)
4. You’ll be confirmed with “Alarm Setup Successfully”
Alarms –Setting the Alarm Volume
3 alarm volumes: Silent (0), Medium Volume (1), Loud Volume (2)
1. With the current time shown, press button C to enter the settings menu
2. Press button B to switch between the volume levels: 0, 1 and 2
3. Press button A to save

6
SETUP –STEP 2
Filling the Tray
1. Remove the clear tray that is inside the dispenser. This makes filling the
tray easier.
2. e-pill MedSmart Voice comes with 9 different dosage templates. Each
template is designed for a specific number of alarms and, very
importantly, the time of day you are filling the tray. Place the correct
template based on your needs into the tray’s template slot.
3. With the tray’s e-pill sticker at 6 o’clock, fill the tray counter-clockwise.
The first dose goes into the compartment immediately to the right of the
tray’s e-pill sticker.
4. Fill compartments (up to 28 dosages are available) with pills using the
dosage template as a guide.
5. Place the tray into the dispenser. Align the tray so that the compartment
with the tray’s e-pill sticker is directly below the gray button labeled “B”.
6. Close the lid, turn the dispenser over, and lock the dispenser
Locking and Unlocking the Dispenser
Lock: When closing the lid, you will NOT hear a click. Please double check that
the lid is completely closed before turning the dispenser over to lock it. To
lock, insert the key into the silver lock and turn the key counter-clockwise
(turn to the left) a ¼ turn.
Unlock: To unlock, turn the dispenser upside down, insert the key into the
silver lock and turn the key clockwise (turn to the right) a ¼ turn.
Note: When locking or unlocking do not use excessive force or turn the key
more than a ¼ turn.

7
Dispensing
1. The device will alarm for up to 60 minutes along with blinking lights
2. Slide open the white dispensing door
3. Dispense by turning e-pill MedSmart Voice upside down
4. Dispensing turns off the alarm. You’ll be confirmed with “Thank you”
after medications are dispensed.
Alarm Duration
At alarm time a voice reminder “It’s time for your medications” will sound for
up to 60 minutes. During the first 10 minute the alarm will go off once a
minute. For minutes 11-59 the alarm will go off every 3 minutes. The lights
will blink every 3 seconds for up to 60 minutes.
Missed Dose
If a dose is not dispensed within 60 minutes after the alarm has started, the
voice reminder message “Patient may have missed their medications” will
sound every minute for up to 4 minutes. After this, the pills will remain
available until the next alarm time when the next dose rotates into position,
and thus rotating away the missed dose.
Low Battery
We recommend keeping e-pill MedSmart Voice plugged in. However, when the
dispenser starts to run low on battery, the low battery symbol will appear. At
this time, replace all 4 AA batteries as soon as possible - using only alkaline
batteries. The estimate battery life is 6-12 months when not plugged in.
Note: Only use alkaline/non-rechargeable batteries in e-pill MedSmart Voice.
The dispenser does not charge batteries.
Power Saving Mode
To save power, e-pill MedSmart Voice will enter stand-by mode by turning off
its display after several minutes of no operation. At alarm time, the dispenser
will wake up and sound its alarm.

8
Follow us on:
e-pill, LLC
49 Walnut Street, Bldg.4
Wellesley, MA 02481, USA
United States: 1-800-549-0095
International: +1-781-239-2941
www.epill.com
Disclaimer:
Organizing medications correctly, setting and assigning alarm/dose times and determining what medications go into
each slot is the responsibility of you, your caregiver, and/or your health care provider. This e-pill Medication
Reminder is only a supplement to any memory system that you currently use to remind yourself to take medications.
The user maintains full responsibility to administer medication at the appropriate times and to keep the device
secure and locked. e-pill, LLC assumes no responsibility for any incidental or consequential damages, including
without limitation, damages or injuries resulting from malfunction of the product. e-pill, LLC’s liability shall under no
circumstances exceed the amount paid by the user for the dispenser.
Table of contents
Other E-Pill Dispenser manuals
Popular Dispenser manuals by other brands

NSI
NSI Tork S1 manual

Bunn
Bunn ULTRA-2 PAF Use & care instructions

LG
LG WD510AS owner's manual

Franke
Franke RODX616 Installation and operating instructions

Kimberly-Clark PROFESSIONAL
Kimberly-Clark PROFESSIONAL 4980 installation guide

START International
START International Labelmoto LD6025 quick start guide