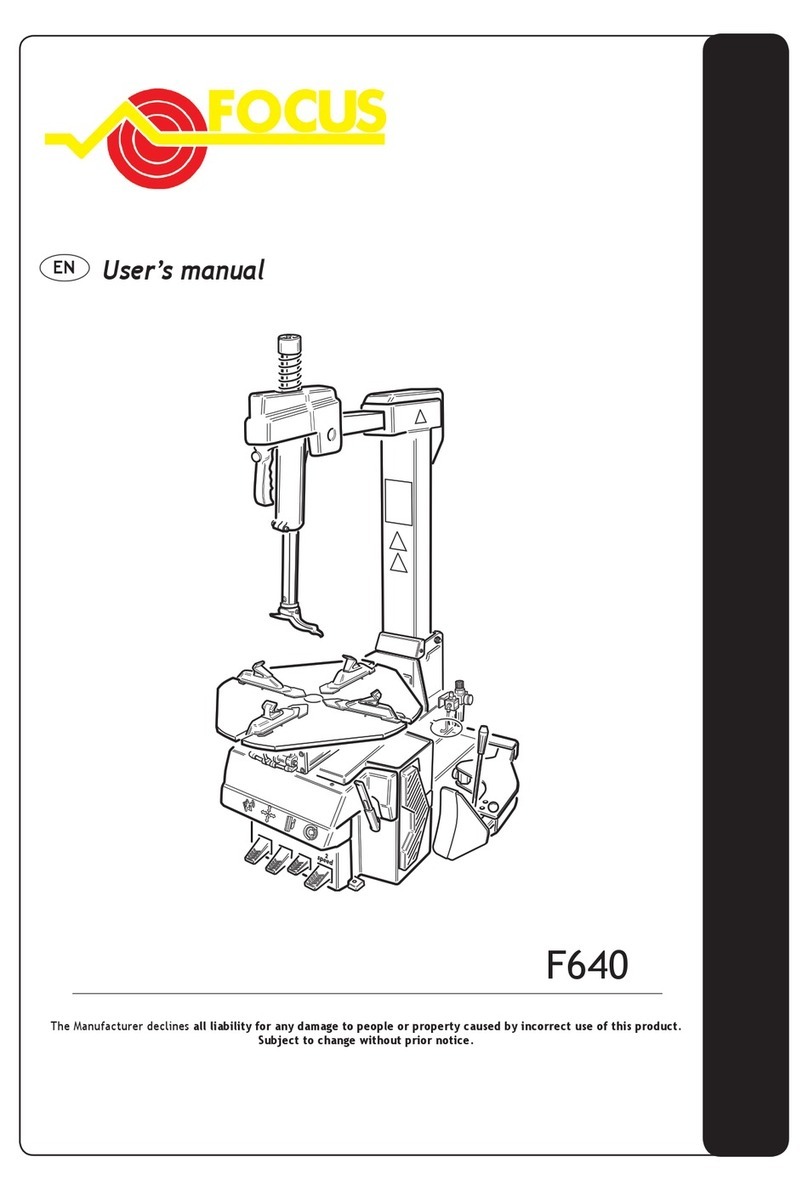
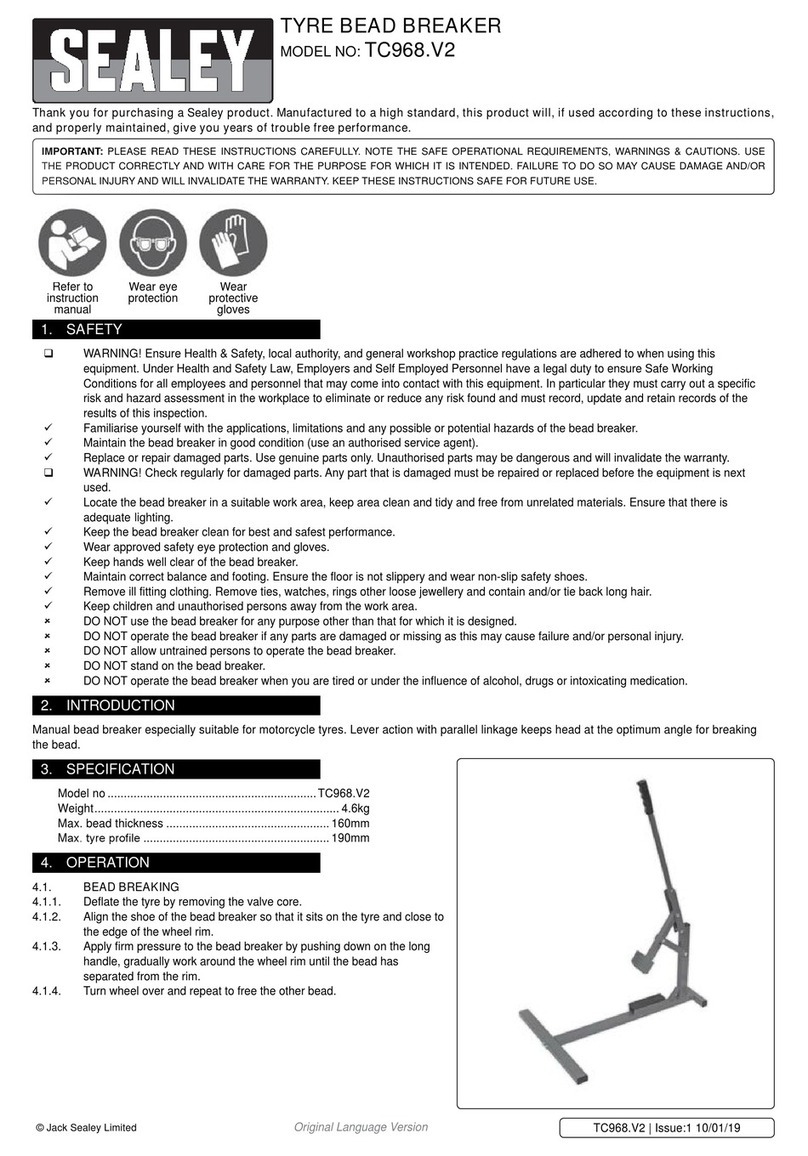
Eagle Equipment ETC-2800A Instructions for use

4810 Clover Road • Greensboro, NC 27450 • 1-800-336-2776 • www.eagleequip.com • © Eagle Equipment 2018.01 • page 1
4810 Clover Road • Greensboro, NC 27450 • 1-800-336-2776 • www.eagleequip.com • © Eagle Equipment 2018.01
ETC-2800A Instruction &
Maintenance Manual
Center Post Tire Changer with Assist Arm | ETC-2800A
READ THIS MANUAL BEFORE INSTALLING OR OPERATING THE EQUIPMENT.
INSPECT THE EQUIPMENT UPON DELIVERY. NOTE ANY DAMAGE ON DELIVERY RECEIPT.

4810 Clover Road • Greensboro, NC 27450 • 1-800-336-2776 • www.eagleequip.com • © Eagle Equipment 2018.01 • page 2
CONTENTS
Terms and Conditions .............................................................................................................................. 3-5
Risk of Loss / Freight / Shipping ............................................................................................................ 3
Delivery, Unloading and Freight Damage ........................................................................................... 3
Warranties ............................................................................................................................................. 4
Returns and Replacements ................................................................................................................... 5
Shipping and Damage Claims ..................................................................................................................... 5
Introduction ................................................................................................................................................. 6
Unpacking .................................................................................................................................................... 7
Workplace Requirements ........................................................................................................................... 7
Important Safety Instructions ..................................................................................................................... 8
Overview ...................................................................................................................................................... 9
Specications ............................................................................................................................................... 9
Position and Installation ........................................................................................................................... 10
Electricity and Pneumatic Connections .................................................................................................... 11
Adjusting Operation ............................................................................................................................ 11-13
Assist Arm Application ......................................................................................................................... 13-15
Inating the Tire .................................................................................................................................. 15-16
Moving the Machine ................................................................................................................................. 16
Maintenance ......................................................................................................................................... 16-17
Trouble Shooting ....................................................................................................................................... 18
Explosive Views with Parts Lists ........................................................................................................... 19-35
Circuit Diagram ......................................................................................................................................... 36
Pneumatic Diagram ................................................................................................................................... 37
About Us .................................................................................................................................................... 38

4810 Clover Road • Greensboro, NC 27450 • 1-800-336-2776 • www.eagleequip.com • © Eagle Equipment 2018.01 • page 3
PLEASE READ THE ENTIRE MANUAL BEFORE ANY
INSTALLATION AND OPERATION OF EQUIPMENT.
TERMS AND CONDITIONS
Please read the safety procedures and operation instructions in this manual before operating the
lift. Proper installation and use is very important. Keep this operation manual near the machine at
all times. Make sure ALL USERS read and fully understand this manual. The lift should be used on a
relatively level oor.
This is a vehicle lift setup and operation manual and no attempt is made or implied herein to instruct
the user in lifting methods particular to an individual application. Rather, the contents of this manual
are intended as a basis for operation and maintenance of the unit as it is intended to be used.
Proper use of this lift is included in this manual. Any other proposed application of this equipment
should be documented and submitted in writing to Eagle Equipment for review. The user assumes full
responsibility for any equipment damage, personal injury, or alteration of the equipment described in
this manual or any subsequent damages.
OUR TERMS AND CONDITIONS
Please read these terms of service carefully.
These terms and conditions of sale (“Agreement”) are applicable to any order placed by you (the
“Customer”) with and accepted by Eagle Equipment (referred to herein as “Eagle”).
Risk of Loss / Freight / Shipping
All shipments are FOB the Eagle warehouse, which means that ownerships of these goods transfers to
the customer when they leave our dock. We use common carriers that have a demonstrated history of
timely deliveries and competitive freight rates for the benet of our customer. Most of these carriers
have restrictions on delivering to residential addresses and may require pick-up at freight terminal.
There are additional fees for residential, limited access and remote delivery. There are additional fees
for lift gate services and scheduled deliveries from the freight carriers.
Delivery, Unloading and Freight Damage
Unloading: The customer is responsible for unloading the shipment from the carrier’s truck. This may
require a forklift and/or lift gate service. Please note that Lifts will require a forklift to unload and they
cannot be unloaded using a lift gate vehicle. The customer care team can advise you prior to shipping
what will be needed to unload your shipment and the approximate weight of the shipment.
Damages: Any charges or damages that may be incurred as a result of unloading from the carrier’s
truck is the customer’s responsibility.
Upon delivery, it is very important that you inspect all of your products immediately. While we make
every attempt to prevent freight damage by properly packaging your order, sometimes damage occurs
in transit. For your protection, it is imperative that you note any and all damage you observe on the

4810 Clover Road • Greensboro, NC 27450 • 1-800-336-2776 • www.eagleequip.com • © Eagle Equipment 2018.01 • page 4
Delivery Receipt (Bill of Lading) that the carrier will ask you to sign. This will establish your right to
le a claim against the freight carrier for this damage. If there are notable shipping damages to your
equipment at time of delivery, we advise that you deny the shipment and note “Arrived Damaged” on
the Bill of Lading. We also advise that you take photos of the damage for your freight claim with the
freight carrier. The carrier will then return the damaged equipment to their warehouse for inspection.
You are then advised to contact us concerning your damaged shipment.
If there are concealed damages after the carrier has departed (something you hadn’t noted on your
initial inspection), this should be reported to the freight company within three days of delivery in order
to preserve your right to le a claim. It is the customer’s responsibility to le damage claims against the
freight company. Our customer care team is here to assist with the claim if we are contacted within the
3-day window.
Shortages: Should you discover any shortages/missing parts, we ask that they be reported to customer
service within 3 days of delivery.
Warranty
Eagle Equipment is warranted to be free of defects in material and/or workmanship for a period
not exceeding one year. Eagle will replace parts only, under this warranty if in Eagle’s view there is
a defect in material or workmanship. The end user will be responsible to pay shipping of suspected
product to the distributor from which they bought the product. The original distributor will arrange
for all warranty parts and will pay return shipping, if the product proves to be defective. This warranty
does not cover normal wear, abuse, misuse, shipping damage or damage from lack of required
maintenance. This warranty is exclusive and in lieu of all other warranties, expressed or implied. Under
no circumstances will Eagle Equipment be liable for consequential or incidental damages. Model and
serial numbers must be provided with original proof of purchase, conrming date sold, to original end
user, before any claim under this warranty will be considered by Eagle Equipment. To view more details
on our Terms of Sale, please visit www.eagleequip.com.
Exclusions:
This warranty will not apply to any machine:
Which has not been operated or maintained according to specications
Which has been abused, misused, altered, or improperly maintained
Which has been improperly installed or assembled
Other limitations:
This warranty does not cover:
Parts needed for normal maintenance
Wear parts, which include but are not limited to: cables, hoses, slider blocks, chains and rubber pads
On-site labor

4810 Clover Road • Greensboro, NC 27450 • 1-800-336-2776 • www.eagleequip.com • © Eagle Equipment 2018.01 • page 5
Returns and Replacements
In the event that you suspect you have a defective part or product (“part”), please contact our
customer care department immediately by calling 1-800-336-2776, or by emailing
[email protected]. Please include photos and video of the defective equipment for your
claim. If we believe that you have received a defective part, Eagle Equipment will provide you with a
return authorization (“RA”) number and schedule a time to have your equipment picked up.
It is the customer’s responsibility to package the equipment for return shipment in sufcient packaging
to prevent damage during return. Please note the RA number on the packaging. Upon receiving and
inspecting the defective part, Eagle Equipment will provide a replacement part, free of charge, to
the customer. If the customer wishes to have the warranty replacement shipped to them prior to the
return of the defective product, the customer must pay for the replacement product at shipping. Eagle
Equipment will issue the Customer a refund upon receiving the defective product. In the event the part
is determined to not be defective, it will be subject to a minimum restocking fee of 20% and the return
freight. Credit for warranty returns to third party vendors will be subject to their return policy. All
returns must be authorized prior to shipping. Contact the customer care department for instructions
and a return authorization number, which must be issued prior to any return. Customers may return
any unused stock item in the original packaging within 30 days of purchase subject to a 20% restocking
fee. All freight charges related to the original shipment and the return will be the responsibility of the
customer.
INSPECT YOUR LIFT UPON DELIVERY.
NOTE ANY DAMAGE ON DELIVERY RECEIPT.
SHIPPING AND DAMAGE CLAIMS
All shipments must be inspected immediately upon receipt. For your protection, any external damage
must be noted on the bill of lading at the time of delivery in order to qualify for a claim against the
freight carrier.
Concealed damage must be reported to the freight company within three (3) days of delivery. It is the
customer’s responsibility to le for damage claims against the freight company. Eagle Equipment is not
responsible for loss or damages caused by shipping.
Shortages or missing parts must be reported to Eagle Equipment Customer Service (1-800-336-2776)
within three (3) days of delivery.

4810 Clover Road • Greensboro, NC 27450 • 1-800-336-2776 • www.eagleequip.com • © Eagle Equipment 2018.01 • page 6
INTRODUCTION
Thank you for your purchase.
Your equipment is the result of decades of research, testing, and development; and represents the
most advanced technology on the market.
The care with which you maintain and operate your equipment will directly affect its overall
performance and longevity.
BE SAFE.
Your equipment was designed and built with safety in mind. However, safety relies on proper training
and thoughtful use on the part of the operator. DO NOT operate or repair this equipment without
reading this manual and the important safety instructions shown inside.
Keep these instructions accessible, and make sure that ALL USERS read this manual.
PLEASE READ THIS MANUAL IN ITS ENTIRETY BEFORE
INSTALLING OR OPERATING THIS EQUIPMENT.
RECORD THE MODEL NUMBER AND THE SERIAL NUMBER
This information is located on the equipment.
THIS INFORMATION WILL BE REQUIRED
SHOULD YOU EVER NEED TO CALL IN FOR
PARTS OR TECHNICAL ASSISTANCE
For parts assistance, please call: 1-800-535-0016
Model Number:
Serial Number:
Manufacturing Date:

4810 Clover Road • Greensboro, NC 27450 • 1-800-336-2776 • www.eagleequip.com • © Eagle Equipment 2018.01 • page 7
WARNING:
Failure to follow the unpacking and assembly directions may cause
personal injury and/or impair the operation of this machine.
PLEASE READ THOROUGHLY.
UNPACKING
1. Your equipment comes packaged as a single unit. A forklift, oor-jack or other heavy-lifting
equipment may be necessary to separate the components. Exercise caution when disassembling the
packaged equipment, as shifting may have occurred during shipping.
2. Carefully remove the packaging from the equipment. Check for any obvious
shipping damage. Remember to report any shipping damage to the carrier and make a notation on
the delivery receipt.
3. An accessory box is included with the equipment and contains smaller components.
4. Remove the equipment from the package. Literature such as the installation manual, warranty
card, and serial number plate is included inside this box.
Shipments must be inspected immediately upon receipt.
External damage must be noted on the bill of lading.
Concealed damages must be reported to the freight company within three days of delivery.
Shortages must be reported to Eagle Equipment within three days of delivery:
1-800-336-2776.
WORKPLACE REQUIREMENTS
Ensure that the workplace is in compliance with safety regulations. Connect power supply and air
source according to this manual. Make sure the location has proper air provided to ensure proper use
of the machine. This machine requires clear space from each wall (shown as Figure 2). This machine is
not recommended to be used outdoors. If installing it outdoors, it must be protected by roof against
rain and sunshine or it voids your warranty.
Figure 2Figure 1

4810 Clover Road • Greensboro, NC 27450 • 1-800-336-2776 • www.eagleequip.com • © Eagle Equipment 2018.01 • page 8
IMPORTANT SAFETY INSTRUCTIONS
READ THESE SAFETY INSTRUCTIONS THOROUGHLY
1. Read and understand all operation and safety warning procedures before operating the equipment.
2. Keep hands and feet clear. Remove hands and feet from any moving parts. Avoid pinch points.
3. Keep work area clean. Cluttered work areas invite injuries. Consider work area environment. Do
not expose equipment to rain. Do not use in damp or wet locations. Keep area well lit.
4. Only trained personnel should operate this equipment. All non-trained personnel should be kept
away from the work area. Never let non-trained personnel come in contact with or operate
the equipment.
5. Use the equipment correctly. Eagle Equipment is not liable for any damage or injury caused by
failure to comply with these regulations.
6. Remain clear of equipment when in operation. Clear area if danger is present.
7. Non-skid, steel-toe foot-wear and safety glasses is recommended when operating equipment.
8. DANGER: Disconnect power at the receptacle before performing any electrical repairs. Secure plug
so that it cannot be accidentally plugged in during service.
9. WARNING: Risk of explosion. This equipment has internal arcing or sparking parts which should not
be exposed to ammable vapors. This machine should not be located in a recessed area or below
oor level.
10. Maintain with care. Keep equipment clean for better and safer performance. Follow manual for
proper instructions. Keep controls clean and free from grease and oil. Protect all parts of the
electrical equipment from humidity and moisture.
11. Carefully inspect the equipment on a regular basis. Perform maintenance according to the
maintenance schedule.
12. Check for damaged parts. Check alignment of moving parts, breakage of parts or any condition
that may affect its operation. Do not use equipment if any component is broken or damaged.
13. Never remove safety-related components from the equipment. Do not use the equipment if safety
related components are damaged or missing.
14. Failure to use the machine in its intended state voids the manufacturer’s warranty. Eagle
Equipment offers a one-year parts warranty.
15. Stay alert. Watch what you are doing. Use common sense. Be aware.

4810 Clover Road • Greensboro, NC 27450 • 1-800-336-2776 • www.eagleequip.com • © Eagle Equipment 2018.01 • page 9
OVERVIEW
This tire changer has been specically designed to demount tires with rims from 8" to 28" and a
maximum 45" diameter.
Any other use is improper and therefore not authorized. Before beginning any kind of work on or with
this machine, carefully read and understand the contents of these operating instructions.
Eagle Equipment is not liable for any injury to persons or damage to things caused by improper use of
this machine. Read the manual carefully before operating the equipment to ensure normal and safe
operation.
- Swing arm
- Assist arm helps user with stiff, low-prole tires
- Bead breaker blade cover
- Quick air booster
- Durable front cover for easy clean up
- 1-Year Warranty
SPECIFICATIONS
ETC-2800A
Rim Diameter 8" - 28"
Maximum Tire Diameter 45"
Maximum Tire Width 16"
Working Pressure 116-145 PSI
Power Supply 110 Volt
Motor 1.5 HP
Noise Level <75 dB
Shipping Weight 694 lbs
Shipping Dimensions 45"W x 35"L x 42"H

4810 Clover Road • Greensboro, NC 27450 • 1-800-336-2776 • www.eagleequip.com • © Eagle Equipment 2018.01 • page 10
POSITION AND INSTALLATION
PARTS OF THE BALANCER
1. Rotation Pedal
2. Rise-fall Pedal
3. Bead Breaker Pedal
4. Bead breaker buffer
5. Bead Breaker shovel
6. Auxiliary rotating rod
7. Column
8. Demount/mount head
9. Tire pressing roller
10. Raise-fall control valve
1. Unscrew the nuts at the bottom, position the machine and
calibrate it with the horizontal rule. Mount the machine with
all the screws and to ensure the machine is stable. Make sure
the system is equipped with a good grounding circuit for
prevent electric leakage and have operation range of ground
for skid prevention.
2. Unscrew the nut A on the machine body B as shown in Figure 4. Lift the column C; mount it on the
machine body B by using the nut A through the bolt located on the machine body B. If the column
becomes loose, tighten it immediately. Otherwise this may damage the tire.
3. Attach the tire lifting device on the side of machine body with bolt set A, shown as Figure 5; after
xing all the bolts, connect the air hose B&C.
4. Attach the left assist arm on the post and cabinet with 10pcs M10 bolts. Put the 8MM pipe into the
cabinet from the right reservation hole (2) of the machine and plug on the three-way connection,
as shown in Figure 6.
5. Attach the cylinder T1 on the swing arm with 2 bolts T2. Attach the tire pressing roller on the
piston rod and tighten with the hex screws T3. Make sure that the tire pressing roller can rotate
freely; connecting the air hose (Figure 7).
Figure 3
Figure 7 Figure 6 Figure 5 Figure 4
11. Vertical arm
12. Adjust handle
13. Inating gun
14. Quick release nut
15. Cone
16. Rubber protection washer
17. Tire installation base assembly
18. Tire lifting device
19. Tire lifting support

4810 Clover Road • Greensboro, NC 27450 • 1-800-336-2776 • www.eagleequip.com • © Eagle Equipment 2018.01 • page 11
ELECTRICITY AND PNEUMATIC CONNECTIONS
WARNING: Before installation and connection, check to be sure that the electricity power supply
corresponds to the machine technical data. All the installation of electric and pneumatic devices must
be operated by a professional electrician.
Connect the compressed air connector which is on the machine right side with compressed air system.
The electric grid that the machine connects to must have fuses protection device and good outer cover
grounding protection. Install the leakage automatic air switch on the maim power supply, leakage
current is set at 30A.
NOTE: The power plug for this machine is NOT INCLUDED. The user should self-connect one power
plug no less than 16A as well as in line with the machine voltage. Or directly connect the power supply
according to the above requirements.
1. ADJUSTING OPERATION
1.1 FUNCTION OF PEDAL
1. Tread rotation pedal (1), Tire installation base (17) rotates in a clockwise
direction; lift Rotation Pedal (1). Tire installation base (17) rotates in an
counter-clockwise direction
2. Tread bead breaker pedal (3), bead breaker shovel (5) closing toward inside;
loose bead breaking pedal (3), bead breaking shovel (5) returns to original
position.
3. Tread rise-fall pedal (2), Tire lifting device lifting up; lift the rise-fall pedal
(2), the tire lifting device will fall.
1.2 OPERATION OF A THE TIRE CHANGER
Operation of tire changer consists of three parts:
1. Breaking the tire bead
2. Demounting the tire
3. Mounting the tire
CAUTION: Before any operations, don’t wear loose clothing and wear
protective hat, gloves, and skid-proof shoes. Ensure to exhaust the air
in the tire completely, and remove all the wheel weights from the rim.
1.2.1. BREAKING THE TIRE BEAD
Exhaust the air in the tire completely. Place the tire against the rubber buffer (4). Bring the paddle (R)
against the bead about 10mm from the edge of the rim shown as Figure 8. Tread bead breaker pedal
(3) to push paddle into the tire. Repeat the above operations on different positions around the tire
and both sides of tire until tire bead is released completely.
Figure 8
Figure 9

4810 Clover Road • Greensboro, NC 27450 • 1-800-336-2776 • www.eagleequip.com • © Eagle Equipment 2018.01 • page 12
1. ADJUSTING OPERATION CONT.
1.2.2. DEMOUNTING TIRE
Remove all the weights on the wheel rim and exhaust the air in the tire completely before this
operation. Apply lubricating grease (or similar lubricant) around the tire bead. The tire may wear
excessively without proper lubrication (Figure 9).
The tire lifting device for raising and lowering the tire is shown in Figure 10.
Make sure to remove the thread shaft on the tire installation base before lifting the tire.
Exhaust the air in the tire completely, remove the valve core and put the tire on the tire lifting
device, tread the rise-fall pedal, and the tire lifting device will lift up the tire. Push the tire to the tire
installation base when the tire lifting support is 90 degrees with the machine body. Tread the rise-
fall pedal again to lower the tire, and adjust the auxiliary rotating rod of tire installation base which
should be alignment with the xing hole of tire rim. Input the tread shaft, positioning the tire with the
appropriate cone, and then secure the tire with the quick release nut shown as the Figure 11.
CAUTION: Check to make sure the wheel rim is rmly secured before the next step.
Move the mounting head near the edge of the rim, rotate the tire pressing arm to move the tire
pressing block above the tire, press the switch handle to depress the tire, and insert the lifting lever in
the clearance between the tire and the rim, then hang the bead on the mounting head (Figure 12).
With the lifting lever held in position, tread the rotation pedal (1), rotate the tire installation base in a
clockwise direction until the tire bead is completely separated from the wheel rim.
For the other side tire demounting, keep using the lifting lever to lift the tire, make the other side tire
beads separated from the wheel rim.
CAUTION: Chains, bracelets, loose clothes and anything else close to the rotating parts will bring
danger to the operator.
Figure 10 Figure 11 Figure 12
Figure 13 Figure 14 Figure 15

4810 Clover Road • Greensboro, NC 27450 • 1-800-336-2776 • www.eagleequip.com • © Eagle Equipment 2018.01 • page 13
Figure 16
Figure 19 Figure 20 Figure 21
Figure 17 Figure 18
1. ADJUSTING OPERATION CONT.
1.2.3. MOUNTING TIRE
Before mounting the tire, please make sure that dimension of tire bead is in accordance with the
tire rim. To avoid any damage to tire, lubricate the tire bead and the wheel rim with the lubrication
recommended by manufacturer. Put on the tire and check the situation.
If the rim diameter and width are same as that of tire, it is not necessary to loosen and lock vertical
arm. Only put tire on rim, move swing arm to position when demounting tire, put one side of tire
bottom bead upon rear of demount/mount head, and the other side of tire bottom bead below front
of demount/mount head. Press tire manually or by pressing roller C of assist arm, rotate tire installation
base and tire bottom bead can be mounted. Please use the bead pressing tool (optional device)/left
assist arm tire pressing function (Figure 21) for auxiliary operation if necessary.
Repeat above operation to mount tire top bead.
2. ASSIST ARM APPLICATION
The assist arm is located at the right side of the machine and is an auxiliary device to help the operator
to demount and mount the tire.

4810 Clover Road • Greensboro, NC 27450 • 1-800-336-2776 • www.eagleequip.com • © Eagle Equipment 2018.01 • page 14
2. ASSIST ARM APPLICATION CONT.
2.1 ASSIST ARM COMPONENTS
Each components of assist arm device are introduced as follows
Figure 16 and 19:
A. Swing arm
B. Small assist arm
C. Roller C
D. Raise-fall roller handle
F. Locking switch for assist arm
G. Roller G
H. Tire pressing roller
S. Control switch
T. Tire pressing head
The function of the assist arm’s control handle is as follows:
Lift the roller handle (D, Figure 16) is for lifting and lowering roller C (G, Figure
16) so as to adjust tire demount/mount vertical height. Operate handle (D, Figure
16) up, then roller C (G, Figure 16) goes up, Operate handle (D, Figure 16) down
then roller C (G, Figure 16) goes down.
2.2 OPERATION
It is difcult to demount and mount big low prole tire. If operation is proper,
it is very easy to use assist arm device to demount and mount tire from rim. The
assist arm device may also be used when demounting and mounting normal tire
with resistance.
A. Clamp rim
Firstly, press both side tire loose as per operation instruction in user’s manual, xing the tire on the tire
installation base.
B. Demount tire
1. Press tire with right pressing roller C/G to a position 3cm lower than rim edge, lubricate tire
bead, rotate turntable, lift roller C (G, Figure 16).
2. Move demount/mount head close to edge of rim, keep a 2-3mm gap between demount/mount
head and rim plane, lock vertical arm, adjust screw bolt in column to position swing arm.
3. Nearby demount/mount head, insert lift lever N into tire, use lift lever to lift bead upon knob
of demount / mount head. Manually rotate roller C to inner side pull handle D down, make
roller C to press rim keep 3-5mm gap between demount/mount head and rim, make sure
demount/mount head not damage rim, rotate tire installation base, demount tire upper bead
(Figure 18)
4. Push handle D up lift roller C (G) press switch F loosen right pressing arm, lift tire up, insert
lifting level into bottom tire bead nearby demount/mount head, lift bead upon knob of
demount/mount head and rotate the turntable to demount down tire bead.
During the above operation, the user can use the left assist arm to help the user. For
example: pressing the wheel hub, attening or lifting up the tire from the side with the tire
pressing (Figure 19 and 20).
Figure 23
Figure 22

4810 Clover Road • Greensboro, NC 27450 • 1-800-336-2776 • www.eagleequip.com • © Eagle Equipment 2018.01 • page 15
2. ASSIST ARM APPLICATION CONT.
C. Install the tire
1. Lubricate tire and rim edge with lubricant to avoid tire damage. Adjust height of demount/mount
head and make tire bottom bead upon rear of demount/mount head and below front of mounting/
demounting head. Rotate tire installation base to mount bottom bead.
2. Make the tire top bead upon rear of demount/mount head and below front of demount/mount
head, clip the tire pressing head (up) on the rim. Move the auxiliary tire pressing head (up) near
the mounting/demounting head (distance 3-4cm), lower the tire pressing head (up) to press down
the tire 3-5cm below mounting/demounting head, rotate turntable, tire pressing head (up) will
follow in synchrony as to rotate and press the tire down in tire rim.
ATTENTION:
1. To keep the assist arm and mounting/demounting head from colliding, do not excessively rotate
the installing base while using assist arm.
2. Make sure the tire pressing head (up) never press on the tire rim, the friction between them will
damage the tire rim. Keep your hands away from the tire pressing head (up).
3. INFLATING THE TIRE
WARNING: All operations in this chapter refer to manual of machine equipped
with inating gun.
The inating operation can be very dangerous. Comply with instruction. When
inating, if the tire or rim become damaged, it will become very dangerous to
continue ination. The possible burst force of a tire goes upward and outward,
and may cause injury or death of the operator or the people around.
Tire burst may be caused by following:
1. The wheel rim and the tire are not of the same size.
2. The tire or the wheel rim is damaged.
3. The pressure of tire ination is over the maximum pressure recommended by manufacturer.
4. The operator fails to comply with the safety regulation.
Please operate as follows:
1. Remove the valve cap from the valve stem.
2. Check to make sure the air nozzle is pressed down completely over the threads of the valve stem.
3. Check to make sure that the tire and the wheel rim are the same size.
4. Lubricating both the tire bead and the wheel rim, additional lubrication is required if needed.
5. Inate the tire with break, while inating, check the pressure listed on the pressure gauge, also
check whether the bead is xed or not. Repeat operation above until the bead is secured; you need
take special steps when inating convex rim or double convex rim (Figure 24).
6. Continue inating and check the air pressure frequently until to reach the required pressure.
Figure 24

4810 Clover Road • Greensboro, NC 27450 • 1-800-336-2776 • www.eagleequip.com • © Eagle Equipment 2018.01 • page 16
3. INFLATING THE TIRE CONT.
NOTE:
1. When inating tire or locking rim, air pressure must not exceed 3.5bar (50psi). Failure to comply my
result in injury or death.
2. If higher air pressure is required to inate tire, take tire off from tire changer, and put it
into inating cage, then start inating. DO NOT inate the tire with pressure higher than that
recommended by tire manufacturer.
3. Operators should be trained professionals only. Untrained personnel should not operate this machine.
4. MOVING THE MACHINE
A forklift is required to move the tire changer. Cut off air supply and electricity supply, lift base a little
bit, insert lift fork into bottom base, move tire changer to new position, then secure tightly.
NOTE: Installation position of tire changer must comply with safety regulation.
5. MAINTENANCE
CAUTION: Maintenance should be preformed by professionals. To prolong the machine’s life, maintain
the machine timely according to the manual. Otherwise, it will impact the reliability of the machine
or cause injury to operator and others nearby. Before performing any maintenance, disconnect the
tire changer from the electric power supply and pneumatic power supply, and tread rotation pedal
for 3-4 times to evacuate all compressed air from the machine. Damaged parts must be replaced by
professional persons with the spare parts provided by Eagle Equipment.
- Clean the machine once every day after work. Clean the dirt on the tire installation base with diesel
oil once per week and lubricate the slides and shafts.
- Following maintenance must be done at least once per month:
Check oil level in Oil Fog Maker, please be lled with SAE30# oil if need.
Unscrew with hex wrench (E). Based on connection of compressed air, rst to tread Rotation Pedal 5-6
times, and then check whether oil in Oil Fog Maker drops down a drip of oil. For continuous
operation, tread twice every time, drop down a drip of oil, and otherwise adjust the screw (D) that
controlled oil enters with minus screwdriver (Figure 25).
NOTE: In the event of tire installation base loses power, check to see if the belt is tight as follow steps:
Remove the left side cover by unscrewing the screws; adjust two screws located on the motor support,
keep a suitable distance between motor support and motor base; tight the screws for the belt tension
(Figure 26).
CAUTION: Disconnect the machine from electric power supply and pneumatic power supply.

4810 Clover Road • Greensboro, NC 27450 • 1-800-336-2776 • www.eagleequip.com • © Eagle Equipment 2018.01 • page 17
5. MAINTENANCE CONT.
In order to achieve the reliability of jaws and Bead Breaker shovel, operate as follows to keep their
valves clean:
1. Remove the left side cover of the machine body by unscrewing the two screws;
2. Loosen the valve mufers (A) which belong to Jaws open and close Pedal and Bead Breaker Pedal;
3. Clean the mufers with compressed air; please replace it referring to the spare parts list if it is
damaged (Figure 27).
Figure 25 Figure 26 Figure 27

4810 Clover Road • Greensboro, NC 27450 • 1-800-336-2776 • www.eagleequip.com • © Eagle Equipment 2018.01 • page 18
6. TROUBLE SHOOTING
Issue Reason Solution
The turntable rotates in
one direction or doesn’t
rotate.
Reverse switch broken. Replace the reverse switch.
The belt is broken. Replace the belt.
The motor’s malfunction.
Check the motor cable or
terminal block wire. Replace the
motor if it is broken.
Demount or x the wheel,
the turntable can’t lock
(spin with wheel). The
jaws delay to open/close.
The turntable locks the
rim incorrectly.
There is a leak in the air network. Check all parts on the air
network.
The clamping cylinder doesn’t work. Replace the cylinder piston.
The jaws are worn. Replace the jaws.
Broken washers of the chuck cylinder. Replace the washers/cylinder.
The mounting head/
demounting head touches
the rim during operation.
The locking plate is incorrectly
adjusted or unqualied. Replace or adjust it.
Screws on the chuck are loose or the
vertical arm can’t be locked by the
locking plate.
Tighten the screws; replace the
locking plate.
The bead breaker pedal
and jaw open and close
but the pedal can’t return
to the original position.
The pedal spring is broken. Replace the pedal spring.
The bead breaker shovel is
difcult to operate.
The silencer is jammed. Clean it or replace the silencer.
The washer on the bead breaker
cylinder is broken. Replace it.

4810 Clover Road • Greensboro, NC 27450 • 1-800-336-2776 • www.eagleequip.com • © Eagle Equipment 2018.01 • page 19
7. EXPLOSIVE VIEW 1
Item Part No. Description
203-1 CX-203-010000-0 Machine Body
231-2 CZ-231-080000-0 Pedal Front Cover
203-3 CX-231-020000-0 Left Cover
4B-010-060101-0 Hex Socket Head Bolt M6×10
5 B-040-061412-1 Flat Washer 6*14*1.2
6 B-014-080251-0 Outer Hex Bolt M8x25
7 B-010-080201-0 Hex Socket Head Bolt M8×20
8B-040-061412-1 Flat Washer 6*14*1.2
200-9 C-000-001020-0 Rubber Foot Buffer
200-10 C-200-500000-0 Bead Breaker Buffer
11 B-027-060401-0 Grounding Screw M6x40
12 C-200-580000-0 Lifting Lever
200-14 C-200-510000-0 Bead Breaker Arm Rubber
200-15 C-200-470000-0 Oil-Water Box
16 B-010-080201-0 Hex Socket Head Bolt M8x20
17 B-040-081715-1 Flat Washer 8*17*1.5

4810 Clover Road • Greensboro, NC 27450 • 1-800-336-2776 • www.eagleequip.com • © Eagle Equipment 2018.01 • page 20
7. EXPLOSIVE VIEW 2
Table of contents