manuals.online logo
Brands
  1. Home
  2. •
  3. Brands
  4. •
  5. Earthworks
  6. •
  7. Microphone
  8. •
  9. Earthworks CMK1 MicKit User manual

Earthworks CMK1 MicKit User manual

DP30/C
Frequency response
Polar Pattern
Cardioid
Sensitivity
1
0mV/Pa (-40dBV/Pa)
Power requirements 48V Phantom,
1
0mA
Peak acoustic input
1
45dB SPL
Output XLR (PIN 2+)
Minimum output load
600Ω, balanced
between pins 2&3
Noise
22dB SPL (A weighted)
Dimensions L x D
Weight
30Hz to 30kHz +2dB@1’
1
0.75 x .860 inches
(275mm x 22mm)
.22lb (
1
00g)
Made in U.S.A.
Earthworks, Inc.
37 Wilton Rd.
Milford, NH 03055
603-654-2433, ext. 114
www.earthworksaudio.com
Printed in U.S.A.
DP30/C
Congratulations on your purchase of the Earthworks CMK1 MicKit™ for
Toms and Snare. You will be thrilled with the results you will be able to ob-
tain using the CMK1, as you will hear far more detail on toms or snare than
with conventional microphones. After reading this manual, if you have any
unanswered questions, please email or phone us using the contact informa-
tion on the back cover of this manual.
Happy Drumming!
First, identify the exact product you have purchased from the list below.
Then verify that you have received each of the items listed below the
product model/name.
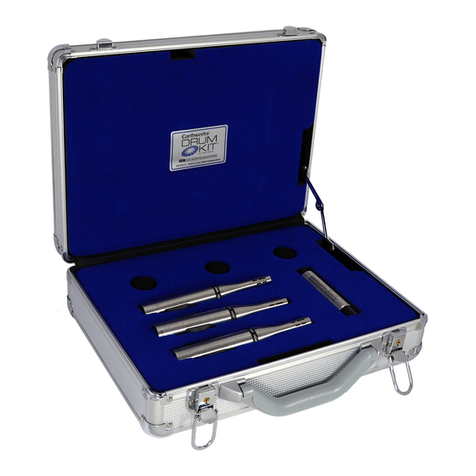
Items Enclosed with you CMK1 MicKit™:
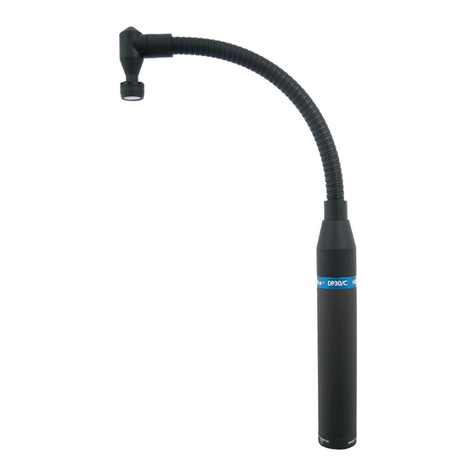
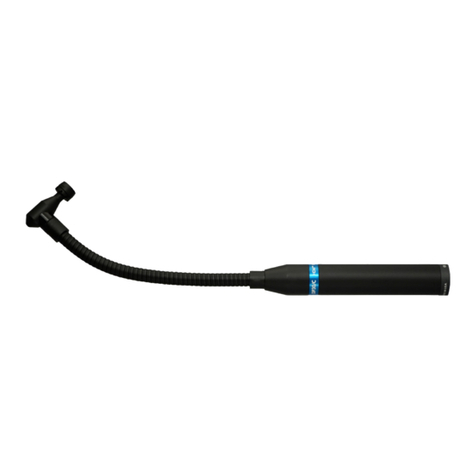
1 – DP30/C Drum Periscope™ Microphone
1 – RM1 RimMount™
1 - LP1530 LevelPad™
1 – PW1 Foam Windscreen
1 – Carrying Case with foam insert
1 – Users Manual,
Version 1, April 10, 2013 2
NOTES
13
IMPORTANT NOTICE - Please Read This:
Use of the LevelPad™ - The DP30/C drum microphones have a high output
level, which may overload the preamps of some mixers or consoles. Many
outboard microphone preampliers and preampliers in mixing consoles will
handle as much as +24dbv at the microphone input, without distortion. We
suggest that you check the “maximum preamp input level” specications of
your mixer or preamplier to see if it will accommodate signal levels this high.
Some mixers and preamps will not handle this high level at their microphone
input. To avoid overload, please use a LevelPad™ in the microphone cable
feeding each Drum Periscope Microphones.
Some mixer or outboard preampliers have a pad that can be switched in or out.
However, some of these pads are not attenuators that precede the preamplier in-
put, instead they only reduce the gain of the preamplier. These (so called) pads
will provide no input overload protection from high level microphone signals
(see Fig. 1-A). In contrast, other outboard or mixer preampliers have actual pads
that precede the preamplier. These types of pads will provide the input overload
protection that is needed (see Fig. 1-B). Such pads will typically provide –10dB
or –20dB attenuation. However, due to the very high output level of the Drum
Periscope™ microphones, -10 dB or even –20dB may not be enough attenuation
when close miking snares or toms with Drum Periscope™ Microphones.
In any case where the pad does not precede the preamplifier, or the pad does
not provide enough attenuation, the Earthworks LP1530 LevelPad™ can be
used and will provide either –15dB or –30dB of attenuation. The LevelPad™
comes housed in a stainless steel tube with gold-plated XLR connectors on
each end. As the LevelPad™ is inserted in the mic line, it will always precede
the preamplifier input. It makes no difference if the LevelPad™ is inserted at
the microphone, or somewhere in the middle of the mic line, or by plugging
3
Figure 1-A and 1-B Preamp Input Pads
A.
B.
Figure 8-A and 8-B Miking the Top Head of a Tom
The DP30/C High Denition Drum Periscope Microphones™ have been used
successfully by drummers with major recording artists in both recording sessions
and for live performance. The Drum Periscope Microphones™ will provide you
with years of exceptional and reliable results and will withstand the rigors of the
road. We welcome you to the ever-growing number of drummers and sound engi-
neers using Earthworks High Denition Microphones™.
We know that when you use the Earthworks High Denition DP30/C Micro-
phones for your recording and live performances you will be thrilled with the re-
sults. We are pleased to welcome you to the ever-growing family of professionals
using Earthworks High Denition Microphones™.
We hope the suggestions in this manual have been benecial to you. Don’t be
afraid to experiment with mic placement. You can be as creative with your mic
placement as you are with your music. You are the judge of what works best and
sounds best.
If you have any questions, or require any additional information, please do
not hesitate to contact Earthworks using the contact information on the back
cover of this manual.
FIFTEEN-YEAR WARRANTY
All Earthworks
®
products carry a 15-year limited warranty (parts and labor).
If you have any problems with your Earthworks products, please contact our
warranty/repair department by email at: returns@earthworksaudio.com or by
telephone at (603) 654-2433, ext 119.
12
A. B.
4
the LevelPad directly into the preamplifier input. The most popular practice
is to plug the LevelPad™ into the preamplifier input, which makes it more
accessible to switch the attenuation settings (-15dB or –30dB) if needed.
Figures 2-A, 2-B and 2-C show how the LevelPad can be inserted into the
microphone line in one of three ways as indicated below:
Figure 2-A LevelPad™ inserted at the microphone base
Figure 2-B LevelPad™ inserted in the microphone cable.
Figure 2-C LevelPad™ inserted into mixer mic input
CAUTION: Plugging the LevelPad into the mic input
of a mixer can cause damage to the mixer input con-
nector if the LevelPad receives a hard push to the
side. However, if your are careful, placing the Level-
Pad at the mixer mic input will provide greater ease
of use in changing the LevelPad attenuation switch.
All of the previous information in this manual applies to both toms and snares
when using a Drum Periscope Microphone.
The DP30/C has been optimized for miking snare drums and toms and has a low
frequency response down to 30Hz. If the DP30/C sounds a little “tubby” on your
snare drum, then use a low-cut (high-pass) lter set somewhere between 50Hz
and 100Hz to reduce the low frequency response or a low frequency equalizer
(EQ) to accomplish the same thing by attenuating/cutting a few dB in the area
of 50Hz to 100Hz for the desired results.
The DP30/C can be used on either the top drumhead, bottom drumhead or both.
Figure 7-A shows a snare drum with a DP30/C microphone placed over the top
drumhead, while Figure 7-B shows a share drum with both the top and bottom
heads miked.
Figure 7-A and 7-B Miking the Top or Top & Bottom of a Snare
Close Miking Toms with the DP30/C
The DP30/C has been optimized for miking toms with a low frequency response
of 30Hz. This extended low frequency response will provide a rich and full tom
sound. You can mike either the top head of a tom with the DP30/C as indicated
in Figure 8 or you can also mike the bottom, or top and bottom of a tom in a
similar fashion as shown on a snare in Figure 7-B. You will notice in Figure 8-A
the microphone head is placed closer to the drum rim, while in Figure 8-B the
microphone head is moved closer to the center of the drumhead by changing the
position of the mini-ex gooseneck.
11
A. B.
Earthworks Drum Periscope™Microphones
The Earthworks DrumKit™ High Denition Three-Microphone Systems have
had great success because they pick up drum sounds with far more detail and accu-
racy than conventional microphones. This improved sound quality is due to propri-
etary advanced technologies utilized in Earthworks High Denition Microphones.
Many famous drummers were using Earthworks High Denition Micro-
phones™ for overheads and kickdrum with exceptional results. They then
wanted the same exceptional sound quality from their snare and tom mics.
With the introduction of the DP30/C Drum Periscope Microphones™, they
were able to get the same pristine, detailed sound from their toms and snares as
they were from their Earthworks High Denition drum overhead mics.
We worked with major artists for nearly two years developing and eld testing
our new DP30/C on snare and toms. During the development phase, we miked
a set of drums with nine Earthworks High Denition Microphones (including
our new DP30/C tom and snare mics) and also nine industry favored mics.
When veteran engineers heard the difference between these two recordings,
they made the comment that the improvement was so dramatic, it didn’t even
sound like the same set of drums. They all agreed, “the increase in detail and
sound quality was staggering.”
The DP30/C, designed specifically for snare and toms, and has a low fre-
quency response of 30Hz. The 30Hz low frequency response is ideal for toms
and will provide a deep, rich full sound. But it is suggested the you attenuate
this low end response for use with snares. A low-cut (high-pass) filter should
be set somewhere between 50 to 100Hz for optimum results. The DP30/C has
a flexible mini-gooseneck and can handle up to 145 dB SPL. The Earthworks
patented polar technology provides excellent rear rejection and a uniformity
of frequency response out to 90 degrees off-axis. This vastly reduces phase
cancellation or other phasing issues, and minimizes cymbal leakage as well
as acoustic feedback problems in “live sound” applications.
Earthworks High Definition Microphones™
the New Science in Microphones
David Blackmer, the brilliant engineer who invented the unique technolo-
gies of dbx, is also the inventor and founder of Earthworks. In the last few
years of his life, David developed a number of revolutionary technologies
that dramatically improve the quality and performance of microphones. In
short, Earthworks High Definition Microphones™ will pick up sounds and
detail that other microphones cannot. These dramatic improvements are in
5
The flexible mini-gooseneck will allow you to move the microphone head
either up or down above the drumhead as well as in and out from the drum
rim. In addition, you can change the angle of the microphone head for your
desired results. Figure 6-A shows how the microphone head can be rotated
while Figure 6-B shows how the microphone head can be moved more toward
the center of the drum by changing the positioning of the mini-gooseneck.
Figure 6-A and 6-B Positioning the Microphone Head
Plug in the LevelPad, if necessary
In close miking drums, one should keep in mind that the peak sound level at
the microphone head is extremely loud. Microphones used for close miking
drums should have a sound pressure handling capability of at least 140dB
SPL with no audible distortion. The DP30/C microphones will handle up to
145dB SPL without distortion. However, as mentioned earlier, with this kind
of high sound pressure level, it is possible for the microphone output to be as
much as +24dBV which may overload some microphone preamplifiers. The
use of the Earthworks LevelPad™ in the microphone line will prevent any
such distortion or overload. So, to be safe, we suggest that you first plug a
LevelPad into the mic line feeding the DP30/C microphone. For full informa-
tion refer to pages 3 and 4 of this manual.
Close Miking Snare Drums with the DP30/C
As previously mentioned, when close miking drums with a DP30/C microphone,
never position the microphone head parallel to the drumhead. Always position
the microphone head at an angle to the drumhead. It is also suggested that the
microphone head be positioned between 1.5 inches and 3 inches above the drum-
head.
10
A. B.
the areas of impulse response, diaphragm settling time and polar technolo-
gies. Those who have heard Earthworks High Definition Microphones™, say
that they hear more of attack, more subtle details and a more pristine quality
in the sound than with any other microphones, regardless of price.
Miking Drums
There are many ways to mic drums and it seems that most every recording or
live sound engineer has their own way of doing so. Our objective is not to in-
dicate which drum miking approach is better, but to make suggestions and look
at advantages and disadvantages of each. Every engineer or producer uses their
own methods to obtain the results they desire, and that’s what matters.
Multi-microphone Method
The objective in multi-microphone drum miking is to place a separate mi-
crophone on either most or all the elements of a drum set. Typically, sepa-
rate mics are used on snare, toms, high-hat and kick drum with one or two
overhead microphones. The overhead mics pick up the overall sound of the
drums including cymbals, which are typically not miked separately. With
this method, the mixing engineer can control the level, and signal process-
ing (limiting, EQ, etc.) for each element of the drum set (toms, snare, hi-hat,
etc.). This provides a great deal of control over the sound of the entire drum
set and allows bringing out certain patterns on sock cymbal, snare, etc. Multi-
miked drums may be desirable when you are recording in a large room with
high ambient sound as it will reduce the amount of unwanted room sound.
Multi-miking is also a popular practice for miking drums in “live sound” ap-
plications such as concerts, as it will provide more gain before feedback in
addition to greater control of the drum mix.
No Phase Cancellation Issues
with Earthworks™Microphones
One of the typical disadvantages in the multi-microphone approach, when
using conventional microphones, is the interactive microphone phasing prob-
lems that result in the cancellation of certain frequencies. These phasing
problems are a result of the poor polar response of conventional microphones.
Conventional microphones have a drastically different frequency response
between the front and sides of the microphone. It is common for conventional
microphones to have a loss of 10 to 20 dB at high frequencies on the sides of
the microphone. This is why you cannot place three singers on a conventional
microphone, the one in front of the mic sounds great, but the two on the sides
have a dramatic loss of quality. These drastic changes in high frequency
response on the sides of the microphone cause phase differences, and these
6
9
The various types of metal drum rims may have the bottom flange of the
rim either closer to the shell or further from the shell. Depending upon the
type of metal drum rim, one of the previously described three positions will
allow the RimMount bracket to be mounted parallel to the drum shell. The
soft protective Polyolefin® coating on the RimMount bracket will prevent
the possibility of scratching the drum shell finish. Position the rim-guide so
the bottom edge “flange” of the drum rim fits comfortably into one of the
rim-guide grooves. This will insure that the cushioned rim-guide remains se-
curely in place as you tighten the thumbscrew to firmly secure the RimMount
to the drum rim.
Adjusting the Microphone Height
Once the RimMount is mounted securely on the drum rim with the DP30/C
microphone housed in the rubber holder, the microphone body can be moved
either up or down in the rubber holder to adjust the desired height. Then the
mini-gooseneck will provide a good amount of latitude in positioning the
microphone head from any pre-set microphone body height. Adjusting the
height of the DP30/C microphone body is shown in Figure 5-A and 5-B.
Figure 5-A and 5-B Adjusting DP30/C Microphone Height
Positioning the Microphone Head
Once the DP30/C microphone height has been set, then the microphone head
can be positioned where you desire. However, you should never place the
microphone head “parallel” to the drumhead. The microphone head should
always be at “an angle” to the drumhead. This will prevent any possibility of
the diaphragm being forced to the microphone backplate which could cause
an unwanted pop or thump in the sound or recording system.
A. B.
are the root cause of phase cancellations with conventional microphones.
In contrast, Earthworks has a patented polar technology that provides our
microphones with the same frequency response on the sides of the micro-
phone as it does at the front (no more than a 3dB loss at any frequency out to
90º off-axis). This very uniform frequency response at the front and sides of
the microphone will nearly eliminate any phasing issues when using Earthworks
microphones. In addition, Earthworks cardioid microphones have a very high
rejection of sounds at the rear (back) of the microphone. This feature will
greatly reduce the leakage of cymbals or other sounds at the rear of
Earthworks microphones.
Close Miking Toms and Snares
with Drum Periscope Microphones
Inserting the DP30/C Microphone into the RM1 RimMount
It is suggested that you insert the DP30/C microphone into the RM1 Rim-
Mount™ prior to attaching the RimMount to the drum.
To insert the DP30/C microphone into the RM1 RimMount™ just place the
mic head and the mini-gooseneck into the rubber holder from the bottom of
the RimMount. Then push the body of the microphone from the bottom (XLR
connector end) to move the microphone up inside the rubber holder. The fit
will be firm, so you will need to apply a little pressure to move the micro-
phone body up into the rubber holder. The suggested procedure is indicated
in Figure 3.
Figure 3. Inserting the Drum Periscope™ Mic into the RimMount™
Mounting the RM1 RimMount to the Drum
The RM1 RimMount is designed for metal drum rims, and will not work on
wooden drum rims. While reading this section, please refer to Figure 4-A,
78
which refers to the various elements of the RimMount™. Mounting the Rim-
Mount to the drum rim is quite easy. First, unscrew the thumbscrew so there
is more than enough space for the Delrin® cushioned rim-guide to clear the
bottom of the drum rim. Then determine where on the drum rim you want
to place the microphone and place the top “hook portion” of the RimMount
bracket over the drum rim.
Figure 4-A. Elements of the RM1 RimMount™
Referring to Figure 4-B, notice that on the cushioned rim-guide there are
two sets of grooves. One set of grooves is in the “center” of the rim-guide,
while the other set of grooves is “off center” (or closer to the edge of the
rim-guide). These two sets of grooves provide you with “three” mounting op-
tions: (1) placing the “off center” rim-guide grooves close to the drum shell,
(2) or rotating the “off center” grooves 180 degrees will place the rim-guide
further away from the drum shell, and (3) the “center” grooves will allow
placement in-between the positions described in (1) and (2) of this paragraph.
Figure 4-B Positioning the Cushioned Rim-guide
Soft Polyolefin® Coated
Metal Bracket
Rubber
Holder
Delrin®
Cushioned Rim-guide
Hook Portion
of Bracket
Thumbscrew
Offset Groove
Positioned
on Left
Offset Groove
Positioned
on Right
Centered
Grooves

Other Earthworks Microphone manuals

Earthworks P30/HC User manual

Earthworks

Earthworks P30/HC User manual

Earthworks SR69 User manual

Earthworks

Earthworks SR69 User manual

Earthworks P30 User manual

Earthworks

Earthworks P30 User manual

Earthworks TC30K User manual

Earthworks

Earthworks TC30K User manual

Earthworks SR30HC User manual

Earthworks

Earthworks SR30HC User manual

Earthworks M30BX User manual

Earthworks

Earthworks M30BX User manual

Earthworks SR40V User manual

Earthworks

Earthworks SR40V User manual

Earthworks QTC50 User manual

Earthworks

Earthworks QTC50 User manual

Earthworks QTC40 User manual

Earthworks

Earthworks QTC40 User manual

Earthworks SR30 User manual

Earthworks

Earthworks SR30 User manual

Earthworks SR30 User manual

Earthworks

Earthworks SR30 User manual

Earthworks SR69 User manual

Earthworks

Earthworks SR69 User manual

Earthworks TC20 User manual

Earthworks

Earthworks TC20 User manual

Earthworks C30 User manual

Earthworks

Earthworks C30 User manual

Earthworks SR40 User manual

Earthworks

Earthworks SR40 User manual

Earthworks SR40 User manual

Earthworks

Earthworks SR40 User manual

Earthworks SR20 User manual

Earthworks

Earthworks SR20 User manual

Earthworks DrumMic DM20 User manual

Earthworks

Earthworks DrumMic DM20 User manual

Earthworks CMK4 CloseMic Kit User manual

Earthworks

Earthworks CMK4 CloseMic Kit User manual

Earthworks TC25 User manual

Earthworks

Earthworks TC25 User manual

Earthworks SR25 User manual

Earthworks

Earthworks SR25 User manual

Earthworks P30/Cmp User manual

Earthworks

Earthworks P30/Cmp User manual

Earthworks SR20LS Cardioid User manual

Earthworks

Earthworks SR20LS Cardioid User manual

Earthworks M50 User manual

Earthworks

Earthworks M50 User manual

Popular Microphone manuals by other brands

Huawei VPM220 quick start guide

Huawei

Huawei VPM220 quick start guide

Peavey PVM 835 Specifications

Peavey

Peavey PVM 835 Specifications

Sennheiser SKM 5200 Instructions for use

Sennheiser

Sennheiser SKM 5200 Instructions for use

Derrica U-6298 user manual

Derrica

Derrica U-6298 user manual

Sandberg 126-07 quick guide

Sandberg

Sandberg 126-07 quick guide

Shure PG48 user guide

Shure

Shure PG48 user guide

Comfort Digisystem DC10 user manual

Comfort Digisystem

Comfort Digisystem DC10 user manual

Audyssey ACM1-X user guide

Audyssey

Audyssey ACM1-X user guide

Samson C02 owner's manual

Samson

Samson C02 owner's manual

Sennheiser MKH 106 P 48 manual

Sennheiser

Sennheiser MKH 106 P 48 manual

Shure KSM9 user guide

Shure

Shure KSM9 user guide

NEVATON MC 401 operating instructions

NEVATON

NEVATON MC 401 operating instructions

Clear One Beamforming Microphone Array 2 quick start guide

Clear One

Clear One Beamforming Microphone Array 2 quick start guide

WorkPro SPS 8 user manual

WorkPro

WorkPro SPS 8 user manual

NEVATON MC 440 operating instructions

NEVATON

NEVATON MC 440 operating instructions

Sennheiser MKH 435 T-U user guide

Sennheiser

Sennheiser MKH 435 T-U user guide

Sennheiser SKM 300 G4 manual

Sennheiser

Sennheiser SKM 300 G4 manual

Sony ECM-SST1 operating instructions

Sony

Sony ECM-SST1 operating instructions

manuals.online logo
manuals.online logoBrands
  • About & Mission
  • Contact us
  • Privacy Policy
  • Terms and Conditions

Copyright 2025 Manuals.Online. All Rights Reserved.