EASYFIX Cubicle User manual

www.easyfix.com
Persse Business Park, Ballinasloe, Co. Galway. H53 VK10.
CIM V8 22
Installation Manual
Cubicle / Freestall

1
Safety and Care Advice
Important
damages due to non-compliance.
•Read all instructions carefully.
•Check you have all required components and fixings listed on pages 2
& 3.
•Keep children and animals away from work area, small parts are a
choking hazard.
•We recommend the use of power tools when screwing the fixings.
•If drilling is required, ensure there are no water pipes where you
intend to drill.
•Dispose of packaging carefully and responsibly.
Helpful Hints
•Assemble the parts in the correct order as outlined in this manual first,
then fix after all parts are assembled.
•If multiple cubicles are being assembled, carry out Step 1 for all of the
cubicles, then Step 2 for all of them and so on.
•Scan the QR code for video instructions on assembly.
QR Code
Cubicle Assembly Video
Thank you for purchasing the Cubicle!

2
Fixings for Assembly
Components
Set in
Concrete
Bolt to Floor
Straight
Angle
(Calm)
1 Post
2 Clamp
3 Top Pipe
Calm
Siesta
Dream
Flex
Rigid
4 Bottom Pipe
5 Coupling
6 Neckrail
7 Scratcher
8 Loop
9 Direct Steel End Wall
Bracket
10 Extended Steel End Wall
Bracket
*Other versions of wall connectors may or may not be applicable to your order.

3
Fixings for Assembly
Fixings
(A) M12 Through Bolt
(B) M10x100mm Bolt
(C) M10 Lock Nut
(D) Tec Screw
(E) M8 x 75mm Screw
(F) M8 Rivet Nut
(G) 25mm Washer
(H) M6 x 40mm
(I) M12 Lock Nut
(J) 50mm SS Screw
(K) Plastic Plug
(L) 80mm SS Screw
(M) M12x40mm Bolt
*May or may not be applicable to your order.
*
*
*

4
Assembly Overview
Models
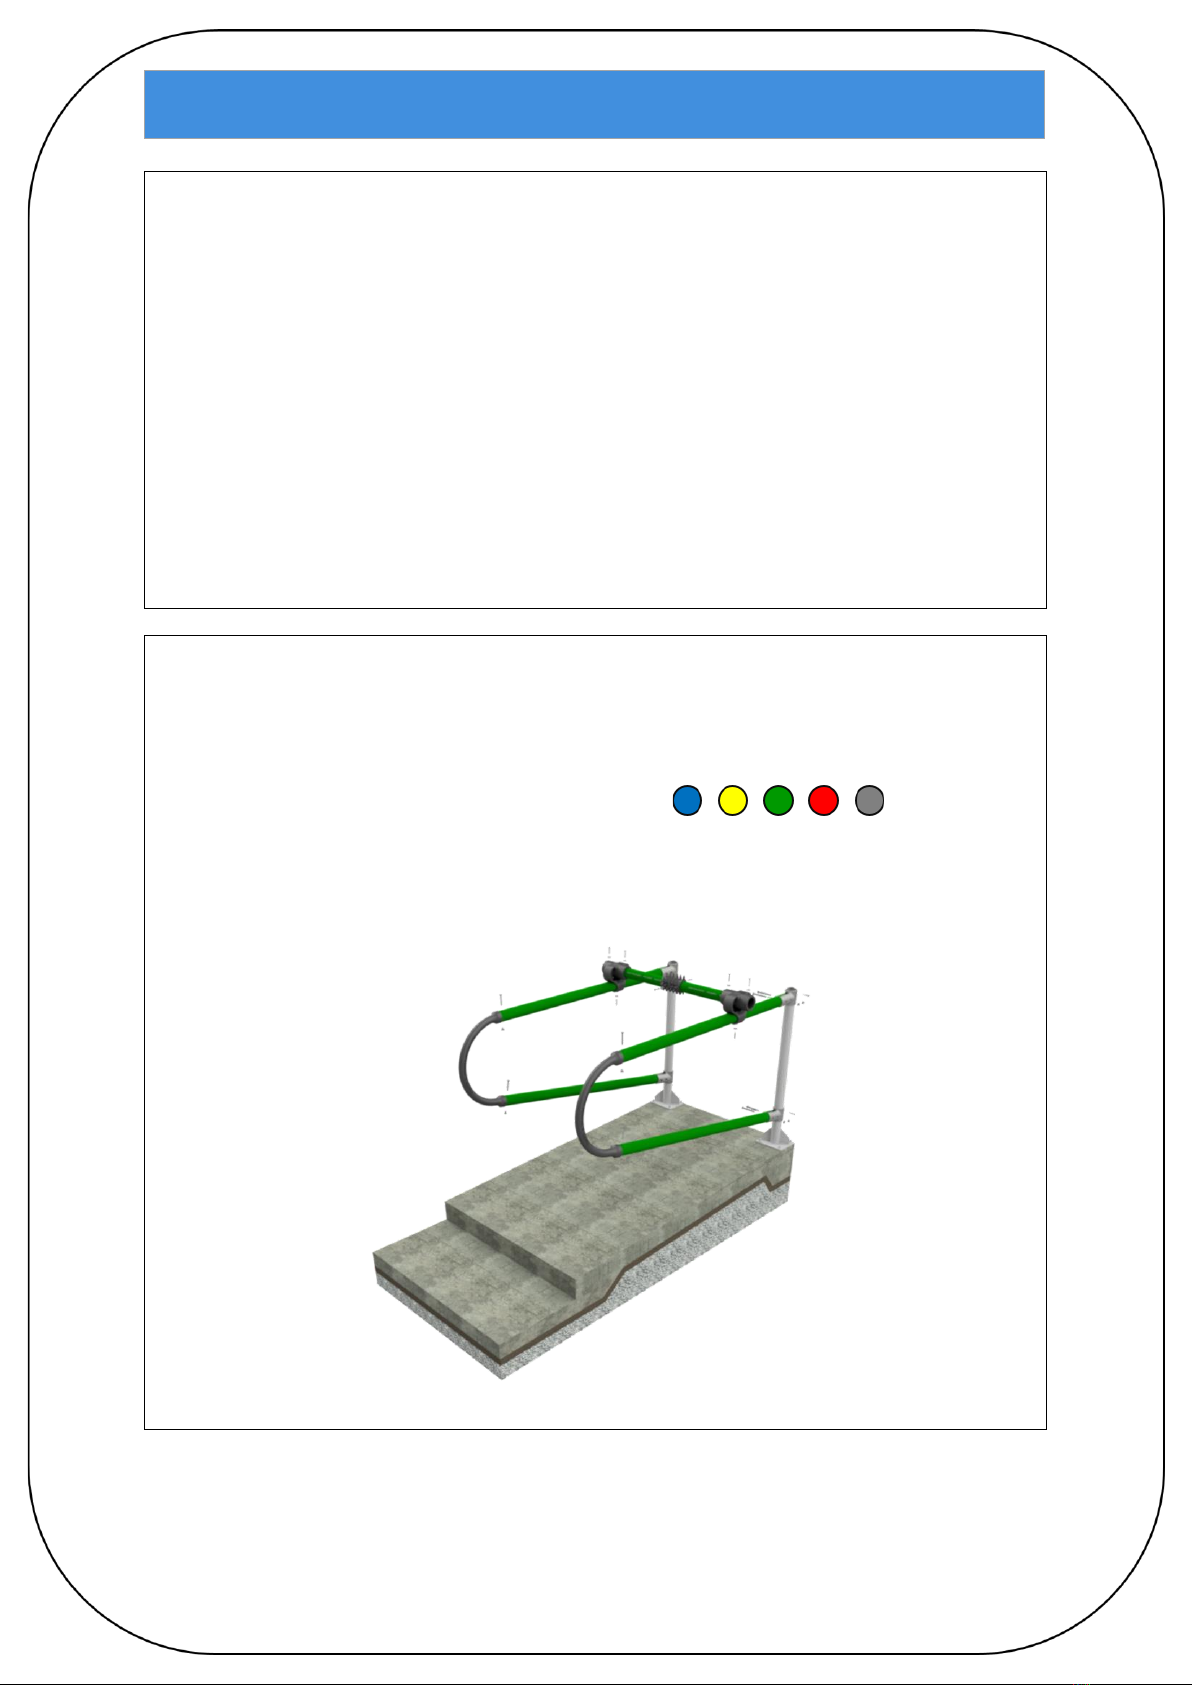
All assembly instructions are consistent throughout all cubicle models. The green Calm
model is used for illustration purposes. All models are available in three colours, seen
below.
Important Assembly Notes
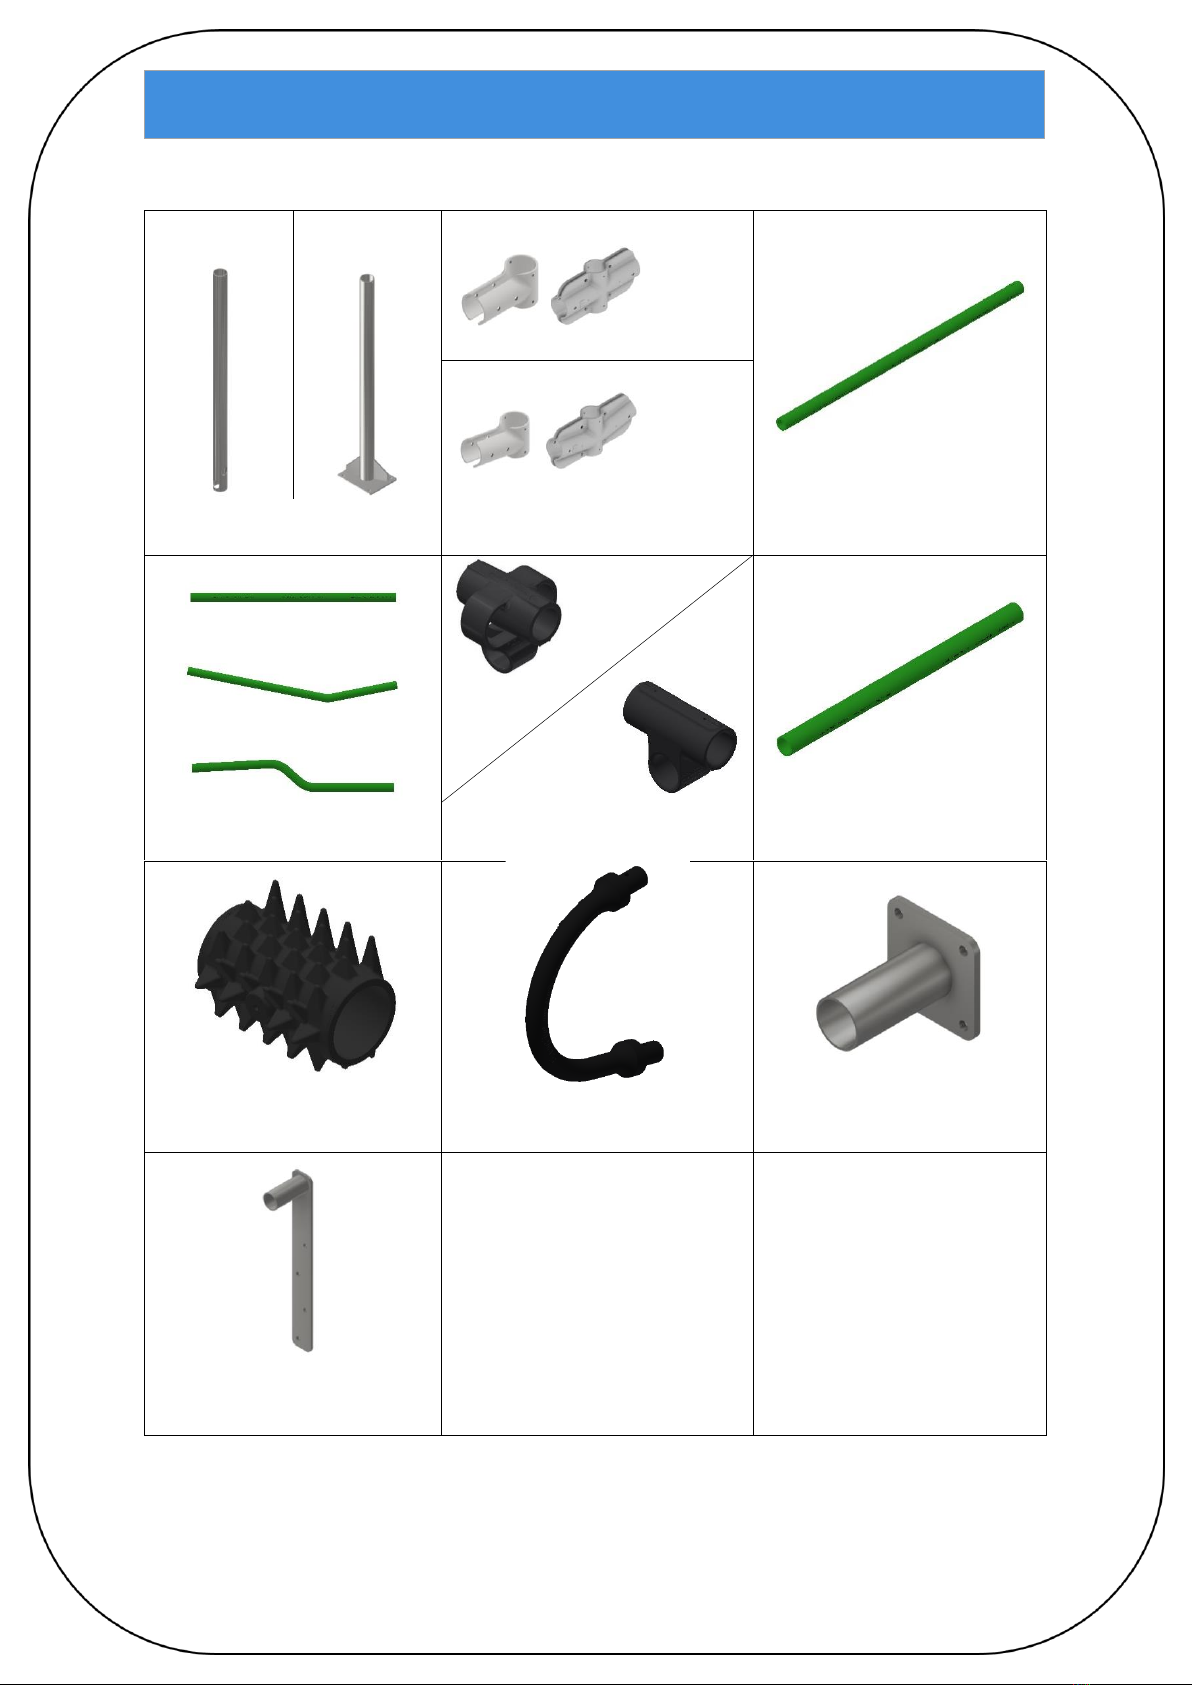
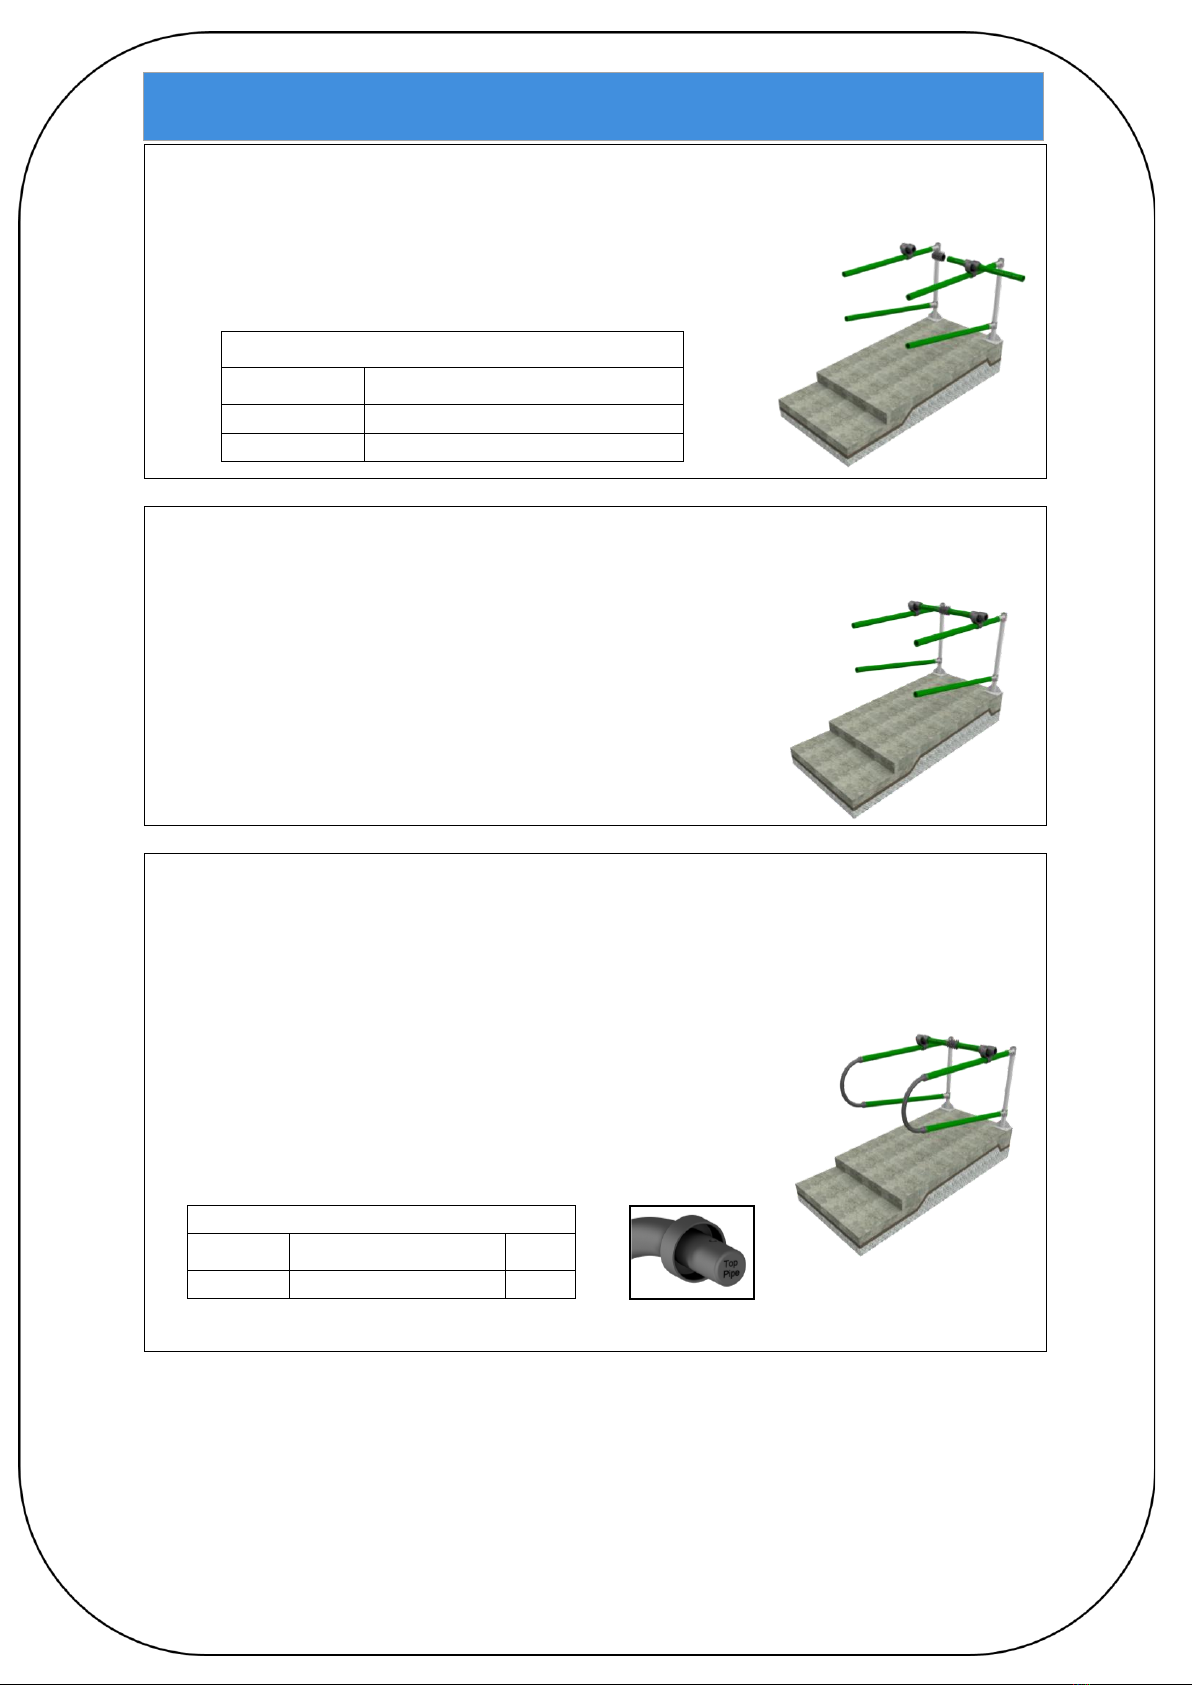
•The top and bottom pipes for the Calm model are the same, but for the purpose of
the manual they will be labelled separately, just to account for the different top
and bottom pipes in the Dream and Siesta models.
•The top and bottom clamp for the Dream and Siesta models is the same, but for
the purpose of the manual they will be labelled separately, just to account for the
different top and bottom clamps in the Calm model. Refer to Page Z for more
detail on the clamp styles for each model.
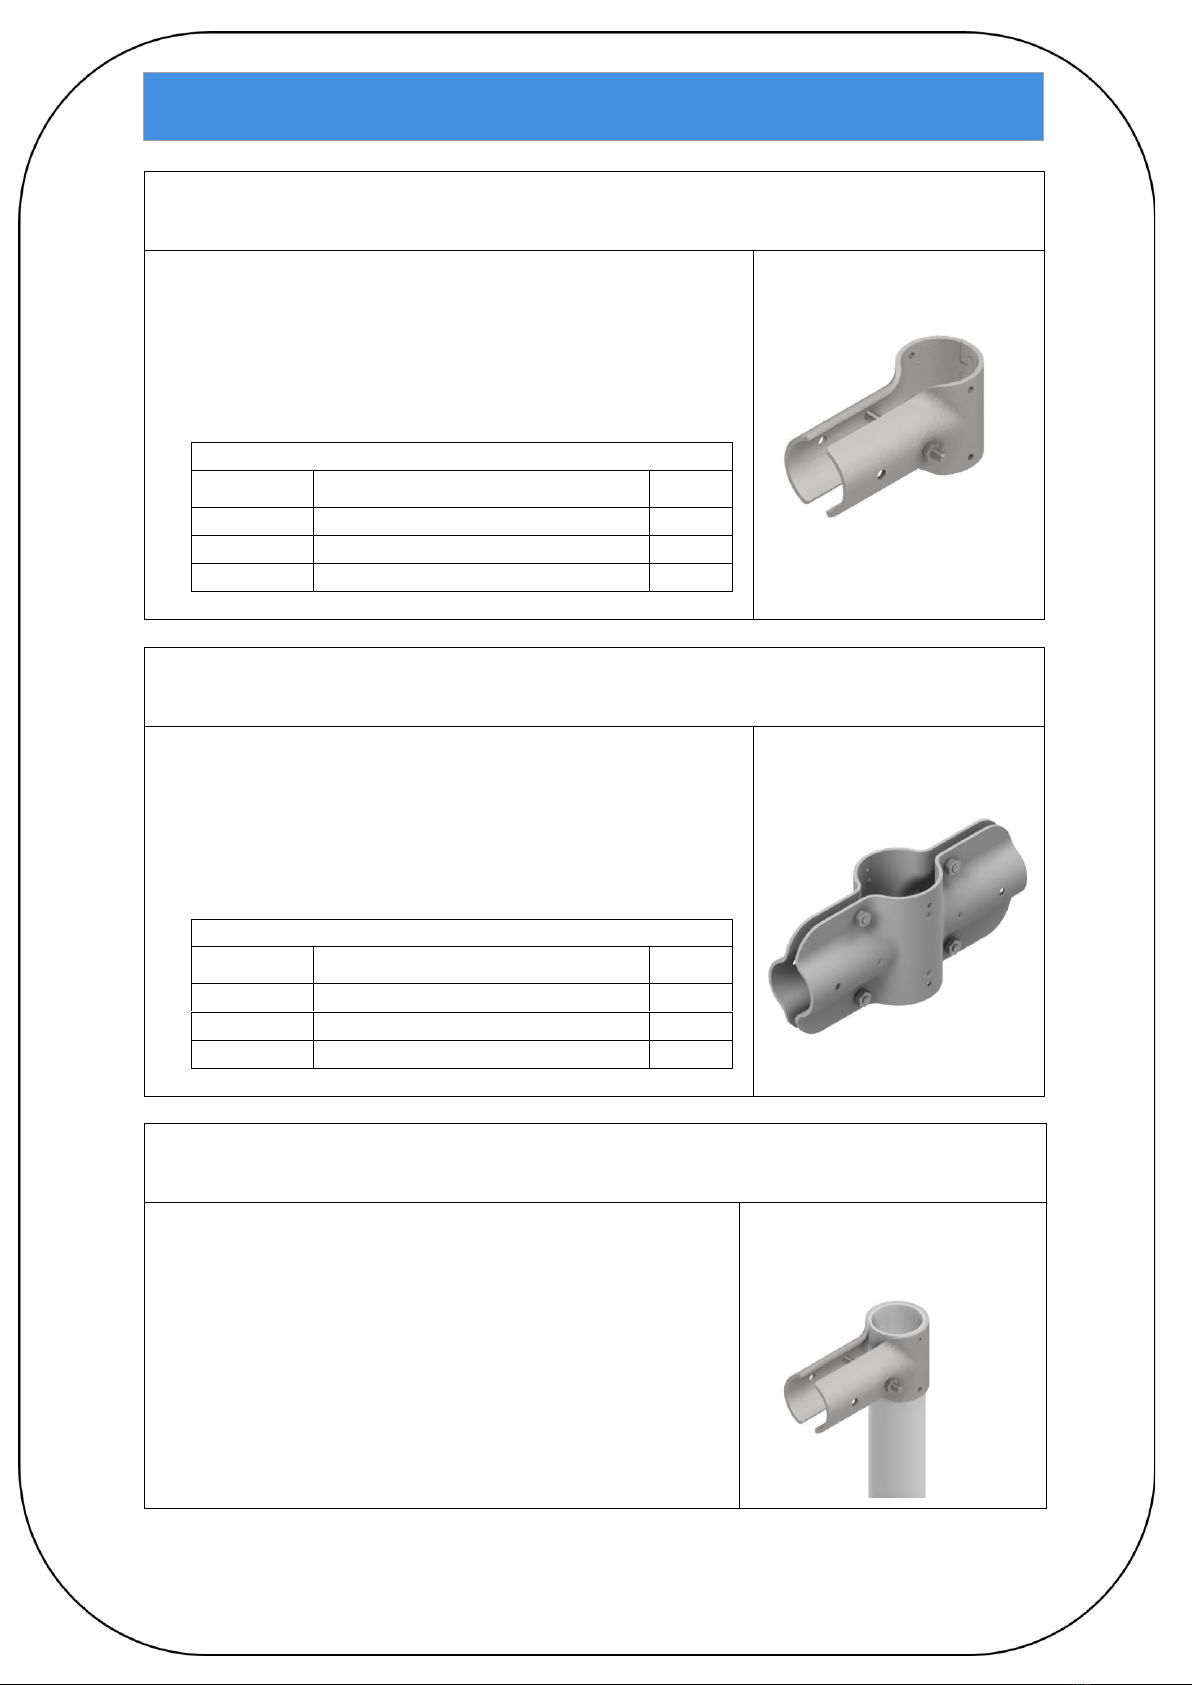
•The positioning measurements in the appendices are applicable to the Set in
Concrete, Bolt To Floor and Wall Mounted configurations, but for illustrative
purposes only the Set In Concrete model is used.
•or the
assembly. Beds may vary in size and look but the measurement recommendations
for positioning remain consistent.

5
Fixing the Cubicle
Step 1- Post Setup
Refer to Appendix A and Appendix B at the back of your manual for full positioning guidelines for the
Single and Double post cubicles.
EASYFIX™recommends a cubicle bed slope of 3-4%
Step 1.1 - Set in Concrete
Single Bed
Step 1.2 - Bolt to Floor
Single Bed
Parts List
Item ID
Part Name
Qty.
1
Post
1
A
M12 Through Bolt
4
M12 Through Bolt Pilot Hole:
Ø12mmx100mm deep
1260mm

6
Fixing the Cubicle
Step 2: Pre-Assemble the Single Clamps
•For the single-sided clamp, interlock the teeth and feed
the M10x110mm Bolt through the hole as shown.
•Do not tighten the bolt fully, only lightly to keep the
sub-assembly together.
Parts List
Item ID
Part Name
Qty.
2
Clamp (matching halves)
1
B
M10x100mm Bolt
1
C
M10 Locknut
1
.
Step 2.1: Pre-Assemble the Double Clamps
•For the double-sided clamp, push the M12 bolts through
both clamps and secure with a nut.
•Do not tighten the bolts fully, only lightly to keep the
sub-assembly together.
Parts List
Item ID
Part Name
Qty.
2
Clamp (matching halves)
1
M
M12x40mm Bolt
4
I
Locknut M12
4
.
Step 3: Slide on the Clamps
•Slide the pre-assembled clamps over the post.
•If angled clamps are used in your cubicle (Calm model
only), lower the angled clamp first as shown in
Appendix A/B.
•When the clamp is in place, the bolt can be slightly
tightened to hold it in place. DO NOT OVERTIGHTEN,
as further adjustment may be required.

7
Fixing the Cubicle
Step 4: Attaching the Pipes
•Place the pipes into the clamps, loosen the tension bolts
if required to do so.
•Ensure the holes at the end of the pipes line up with the
holes in the clamps and secure the pipes in the clamps
using the bolt (B) and locknut (C) provided.
Parts List
Item ID
Part Name
Qty.
B
Bolt M10x100mm
1
C
Locknut M10
1
.
Step 5: Securing the Pipes and Clamps
•Ensure that the clamps are at the appropriate heights.
See Appendix A/B for EASYFIX recommended
measurements.
•Tighten the pipe bolts, securing both the pipes and
clamps in place.
Step 6: Placing the Couplings
•Slide a coupling along each of the top pipes.
•Ensure the coupling is put on in the correct orientation as
shown.
Parts List
Item ID
Part Name
5
Coupling

8
Fixing the Cubicle
Step 7.1: Placing the Neckrail & Scratcher
•Insert the neckrail through the coupling from one side
and through the scratcher.
Parts List
Item ID
Part Name
6
Neckrail
7
Scratcher
Step 7.2: Placing the Neckrail & Scratcher
•Continue through the neckrail and insert it in the next
coupling.
•Slide the scratcher along the neckrail until it sits in the
middle of the bed. This will be later fixed.
Step 8: Attaching the Loops
•Insert the rubber loop to the appropriate pipe, ensuring
that the top side is inserted into the top pipe. The
orientation of the loop is printed at the end of the loop.
•Press fit the rubber loop in until the pipe is flush with the
inside face of the loop.
Parts List
Item ID
Part Name
Qty.
8
Loop
1

9
Positioning & Fixing the Cubicle
Positioning
Refer to Appendix A for single cubicle assembly positioning
guidelines.
•The scratcher should sit in the middle of the cubicle. Use a measuring tape to find the
centre of the bed and centre the scratcher along it. Ensure the short spikes of the
scratcher face the bed to provide optimal positioning and use for the animal.
•A key measurement is the distance from the neckrail to the heelstone, as can be seen
in Appendix A and Appendix B. This measurement should
Fixing
•The Fixing ID identifies which bag the fixing belongs to in accordance with the bag
identifier on the bag labels. It is advised to use the fixing for the application from the
Fixing ID :
•Detailed descriptions of the following fixings can be found on the next page. Please
pay close attention to each Fixing ID and to the relative quantity required.

10
Fixing the Cubicle
A –Loop to Pipe (Top & Bottom)
B –Coupling to Pipe/ Neckrail
C –Scratcher to Neckrail
D –Pipe to Stem (Top & Bottom)
Note: All bolts/fixings should be rechecked & retightened where necessary after the first 3
months of use and once yearly thereafter.

11
End Wall Bracket Installation
Direct End Wall Bracket
Extended End Wall Bracket
Note: For use where the neckrail runs above the height of the end wall.

12
Appendix A
Pipe comes in 1.8m, 2m & 2.2m (5’11’’,
6’7’’, 7’3’’) lengths. To determine X:
For Cubicle bed lengths (Y) of 2286mm-
2438mm (76 80)
Use 1.8m (511) long pipes.
For Cubicle bed lengths (Y) of 2438mm-
2743mm (80 90)
Use 2m (67) long pipes.
For Cubicle bed lengths (Y) greater than
2473mm (90)
Use 2.2m (73) long pipes.
*The 940mm centre to centre
measurement between the cubicle
clamps is recommended. This can be
adjusted for smaller animals.

13
Appendix B
Pipe comes in 1.8m, 2m & 2.2m (5’11’’, 6’7’’, 7’3’’) lengths.
To determine X:
For Cubicle bed lengths (Y) of 4572mm-4877mm (1516)
Use 1.8m (511) long pipes.
For Cubicle bed lengths (Y) of 4877mm-5182mm (1617)
Use 2m (67) long pipes.
For Cubicle bed lengths (Y) of 5182mm-5486mm (1718)
Use 2.2m (73) long pipes.
Note: For bed lengths (Y) in excess of these guidelines, it is
recommended to use two single posts back-to-back to achieve
the correct cubicle loop to heelstone measurement (Z).
*The 940mm centre to
centre measurement
between the cubicle
clamps is recommended.
This can be adjusted for
smaller animals.

14
Appendix C
Dream
Top Pipe
Top Clamp
Bottom Pipe
Bottom Clamp
Calm
Top Pipe
Top Clamp
Bottom Pipe
Bottom Clamp
Siesta
Top Pipe
Top Clamp
Bottom Pipe
Bottom Clamp
This manual suits for next models
1
Table of contents
Other EASYFIX Farm Equipment manuals
Popular Farm Equipment manuals by other brands

Betterbee
Betterbee Lyson 12 instructions

Schlagel
Schlagel Rapid Till RT-1000 Operator's manual

Schaffert
Schaffert FURROW V CLOSER Mounting instructions

Amazone
Amazone Catros 3002-T Operator's manual

GREAT PLAINS
GREAT PLAINS Nutri-Pro NP3000 Operator's manual

Raven
Raven SBGuidance Auto installation manual