manuals.online logo
Brands
  1. Home
  2. •
  3. Brands
  4. •
  5. EASYFIX
  6. •
  7. Farm Equipment
  8. •
  9. EASYFIX Dream User manual

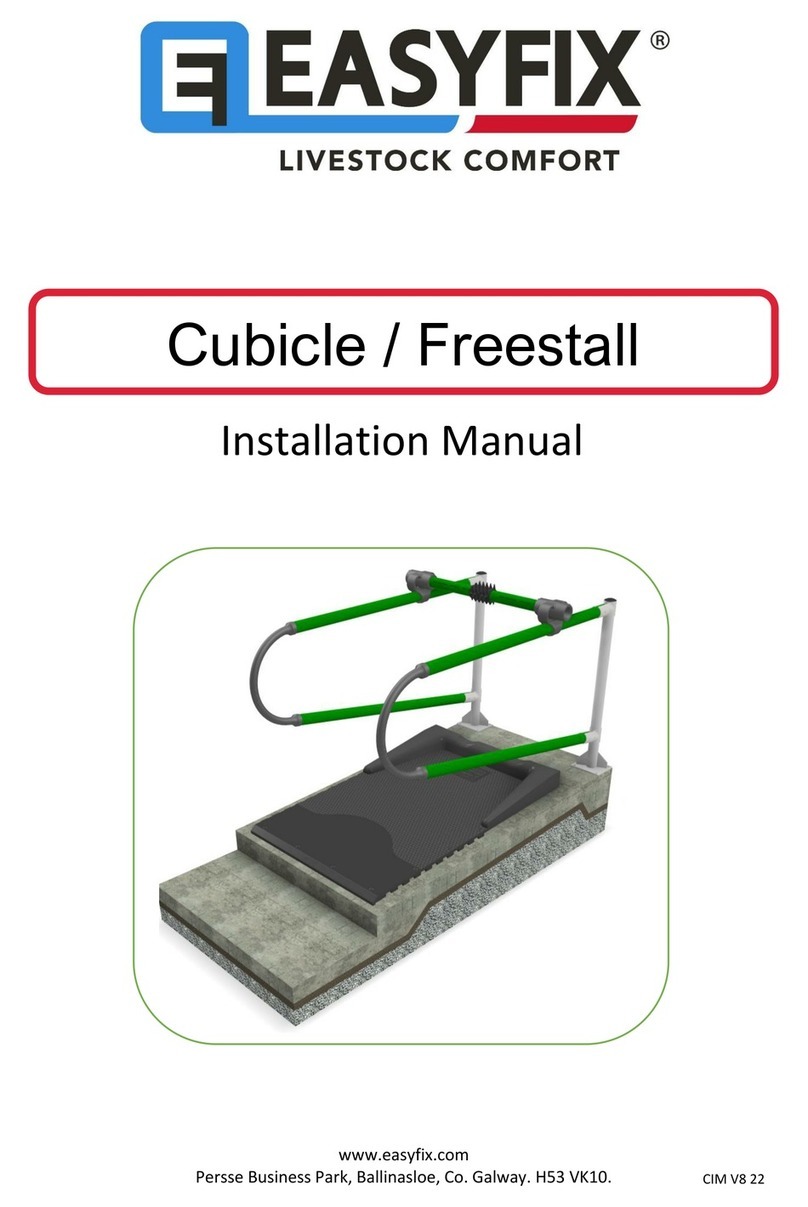
EASYFIX Dream User manual

Cubicle/ reestall
Installation
Manual
Persse
Business
Park,
Ballinasloe,
Co.
Galway,
H53
VK10
WWW.EASY IX.COM
CIM
V1
20
Read
all
instructions
carefully.
Check
you
have
all
required
components
and
fixings
listed
on
pages
2
&
3.
We
recommend
the
use
of
power
tools
when
screwing
the
fixings.
If
drilling
is
required,
ensure
there
are
no
water
pipes
where
you
intend
to
drill.
Dispose
of
packaging
carefully
and
responsibly.
Cubicle
Assembly
Video
Assemble
the
parts
in
the
correct
order
as
outlined
in
this
manual
first,
then
fix
after
all
parts
are
assembled.
If
multiple
cubicles
are
being
assembled,
carry
out
Step
1
for
all
of
the
cubicles,
then
Step
2
for
all
of
them
and
so
on.
Scan
the
QR
code
below
for
video
instructions
on
assembly.
Helpful
Tips
Important
Safety
&
Care
Advice
Thank
you
for
purchasing
your
new
EASY IX
™
Cubicle!
Please
note
the
following
safety
instructions.
EASY IX
™
is
not
liable
for
damages
due
to
non
-
compliance.
1
Open
the
camera
on
your
phone.
Point
your
phone
at
the
QR
code
to
the
right
and
scan
it.
Tap
the
pop
-
up
notification
at
the
top
of
your
screen.
You
will
then
be
brought
to
the
cubicle
assembly
video.
1.
2.
3.
4.
Parts
for
Assembly
2
Top
Pipe
Neckrail
End
Wall
Bracket
May
or
may
not
be
applicable
to
your
order
*
SIC
=
BT
=
WM
=
Set
In
Concrete
Bolt
To
loor
Wall
Mounted
Abbreviations
Post
12
Siesta
Dream
Calm
Bottom
Pipe
3
lex
Rigid
Coupling
45
Scratcher
6
Loop
78
End
Wall
Extension
Paddle
Kit
*
9
Components
Parts
for
Assembly
3
M8
x
75mm
Screw M8
Rivet
Nut M6
x
40mm
Screw
25mm
Washer M8
x
90mm
Bolt M8
Nut
Plastic
Plug
*
50mm
SS
screw
* *
80mm
SS
Screw
May
or
may
not
be
applicable
to
your
order
*
ixings
All
assembly
instructions
are
consistent
throughout
all
cubicle
models.
The
green
Calm
model
is
used
for
illustration
purposes.
All
models
are
available
in
three
colours,
seen
below.
Assembly
Overview
Models
Dream Calm Siesta
Important
Assembly
Notes
The
top
and
bottom
pipe
for
the
Calm
model
are
the
same,
but
for
the
purpose
of
the
manual
they
will
be
labelled
separately,
just
to
account
for
the
different
top
and
bottom
pipes
in
the
Dream
and
Siesta
models.
The
positioning
measurements
in
the
appendices
are
applicable
to
the
Set
In
Concrete,
Bolt
To
loor
and
Wall
Mounted
configurations,
but
for
illustrative
purposes
only
the
Set
In
Concrete
model
is
used.
All
measurements
are
EASY IX
™
recommended
and
are
just
a
guideline
for
the
assembly.
Beds
may
vary
in
size
and
look
but
the
measurement
recommendations
for
positioning
remain
consistent.
4
210mm
210mm
Double Bed
210mm
Anchor
Bolt
bit
size:
12mm
Masonry
Bit,
150mm
deep
Threaded
Bar
bit
size:
14mm
Masonry
Bit
Anchor
Bolt
bit
size:
12mm
Masonry
Bit,
150mm
deep
Refer
to
Appendix
A
and
Appendix
B
at
the
back
of
your
manual
for
full
positioning
guidelines
for
the
Single
and
Double
post
cubicles.
Step
1.3
-
Wall
Mounted
Step
1.1
-
Set
In
Concrete
Single Bed
Assembly
Instructions
Step
1
-
Post
Setup
EASY IX
™
recommends
a
cubicle
bed
slope
of
3
-
4
%
.
Step
1.2
-
Bolt
To
loor
5
210mm
210mm
Step
4
Slide
the
top
pipes
on
to
the
top
stems
of
the
posts
.
Slide
the
bottom
pipes
on
to
the
bottoms
stems
of
the
posts
.
PARTS
LIST
ITEM
ID PART
NAME
2
3
Top
Pipe
Bottom
Pipe
Drop
in
an
M8
x
90mm
Bolt
on
the
top
and
bottom
pipe/stem
to
maintain
correct
pipe
positioning.
Slide
a
coupling
along
each
of
the
top
pipes
.
Assembly
Instructions
Step
2
Step
3
Ensure
the
predrilled
holes
in
all
of
the
paired
components
line
up.
or
the
Dream
and
Siesta
models,
ensure
that
the
pipes
are
in
the
correct
orientation.
PARTS
LIST
ITEM
ID PART
NAME
EM8
x
90mm
Bolt
Ensure
the
coupling
is
put
on
in
the
correct
orientation,
as
seen
in
igure
1.
PARTS
LIST
ITEM
ID PART
NAME
4 Coupling
igure
1
2
1
3
1
2
1
3
4
2
4
6
Insert
the
neckrail
through
the
coupling
from
one
side
and
through
the
scratcher
.
Continue
through
with
the
neckrail
and
insert
it
in
the
next
coupling
.
Slide
the
scratcher
along
the
neckrail
until
it
sits
in
the
middle
of
the
bed.
This
will
be
later
fixed.
Assembly
Instructions
Step
5
Step
6
PARTS
LIST
ITEM
ID PART
NAME
6
Neckrail
Scratcher
5
Step
7
igure
2
Insert
the
rubber
loop
to
the
pipe,
ensuring
that
the
top
side
(See
igure
2
)
is
inserted
into
the
top
pipe
.
Press
fit
the
rubber
loop
in
until
the
pipe
is
flush
with
the
inside
face
of
the
loop.
54
6
65
5
4
65
7
2
7
7
7 Rubber
Pipe
PARTS
LIST
ITEM
ID PART
NAME
The
ixing
ID
identifies
which
bag
the
fixings
belongs
to
in
accordance
to
the
bag
identifier
on
the
bag
labels.
It
is
advised
to
use
the
fixing
for
the
application
from
the
ixing
ID
given
in
the
instructions.
These
ID's
are:
Positioning
&
ixing
the
Cubicle
Positioning
Refer
to
Appendix
A
for
single
cubicle
assembly
positioning
guidelines
Refer
to
Appendix
B
for
double
cubicle
assembly
positioning
guidelines
The
scratcher
should
sit
in
the
middle
of
the
cubicle.
Use
a
measuring
tape
to
find
the
center
of
the
bed
and
center
the
scratcher
along
it.
Ensure
the
short
spikes
of
the
scratcher
face
the
bed
to
provide
optimal
positioning
and
use
for
the
animal.
A
key
measurement
is
the
distance
from
the
neckrail
to
the
heelstone,
as
can
be
seen
in
Appendix
A
and
Appendix
B.
This
measurement
should
sit
between
2058mm
(6'9"
)
and
2108mm
(6'11"
)
.
ixing
Detailed
descriptions
of
the
following
fixing's
can
be
found
on
the
next
page.
Please
pay
close
attention
to
each
ixing
ID
and
to
the
relative
quantity
required.
8
ixing
the
Cubicle
*Note
that
bolt
E
should
already
be
in
place
from
Step
3
A
–
Loop
to
Pipe
(Top
&
Bottom
)
B
–
Coupling
to
Pipe/Neckrail
C
–
Scratcher
to
Neckrail D
–
Pipe
to
Stem
(Top
&
Bottom
)
ixing
ID ixing
ID
ixing
ID ixing
ID
9
8mm
holes
drilled
60mm
deep
8mm
holes
drilled
90mm
deep
or
use
where
the
neckrail
runs
above
the
height
of
the
end
wall
End
Wall
Bracket
Installation
Positioning
End
Wall
Bracket:
End
Wall
Extension
Paddle
Kit
10
inal
Step
Let
the
cows
enjoy
the
comfort
of
your
new
EASY IX
™
Cubicles!
Please
feel
free
to
email
us
your
images
via
marketing
@
easyfix.com
or
tag
us
on
social
media
to
be
featured
on
our
page.
@
EASY IXOfficial
@
EASY IX_O
11
Appendix
A
Note
A
Pipe
comes
in
1.8m,
2m
&
2.2m
(5'11",
6'7",
7'3"
)
lengths.
or
Cubicle
bed
lengths
(Y
)
of
2286mm
-
2438mm
(7'6"
-
8'0"
)
Use
1.8m
(5'11"
)
long
pipes.
or
Cubicle
bed
lengths
(Y
)
of
2438mm
-
2743mm
(8'0"
-
9'0"
)
Use
2m
(6'7"
)
long
pipes.
or
Cubicle
bed
lengths
(Y
)
greater
than
2743mm
(9'0"
)
Use
2.2m
(7'3"
)
long
pipes.
Appendix
B
Pipe
comes
in
1.8m,
2m
&
2.2m
(5
’
11
’’
,
6
’
7
’’
,
7
’
3
’’)
lengths.
To
determine
X:
Note
B
or
Cubicle
bed
lengths
(Y
)
of
4572mm
-
4877mm
(15
’ –
16
’)
Use
1.8m
(5
’
11
’’)
long
pipes.
or
Cubicle
bed
lengths
(Y
)
of
4877mm
-
5182mm
(16
’ –
17
’)
Use
2m
(6
’
7
’’)
long
pipes.
or
Cubicle
bed
lengths
(Y
)
of
5182mm
-
5334mm
(17
’ –
17
’
6
”)
Use
2.2m
(7
’
3
’’)
long
pipes.
Note:
or
bed
lengths
(Y
)
in
excess
of
these
guidelines,
it
is
recommended
to
use
two
single
posts
back
to
back
to
achieve
the
correct
cubicle
loop
to
heelstone
measurement
(Z
)
.

This manual suits for next models

2

Other EASYFIX Farm Equipment manuals

EASYFIX Cubicle User manual

EASYFIX

EASYFIX Cubicle User manual

EASYFIX Neptune User manual

EASYFIX

EASYFIX Neptune User manual

Popular Farm Equipment manuals by other brands

Alice's Garden CHABO CKC912BN manual

Alice's Garden

Alice's Garden CHABO CKC912BN manual

Killbros 590 Operator's Manual/Parts Catalog

Killbros

Killbros 590 Operator's Manual/Parts Catalog

Plotmaster HUNTER Series user manual

Plotmaster

Plotmaster HUNTER Series user manual

Montag GEN 2 - 2218 Operation manual

Montag

Montag GEN 2 - 2218 Operation manual

Landoll 6231 Operator's manual

Landoll

Landoll 6231 Operator's manual

daewon SPK+1 user manual

daewon

daewon SPK+1 user manual

DuraTech Industries Haybuster Balebuster 2620 Operating Instructions and Parts Reference

DuraTech Industries

DuraTech Industries Haybuster Balebuster 2620 Operating Instructions and Parts Reference

IBEX TX40 quick start guide

IBEX

IBEX TX40 quick start guide

APV ES 100 M1 Classic Original operating manual

APV

APV ES 100 M1 Classic Original operating manual

FARMTECH T-DCBM-4 user manual

FARMTECH

FARMTECH T-DCBM-4 user manual

Soil-Max Gold Digger Stealth ZD manual

Soil-Max

Soil-Max Gold Digger Stealth ZD manual

Arrowquip EASY FLOW product manual

Arrowquip

Arrowquip EASY FLOW product manual

ketrop BirdYell Hand instruction manual

ketrop

ketrop BirdYell Hand instruction manual

CropCare PR2500AM Assembly manual

CropCare

CropCare PR2500AM Assembly manual

REIST INDUSTRIES RR48 Operator and parts manual

REIST INDUSTRIES

REIST INDUSTRIES RR48 Operator and parts manual

Case IH AXIAL-FLOW 2577 Operator's manual

Case IH

Case IH AXIAL-FLOW 2577 Operator's manual

Case IH AFX8010 Repair manual

Case IH

Case IH AFX8010 Repair manual

Aitchison Reese Agri UFO SEEDKING Professional manual

Aitchison

Aitchison Reese Agri UFO SEEDKING Professional manual

manuals.online logo
manuals.online logoBrands
  • About & Mission
  • Contact us
  • Privacy Policy
  • Terms and Conditions

Copyright 2025 Manuals.Online. All Rights Reserved.