Customer service: 0871 855 6100
For more innovative products from Easylife please visit:
www.easylifegroup.com
CLEANING YOUR AUDIO (OPTIONAL)
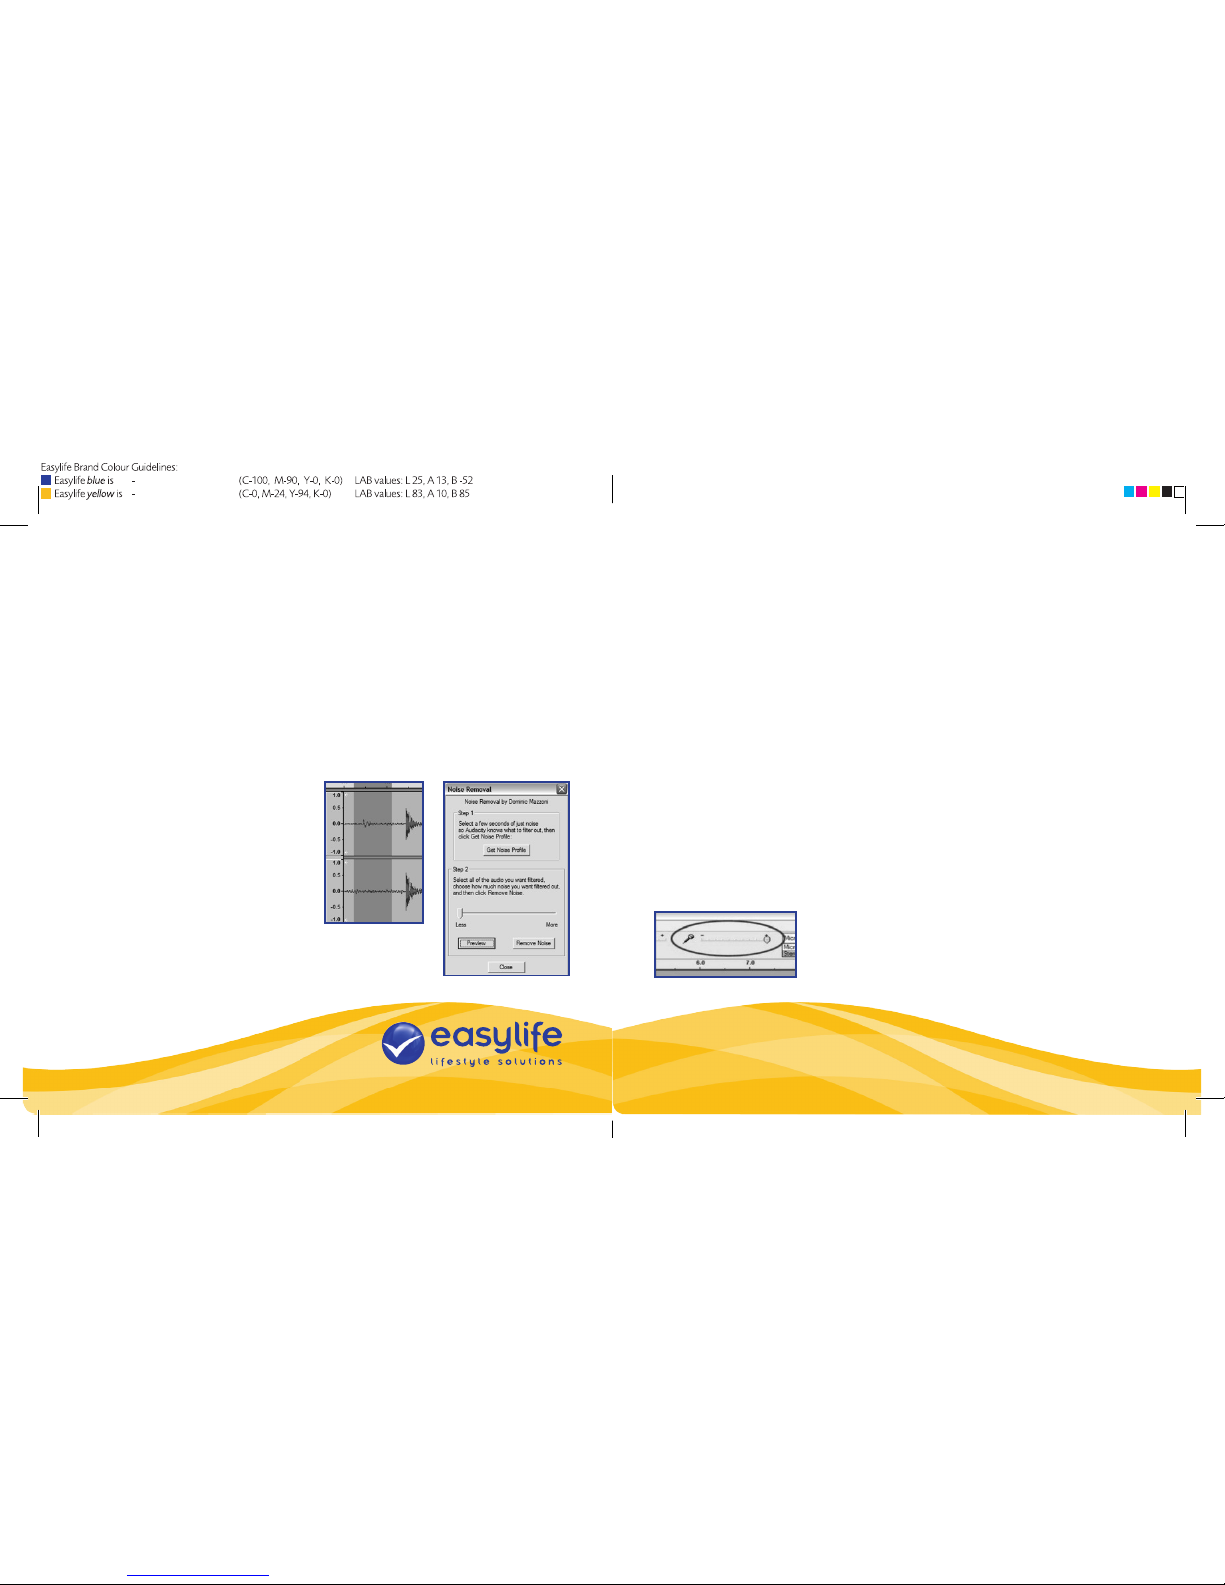
Drag the cursor over the portion of the audio track which contains unwanted noise. We
recommend using the beginning or the end of a track where there is no music and only
noise. (See Figure 4).
Select Noise Removal from the Effect drop down menu at the top of the screen to bring
up the Noise Removal window (Figure 5). Click Get Noise Prole. The Noise Removal
window will now close automatically.
Select the entire section of audio that you wish to remove noise from. If you wish to clean
the entire recording use Select All in the Edit menu (see Figure 1). Again, select the Noise
Removal window from the Effect menu.
Adjust the amount of audio that you would
like to lter by moving the slider in the
Noise Removal window. We recommend
using the minimum noise removal for
optimum sound.
Finally, click Remove Noise. You can
preview the audio before removing
the noise by clicking on Preview. Figure 4
Figure 5 Figure 6
TROUBLESHOOTING
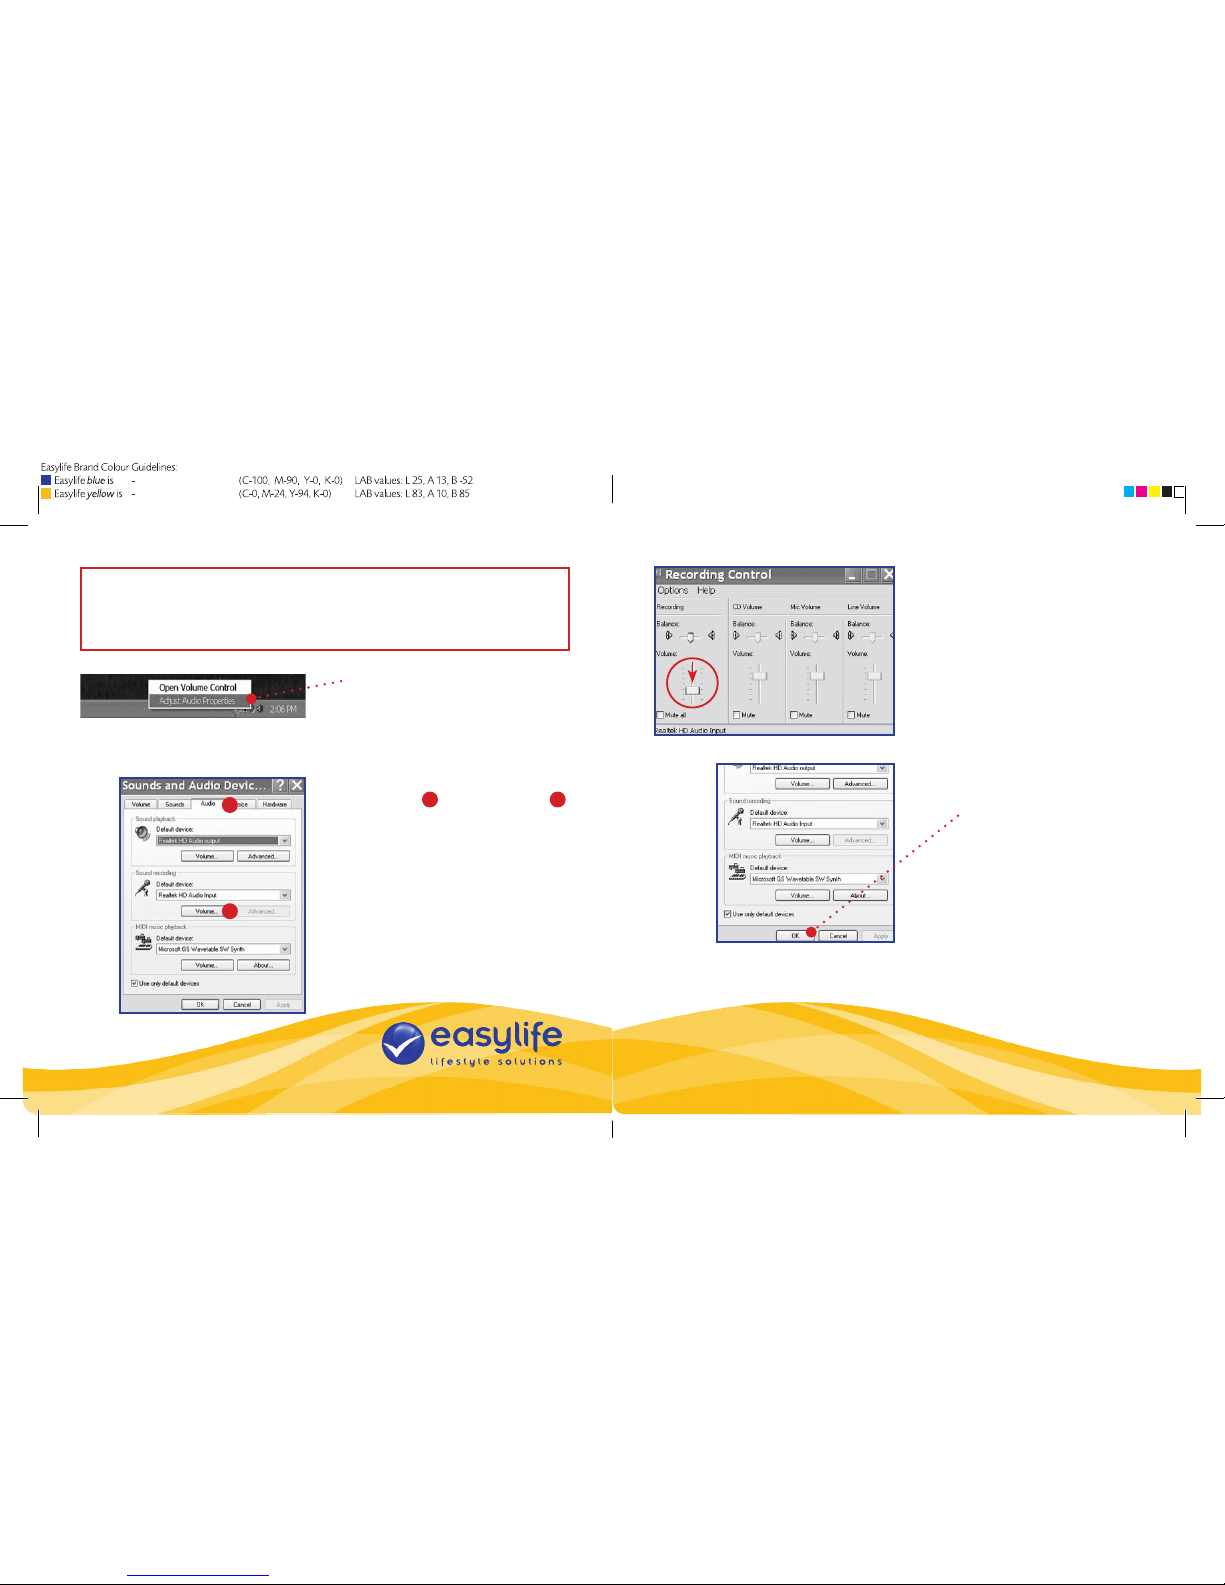
NO SOUND
•If you can’t hear any sound when using the software application, go to the Audacity
Preferences and ensure that the USB input is selected in the Recording Device menu.
•If you cannot hear the music but you do see the audio waves moving on the screen,
open your Audacity Preferences and make sure that your Playback Device is set to
your internal computer soundcard.
•If neither of the above options work, close Audacity, turn off the Tape Grabber and
unplug the USB cable. Then plug in the USB cable, turn on the Tape Grabber and
reopen Audacity.
MICRO-PHONE SLIDER
If you can’t see the microphone slider on your screen, please go to the Preferences menu
in Audacity, click on the Interface tab and make sure that the Enable Mixer Toolbar and
Enable Meter Toolbar options are selected. If they are not, please tick them and press
OK. The microphone slider should be at full volume (as far to the right as possible).
POOR SOUND QUALITY
If a recorded track sounds distorted during playback, you
may need to adjust the input volume from the Tape Grabber.
Try moving the Input Level slider in Audacity to the left to
lower the input volume (as shown in Figure 6). You can also
use the Normalize effect in the drop down Effect menu.
PANTONE 072 C
PANTONE 123 C