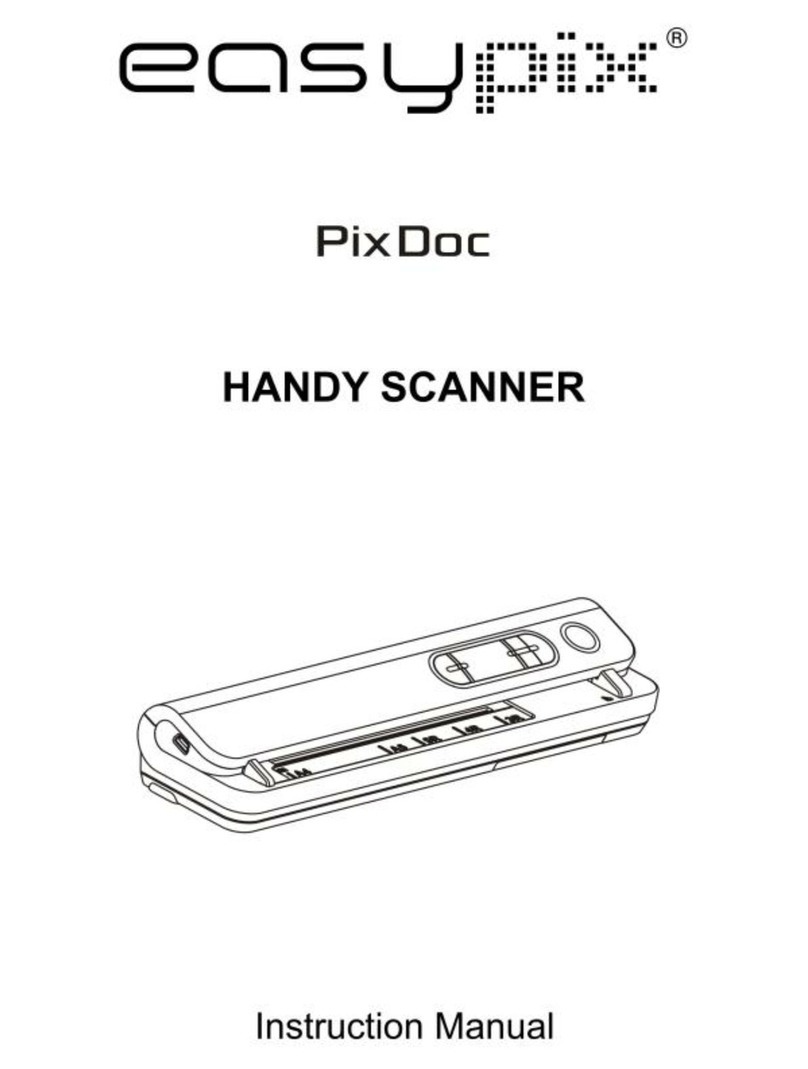
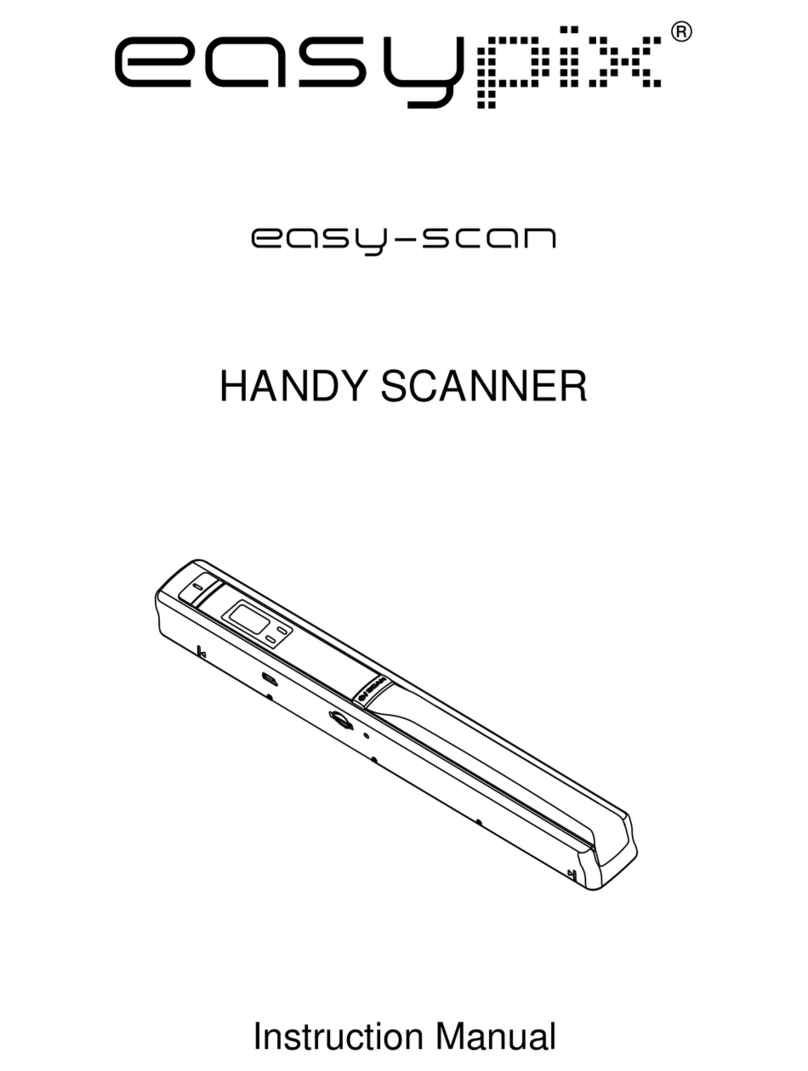
Easypix Easy-Scan User manual

HANDY SCANNER
Instruction Manual

1. Key features
Color JPG/PDF scan selection
900/600/300 dpi scan selection
Direct save JPG/PDF file to microSD card
Support microSD card up to 32GB
Driver free to download for Windows 7 / Vista / XP and
Mac OS10.4 or above (direct plug-in, driver installation not required)
Part Function
1
2
3
4
5
6
7
Battery door For 2x AA alkaline batteries
Power/Scan Power On/ Off: Press and hold this key for 2 seconds to turn
power on or off. In power on mode, press this button to start scan,
press this button again to stop
LCD screen Scanning status display
Resolution
JPG/PDF
Select High(900dpi)/Middle(600dpi/)Low(300dpi) resolution;
High/ /Low resolution mode icon will be displayed on status LCDMiddle
Select scan, JPG/PDF mode icon will bedisplayed on status
LCD JPG/PDF
USB interface
SD card slot MicroSD card storage location.
Download photo to a computer via USB cable provided.
Scan LED indicator
8
2. Functional parts
Ready for scan: Green LED on
Error LED indicator Over speed: Red LED on
9
10
Format button Press this button to format the microSD card.
Manual
11
Time set Press to enter Time setting mode
1
2
35
7
6
4
89
1011

3. Explanation of the status icons
RESOLUTION
HI MI LO
JPG PDF
FULL
EFFECT
1
2
3
4
5
Item Function Description
SD card indicator Photos will be stored in m SD card icro
Battery indicator Battery is full Empty battery
Effect indicator JPG PDFor
Counting indicator Show scanned files in SD cardmicro
Selected resolution High(900dpi)/Middle(600dpi/)Low(300dpi)
1
2
3
4
5
4. Using the scanner
4.1 Installing the battery
1. Open the battery door.
2. Insert 2x AA alkaline batteries into the battery compartment.
3. Turn on the by pressing the [POWER] button for 2 seconds.scanner
4.2 Inserting a microSD memory card (not included)
You must insert a microSD Card (not supplied) to record and store your pictures.
Inserting the microSD memory card:
1. Turn OFF the scanner.
2. Insert the microSD card into the microSD card slot, gently press in until card
is latched.
Note: -Do not force the card into the slot; forcing may damage scanner and
the microSD memory card. Align microSD card position (as marked)
and try again.
-The microSD memory card must be formatted before scanning.
See the following instruction.

4.5 Setting the resolution
Press the [DPI] button to select High/ Low resolution. Middle/
resolution icon will be displayed on status LCD.High/Middle/Low
4.6 Setting the scan mode
Press the [ ] button to select mode. JPG/PDF JPG/PDF
icon will be displayed on status LCD.JPG/PDF
4.7 How to scan
Hold the document firmly by one hand.
Place the scanner on the start-scanning position.
Hold the scanner tight and press the scan button once.
Slide the scanner slowly and keep your hand stable to get the best quality picture.
Press again to stop scanning.
4.4 Formatting the microSD memory card
1. Insert a new SD card into the scanner, then turn on the scanner.
2. Press the format button into format mode. “F” shows on the LCD.
3. Press the Power/Scan button to start formatting the SD card.
4. SD card indicator will blink until format is complete.
micro
micro
4.3 Time setting
1. Press [TIME SET] to enter time setting mode
2. In the LCD, it shows 1 XX, and press ( & DPI) buttons for up & down
number selection
JPG/PDF
3. Press ( SCAN ) button to confirm setting
4. In the LCD, it jumps to next setting mode as below sequence
1 XX year setting
2 XX month setting
3 XX date setting
4 XX hour setting
5 XX minute setting
5. After all the information has been set, press ( TIME SET ) button again to exit
OK

5. LED light indications
“GREEN” SCAN LED ON
“GREEN” SCAN LED OFF
Scan in progress.
Standby/Scan is complete.
Scanning too fast.
May cause scanning error.
Restart and scan again.
“RED” ERROR LED ON
“RED” ERROR LED OFF No error in scanning speed.
Continue scanning process.
6. Connect to computer
You may also connect your scanner to your computer and view p on the
computer monitor .
ictures
7. Specification
Image sensor A4 Color Contact Image Sensor
Number of sensor 5136 dots(1st~5104 dots available)
Resolution Low resolution : 300x300 dpi(default)
High resolution: 900x900 dpi
Maximum scanning
speed for A4 size
document
Color High resolution:12 Seconds
Color Middle resolution:8 Seconds
Color Low resolution:3 Seconds
Capacity (Based on
1GB microSD card.
Scan A4 size file,
the quantity of scans
varies depending on
the content complexity)
900dpi color
600dpi color
300dpi color
110pcs/JPG or PDF (Min.)
250pcs/JPG or PDF (Min.)
850pcs/JPG or PDF (Min.)
Computer
USB
Middle resolution : 600x600 dpi(default)

Scan width 21cm (8.27”)
Scan length
File format JPEG(default)/PDF
LCD Scanning status display
Auto Power Off 3 Minutes
USB Port USB 2.0 high speed
External memory microSD Card
Standard Battery 2XAA alkaline batteries
8. Computer system minimum requirement
Operating system Windows 7 / Vista / XP and Mac OS 10.4 or above
(direct plug-in, driver installation not required)
Interface USB port
CPU Pentium II or above
RAM 64MB
9. Troubleshooting
Problem Cause Solution
Cannot turn on the
scanner
1. Low battery power
2. Battery not inserted properly
Replace or install the
battery correctly
Pictures cannot be
saved when you are
scanning them
1. SD card has not been
installed
2. Memory is full
3. The SD card has not
been formatted properly
Micro
micro
1. Install SD card
2. Download the pictures from
the scanner to the computer
to create storage space
3. Please refer to section 4.4
micro
Blurry images The lens of scanner is dirty Clean the lens with soft dry cloth
Computer does not
recognize your
scanner when
connected. (You
cannot find
removable disk)
Connection failure Make sure all cable connections
are secured. Restart the computer
if necessary
The battery life is
very short
Use wrong type of battery Replace with new 2x AA alkaline
batteries
ERR. LED is on when
scanning a document
Scanning speed is too fast Press the button to
reset and scan again the document
Power/Scan
High resolution:35” Middle resolution:45” Low resolution:98”

1.Eigenschaften
Komponente Funktion
1
2
3
4
5
6
7
Batteriefachdecke
Für 2x AA Alkali-Batterien
Power/Scan
(Ein/Scannen)
Ein-/Ausschalten: Zum Ein- oder Ausschalten diese Taste für
2 Sekunden gedrückt halten. Im eingeschalteten Zustand den
Scanvorgang starten und mit einem erneuten Tastendruck beenden.
LCD-Bildschirm Anzeige des Scanstatus.
Auflösung
JPG/PDF
Auswahl: Hohe (900 DPI), mittlere (600 DPI) und niedrige (300 DPI)
Auflösung. Das Modussymbol für die hohe / mittlere / niedrige
Auflösung wird auf dem Status-LCD angezeigt.
Auswahl: Scan im JPG-/PDF-Format.
Das JPG-/PDF-Symbol wird auf dem Status-LCD angezeigt.
USB-Schnittstelle
Schlitz für SD Card Steckplatz für Mikro-SD-Karte
Downloaden eines Fotos mittels des mitgelieferten USB-Kabels.
Scan-LED
8
2. Aufbau
Bereit zum Scannen: Die grüne LED leuchtet auf.
Fehler-LED Zu hohe Geschwindigkeit: Die rote LED leuchtet auf.
9
10
Format Taste zum Formatieren der Mikro-SD-Karte.
Bedienungsanleitung
11
Time Set Drücken Sie die Taste um in den Zeiteinstellungsmodus zu gelangen
1
2
35
7
6
4
89
1011
- Farbauswahl
- Auflösung 900/600/300
- Direktes Speichern als JPG/PDF-Datei auf eine Mikro-SD-Karte
- Unterstützt Mikro-SD-Karten bis zu 32GB
- Kostenloser Software-Download für Windows 7 / Vista / XP und Mac OS 10.4
oder höher (direkt einstecken, Treiberinstallation nicht erforderlich)

3. Erläuterung der Statussymbole
Element Funktion Beschreibung
Anzeige SD-Karte Fotos werden auf der Mikro-SD-Karte
gespeichert.
Batterieanzeige Batterie ist voll Batterie ist leer
Effektanzeige JPG/PDF
Zähler Zeigt die Anzahl der gescannten Dateien auf
der Mikro-SD-Karte an.
Gewählte Auflösung Hoch: 900 DPI Mittel / Niedrig: 300 DPI: 600 DPI
1
2
3
4
5
4.
4.1
Betrieb des Scanners
Einlegen der Batterien
1.Öffnen Sie die Batteriefachklappe.
2.Setzen Sie 2 AA Alkali-Batterien in das Batteriefach ein.
Schalten Sie den Scanner ein, indem Sie [POWER] (Ein/Aus) für 2 Sekunden gedrückt
halten.
4.2
Einsetzen einer Mikro-SD-Karte (nicht mitgeliefert)
Sie müssen eine Mikro-SD-Karte einsetzen (nicht im Lieferumfang enthalten), um Ihre Bilder
zu aufzunehmen und zu speichern. Einsetzen der Mikro-SD-Speicherkarte:
1.Schalten Sie den Scanner aus.
2.Stecken Sie die Mikro-SD-Karte in den Schlitz für die SD-Karte und drücken vorsichtig auf
die Karte, bis sieeinrastet.
Anmerkung:
- Die Karte nicht mit Gewalt in den Schlitz drücken. Gefahr einer Beschädigung des Scanner
und der Mikro-SD-Speicherkarte. Richten Sie die Position der Mikro-SD-Karte (wie
dargestellt) aus und versuchen Sie es erneut.
- Die Mikro-SD-Speicherkarte muss vor dem Scannen formatiert werden.
Siehe folgende Anweisung.
5
RESOLUTION
HI MI LO
JPG PDF
FULL
EFFECT
1
2
3
4

4.5 Einstellen der Auflösung
Drücken Sie [DPI], um die hohe, mittlere oder niedrige Auflösung auszuwählen.
Das Symbol für die hohe, mittlere oder niedrige Auflösung wird auf dem Status-LCD angezeigt.
4.6 Einstellen des Scanmodus
Wählen Sie mit [ ] den Farb- oder JPG/PDF den JPG-/PDF-Modus aus
Das Symbol für wird auf dem Status-LCD angezeigt.JPG/PDF
4.7
Scannen
Halten Sie das Dokument mit einer Hand fest.
Setzen Sie den Scanner auf die Startposition für das Scannen.
Halten Sie den Scanner fest und drücken Sie einmal die Taste „Scan“.
Schieben Sie den Scanner langsam und halten Sie Ihre Hand ruhig, damit Sie die beste
Bildqualität erhalten.
Um das Scannen zu beenden, drücken Sie erneut „Scan“.
4.4 Formatieren der Mikro-SD-Speicherkarte
Stecken Sie eine neue Mikro-SD-Karte in den Scanner und schalten ihn anschließend ein.
2.Rufen Sie mit der Taste „Format“ den Formatiermodus auf. Auf dem Display wird „F“ angezeigt.
3.Starten Sie die Formatierung der Mikro-SD-Karte mit der Taste „Power / Scan“.
4. Die SD-Karten-Anzeige blinkt, bis das Formatieren abgeschlossen ist.
1.
4.3 Zeiteinstellung
1. Drücken Sie [TIME SET], um in den Einstellungsmodus zu gelangen
2. In der LCD zeigt es 1 XX, und drücken Sie (JPG/PDF & DPI) Tasten für up & down um die
Zahlen auszuwählen
3. Press (SCAN)-Taste um die Einstellung zu bestätigen
4. In der LCD, springt es zum nächsten Einstellmodus
1 XX Einstellung der Jahreszahl
2 XX Monatseinstellung
3 XX Datumseinstellung
4 XX Stunden einstellen
5 XX Minuten-Einstellung
5. Nachdem die Informationen festgelegt wurden, drück en Sie die TIME SET-Taste erneut, um zu
beenden.
OK

5. LED-Anzeigen „GRÜNE“ SCAN LED LEUCHTET
„GRÜNE“ SCAN LED LEUCHTET
NICHT
Scan-Vorgang läuft.
Standby oder das Scannen
ist beendet.
Scannen erfolgt zu schnell.
Kann zu Scan-Fehlern führen.
Den Scan-Vorgang erneut
starten.
„ROTE“ FEHLER-LED LEUCHTET
NICHT
Kein Fehler bei der Scan-
Geschwindigkeit.
Setzen Sie der Scan-Vorgang
fort.
6. Anschluss an einen Computer
Sie können Ihren Scanner auch an einen Computer anschließen und die Bilder auf dem
Computermonitor anzeigen.
7. Spezifikationen
Bildsensor A4 Farb-Kontakt-Bildsensor
Anzahl Sensoren 5136 Punkte (1,5104 Punkte verfügbar)
Auflösung Niedrige Auflösung: 300 x 300 DPI (Standard)
Hohe Auflösung: 900 x 900 DPI
Maximale
Scangeschwindigkeit
für ein A4-Dokument.
Hohe Auflösung in Farbe;12 Sekunden
MittlereAuflösung in Farbe: 8 Sekunden
Niedrige Auflösung in Farbe:3 Sekunden
Kapazität (Auf
Grundlage einer 1 GB
Mikro-SD-Karte.
Dateigröße eines A4-
Scans. Die Anzahl der
Scans hängt von der
Komplexität des
Inhalts ab)
900 DPI Farbe
600
DPI Farbe
300 DPI Farbe
110pcs/JPG or PDF (Min.)
Der Scan-Vorgang beginnt, wenn gedrückt wird.
Zum Beenden des Scan-Vorgangs erneut drücken.
Computer
USB
M Auflösung: 600 x 600 DPIittlere
250pcs/JPG or PDF (Min.)
850pcs/JPG or PDF (Min.)

Scanbreite 21cm
Scanlänge High resolution:35” Middle resolution:45” Low resolution:98”
Dateiformat JPEG/PDF
LCD Anzeige des Scanstatus
Automatisches Ausschalten 3 Minuten
USB-Port USB 2.0 Hochgeschwindigkeit
Externer Speicher Mikro-SD-Karte
Standardbatterie 2x AA Alkali-Batterien
8. Mindestanforderungen an den Computer
Betriebssystem Windows 7 / Vista / XP und Mac OS 10.4 oder höher
(direkt einstecken, Treiberinstallation nicht erforderlich)
Schnittstelle USB-Port
CPU Pentium II oder höher
RAM 64MB
9. Störungserkennung
Problem Ursache
Der Scanner lässt
sich nicht einschalten.
1.Schwache Batterien.
2.Batterien nicht richtig herum
eingelegt.
Ersetzen Sie die Batterien oder
legen Sie die Batterien richtig
herum ein.
Die Bilder können
beim Scannen nicht
gespeichert
werden.
1.Es wurde keine Mikro-SD-
Karte eingesetzt.
2.Der Speicher ist voll.
3.Die Mikro-SD-Karte wurde
nicht richtig formatiert.
1. Setzen Sie eine Mikro-SD-
Karte ein.
2.Downloaden Sie die Bilder
vom Scanner in einen
Computer, damit wieder Platz
frei wird.
3.Siehe Abschnitt 4.4
Verschwommenes
Bild Die Scannerlinse ist
verschmutzt. Reinigen Sie die Linse mit einem
weichen, trockenen Tuch.
Der Computer
erkennt den Scanner
nach dem Anschließen
nicht. (Sie finden
keinen
Wechseldatenträger)
Anschlussfehler Vergewissern Sie sich, dass alle
Kabel gut angeschlossen sind.
Starten Sie ggf. den Computer
erneut.
Die Batterien halten
nur kurze Zeit.
Falscher Batterietyp Ersetzen Sie die Batterien mit
neuen Alkali-Batterien.
Die Fehler-LED
leuchtet beim
Scannen eines
Dokuments auf.
Die Scangeschwindigkeit
ist zu hoch.
Drücken Sie erneut die Taste
„Power/Scan“ zum
zurücksetzen und starten Sie
den Scan erneut.
Lösung

Entsorgungshinweise
Altbatterie- Rücknahme
Altbatterien dürfen nicht in den Hausmüll. Verbraucher sind
verpflichtet, Batterien zu einer geeigneten Sammelstelle bei
Handel oder Kommune zu bringen.
Bitte kleben Sie bei Lithiumbatterien die Pole ab und achten
bitte auf völlige Entladung der Batterie.
Altbatterien enthalten möglicherweise Schadstoffe oder
Schwermetalle, die Umwelt und Gesundheit schaden können.
Batterien werden wieder verwertet, sie enthalten wichtige
Rohstoffe wie Eisen, Zink, Mangan oder Nickel.
Die Umwelt sagt Dankeschön.
Die Mülltonne bedeutet: Batterien und Akkus dürfen nicht in den Hausmüll.
Die Zeichen unter den Mülltonnenstehen für:
Pb: Batterie enthält Blei
Cd: Batterie enthält Cadmium
Hg: Batterie enthält Quecksilber
Hinweise zum Umweltschutz
Dieses Produkt darf am Ende seiner Lebensdauer nicht über den normalen Haushaltsabfall
entsorgt werden, sondern muss an einem Sammelpunkt für das Recycling von elektrischen
und elektronischen Geräten abgegeben werden. Das Symbol auf dem Produkt, der
Gebrauchsanleitung oder der Verpackung weist darauf hin.
Die Werkstoffe sind gemäß ihrer Kennzeichnung wiederverwertbar. Mit der Wiederverwendung, der
stofflichen Verwertung oder anderen Formen der Verwertung von Altgeräten leisten Sie einen wichtigen
Beitrag zum Schutze unserer Umwelt.

1.Fonctions clé
Sélection de numérisation en Couleur
Sélection de numérisation 900/600/300 dpi
Sauvegarde directe de fichier JPG/PDF vers la carte MicroSD
Supporte une carte microSD jusqu'à 32Go
Pilote à télécharger gratuitement pour Windows 7 / Vista / XP et Mac OS10.4 ou au-dessus
(plug-in direct, installation pilote non requis)
Partie Fonction
1
2
3
4
5
6
7
Compartiment à piles
Pour 2 piles alcalines AA
Power/Scanner Allumer/Éteindre : appuyer et maintenir ce bouton enfoncé
pendant 2 secondes pour allumer ou éteindre. En mode sous
tension, appuyer sur ce bouton pour démarrer la numérisation,
réappuyer sur ce bouton pour arrêter.
Écran LCD Afficher l'état de la numérisation
Résolution
JPG/PDF
Sélectionner Haute(900dpi) Basse(300dpi) résolution; Middle(600dpi)
l'icône du mode Haute/Basse résolution s'affichera sur l'écran LCD
Sélectionner numérisation en , l'icône du JPG/PDF
mode s'affichera sur l'écran LCDJPG/PDF
Interface USB
Fente pour carte SD Emplacement de la carte mémoire MicroSD
Télécharger des images vers un ordinateur via un câble USB fourni.
Voyant LED Scanner
8
2. Parties fonctionnelles
Prêt pour numériser : LED verte allumée
Voyant LED Erreur Survitesse: LED rouge allumée
9
10
Bouton Formater Appuyer sur cette touche pour formater la carte MicroSD
Manuel
11
1
2
35
7
6
4
89
1011
Temps de jeu Appuyez sur pour entrer dans le temps le mode de réglage

3. Explication des icônes d'état
Elément Function Description
Indicateur de carte SD Les images seront stockées dans la carte
MicroSD
Indicateur de pile Piles pleines Piles vides
Indicateur d'effet JPG/PDF
Compteur Affiche le nombre de fichiers numérisés dans
la carte MicroSD
Résolution sélectionnée Haute : 900dpi ou Basse : 300dpi Middle : 600dpi
1
2
3
4
5
4. Utilisation du scanner
4.1 Installation des piles
1. Ouvrir le compartiment à piles.
2. Insérer 2 piles alcalines AA dans le compartiment à piles.
3. Allumer le scanner en appuyant sur le bouton [POWER] pendant 2 secondes.
4.2
Insertion d'une carte mémoire microSD (non fournie)
Vous devez insérer une carte MicroSD (non fournie) pour enregistrer et stocker vos
images. Insertion d'une carte mémoire MicroSD :
Mettre le scanner HORS TENSION.
Insérer la carte MicroSD dans la fente à carte MicroSD, appuyer doucement jusqu'à
ce que la carte soit enclenchée.
1.
2.
Remarque :
- Ne pas insérer la carte de force dans la fente; cela peut endommager le scanner et la carte
mémoire MicroSD. S’aligner sur la position de la carte MicroSD (comme indiqué) et réessayer.
- La carte mémoire MicroSD doit être formatée avant la numérisation.
Voir l’instruction suivante.
5
RESOLUTION
HI MI LO
JPG PDF
FULL
EFFECT
1
2
3
4

4.5 Réglage de résolution
Appuyer sur le bouton [DPI] pour sélectionner une Haute ou Basse résolution. Middle
L’icône Haute Middle Basse résolution s’affichera sur l’écran LCD.
4.6
Appuyer sur le bouton [ ] pour sélectionner le mode JPG/PDF JPG/PDF
L’icône s’affichera sur l’écran LCD.JPG/PDF
Réglage du mode de numérisation
4.7
Comment numériser
Maintenir le document fermement d’une seule main.
Placer le scanner en position de démarrage de numérisation.
Tenir le scanner fermement et appuyer une fois sur le bouton Scanner.
Faire glisser le scanner tout doucement et maintenir votre main stable pour obtenir la
meilleure qualité d’image possible.
Réappuyer pour arrêter la numérisation.
4.4 Formatage de la carte mémoire MicroSD
1. Insérer un nouvelle carte MicroSD dans le scanner, puis allumer le scanner.
2. Appuyer sur le bouton Formatage pour entrer en mode formatage. “F” s’affiche sur le LCD.
3. Appuyer sur le bouton Power/Scanner pour démarrer le formatage de la carte MicroSD.
4. L’indicateur de carte SD clignotera jusqu’à la fin du formatage.
OK
4.3 Impostazione del tempo
1. Appuyez sur [TIME SET] pour entrer en mode de réglage
2. Dans le LCD, il affiche 1 XX, et appuyez sur ( & DPI) pour les boutons haut et bas
de sélection numéro
JPG/PDF
3. Appuyez sur (SCAN) pour confirmer le réglage
4. Dans le LCD, il saute au mode réglage suivant la séquence ci-dessous
1 XX ans fixant
2 XX Réglage du mois
3 XX Date de mise en
4 XX réglage de l'heure
5 XX réglage des minutes
5. Après toutes les informations a été réglée, appuyez sur (TIME SET) pour quitter

5. Indications des voyants LED
LED “VERTE” SCANNER ALLUMÉE
LED “VERTE” SCANNER ÉTEINTE
Numérisation en cours.
En Veille ou la
numérisation est terminée.
Numérisation trop rapide.
Peut causer une erreur
de numérisation.
Redémarrer et scanner
à nouveau.
LED “ROUGE” ERREUR ALLUMÉE
LED “ROUGE” ERREUR ÉTEINTE Pas d'erreur concernant la
vitesse de numérisation.
Continuer le processus
de numérisation.
6.
Connecter à l'ordinateur
Vous pouvez également connecter le scanner à votre ordinateur et visionner des images
sur l'écran d'ordinateur.
7. Spécification
Capteur d'image Capteur d'image à contact en couleurs A4
Nombre de capteur er
5136 points (1 ~5104 points disponibles)
Résolution Basse résolution : 300x300dpi (par défaut)
Middle résolution : 600x600dpi
Vitesse maximale de
numérisation pour un
document A4
Couleur Haute résolution
Couleur Basse résolution
Couleur Middle résolution
Capacité (basée sur la
carte MicroSD 1Go.
Numérisons un fichier
de taille A4, la quantité
de numérisation varie
selon la complexité
du contenu)
900dpi couleur:110pcs/JPG or PDF (Min.)
600dpi couleur:250pcs/JPG or PDF (Min.)
300dpi couleur:850pcs/JPG or PDF (Min.)
La numérisation va DÉMARRER lorsque l'on appuie sur le bouton
Pour ARRÊTER la numérisation, réappuyer sur le bouton
12 secondes
8 secondes
3 secondes
Computer
USB
Haute résolution : 900x900dpi

Largeur de numérisation 21cm (8.27”)
Longueur de numérisation
Format de fichier JPEG/PDF
LCD Écran affichant l’état de numérisation
Mise hors tension Auto 3 Minutes
Port USB USB2.0 grande vitesse
Mémoire externe Carte MicroSD
Pile standard 2 piles alcalines AA
8. Configuration minimum requise pour l’ordinateur
Système
d’exploitation
Windows 7 / Vista / XP et Mac OS 10.4 ou au-dessus
(plug-in direct, installation pilote non requis)
Interface Port USB
CPU Pentium II ou au-dessus
RAM 64Mo
9. Diagnostic des pannesg
Problème Cause Solution
Le scanner ne
s’allume pas
1. Piles faibles
2. Les piles sont mal insérées
Remplacer ou installer les piles
correctement
Les images ne
peuvent être
sauvegardées lors
de leur
numérisation
1. La carte MicroSD n’a pas
été installée.
2. La mémoire est pleine.
3. La carte MicroSD n’a pas
été formatée correctement
1. Installer une carte MicroSD.
2. Télécharger les images depuis
le scanner vers l’ordinateur
pour créer un espace de
stockage.
3. Veuillez vous reporter à la
section 4.4
Images floues La lentille du scanner est sale Nettoyer la lentille avec un
chiffon doux et sec
L’ordinateur ne
reconnaît pas votre
scanner lors de la
connexion. (vous
n’arrivez à retrouver
aucun disque
amovible)
Échec de connexion S’assurer que tous les câbles
soient bien connectés.
Redémarrer l’ordinateur si
nécessaire.
La longévité des
piles est très courte
Un mauvais type de piles est
utilisé
Remplacer par deux piles
alcalines AA neuves.
La LED ERR. est
allumée lors de la
numérisation de
document
La vitesse de numérisation
est trop grande
Appuyer sur le bouton
Power/Scanner pour réinitialiser
et scanner à nouveau le
document
Haute résolution:35” Middle résolution:45” Basse résolution:98”

1.Características principales
Selección de exploración color
Selección de exploración 900/600/300 dpi
Guarda directamente los archivos JPG/PDF en una tarjeta MicroSD
Soporte de tarjeta microSD hasta 32Gb
Descarga sin controladores para Windows 7 / Vista / XP y MacOS 10.4 o superior
(conexión directa, no necesita instalar controlador).
Pieza Función
1
2
3
4
5
6
7
Compuerta de baterías
Para 2 baterías AA alcalinas
Encendido/escanear Encender/apagar: presione y mantenga la tecla durante 2 segundos
para encender o apagar. En modo encendido, pulse el botón para
iniciar el escaneado, pulse el botón de nuevo para detenerlo.
Pantalla LCD Indicación de estado de escaneo
Resolución
JPG/PDF
Seleccione una resolución Alta(900dpi) Baja(300dpi); Middle(600dpi)
modo de resolución alta/baja se mostrará en el
Seleccione el escaneado , el icono de modo JPG/PDF JPG/PDF
se mostrará en el LCD de estado
Interfaz USB
Ranura de tarjeta SD Ubicación de almacenamiento de tarjeta MicroSD
Descargue fotos a un ordenador mediante el cable USB incluido.
Testigo LED de
escaneo
8
2. Piezas funcionales
Listo para explorar: LED verde encendido
Testigo LED de error Velocidad excesiva: LED rojo encendido
9
10
Botón de formato Pulse este botón para formatear la tarjeta MicroSD
Manual
11
Tempo impostato Premere per entrare in modalità di impostazione del tempo
1
2
35
7
6
4
89
1011
el icono de
LCD de estado

Nota:
- No fuerce la tarjeta en la ranura; forzarla puede dañar el escáner y la tarjeta de memoria
microSD. Alinee la posición de la tarjeta MicroSD (según está indicado) y pruebe de nuevo.
- La tarjeta de memoria MicroSD debe formatearse antes de escanear.
Ver las instrucciones siguientes.
3. Explicación de los iconos de estado
Objeto Función Descripción
Indicador de tarjeta SD Las fotos se guardarán en la tarjeta microSD
Indicador de batería Batería llena
Indicador de efecto JPG/PDF
Contador Muestra los archivos escaneados de la
tarjeta MicroSD
Resolución seleccionada Alta: 900dpi Baja:300dpi Middle: 600dpi
1
2
3
4
5
4.
4.1
Uso del escáner
Instalación de las baterías
1. Abra la tapa de baterías
2. Introduzca dos baterías alcalinas tipo 'AA' en el compartimiento de baterías.
3. Encienda el escáner pulsando el botón [ENCENDIDO] durante 2 segundos.
4.2 Introducir una tarjeta de memoria MicroSD (no incluida)
Debe introducir una tarjeta MicroSD (no incluida) para grabar y guardar sus imágenes.
Introducción de la tarjeta de memoria MicroSD:
1. Apague el escáner.
2. Introduzca la tarjeta microSD en la ranura de tarjeta microSD,
presiónela suavemente hasta que encaje.
Batería vacía
5
RESOLUTION
HI MI LO
JPG PDF
FULL
EFFECT
1
2
3
4

5 XX impostazione dei minuti
1 XX anno impostazione
2 XX impostazione del mese
3 XX Data di impostazione
4 XX impostazione delle ore
5. Dopo tutte le informazioni è stata impostata, premere (TIME SET) di nuovo il pulsante
per uscire
4.3 Impostazione del tempo
1. Premere [TIME SET] per accedere alla modalità di impostazione tempo
2. Sul display LCD, mostra uno XX, e premere (JPG/PDF e DPI) pulsanti per l'up & down di
selezione numero
3. Premere (SCAN) per confermare l'impostazione
4. Sul display LCD, si passa alla modalità di impostazione successiva come qui di seguito
la sequenza
4.5
Configurar la resolución
Pulse el botón [DPI] para seleccionar la resolución Alta Middle Baja.
El icono de modo de resolución alta /baja se mostrará en el LCD de estadoMiddle
4.6
Configurar el modo de escaneo
Pulse el botón [ ] para seleccionar el modo JPG/PDF.JPG/PDF
El icono se mostrará en el LCD de estado.JPG/PDF
4.7
Cómo escanear
Aguante firmemente el documento con una mano.
Ponga el escáner en la posición de inicio de escaneo.
Aguante firmemente el escáner y pulse una vez el botón de escaneo.
Deslice lentamente el escáner y mantenga la mano firme para obtener la mejor calidad
de imagen.
Pulse de nuevo para dejar de escanear.
4.4 Formatear la tarjeta MicroSD
Introduzca una nueva tarjeta microSD en el escáner y enciéndalo.
2. Pulse el botón de formato en modo formateado. Se mostrará "F" en la LCD.
3. Pulse el botón de encendido/escanear para comenzar a formatear la tarjeta MicroSD.
4. El indicador de la tarjeta SD parpadeará hasta que termine el formateado..
1.
OK
Table of contents
Languages:
Other Easypix Scanner manuals

Easypix
Easypix Cyber Scanner Basic User manual

Easypix
Easypix CyberScanner P500 User manual

Easypix
Easypix CyberScanner Basic User manual

Easypix
Easypix Foto/Name Card User manual

Easypix
Easypix easy-scan User manual

Easypix
Easypix PixDoc User manual

Easypix
Easypix easy-scan User manual

Easypix
Easypix TSN510 User manual