manuals.online logo
Brands
  1. Home
  2. •
  3. Brands
  4. •
  5. Eaton
  6. •
  7. Control Unit
  8. •
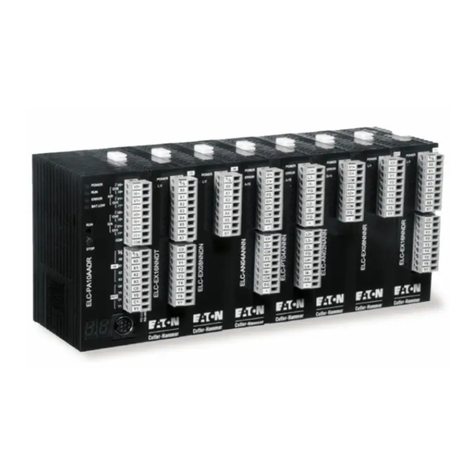
  9. Eaton ELC-COENETM User manual

Eaton ELC-COENETM User manual

ELC-COENETM
Ethernet Communication Module Instruction Sheet
WARNING
xThis instruction sheet only provides introductory information on electrical specification, general
specifications, installation, basic operation and settings of ELC-COENETM. For more detailed
information on the network protocols, please refer to relevant references or literatures.
xThis is an OPEN TYPE Controller. The ELC should be kept in an enclosure away from airborne
dust, humidity, electric shock risk and v bration. Also, it is equipped with protective methods
such as some special tools or keys to open the enclosure, so as to avoid the hazard to users
and the damage to the ELC. DO NOT touch terminals when power on.
xPlease read this instruction sheet carefully before use and follow this instruction to operate the
device in order to prevent damages on the product or injuries to staff.
xUse cooper conductors only and the temperature is 60/70°C. Ambient temperature is 55°C.
xPower, input and output (I/O) wiring must be in accordance with Class ȱ, Division 2 wiring
methods – Article 501-10(B)(1) of the National Electrical Code.
xSuitable for use in Class ȱ, Division 2, GroupsA, B, C, D or non-hazardous locations only.
xExplosion hazard – Substitution of components may impair suitability for Class ȱ, Division 2.
xExplosion hazard - DO NOT disconnect equipment unless power has been switched off or the
area is known to be non hazardous.
1 INTRODUCTION
1.1 Model Explanation & Peripherals
Thank you for choosing Eaton Logic Controller (ELC) series products.
Functions:
Supports MODBUS TCP/IP
Supports Master and Slave Data Exchange
ELC-PV28NNDR/T Automatic Time Correction
Supports E-Mail
Supports SNMP V1 and V2
Transmission Speed: 10/100 Mbps
IPLabel MACAddress
IPADDRESS
SUBNET MASK
00D0AF100022
1.2 Product Profile & Outline
AN
RS-232
INK
RS-232
OWER
00M
3
2
46
1
8
7
5
MExtension Port to connect Device
NExtension Port to connect Extension module
OPOWER, LINK, RS-232, 100M LED
PExtension clip
QExtension hole for mounting unit or module
RDIN rail clip
SRS-232 port
TE hernet RJ-45 port
Product Profile: Unit mm [inchs]
AN
RS-232
NK
RS-232
OWER
00M
90 [3.543]
60 [2.362]
33.1 [1.303]
60 [2.362]
3 [0.118]
2011
-
01
-
17
5011670306-CEM
6
2 STANDARD SPECIFICATIONS
Function Specifications
Network Interface
Interface RJ-45 withAuto MDI/MDIX
Number of ports 1 Port
Transmission method IEEE 802.3, IEEE 802.3u
Transmission cable Category 5e (TIA/EIA-568-A,TIA/EIA-568-B)
Transmission Rate 10/100 MbpsAuto-Detect
Protocol ICMP, IP, TCP, UDP, DHCP, SMTP, NTP, MODBUS TCP, SNMP
Serial Interface
Interface RS-232
Number of Ports 1 Port
Transmission Cable ELC-CBPCELC3
Environmental Specifications
Noise Immunity
ESD (IEC 61131-2, IEC 61000-4-2): 8KVAir Discharge
EFT (IEC 61131-2, IEC 61000-4-4): Power Line: 2KV, Communication I/O: 1KV
Damped-Oscillatory Wave: Power Line: 1KV, Digital I/O: 1KV
RS (IEC 61131-2, IEC 61000-4-3): 26MHz ~ 1GHz, 10V/m
Environment Operation: 0°C ~ 55°C (temperature), 50 ~ 95% (humidity), pollution degree 2;
Storage: -25°C ~ 70°C (temperature), 5 ~ 95% (humidity)
Vibration/ Shock
Resistance Standard: IEC61131-2, IEC 68-2-6 (TEST Fc)/IEC61131-2 & IEC 68-2-27 (TEST Ea)
Cer ificates , Opera ing temperature code: T5
Electrical Specifications
Power supply voltage 24VDC (-15% ~ 20%) (Power is supplied by the internal bus of MPU)
Power Consumption 1.5W
Insula ion voltage 500V
Weight (g) 92 (g)
3 INSTALLATION
3.1 How to Connect ELC-COENETM with ELC
1. Adjust the extension clip on the left side of the MPU.
2. Meet the extension port of the MPU with ELC-COENETM and connect them as the figure shown
below.
3. Fasten the extension clip.
AN
RS-2 2
RS 232
NK
0M
OWER
3.2 Install ELC-COENETM with Other Module
To connect ELC-COENETM with the other extension module, lift the extension clip of the extension
module by a screwdriver and open the side cover.
IL05001002E.pdf
4 CR (CONTROL REGISTER)
CR No. Type Register Descrip ion
HW LW
#0 R Model NO Read only; ELC-COENETM model NO.=H’4050
#1 R Firmware version System firmware version; The type is hex. For
example, H’0100 means the firmware version is v1.00.
#2 R Communication Mode b0 Modbus TCP Mode set ing
b1 Data Exchange Mode setting
#3 W E-Mail Event 1 Trigger Set to 1 to send the E-mail 1.
#4 W E-Mail Event 2 Trigger Set to 1 to send the E-mail 2.
#5 W E-Mail Event 3 Trigger Set to 1 to send the E-mail 3.
#6 W E-Mail Event 4 Trigger Set to 1 to send the E-mail 4.
#7 R E-Mail 1, 2 Status Register b0~b7 Status of E-Mail 2 b8~b15 Status of E-Mail
1
#8 R E-Mail 3, 4 Status Register b0~b7 Status of E-Mail 4 b8~b15 Status of E-Mail
3
#9 R/W E-Mail 1 Additional Message User defined message to be sent by email.
#10 R/W E-Mail 2 Additional Message User defined message to be sent by email.
#11 R/W E-Mail 3 Additional Message User defined message to be sent by email.
#12 R/W E-Mail 4 Additional Message User defined message to be sent by email.
#13 R/W Data Exchange trigger Set to 1 to start the Data Exchange transaction.
#14 R Data Exchange Status Register Status of Data Exchange transaction
#15 R/W Remote I/O mapping Trigger Set to 1 to start the Remote I/O mapping.
#16 R/W Status of Remote I/O slaves CR#16 b0 ~ b3: Connection status of Remote I/O
mapping slave 1 ~ 4
#17 R/W Data Exchange cycle ime Minimum cycle time (ms) of Data Exchange command
#19 #18 R Error status of Data Exchange
slaves
CR#19 b0 ~ b15: Status of Data Exchange slave 1~ 16
CR#18 b0 ~ b8: Status of Data Exchange slave 17~ 24
Status = 1 when an error occurs.
#24 ~ #20 - Reserved Reserved
#26 #25 R/W Des ination IP Des ination IP address for Data Exchange
#27 - Reserved Reserved
#28 R/W Des ination Slave ID Des ination Slave ID for Data Exchange
#48 ~ #29 R/W Default Transmission Buffer Transmitted data buffer for Data Exchange Mode
#68 ~ #49 R Default Received Buffer Received data buffer for Data Exchange Mode
#80 ~ #69 - Reserved Reserved
#81 R/W Slave Transmission Buffer Address Slave Transmission buffer Address for Data Exchange
#82 R/W Number of Received Registers Number of Received Registers
#83 R/W Master Received BufferAddress Master Received Buffer Address for Data Exchange
#84 R/W Slave Received BufferAddress Slave Received BufferAddress for Data Exchange
#85 R/W Number of Sending Registers Number of Sending Registers
#86 R/W Master Transmission Buffer
Address Master Transmission Buffer Address for Data
Exchange
#87 R/W DHCP/Static IP Select DHCP Mode or Static IP
#89 #88 R/W IP Address IP Address
#91 #90 R/W Subnet Mask Subnet Mask of ELC-COENETM
#93 #92 R/W Gateway IP Default Gateway IPAddress
#94 R/W IP Change Trigger Set to 1 to modify IPAddress
#95 R/W DHCP Status Status of IP address setting
#110 ~ #96 - Reserved Reserved
#111 R/W Modbus TCP Operating Mode Set to 1 to configure Modbus TCP for 8-bit mode.
#112 R/W Modbus TCP Keep-Alive Time-out Modbus TCP Keep-Alive Time-out (s)
#113 - Reserved Reserved
#114 R/W Modbus TCP Time-Out Modbus TCP transaction time-out (ms)
#115 R/W Modbus TCP Trigger Set to 1 to send Modbus command.
#116 R/W Modbus TCP Status Register Status of Modbus TCP transaction
CR No. Type Register Description
HW LW
#118 ~#117 R/W Modbus TCP Destination IP The Destination IPAddress of Modbus TCP transaction
#119 R/W Modbus TCP Data Length Data length of Modbus TCP in CR#120 ~ CR#219
#219 ~ #120 R/W Modbus TCP Data Buffer Data buffer of Modbus TCP Mode for storing
sending/receiving data
#250 ~ #220 - Reserved Reserved
#251 R Error Code The ELC-COENETM error code
#255 ~ #252 - Reserved Reserved
Symbol defini ion: R: Read, W: Write
Read and write CR register
1. ELC uses the FROM/DFROM instruction to read CR data of fast expansion modules.
2. ELC uses the TO/DTO instruction to write CR data of fast expansion modules.
3. The number of fast expansion modules is from 100 to 107 (m1=100~107).
Explanation
1. CR#2: Communication mode setting: Set to 0 to Disable; Set to 1 to Enable.
bit Mode 0 1
b0 Modbus TCP Mode Modbus TCP Mode Disable Modbus TCP Mode Enable
b1 Data Exchange Mode Data Exchange Mode Disable Data Exchange Mode Enable
2. CR#251: Error codes; please refer to the following chart.
CR#251 Error status
b0 Not connected.
b3 CR#13 is set as 1 but Data Exchange func ion has not been enabled.
b7 Connecting to SMTP Server fails.
b8 DHCP did not acquire correct network parameters.
Network Configuration Function
1. CR#87: IP mode setting. Set as 0 to be Static IP address; Set as 1 to obtain IP address by DHCP
(Dynamic IP).
2. CR#88 ~ CR#89: IP Address setting. It’s accessed through Hex Mode. It cannot write when in
DHCP Mode. For example, if the user wants to set the IP as 192.168.0.2, write H’0002 to CR#70
and H’C0A8 to CR#71. (K192 = H’C0, K168 = H’A8, K0 = H’00, K2 = H’02)
3. CR#91 ~ CR#90: Subnet Mask setting. It’s accessed through Hex Mode. It cannot write when in
DHCP Mode. For example, if the user wants set Subnet Mask as 255.255.255.0, write H’FF00 to
CR#90 and H’FFFF to CR#91.
4. CR#93 ~ CR#92: Default Gateway IP Address setting. It’s accessed through Hex Mode. It cannot
write when in DHCP Mode. See CR#88 and CR#89 for the steps of Default Gateway IP Address
setting.
5. CR#94: IP address are configured using CR#87 ~ CR#93 when CR#94 is set to 1. CR#94 = 0
when the IP address configuration is completed.
6. CR#95: Status of IPAddress. CR#95 = 0 refers to normal; CR#95 = 1 when the DHCP
transaction is uncompleted; CR#95 = 2 when IP Address setting is in progress.
Sending E-mail Function
1. CR#3 ~ CR#6: E-mail will be sent when set to 1. After the E-Mail sending is complete, the CR
value will be set to 0. Please use differential command to trigger CR#3 ~ CR#6 in order to avoid
continual e-mails.
2. CR#7, CR#8: E-Mail Status. See the table below.
CR Value E-Mail Status
0 Nothing
1 Processing
2 Success
3 ~ 9 Reserve
10 Cannot connect to SMTP-Server
11 E-mail Address error
12 Error response SMTP-Server transmission error
13 No available TCP connection
CR Value E-Mail Status
14 ~ 255 Reserve
3. CR#9 ~ CR#12: The user defined value entered into the register will be displayed in the e-mail
subject.
Data Exchange Function
1. CR#13: The data in Data Exchange Buffer will be exchanged when CR#13 is set to 1. CR#13 will
be set to 0 when the transaction is finished. When CR#13 is set to 2, the Data Exchange Function
will be executed continually. Set CR#13 to 0 to stop the Data Exchange Function (The continual
execution is only supported by firmware V2.0 or later versions).
2. CR#14: The statuses register of Data Exchange transaction. CR#14 = 1 when the Data Exchange
transaction is being processed. CR#14 = 2 when the Data Exchange transaction is completed.
CR#14 = 3 when an error occurs.
3. CR#17: CR#17 is the execution cycle time (ms) of Data Exchange function.
4. CR#18 ~ CR#19: CR#18 ~ CR#19 are the error status of Data Exchange slaves. The error bit will
be set to 1 when connection fails or an error occurs. CR19# b0 ~ b15: Status of Data Exchange
slave 1 ~ 16, CR18# b0 ~ b8: Status of Data Exchange Slave 17 ~ 24.
5. CR#28: The Destination Slave ID for Data Exchange. Range: K1 ~ K255. ELC-COENETM will
look up the Slave IP address in the Slave ID–IP lists of Data Exchange function. When CR#28 is
set to 0, CR#25 and CR#26 will be the Slave IP Address.
6. CR#25 ~ CR#26: Before setting up the destination IP address of Data Exchange Mode, set
CR#28 to 0. For example, if the user wants to set the destination IP address to 192.168.0.2, write
H’0002 to CR#25 and H’C0A8 to CR#26. (K192 = H’C0, K168 = H’A8, K0 = H’00, K2 = H’02).
7. CR#29 ~ CR#48: The default Data Exchange registers for storing the data to be sent to the
remote MPU.
8. CR#49 ~ CR#68: The default Data Exchange registers for storing the received data from the
remote MPU.
9. CR#81᧶Setting the Modbus Address of Sending Buffer in Slave for Data Exchange Mode. It’s only
permitted to use D Registers. Ex. D0 = H1000.
10. CR#82᧶The number of reading registers for Data Exchange Mode. Range: K1 ~ K100.
11. CR#83᧶Setting the Modbus Address of Receiving Buffer in Master for Data Exchange Mode. It’s
only permitted to use D Registers.
12. CR#84᧶Setting the Modbus Address of Receiving Buffer in Slave Data Exchange Mode. It’s only
permitted to use D Registers.
13. CR#85᧶The number of sending registers for Data Exchange Mode. Range: K1 ~ K100.
14. CR#86᧶Setting the Modbus Address of Sending Buffer in Master for Data Exchange Mode. It’s
only permitted to use D Registers. For example, set CR#81 to H1000 (D0), set CR#82 to K1, and
set CR#83 to H1064 (D100). When the Data Exchange is executed, it will read the Slave’s D0
and write into the D100 in Master. Set CR#84 to H1002 (D2), set CR#85 to K4, and set CR#86 to
H1008 (D8). When the Data Exchange is executed, It will read Master’s D8~D11 and write into
Slave’s D2~D5. The sending and receiving functions can be executed at one time. If both values
of CR#82 and CR#85 are 0, default sending and receiving buffers (CR#29~CR#68) and default
register number (K20) will be used.
Modbus TCP Function
1. CR#111: The Modbus TCP communicating Mode. Set CR#111 to 1 for 8-bit mode or set to 0 for
16-bit mode.
2. CR#112: CR#112 is the TCP Keep-Alive Time-out for Modbus TCP connection (s).
3. CR#114: CR#114 is the time-out for Modbus TCP transaction (ms).
4. CR#115: When CR#115 is set to 1, the Modbus TCP transaction will start. Once finished, CR#115
will be set to 0. Use differential instruction to trigger.
5. CR#116: The status registers of Modbus TCP transaction. CR#116 = 1 when the Data Exchange
transaction is being processed. CR#116 = 2 when the Data Exchange transaction is completed.
CR#116 = 3 when an error occurs.
6. CR#117 ~ CR#118: Destination IP address of Modbus TCP. See CR#25 and CR#26 for the steps
to setting the IP address.
7. CR#119: The data length of Modbus TCP in CR#120 ~ CR#247. In 8-bit mode the range is K1 to
K100. In 16-bit mode the range is K1 to K200.
2E.pdfIL0500100
8. CR#120 ~ CR#247: Modbus TCP registers for storing the data to be sent and received.
Remote I/O Function
1. CR#15: The data of Remote /IO device will be continually mapped to D registers and M coils
when CR#15 is set to 1. Set CR#15 to 0 to stop the mapping execution.
2. CR#16: Connection statuses of Remote I/O mapping execution. CR#16 b0 ~ b3 = 1 when the
connection to Remote I/O slave is established. CR#16 b0 ~ b3 = 0 when the connection is closed.
5 LED INDICATION & TROUBLESHOOTING
5.1 LED Indication
LED LED Status Indication How to deal with
POWER Green constantly ON Power supply is normal None
Green constantly OFF No power supply Check if the module is powered
RS-232
Red flashes Data are being transmitted
in the serial port None
Red constantly OFF No data transmission Check if the RS-232 cable is connected when
using RS-232 communication
100M Orange constantly ON Transmission speed: 100M None
Orange constantly OFF Transmission speed: 10M Check if the network transmission speed is 100M
LINK
Green constantly ON Network works normally None
Green flashes Network is working None
Green constantly OFF Network is not connected Check if the RJ-45 cable is tightly connected
5.2 Troubleshooting
Abnormality Cause How to deal with
POWER LED
OFF
MPU is not powered Check if he MPU is powered and whe her the power supply
is normal.
Not connected to MPU Check if ELC-COENETM is tigh ly connected with MPU.
LINK LED OFF
Not connected to the network Check if he RJ-45 cable is correctly connected to the
network.
RJ-45 poor contact Check if the RJ45 contact is tightly connected to the Ethernet
RJ-45 port.
100M LED OFF
The module is not connected to
the network Check if he RJ-45 cable is correctly connected to the
network.
Transmission speed: 10M Check if he network transmission speed is 100M.
RJ-45 poor contact Check if he RJ45 contact is tightly connected to the Ethernet
RJ-45 port.
Unable to locate
a module
Not connected to the network Check if ELC-COENETM is correctly connected to the
network.
The computer and MPU are
blocked by the firewall. Search by IP address or use RS-232 for settings.
Unable to open
ELC-COENETM
setup screen
Not connected to the network Check if ELC-COENETM is correctly connected to the
network.
Incorrect communication
settings in ELCSoft Check if you select “Ethernet” in the communication settings.
The computer and MPU are
blocked by the firewall. Use RS-232 for settings.
Fail to up/down
load program and
monitor by
ELCSoft
The network setting of
ELC-COENETM is incorrect
Check if he network setting of ELC-COENETM is correct.
Consult the IT staff if you are using the Intranet in the
company or refer to the network setting instructions provided
by your ISP.
Unable to send
out emails
ELC-COENETM set ings are
incorrect Check if he settings of ELC-COENETM are correct.
Incorrect CR set ings Check if he CR is used correctly.
Incorrect settings of mail server Check he IP address of SMTP-Server.

Other manuals for ELC-COENETM

1

Other Eaton Control Unit manuals

Eaton Powerware Series User manual

Eaton

Eaton Powerware Series User manual

Eaton Powerware 9125 User manual

Eaton

Eaton Powerware 9125 User manual

Eaton Crouse-hinds series User manual

Eaton

Eaton Crouse-hinds series User manual

Eaton MSFI-125A Manual

Eaton

Eaton MSFI-125A Manual

Eaton MFD-TP12 Series Manual

Eaton

Eaton MFD-TP12 Series Manual

Eaton xComfort Room-Manager User manual

Eaton

Eaton xComfort Room-Manager User manual

Eaton ePDU G3HD User manual

Eaton

Eaton ePDU G3HD User manual

Eaton PowerXL DE1 series User manual

Eaton

Eaton PowerXL DE1 series User manual

Eaton EP Control User manual

Eaton

Eaton EP Control User manual

Eaton Cutler Hammer PanelMate ePro 7685 8 Series User manual

Eaton

Eaton Cutler Hammer PanelMate ePro 7685 8 Series User manual

Eaton 145406 Installation and operating instructions

Eaton

Eaton 145406 Installation and operating instructions

Eaton ATC-300+ User manual

Eaton

Eaton ATC-300+ User manual

Eaton OPTCB RS-485 User manual

Eaton

Eaton OPTCB RS-485 User manual

Eaton SmartWire-DT SWD Series User manual

Eaton

Eaton SmartWire-DT SWD Series User manual

Eaton BreakerVisu NZM-XMC-MDISP35-MOD User manual

Eaton

Eaton BreakerVisu NZM-XMC-MDISP35-MOD User manual

Eaton CEAG 3-PM-IO Service manual

Eaton

Eaton CEAG 3-PM-IO Service manual

Eaton CEAG DLS/3PH-BUS-Module-inverse Service manual

Eaton

Eaton CEAG DLS/3PH-BUS-Module-inverse Service manual

Eaton ePDU G3 Datasheet

Eaton

Eaton ePDU G3 Datasheet

Eaton CBEU-02/03 User manual

Eaton

Eaton CBEU-02/03 User manual

Eaton XIOC-NET-DP-M Manual

Eaton

Eaton XIOC-NET-DP-M Manual

Eaton Vickers RF Series User manual

Eaton

Eaton Vickers RF Series User manual

Eaton Moeller SmartWire-Darwin EU5C-SWD-DP Manual

Eaton

Eaton Moeller SmartWire-Darwin EU5C-SWD-DP Manual

Eaton Cutler-Hammer Durant PRESIDENT Series User manual

Eaton

Eaton Cutler-Hammer Durant PRESIDENT Series User manual

Eaton Char-Lynn User manual

Eaton

Eaton Char-Lynn User manual

Popular Control Unit manuals by other brands

Continental Refrigerator DTCO 1381 Process Guide

Continental Refrigerator

Continental Refrigerator DTCO 1381 Process Guide

Amulet Hotkey CoreModule quick start guide

Amulet Hotkey

Amulet Hotkey CoreModule quick start guide

ABB MotiFlex e100 OPT-MF-005 user manual

ABB

ABB MotiFlex e100 OPT-MF-005 user manual

SGS electronic TVC-TRF-10-MBT manual

SGS electronic

SGS electronic TVC-TRF-10-MBT manual

A.R.I. D-26 Installation operation & maintenance

A.R.I.

A.R.I. D-26 Installation operation & maintenance

Azbil ACTIVAL VY5303A Specifications & instructions

Azbil

Azbil ACTIVAL VY5303A Specifications & instructions

Becker Centronic UnitControl UC52 Assembly and operating instructions

Becker

Becker Centronic UnitControl UC52 Assembly and operating instructions

Woodward easYlite-200 manual

Woodward

Woodward easYlite-200 manual

Toshiba BMS-SM1280HTLE owner's manual

Toshiba

Toshiba BMS-SM1280HTLE owner's manual

Kohler K301 installation guide

Kohler

Kohler K301 installation guide

Comelit Simplebus1 UT1020 Technical manual

Comelit

Comelit Simplebus1 UT1020 Technical manual

DMP Electronics 263EXT installation guide

DMP Electronics

DMP Electronics 263EXT installation guide

SOMFY animeo KNX Master Control W8 installation guide

SOMFY

SOMFY animeo KNX Master Control W8 installation guide

Omega OM-USB-2404-60 user guide

Omega

Omega OM-USB-2404-60 user guide

Mitsubishi MELDAS MDS-C1 instruction manual

Mitsubishi

Mitsubishi MELDAS MDS-C1 instruction manual

Microchip Technology TC7660S Series manual

Microchip Technology

Microchip Technology TC7660S Series manual

Beninca CELL.P manual

Beninca

Beninca CELL.P manual

AUREL RX-8MR50++ instruction manual

AUREL

AUREL RX-8MR50++ instruction manual

manuals.online logo
manuals.online logoBrands
  • About & Mission
  • Contact us
  • Privacy Policy
  • Terms and Conditions

Copyright 2025 Manuals.Online. All Rights Reserved.