manuals.online logo
Brands
  1. Home
  2. •
  3. Brands
  4. •
  5. Eaton
  6. •
  7. Control Unit
  8. •
  9. Eaton Crouse-hinds series User manual

Eaton Crouse-hinds series User manual

Other manuals for Crouse-hinds series

95

This manual suits for next models

3

Other Eaton Control Unit manuals

Eaton Crouse-hinds series Setup guide

Eaton

Eaton Crouse-hinds series Setup guide

Eaton Char-Lynn User manual

Eaton

Eaton Char-Lynn User manual

Eaton Crouse-hinds series User manual

Eaton

Eaton Crouse-hinds series User manual

Eaton XTPAXENCS65B Manual

Eaton

Eaton XTPAXENCS65B Manual

Eaton CBEU-02/03 User manual

Eaton

Eaton CBEU-02/03 User manual

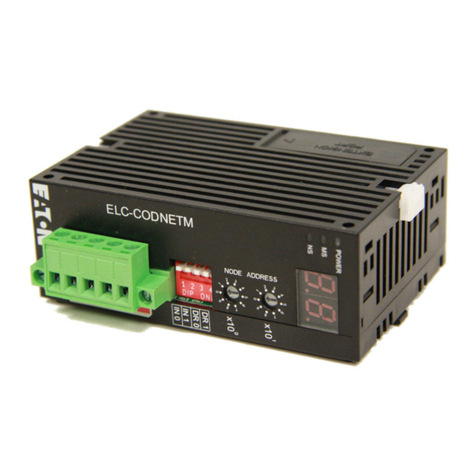
Eaton ELC-CODNETM User manual

Eaton

Eaton ELC-CODNETM User manual

Eaton eNMC2 User manual

Eaton

Eaton eNMC2 User manual

Eaton Vickers CG-03 Series User manual

Eaton

Eaton Vickers CG-03 Series User manual

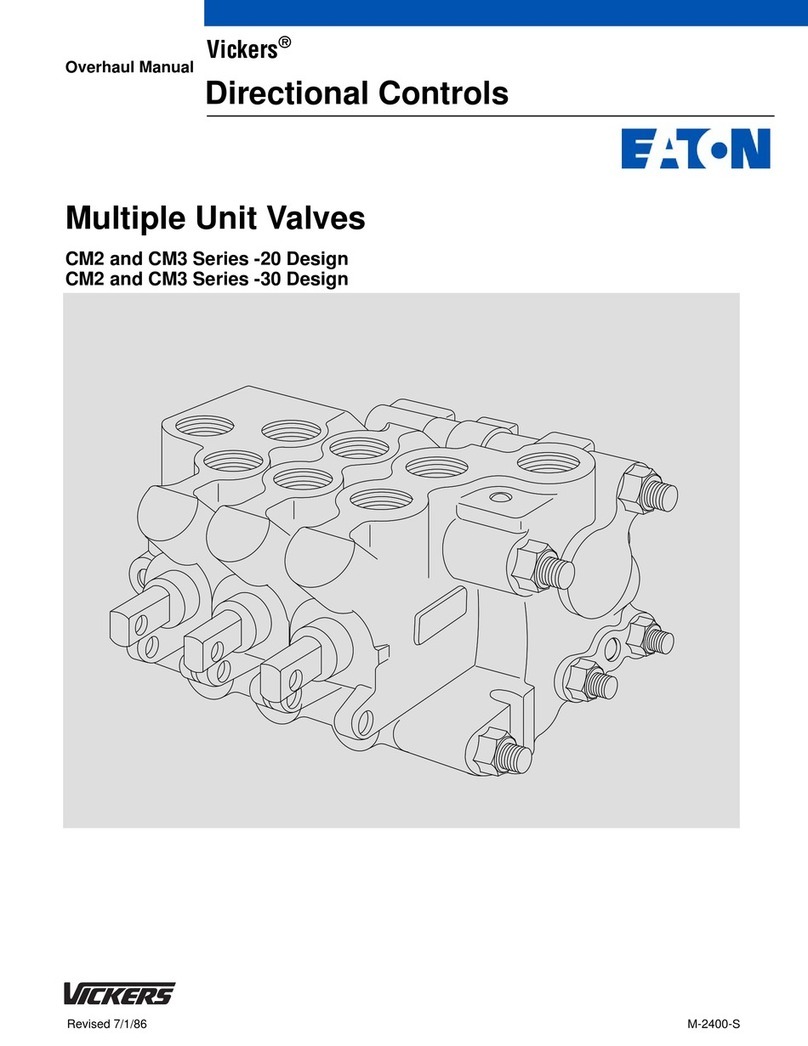
Eaton Vickers CM2 Series User manual

Eaton

Eaton Vickers CM2 Series User manual

Eaton ELC-MC01 User manual

Eaton

Eaton ELC-MC01 User manual

Eaton EP Control User manual

Eaton

Eaton EP Control User manual

Eaton OPTC4 LonWorks User manual

Eaton

Eaton OPTC4 LonWorks User manual

Eaton Crouse-hinds series User manual

Eaton

Eaton Crouse-hinds series User manual

Eaton MMX-COM-PC Manual

Eaton

Eaton MMX-COM-PC Manual

Eaton Powerware Series User manual

Eaton

Eaton Powerware Series User manual

Eaton Cutler-Hammer IQMSSPM User manual

Eaton

Eaton Cutler-Hammer IQMSSPM User manual

Eaton PXS24 Series User manual

Eaton

Eaton PXS24 Series User manual

Eaton NZM2-XMVR Manual

Eaton

Eaton NZM2-XMVR Manual

Eaton EWFFSC15 User manual

Eaton

Eaton EWFFSC15 User manual

Eaton Powerware PowerPass 9125 User manual

Eaton

Eaton Powerware PowerPass 9125 User manual

Eaton CEAG DLS/3PH-BUS-Module-inverse Service manual

Eaton

Eaton CEAG DLS/3PH-BUS-Module-inverse Service manual

Eaton i-on Compact User manual

Eaton

Eaton i-on Compact User manual

Eaton VICKERS DG3V-10 Series User manual

Eaton

Eaton VICKERS DG3V-10 Series User manual

Eaton ELC-MC01 User manual

Eaton

Eaton ELC-MC01 User manual

Popular Control Unit manuals by other brands

Seitz 14A80 user manual

Seitz

Seitz 14A80 user manual

Wilo RS485 Installation and operating instructions

Wilo

Wilo RS485 Installation and operating instructions

Becker CentralControl CC41 Commissioning Instruction

Becker

Becker CentralControl CC41 Commissioning Instruction

SICK CDB650 operating instructions

SICK

SICK CDB650 operating instructions

Panduit NetKey NKP5E88M Series installation instructions

Panduit

Panduit NetKey NKP5E88M Series installation instructions

MX Options Concentric Petite Fitting instructions

MX

MX Options Concentric Petite Fitting instructions

Clean Water Systems Fleck 2510 Installation & start?up guide

Clean Water Systems

Clean Water Systems Fleck 2510 Installation & start?up guide

Fairchild FSB44104A user guide

Fairchild

Fairchild FSB44104A user guide

LEGRAND Wattstopper LMIN-104 installation instructions

LEGRAND

LEGRAND Wattstopper LMIN-104 installation instructions

PMK ATT10BNCS instruction manual

PMK

PMK ATT10BNCS instruction manual

Tektronix TDS3FFT user manual

Tektronix

Tektronix TDS3FFT user manual

Woodward easYgen Technical manual

Woodward

Woodward easYgen Technical manual

Balluff BNI EIP-502-105-R015 user guide

Balluff

Balluff BNI EIP-502-105-R015 user guide

NXP Semiconductors TWR-LS1021A Getting started

NXP Semiconductors

NXP Semiconductors TWR-LS1021A Getting started

Advantech PCM-3117 Startup manual

Advantech

Advantech PCM-3117 Startup manual

Danfoss MCO 101 manual

Danfoss

Danfoss MCO 101 manual

Moons' Lin Engineering R701P user manual

Moons'

Moons' Lin Engineering R701P user manual

Aventics RV1 operating instructions

Aventics

Aventics RV1 operating instructions

manuals.online logo
manuals.online logoBrands
  • About & Mission
  • Contact us
  • Privacy Policy
  • Terms and Conditions

Copyright 2025 Manuals.Online. All Rights Reserved.

9377
MTL fieldbus barrier module
DRAFT- 28 July 2014
November 2016
INS9377 Rev 4
Instruction sheet
MTL fieldbus networks
1
9377
MTL fieldbus barrier module
DRAFT- 28 July 2014
November 2016
INS9377 Rev 4
Instruction sheet
MTL fieldbus networks
1
Eaton Electric Limited,
Great Marlings, Butterfield, Luton
Beds, LU2 8DL, UK.
Tel: + 44 (0)1582 723633 Fax: + 44 (0)1582 422283
E-mail: [email protected]
www.mtl-inst.com
© 2016 Eaton
All Rights Reserved
Publication No. INS9377 Rev 4
November 2016
Eaton Electric Limited,
Great Marlings, Butterfield, Luton
Beds, LU2 8DL, UK.
Tel: + 44 (0)1582 723633 Fax: + 44 (0)1582 422283
E-mail: [email protected]
www.mtl-inst.com
© 2016 Eaton
All Rights Reserved
Publication No. INS9377 Rev 4
November 2016
Introduction
The 9377-FB-R Fieldbus Barrier module is the main active component
in the 9370-FB range Fieldbus Barrier System for Foundation™
fieldbus networks and provides six intrinsically safe fieldbus spurs
from a single incoming trunk.
See the 9370-FB technical datasheet for full product details.
The 9377-FB-R Fieldbus Barrier module may be fitted or removed
without the need to isolate trunk power. The trunk connections
to the barrier module on the carrier have spark suppression by
design and cannot cause ignition while they are being connected
or disconnected.
The 9377-FB-R module may be installed or removed
without isolating the trunk power.
READ SAFETY INFORMATION OVERLEAF
Compatibility
The 9377-FB-R module may be used as a direct replacement for
type 9377-FB in all 937x-FB-xx-xx range (enclosure) and 938x-FB-xx
range (open frame) Fieldbus Barrier systems.
Installing a module
Remove the module from any packaging provided.
Do not use, or attempt to repair, a module that has any of the
pins on its underside bent or damaged, because this might affect
its safety and invalidate the certification.
• Engage the two locating guides (A) on the underside of the
9377-FB-R Fieldbus Barrier module into the sockets provided
on the carrier and push the module into place, locating the
barrier loop over the retaining clip (B).
• Three spring-loaded fixing screws (C) are provided. Start each
one in its threaded hole on the carrier and then tighten them on
each side and at the top of the module (recommended torque
of 0.9Nm) to secure the module.
Removing a module
Removal is a two-step process that first breaks the electrical
connection, followed by the physical removal of the module from
the carrier.
• Loosen the three captive fixing screws (C) on the module to
release it. The screws are spring-loaded and should retract
when the thread has fully disengaged.
• Slowly pull the 9377-FB-R Fieldbus Barrier module away from
its connections on the carrier until the safety retaining clip (B)
stops further removal.
Press the clip towards the module - see removal diagram - until the
barrier is released and can then be removed completely.
Installing 9377-FB-R barrier
9377-FB-R barrier removal










Carrier Information label
An adhesive label entitled “FB CARRIER INFORMATION” is
enclosed with this module. This label must be affixed to the
module carrier in the location shown below. If a certification
label already exists on the module carrier in this location, then
the enclosed label may be discarded.
Introduction
The 9377-FB-R Fieldbus Barrier module is the main active component
in the 9370-FB range Fieldbus Barrier System for Foundation™
fieldbus networks and provides six intrinsically safe fieldbus spurs
from a single incoming trunk.
See the 9370-FB technical datasheet for full product details.
The 9377-FB-R Fieldbus Barrier module may be fitted or removed
without the need to isolate trunk power. The trunk connections
to the barrier module on the carrier have spark suppression by
design and cannot cause ignition while they are being connected
or disconnected.
The 9377-FB-R module may be installed or removed
without isolating the trunk power.
READ SAFETY INFORMATION OVERLEAF
Compatibility
The 9377-FB-R module may be used as a direct replacement for
type 9377-FB in all 937x-FB-xx-xx range (enclosure) and 938x-FB-xx
range (open frame) Fieldbus Barrier systems.
Installing a module
Remove the module from any packaging provided.
Do not use, or attempt to repair, a module that has any of the
pins on its underside bent or damaged, because this might affect
its safety and invalidate the certification.
• Engage the two locating guides (A) on the underside of the
9377-FB-R Fieldbus Barrier module into the sockets provided
on the carrier and push the module into place, locating the
barrier loop over the retaining clip (B).
• Three spring-loaded fixing screws (C) are provided. Start each
one in its threaded hole on the carrier and then tighten them on
each side and at the top of the module (recommended torque
of 0.9Nm) to secure the module.
Removing a module
Removal is a two-step process that first breaks the electrical
connection, followed by the physical removal of the module from
the carrier.
• Loosen the three captive fixing screws (C) on the module to
release it. The screws are spring-loaded and should retract
when the thread has fully disengaged.
• Slowly pull the 9377-FB-R Fieldbus Barrier module away from
its connections on the carrier until the safety retaining clip (B)
stops further removal.
Press the clip towards the module - see removal diagram - until the
barrier is released and can then be removed completely.










Carrier Information label
An adhesive label entitled “FB CARRIER INFORMATION” is
enclosed with this module. This label must be affixed to the
module carrier in the location shown below. If a certification
label already exists on the module carrier in this location, then
the enclosed label may be discarded.
Installing 9377-FB-R barrier
9377-FB-R barrier removal
DRAFT- 28 July 2014
The given data is only intended as a product
description and should not be regarded as a legal
warranty of properties or guarantee. In the interest
of further technical developments, we reserve the
right to make design changes.
2
MTL fieldbus barrier module
November 2016
Eaton Electric Limited,
Great Marlings, Butterfield, Luton
Beds, LU2 8DL, UK.
Tel: + 44 (0)1582 723633 Fax: + 44 (0)1582 422283
E-mail: [email protected]
www.mtl-inst.com
© 2016 Eaton
All Rights Reserved
Publication No. INS9377 Rev 4 071116
November 2016
EUROPE (EMEA):
+44 (0)1582 723633
[email protected]
THE AMERICAS:
+1 800 835 7075
[email protected]
ASIA-PACIFIC:
+65 6 645 9888
[email protected]
DRAFT- 28 July 2014
The given data is only intended as a product
description and should not be regarded as a legal
warranty of properties or guarantee. In the interest
of further technical developments, we reserve the
right to make design changes.
MTL fieldbus barrier module
November 2016
Eaton Electric Limited,
Great Marlings, Butterfield, Luton
Beds, LU2 8DL, UK.
Tel: + 44 (0)1582 723633 Fax: + 44 (0)1582 422283
E-mail: [email protected]
www.mtl-inst.com
© 2016 Eaton
All Rights Reserved
Publication No. INS9377 Rev 4 071116
November 2016
EUROPE (EMEA):
+44 (0)1582 723633
[email protected]
THE AMERICAS:
+1 800 835 7075
[email protected]
ASIA-PACIFIC:
+65 6 645 9888
[email protected]
2
ATEX and IECEx Safety Instructions for 9377-FB-R
Fieldbus Barrier Module
The following information is in accordance with the
Essential Health and Safety Requirements (Annex II) of the
EU Directive 2014/34/EU [the ATEX Directive - safety
of apparatus] and is provided for those locations where
such requirements are applicable.
General
a) This module must only be installed, operated
and maintained by competent personnel. Such
personnel shall have undergone training, which
included instruction on the various types of
protection and installation practices, the relevant
rules and regulations, and on the general principles
of area classification. Appropriate refresher training
shall be given on a regular basis. [See clause 4.2 of
EN 60079-17].
b) This module has been designed to provide
protection against all the relevant additional hazards
referred to in Annex II of the directive, such as
those in clause 1.2.7.
c) This equipment has been designed to meet the
requirements of EN 60079-0, EN 60079-1, EN
60079-7, EN 60079-11, EN 60079-18 and EN
60079-25.
Installation
a) The installation must comply with the appropriate
European, national and local regulations, which
may include reference to the IEC code of practice
IEC 60079-14. In addition, particular industries
or end users may have specific requirements
relating to the safety of their installations and these
requirements should also be met. For the majority
of installations the Directive 1999/92/EC [the ATEX
Directive - safety of installations] is also applicable.
b) This module can be mounted in a Safe area or a
Zone 2 or Zone 1 hazardous area. When mounted
in a Zone 2 or Zone 1 location the module must
be provided with an enclosure, which offers an
additional degree of protection appropriate to the
area classification.
Unless already protected by design, this module must be
protected by a suitable enclosure against:
i) mechanical and thermal stresses in excess of those
noted in the certification documentation and the
product specification
ii) aggressive substances, excessive dust, moisture
and other contaminants.
Read also the Schedule of Limitations (below) for
any additional or more specific information.
Schedule of Limitations
1) The 9377-FB-R Fieldbus Barrier must plug
into equipment that uses the mating part
of the connector covered by certificates
IECExTUN09.0014U and TUV09ATEX555354U.
2) The component must be housed in an
appropriatedly certified enclosure when used in
hazardous areas. When used in safe areas, the
enclosure must provide ingress protection of at
least IP20.
3) The component is intended to meet the
requirements for temperature class T4 when used
within its certified temperature range.
4) The air temperature inside the external enclosure
around the component must not exeed +75°C
during normal operation.
5) The component shall only be powered from
supplies conforming to IEC 61158.
Inspection and maintenance
a) Inspection and maintenance should be carried out
in accordance with European, national and local
regulations which may refer to the IEC standard
IEC 60079-17. In addition specific industries or end
users may have specific requirements which should
also be met.
Repair
This module cannot be repaired by the user and must
be replaced with an equivalent certified product.
ATEX and IECEx Safety Instructions for 9377-FB-R
Fieldbus Barrier Module
The following information is in accordance with the
Essential Health and Safety Requirements (Annex II) of the
EU Directive 2014/34/EU [the ATEX Directive - safety
of apparatus] and is provided for those locations where
such requirements are applicable.
General
a) This module must only be installed, operated
and maintained by competent personnel. Such
personnel shall have undergone training, which
included instruction on the various types of
protection and installation practices, the relevant
rules and regulations, and on the general principles
of area classification. Appropriate refresher training
shall be given on a regular basis. [See clause 4.2 of
EN 60079-17].
b) This module has been designed to provide
protection against all the relevant additional hazards
referred to in Annex II of the directive, such as
those in clause 1.2.7.
c) This equipment has been designed to meet the
requirements of EN 60079-0, EN 60079-1, EN
60079-7, EN 60079-11, EN 60079-18 and EN
60079-25.
Installation
a) The installation must comply with the appropriate
European, national and local regulations, which
may include reference to the IEC code of practice
IEC 60079-14. In addition, particular industries
or end users may have specific requirements
relating to the safety of their installations and these
requirements should also be met. For the majority
of installations the Directive 1999/92/EC [the ATEX
Directive - safety of installations] is also applicable.
b) This module can be mounted in a Safe area or a
Zone 2 or Zone 1 hazardous area. When mounted
in a Zone 2 or Zone 1 location the module must
be provided with an enclosure, which offers an
additional degree of protection appropriate to the
area classification.
Unless already protected by design, this module must be
protected by a suitable enclosure against:
i) mechanical and thermal stresses in excess of those
noted in the certification documentation and the
product specification
ii) aggressive substances, excessive dust, moisture
and other contaminants.
Read also the Schedule of Limitations (below) for
any additional or more specific information.
Schedule of Limitations
1) The 9377-FB-R Fieldbus Barrier must plug
into equipment that uses the mating part
of the connector covered by certificates
IECExTUN09.0014U and TUV09ATEX555354U.
2) The component must be housed in an
appropriatedly certified enclosure when used in
hazardous areas. When used in safe areas, the
enclosure must provide ingress protection of at
least IP20.
3) The component is intended to meet the
requirements for temperature class T4 when used
within its certified temperature range.
4) The air temperature inside the external enclosure
around the component must not exeed +75°C
during normal operation.
5) The component shall only be powered from
supplies conforming to IEC 61158.
Inspection and maintenance
a) Inspection and maintenance should be carried out
in accordance with European, national and local
regulations which may refer to the IEC standard
IEC 60079-17. In addition specific industries or end
users may have specific requirements which should
also be met.
Repair
This module cannot be repaired by the user and must
be replaced with an equivalent certified product.