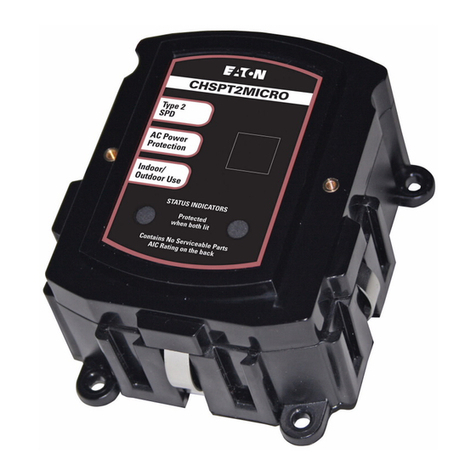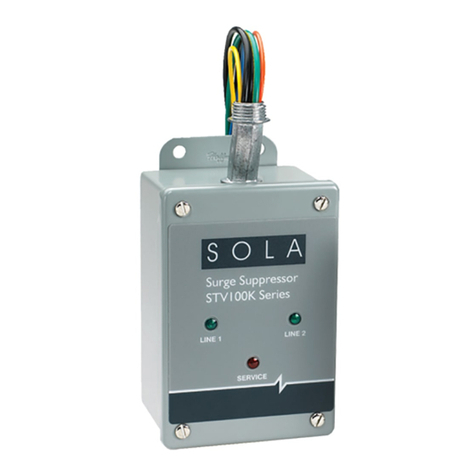
GFS ground fault circuit interrupter
Installation & maintenance information
SAVE THESE INSTRUCTIONS FOR FUTURE REFERENCE
IF 1007
IMPORTANT INFORMATION
A GFS ground fault circuit interrupter reduces the hazards of ground fault currents that
can cause loss of life. Upon detecting a ground fault current (exceeding 5 milliamps) in
the protected branch circuit, the GFS unit will trip, interrupting power. Even with GFS unit
limiting ground fault current, some electrical shock may be felt. Such shock will normally
be of less than dangerous duration. However, persons with heart problems or other
medical conditions that may make that person susceptible to the effects of electrical shock
may still be seriously injured. While the GFS ground fault circuit interrupter provides
a signicant level of protection, there is no known device that can provide complete
protection from all hazards of electrical accidents under all conditions.
The GFS unit will not protect against short circuits or overloads. A circuit breaker or fuse
controlled switching system that supplies power to the branch circuit must provide that
protection.
When the GFS unit has interrupted a ground fault current caused by faulty insulation,
defective equipment or wet wiring, the fault must be repaired before the GFS unit is reset.
The GFS unit must be tested upon completion of initial installation and at regular intervals
in an established testing program.
APPLICATION
GFS ground fault circuit interrupter is used with portable electrical equipment to protect
against possible injury due to unwanted ground faults, meeting the requirements for
personnel protection as dened by the National Electrical Code®(NEC) and the Canadian
Standards Association. When mounted on proper body, no additional sealing is required. A
factory sealed chamber encloses the unit in a housing with explosionproof ground joints.
GFS interrupter is suitable for use in Class I, Groups C, D; Class II, Groups E, F, G; and Class
III hazardous (classied) areas as dened by the National Electrical Code. ENR receptacles
are not suitable for use in Class II, Group E environments, including when used as ENR
GFCI kit (example: ENR22201 GFI).
GFS ground fault interrupter is a feed through type to serve receptacles in a branch circuit of
15 to 20 amperes at 125 volts AC. They are intended for use with Crouse-Hinds series ENR
or CPS152 receptacles.
IF 1007 • 07/18 Copyright © 2018, Eaton’s Crouse-Hinds Division Page 1
!CAUTION
To prevent water ingress:
Do not install in corrosive areas or areas exposed to rain, hose down or water runoff.
INSTALLATION
Before starting, read all instructions contained in this installation and maintenance
information sheet.
1. Install single- or two-gang standard, or two- or three-gang tandem EDS or EDSC
device box (ordered separately) in desired location and connect into grounded conduit
system.
NOTE: GFS units cannot be installed on EDSCM multi-gang modular control device bodies.
2. Pull all power source (line) wiring and receptacle (load) wiring into device box.
3. Attach wiring from GFS factory sealed chamber to power source and receptacles
wiring in an approved manner. Make all connections following wiring diagram for your
specic wiring system.
4. Insert wiring, then factory sealed chamber into device box with internal TEST and
RESET buttons positioned correctly. TEST button on external cover MUST be lined up
with TEST button of device in sealing well (clearly marked).
5. Place external cover over factory sealed chamber per Step 4, and attach with the four
(4) screws provided. Tighten screws to 30 in.-lbs. torque.
6. Do not use GFS unit until it has been fully and successfully tested as specied in
TESTING PROCEDURE.
!CAUTION
To avoid the risk of electric shock:
• Be sure all electrical power is OFF before starting installation and maintenance.
• Install on 120 VAC grounded circuit only that is protected by properly rated
circuit breaker or fuse.
• Install GFS between circuit breaker or fuse and receptacles.
• Connect to copper wire only.
• Install GFS unit as close as practical to protected receptacles.
!WARNING
To avoid the risk of explosion:
Clean both ground joint surfaces of cover, internal sealing chamber and device
box before tightening screws. Dirt or foreign material must not accumulate on flat
ground joint surfaces. Surfaces must fully seat against each other to form a proper
explosionproof seal.
TESTING PROCEDURE
1. Turn power ON to branch circuit receptacle protected by GFS unit.
2. Press the TEST button on GFS unit, the RESET button should extend outward
displaying a red o-ring.
3. Plug a test lamp or meter into a protected receptacle. If the test lamp lights (or
meter indicates a voltage reading), this indicates that the connections have been
wired incorrectly. Turn off power to circuit and correct wiring before proceeding
further. If the test lamp does not go on, or meter indicates zero voltage reading,
proceed to the next step.
4. Press the RESET button rmly until an audible click is heard. The test lamp should
now turn on. Press the TEST button again. The test lamp should go OFF and RESET
button extend outward. This indicates proper wiring connection to that receptacle.
5. With the RESET button extended, test the other receptacles in the branch circuit
protected by the GFS unit. If the test lamp lights or the meter indicates a voltage
reading, this indicates that the receptacle is NOT protected by the GFS unit. Turn
power OFF to circuit and correct the wiring. Test all receptacles protected by the
GFS unit.
6. Attach the self-adhesive “GROUND FAULT PROTECTED” label to each receptacle
protected by the GFS unit.
7. Establish and maintain a regular monthly testing schedule.
!WARNING
To avoid the risk of explosion:
If receptacle to be tested is located in a normally hazardous area, that area must be
purged of the hazard and declared non-hazardous before starting testing procedure.
