EchoNous Kosmos AI Station 2 User manual

Kosmos
AI Station 2 User Guide

Introduction 3
Kosmos AIS 4
AIS Core Installation 4
Using the utility bin 5
Locking the casters 6
Storing the AC power cord 6
AIS: Kosmos Bridge Installation 7
Installing Kosmos Bridge Tablet Mount to AIS 8
Installing Kosmos Bridge in Bridge Tablet Mount 9
Removing Kosmos Bridge from the Bridge Tablet Mount 10
Locking the release button (optional) 11
Adjusting the tablet mount hinge 11
AIS: Kosmos Bridge with Kosmos Hub 14
Installing Kosmos Hub to AIS 14
AIS: Kosmos on Android 20
AIS: Kosmos on Android without Power Pack 20
Installing Android Tablet to AIS 21
AIS: Kosmos on Android with Power Pack 23
Installing Android Tablet with the Power Pack to AIS 24
Charging the Power Pack 27
AIS: Kosmos on iOS 29
AIS: Kosmos on iOS without Hub 30
Installing iOS Tablet to AIS 31
AIS: Kosmos on iOS with Kosmos Hub 33
Cleaning and disinfecting 39
Routine Maintenance 39
Cleaning the Mounting Assembly 39
Specifications 40
Stand 40
Kosmos Hub 40
Hub Enclosure Box 40
Power Supply 40
Hub to tablet cable length 40
Safety 41
Recycling and Disposal 41
Labeling symbols 43
Contact information 47
Table of Contents
* Android is a trademark of Google LLC.
* Apple licenses the “iOS” trademark from Cisco.
© 2015 to 2023 EchoNous, Inc.,or its affiliates. All rights
reserved.
P006266-009 Rev A
October 2023

EchoNous AI Station 2 User Guide 3
Introduction
Introduction
EchoNous offers hardware accessories which allow for longer scanning sessions,
simultaneous charge-while-scanning, and collective portability for Kosmos
tablets and all Kosmos probes.
The EchoNous AI Station 2 (AIS) is a stand that lets you easily mount and remove
the Kosmos Bridge, Android tablet or iOS tablet for convenient use and
portability. Additionally, the Kosmos Hub allows Kosmos Bridge users and
Kosmos on iOS users to simultaneously scan and charge when Lexsa is
connected, when Torso or Torso-One are connected or when both Torso/Torso-
One and Lexsa are connected.
The AIS core assembly instructions remain consistent across all Kosmos
platforms. After setting up the AIS, please refer to the appropriate device-specific
instructions.
Use this guide in conjunction with the following documents:
• AI Station 2 Installation Guide, Core Stand included in the AIS box.
• Kosmos User Guide (if applicable)
• Kosmos on iOS-Android User Guide (if applicable)
• Power Pack Quick Guide (if applicable)
Torso is only available for Kosmos Bridge.
Not all features are available in all markets. Reference the user guide of
your region or country for all available features before use.
Please visit the website at echonous.com/kosmos-resources for
electronic versions of the user guides.
Please visit the website at echonous.com/product/device-
compatibility for a current list of compatible Android and iOS tablets.

4EchoNous AI Station 2 User Guide
Kosmos AIS
AIS Core Installation
What’s in the box
• AIS- Column
• AIS- Base
• Utility Bin
• (2) Cable Clip
• (4) 1/4-20 Lock Nut
• (4) 1/4” Flat Washer
To assemble AIS:
1. Lay the base and the column of the AIS on their side.
2. Align the screws on the bottom of the column to match the openings on the
base. Connect the base and the column.
3. Tighten the base and the column together using the provided (4) Lock Nuts
and (4) Flat Washers.
Please note that AIS installation may require two people.

EchoNous AI Station 2 User Guide 5
Kosmos AIS
4. Once the column and the base are securely connected, turn the stand upright
and slide the Utility bin into place.
Using the utility bin
The utility bin can safely carry 4.5 kg.
To remove the utility bin for cleaning, press the tab, and slide the bin upward.
Do not exceed the safe working load of the AIS.

6EchoNous AI Station 2 User Guide
To reinstall the bin, align it with the top edge of the mounting bracket, and
slide the bin downward until it clicks into place.
Locking the casters
The AIS has four locking casters.
To lock a caster, use your foot to push down on the tab.
Storing the AC power cord
To store the AC power cord, wrap the cord onto the cord wrap at the bottom
of the stand.
The AIS is designed to roll freely; however, after you have placed it where
you want, lock the casters so it does not unintentionally move.

EchoNous AI Station 2 User Guide 7
AIS: Kosmos Bridge Installation
AIS: Kosmos Bridge Installation

8EchoNous AI Station 2 User Guide
Installing Kosmos Bridge Tablet Mount to AIS
What’s in the box
To install Bridge tablet mount to AIS:
2. Using the T-20 Torx wrench, secure the Bridge tablet mount to the AIS
column using (4) M4 x 8mm Button Head Torx Screws (BHTS).

EchoNous AI Station 2 User Guide 9
AIS: Kosmos Bridge Installation
Installing Kosmos Bridge in Bridge Tablet Mount
To install Kosmos Bridge in tablet mount:
1. Align Bridge so that the bottom edge rests on the corner tabs of the tablet
mount.
2. Tilt Bridge back into the tablet mount, and press it in. There may be minor
resistance as you press the handle into the slot.
3. Press down on the latch until it clicks.
Ensure the latch is fully closed so Kosmos Bridge does not fall out and
cause injury or damage.

10 EchoNous AI Station 2 User Guide
Removing Kosmos Bridge from the Bridge Tablet Mount
The release button is intentionally hidden to improve security.
To remove Bridge from the tablet mount:
1. Make sure that Bridge is facing straight forward and not tilted downward.
2. Support Bridge with one hand, and use your other hand to press the release
button quickly and completely on the back upper right slot of the tablet
mount.
3. Holding the top of the Bridge, tilt it forward and lift up to remove it from the
mount.
When removing Bridge from the mount, adjust the holder so it is not
tilted downward before you push the release so it does not fall to the
ground.
• The release button simultaneously releases both the latch and the USB
cable.
• Press the release button quickly and completely – this ensures the USB
cable properly releases.

EchoNous AI Station 2 User Guide 11
AIS: Kosmos Bridge Installation
Locking the release button (optional)
If you want to keep the Bridge in the AIS, you can lock the release button on the
top of the tablet mount to ensure the latch does not open.
To lock the release button:
1. After installing the Bridge in the mount, use the T-10 Torx wrench to install
the M3 x 8mm BHTS into the back of the tablet mount. This will lock the
release button.
Adjusting the tablet mount hinge
You can adjust the tablet mount so it tilts up and down (+30/-15 degrees) and
swivels left and right (+/- 90 degrees).
The tilt and swivel tension should only be adjusted after the monitor is
installed.
The downward tilt is intentionally limited to reduce the likelihood that
Kosmos Bridge will fall if the latch is accidentally opened.

12 EchoNous AI Station 2 User Guide
To adjust swivel tension:
1. Using a 1/2” socket wrench, tighten or loosen the swivel tension nut until
desired swivel tension is achieved. Socket wrench is not provided.
To adjust tilt tension:
1. Using a 5/32” Allen wrench, tighten or loosen the tension adjustment screws.
Allen wrench is not provided.
To begin scanning:
1. Connect Torso/Torso-One into probe port underneath Bridge handle.
2. Connect Lexsa to the USB-C port on the side of the Bridge.
Be sure to support the tablet while adjusting the tension; if the tension is
too loose, the tablet mount could suddenly tilt down.

EchoNous AI Station 2 User Guide 13
To charge Bridge (without the Hub):
1. Using the power supply cables provided with your Bridge, connect the USB-C
power supply cable end to USB-C port on the side of the Bridge and the other
end to the wall outlet. Lexsa must be disconnected from Bridge.
Please continue to the next section for Kosmos Hub installation instructions.

14 EchoNous AI Station 2 User Guide
AIS: Kosmos Bridge with Kosmos Hub
Installing Kosmos Hub to AIS
What’s in the Box
•Kosmos Hub
•Hub Enclosure Box
•Hub-to-Bridge USB-C cable
•Hub Power Supply
•(3) M4 x 12mm PHMS
•(1) 1/4-20 x 3/4 Set Screw
•(1) 1/8” Hex wrench
To Attach the Hub Enclosure Box to the AIS:
1. At the base of the AIS, insert the mount of the Hub enclosure box, without
the Hub, through the opening.
While scanning with Lexsa, do not disconnect the AC power if it is already
connected.
Lexsa must be plugged into the Hub Enclosure Box before connecting
the Bridge to the Hub. The Bridge will not recognize the Lexsa probe if
this sequence is not followed.
Kosmos Hub must be connected and attached to Kosmos AI Station prior
to use.
The Hub Enclosure Box should not be open while in the patient
environment.
The Kosmos Hub is currently available for Kosmos Bridge and Kosmos on
iOS.

EchoNous AI Station 2 User Guide 15
AIS: Kosmos Bridge with Kosmos Hub
2. Slide the Hub enclosure box up the spine of the stand.
3. At the location shown in the image below, use the provided 1/8” Hex wrench
and the single Set Screw to tighten the Hub enclosure box to the AIS.
1. Opening for Hub
enclosure box mount
3. Insert Set Screw
and tighten with 1/8”
Hex wrench until the
Hub enclosure box is
secure

16 EchoNous AI Station 2 User Guide
Connecting the Hub - See image below
4. Prior to placing the Hub into the Hub enclosure box, connect one end of the
Bridge-to-Hub USB-C cable to the USB-C port on the Hub.
5. Place the Hub into the Hub enclosure box. Guide the Bridge-to-Hub USB-C
cable through the fittings and cable opening of the Hub enclosure box.
6. Connect the Hub power supply cable to the Hub power supply port.
7. Guide the Hub power supply cable through the fittings and cable opening of
the Hub enclosure box.
• Hint: Utilize the space behind the Hub to help adjust the cable through
the fittings.
8. Connect the extension cable (USB-C) to the USB-C ports on the Hub.
9. To scan with Kosmos Lexsa, connect Lexsa to the exterior port on the side of
the Hub enclosure box.
When scanning with Torso/Torso-One, connect the Torso/Torso-one to the
Kosmos Bridge (port under the Bridge handle).
9. Exterior port
for Kosmos Lexsa
8. Extension cable (USB-C)
6. Hub power
supply cable
4. Bridge-to-Hub
USB-C cable
7. Opening for Hub
power supply cable 5. Opening for Bridge-
to-Hub USB-C cable

EchoNous AI Station 2 User Guide 17
AIS: Kosmos Bridge with Kosmos Hub
Connecting the Hub to the Bridge
10. Guide the loose end of the Bridge-to-Hub USB-C cable through the core of
the AIS and up to the Bridge mount.
11. Insert the Bridge into the Bridge mount and plug the Bridge-to-Hub USB-C
cable into the Bridge side port.
Lexsa must be plugged into the Hub enclosure box before connecting
the Bridge to the Hub.
AIS Core
Bridge-to-Hub USB-C port

18 EchoNous AI Station 2 User Guide
12. Attach the cable clips to the Bridge tablet mount. Feed the Bridge-to-Hub
USB-C cable through the cable clips and tighten the cable clips to the mount
using the (2) M3.5 x 1.65 x 10mm BHTS and T-15 Torx wrench.
Complete the Hub Set Up
13. Connect the AC power cable to the Hub power supply.
Cable Clips
Hub power supply
AC power cable

EchoNous AI Station 2 User Guide 19
14. Plug the AC power cable into wall outlet. Turn on Kosmos device.
15. With successful installation of Hub, close the Hub enclosure box with the
provided screws. Phillips screwdriver is not provided.

20 EchoNous AI Station 2 User Guide
AIS: Kosmos on Android
You can easily mount compatible Android tablets to the AIS using the Android-
iOS tablet mount. Android tablet users can also mount the Power Pack to the AIS.
AIS: Kosmos on Android without Power Pack
Electronic user guides are available on the EchoNous website at
echonous.com/kosmos-resources
For a list of compatible tablets, please visit the EchoNous website at
echonous.com/product/device-compatibility
The Power Pack is only available for Kosmos on Android.
This manual suits for next models
1
Table of contents
Other EchoNous Medical Equipment manuals
EchoNous
EchoNous Uscan User manual
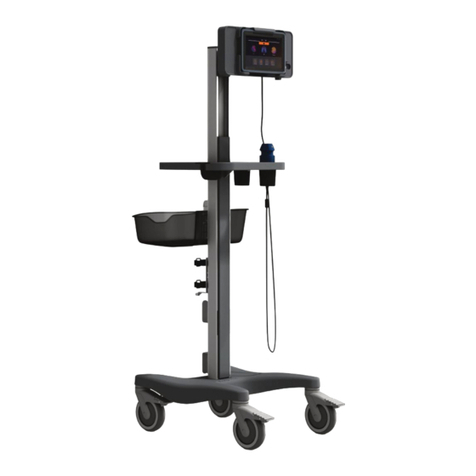
EchoNous
EchoNous Kosmos Grab and Go on AI Stand User manual

EchoNous
EchoNous KOSMOS User manual

EchoNous
EchoNous KOSMOS User manual
EchoNous
EchoNous KOSMOS User manual

EchoNous
EchoNous KOSMOS User manual

EchoNous
EchoNous Uscan User manual
EchoNous
EchoNous Kosmos Torso-One User manual
EchoNous
EchoNous EchoNous Bladder User manual

