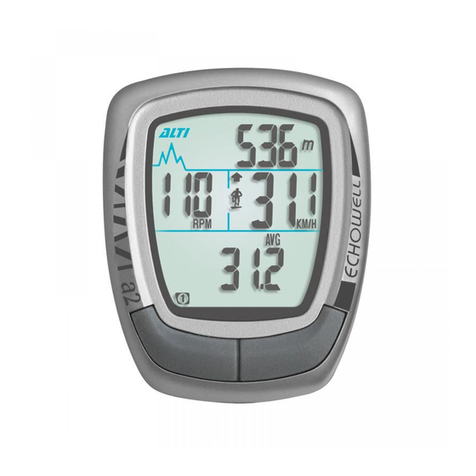
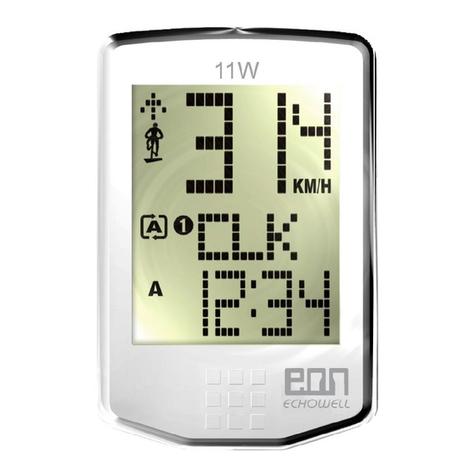
Echowell Ui 35 User manual

English
·Wheel Circumference Measurement ___________
·Button function description ___________________
·Data setting ___________________________
·LCD (icon) display__________________________
·General function Display__________________
·General Mode Display_______________________
·Sensor pairing_____________________________
·Functions(SPEED)______________________
·Functions(RPM)______________________
·Functions(Temperaur)____________________
·
Functions(CO2)
______________________
·
Functions(Others)
______________
·
Maintenance Reminder/
About Pedal Revolution /
About RPM Limit___________________
·About LAP( for Ui35 only )_____________
·LCD Brightness Adjust /
Low Battery Indicator_______________
·Battery Replacement_______________
·Specifcations_____________________
·Trouble Shooting_______________
·Precaution_______________________
·General Specifications______________
Index
English
01.
02.
03~06.
07.
08~09.
10.
11.
12~13.
14~15.
15.
15~16.
16~17.
18.
19.
20.
21.
22.
23~24.
24.
25.

EN 01
1st
2nd
Wheel Circumference Measurement
Tire Size
Circumference
Number
POPULAR TIRE CIRCUMFERENCE
REFERENCE TABLE
Precise Measurement
Roll the wheel until the valve stem is at lowest point to the ground.
Then mark this first point on the ground. Get on the bicycle and have a
helper push you until the valve stem returns to lowest point. Mark the
second point on the ground. Measure the distance between the
marks. Enter this value to set the wheel circumference.
Quick Table : Get a suitable circumference value from the table.
18 Inch
20x1.75
20 Inch
22 Inch
ATB 24x1.75
24 Inch
24x 13/8
ATB 26x1.40
ATB 26x1.50
ATB 26x1.75
26Inch (650A)
ATB26x2.0(650B)
700C TUBULAR
700x20C
700x23C
700x25C
700x28C
27 Inch(700x32c)
700x35C
700x38C
27.5 Inch
28 Inch (700B)
28.6 Inch
1436 mm
1564
1596
1759
1888
1916
1942
1995
2030
2045
2073
2099
2117
2092
2112
2124
2136
2155
2164
2174
2193
2234
2281

EN 02
Button function description
ALL CLEAR : A+B+C hold 3's (then automatically warm-up)
Enter fast pairing : A+B+C (in warm-up mode)
Enter clear eeprom :A+B+C hold 1's (in warm-up mode)
(3). Lap mode:
A Button : Press for start/stop Lap function
B Button : Press for change to next Lap
C Button : Press for enter Lap review mode
(4). Lap review mode:
A Button : Press for change Lap No.
B Button : Press for change Lap data
C Button :
Press for to back general mode
A + B Button : Hold 3's for reset lap data
(5).
When under maintenance mode
:
A + B Button : Hold 3's for reset reminder
to default value
D
C
AB
(1). Data setting mode:
A Button : Press for increase setting
digital ,hold 1's for auto
increase
B Button : Press for change setting digital
C Button : Press for enter next date
setting mode
D Button : Press for quit date setting
mode
(2). General mode:
A Button : Press for change function
Group hold 1’s for change
screen display
B Button : Press for change function
mode
C Button : Press for enter Lap and Lap
review mode ( for Ui35 only )
: Hold 3's for turn on RF power
(mount on bracket)
D Button : Press for enter data setting
mode
A + B Button : Hold 3's for data reset

EN 03
or
A
B
Data setting
ALL
CLEAR
(warm-up)
A
B
D
+
+
hold 1's C
0. Unit Setting 1. Clock Setting 2. Date Setting 3. RPM Setting
AA
A
AA
CC
C
A
AA
A
B
B
B
B
D
B
BBB
B
D
D
CCC C
B
GENERAL MODE
GENERAL MODE
D
GENERAL MODE
GENERAL MODE
B

EN 04
5. Cmm 1/2 Setting
A
B
A
B
A
B
6. Maintenance 1/2 Setting 7. ODO 1/2 Setting
CCC
GENERAL MODE
D
GENERAL MODE
D
GENERAL MODE
D
B BBBBB
CCC
4. Bike1/Bike2
Setting
A
B
C
C
A
A
D
GENERAL MODE

EN 05
A
B
8. T.RT 1/2 Setting
C
B
B
B
B
B
B
C
GENERAL MODE
D
9. Total Pedal
Revolution 1/2 Setting
A A
B B
10. Total CO2
Saving 1/2 Setting
GENERAL MODE
D
GENERAL MODE
D
BBB B
C
CC
C

EN 06
A
B
11. Sensor Pairing 12. LCD Contrast
Setting
GENERAL MODE
D
GENERAL MODE
D
A
C
AA
C
A A A
C
A
A A
CB
B

EN 07
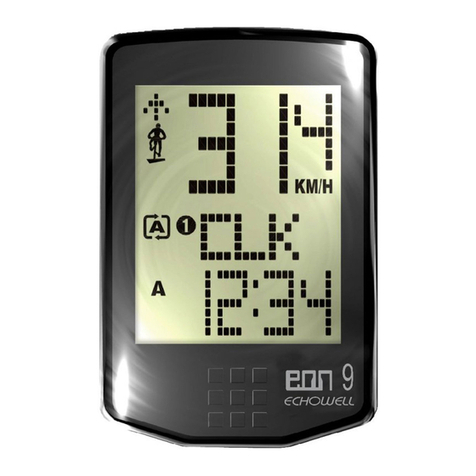
LCD (icon) display
Bike 1
Bike 2
Speed Pacer
Current Speed
A/B/C Button
Function Display
Speed
RPM
KM/H
%
Low Battery
Indicator
BAC
Button
B
Button
A
Button
C( for Ui35 only )

EN 08
General Function Display
B
B
B
B B
B
B
B
B
B
B
B
BB
B
B
B
A A A A A
B
B
B
B
B
B
B
B
B B B B B
B
GROUPGROUP GROUP GROUPGROUPGROUP
Button switch
function group
Button switch
function mode
Button switch
function group
A
B
C
AB
C
A

EN 09
General Function Display ( for Ui35 only )
GROUP
A
A
A
A
B
B
MODE
B
B
B
B
B
B
B
B
B
B
Lap Review
MODE
A
B
AC
Button switch function group
ABButton switch function mode CButton switch function group
The latest
stop screen
A
A Button
function group
AA
B
B
01~30
C
CC
01~07
A

Bracket Bracket
Power off
The display of General Mode looksdifferent
in differentphrases as shown below:
1. The main unit will automatically enter Sleep Mode in
15 minutes once it doesn't receive anysignals from
the bike. Only current time is displayed when the
computer is in Sleep Mode (Power-Saving Mode.)
2. The computer will automatically start measuring the
speed, cadence by put it onto the bracket, or by
riding the bicycle if it was fit on the bracket already,
or by pressing the A (or B) button to wake it up.
3. When you wake up the computer and riding, it will
automatically scan for transmitters. S/R symbols will
flash till coded. (S: Speed, R: RPM)
*
If either of S/R symbol disappears, please hold C
button 3 seconds. It will again automatically scan
for transmitters.
4. When you put the computer onto the bracket, the
display will turn to instant icon, press A (or B) will
return to the function icon.
5. The computer will mark on the coded transmitter(s)
only. Non-coded transmitter(s) will result in
non-instant data display.
Note:
*
All the computer and transmitter in the package had been
paired in the factory before shipment.
You might to pair them again when: 1. no signal received,
2. buy or replace with new parts.
*
The computer can keep sensor pairing data in the memory
even you change the battery.
General Mode Display
During
Riding
SPEED+RPM LCD Display
1s
A
1s
A
24H
Before Installed
Onto The Bracket
Onto The
Bracket
12H
EN 10

EN 11
Sensor pairing
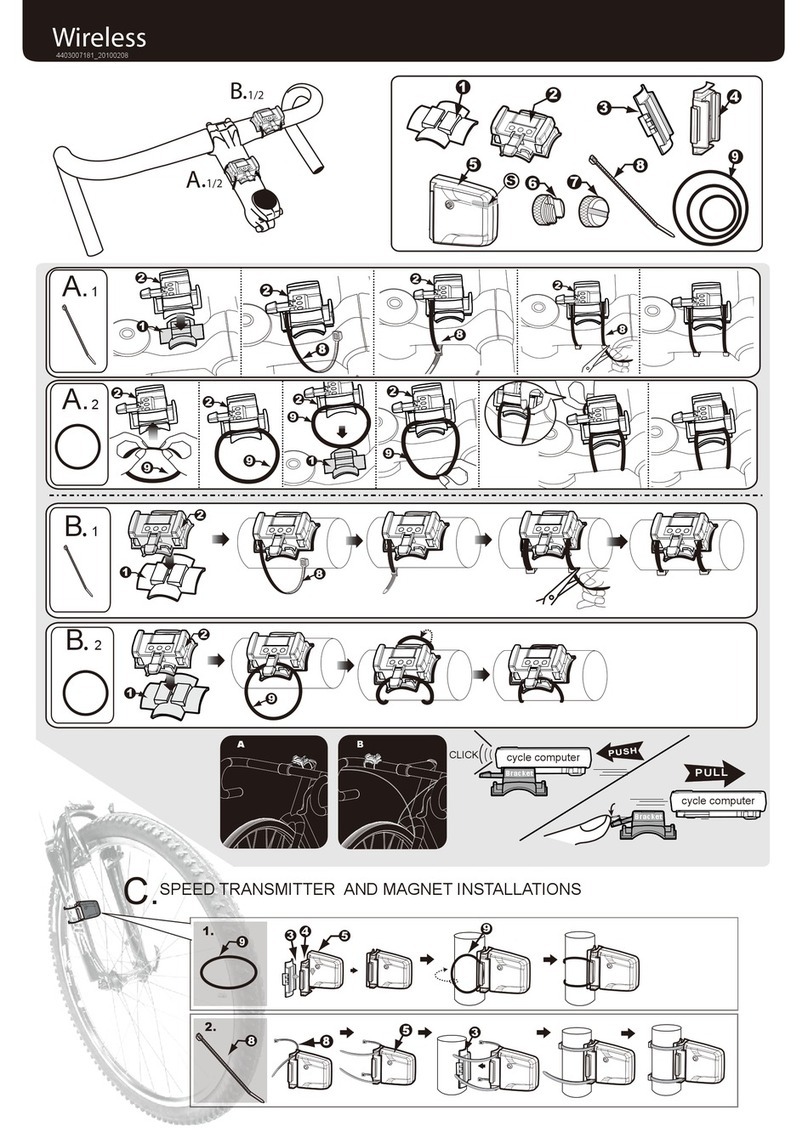
When you have all the bracket, transmitters,
and accessories installed, you need to do
the pairing and coded signal testing
between computer and transmitters.
1. Hold 1 second button D, it will enter
setting loop, press D button to find the
SENSOR PAIRING, choose bike1 or bike
2 (by pressing B) and press A to show
coded ID. If computer did not receive any
signal from transmitter over 30 seconds,
it will show TIME OUT; please check the
installation, battery power, and do the
pairing again.
2. This computer is design for 2 bikes (you
could purchase the 2nd set bike parts), it
will automatically shift to bike 1 or bike 2
after pairing separately.
RPM
SPEED
D
Press D button
to find the
D
D
C
A
A
B
Get signals from Sensors:
signal received
RPM
signal received
SPEED
A
A
B
B

1. Trip distance refers to the accumulated distance
during a trip.
2. Whenever you reset the computer or change the battery,
the trip distance record will be cleared.
1. With this function, the computer accumulates the total
distance of the bike you ride.
2. The odometer data cannot be cleared
by the reset operation.
1. With this function, the computer accumulates the total
distance of the two bikes you ride.
2. The sum of ODO 1 and ODO 2 equals ODO (1) (2).
(i.e. total distance of bikes 1 and 2)
3. The total odometer data cannot be cleared by the reset
operation.
EN 12
Average Speed
Trip Distance
Odometer
1. The current speed is always shown on the middle
display during riding.
2. The speed data are updated per second.
1. With this function, the computer will display your
average speed during riding.
2. Whenever you reset the computer or change the
battery, the average speed record will be cleared.
3. The computer will automatically reset the following
data to zero once the riding time is over 100 hours
or the distance is over 1000KM (or miles): Riding
Time, Trip Distance, Average Speed.
1. With this function, the computer will record the
maximum speed you reach during riding.
2. Whenever you reset the computer or change the
battery, the max. speed record will be cleared.
Functions
SPEED FUNCTIONS
Speed
Maximum Speed
Total odometer ( Bikes 1+2 )

1. Riding time refers to the accumulated riding time of a
trip.
2. Whenever you reset the computer or change the
battery, the trip distance record will be cleared.
3. The computer automatically starts measuring the riding
time upon receipt of wheel signals.
1. With this function, the computer accumulates the total
riding time of a bike.
2. The total riding time data cannot be cleared by the
reset operation.
1. With this function, the computer accumulates the total
riding time of the two bikes you ride.
2. The sum of T_ RIDINGTIME bike 1 and bike 2 equals
A_RIDINGTIME. (i.e. total riding time of bikes 1 plus 2)
3. The accumulated total riding time of Bike 1 and Bike 2
cannot be cleared by the reset operation.
EN 13
1. function is to remind you about maintaining your beloved
bike after presetting the desired reminding distance.
2. It displays the icon ( ) for Maintenance
Reminder setting. (Maintenance: Bike1:300km or miles,
Bike2:990km or miles.)
1. The pace arrow shows the comparison between the
current speed and average speed.
2. If the current speed is above or equal to the average
speed, the upward arrow ( ) will flash on the display.
3. On the contrary, if the current speed is below the average
speed, the downward arrow ( ) will flicker.
Total Riding Time ( Bikes 1+2 )
Maintenance
Speed Pacer
Trip Riding Time
Total Riding Time
SPEED FUNCTIONS

EN 14
Maximum RPM
Average RPM
RPM limiet
1. The bike1, bike2 accumulates the pedal revolutions as
long as the bike is running.
2. The bike1, bike2 data can be cleared to zero by Data
Reset operation.
Setup the RPM value, the pacer symbol will show up
(beep should sound) to remind you only when RPM is
over limit. By this way you can shift to a upper gear for
more easy riding.
1. The computer accumulates the total pedal revolutions as
long as the bike is running.
2. The bike1, bike2 data can not be cleared to zero by Data
Reset operation, but by all clear operation.
3. The real value is ten times of the number on the screen.
(ex. 38, means 380 turns)
RPM FUNCTIONS
1. RPM (Revolutions Per Minute) is a measure of rotational
speed. It's updated every second.
2. The current RPM (cadence) is always shown on the
middle display.
3. For Bike 1, if you do not turn the crank for over 4
seconds, the current RPM will be reset to zero.
For Bike 2, if you do not turn the crank for over 2
seconds, the current RPM will be reset to zero.
1. With this function, the computer will record your
maximum cadence during riding.
2. Whenever you reset the computer or change the battery,
the max. RPM record for a trip will be cleared.
1. With this function, the computer will display the average
cadence during riding. It's updated per second.
2. Whenever you reset the computer or change the battery,
the average cadence record will be cleared.
RPM
Total Pedal Revolution
Trip Pedal Revolution

EN 15
RPM Limit Pacer
RPM FUNCTIONS
Total Pedal Revolution ( Bikes 1+2 )
1. The A-revolution accumulates the total pedal revolutions
as long as the bike is running. Either Bike 1 or 2 has its
individually.
A-revolution is the sum after bike1 plus bike2 total pedal
revolutions
2. The A-revolution data can not be cleared to zero by Data
Reset operation, but by all clear operation.
3. The real value is one hundred times of the number on the
screen. (ex. 188, means 18800 turns)
A pacer symbol will show up to remind you only when RPM
is over limit (beep should sound). By this way you can shift
to a upper gear for more easy riding.
TEMPERATURE FUNCTIONS
CO2FUNCTIONS
Current Temperature
Maximum / Minimum Temperature
Temperature would be automatically detected under this
mode. You could choose either in °C or °F to display the
temperature.
1. With this function, the computer will display the Maximum
temperature / Minimum temperature during riding.
2. Whenever you reset the computer or change the battery,
the Maximum temperature / Minimum temperature record
will be cleared.
The CO2function accumulates the CO2saving amount from
the last RESET operation as long as the bike is being ridden.
The Total CO2Saving as long as the bicycle is running, the
CO2saving can be cleared by the All Clear operation only.
Trip CO2Saving
Total CO2Saving
/

EN 16
CO2FUNCTIONS
1. With this function, the computer accumulates the total
CO2Saving of the two bikes you ride.
2. The sum of T.CO2Bike1 and T.CO2Bike2 equals T.CO2
Bike1+Bike2.
3. The total CO2saving cannot be cleared by the reset
operation.
Total CO2Saving ( Bikes 1+2 ) Clock Time: 12H/24H Alternative
Calendar
OTHERS FUNCTIONS
1.
When the user sets the clock time in Data Setting
Mode, there are two formats for option-- 12H and 24H.
2. 12H means 12 hours. In this format, to AM or PM.
24H means 24 hours.
3. When in the sleep mode, only the clock time will be
displayed on the screen.
1. Calendar per setting month /day /year
2. auto display day format 01.01.2013~12.31.2099.
Press MODE button Ato choose KM/H or M/H. Then press
the SET button Dto store selection.
Unit Selection

EN 17
Circumference
OTHERS FUNCTIONS
Lcd Brightness Adjust
Low Battery Indicator
Auto Detect ( Bike1 / Bike2 )
Auto Start / Stop
1. When the low-battery icon ” ” appears on the display, it's
time to get a new battery.
2. Replace the battery with a new one when the icon blinks
on the display. Otherwise, the new data of some functions
will not be stored into the computer.
This computer is design for 2 bikes (you could purchase the
2nd set bike parts), it will automatically shift to bike 1 or bike
2 after pairing separately.
To preserve battery, this computer will automatically switch off
and just displays the CLK data when it has not been used for
about 15 minutes.
The power will be turned on automatically by riding the bike or
by pressing the button.
1. Roll the wheel until the valve stem at its lowest point
close to the ground, then mark this first point on the
ground.
2. Measure the distance between the marks in milimeters.
Enter this value to set the wheel circumference.
Option: Get a suitable circumference value from the
table.
3. Adjust the wheel circumference as the data setting
process.
4. Unit will change to the normal operation after this
circumference setting.
4 grades adjust the brightness.
To reset it you need to pull off the computer from the
bracket. Hold the C button to enter setting mode, Hold
the A button find the BRIGHTNESS SETTING.

EN 18
About Pedal Revolution
About RPM Limit
C
A
The REVOLUTION function accumulates the
pedal rotation data from the latest RESET
operation as long as the bicycle is being ridden.
1. The computer accumulates the total pedal
revolutions as long as the bike is running.
2. The real value is 100 times of the number on
the screen. (ex. 38, means 3800 turns)
3. Computer will keep this data even you
change the battery.
1. is the sum of bike1 and bike2
of its total pedal revolution.
2. The real value is 100 times of the number on
the screen. (ex. 38, means 3800 turns)
3. Computer will keep this data even you
change the battery.
1. A pacer symbol will
show up to remind you
only when RPM is over
limit. By this way you
can shift to a upper gear
for more easy riding.
2. To rest it you need to
pull off the computer
from the bracket. Find
“RPM limit” icon
(cadence group), hold 1
second the D button to
enter (quit) setting
mode.
MAINTENANCE REMINDER
1. The user’s friendly function is to
remind you about maintaining
your beloved bike after
presetting the desired reminding
distance.
2. It displays the icon for
Maintenance Reminder setting.
Maintenance
Reminder
reset reminder to
default value
maintenance
default value
A
B
+
hold 3's
after ride 312.37km,
over counting 12.37km.

EN 19
Maximum Speed
Average Speed
Trip Distance
Trip Riding Time
Maximum RPM
Average RPM
Trip Pedal Revolution
Lap 30 sets with data:
Any Key
A
B
About LAP ( for Ui35 only)
Lap Data Group
With LAP function, you can have the trip or training divided into
several (up to 30) records.
1. Press C to find the LAP icon, press Start to record a new
Lap.
2. Lap review is allowed only when you stop riding.
3. In Lap Data Group
Speed ( AVERAGE / MAXIMUM / DISTANCE / RIDE TIME )
RPM ( AVERAGE / MAXIMUM / REVOLUTION )
4. 31st Lap record will automatically cover the 1st Lap
record.
5. To clear the LAP data, LAP function group icon, hold 3 seconds
A and B button.
+B
A
3’s
LAP DATA RESET
Lap data can be cleared only in the LAP icon (LAP mode.)
Table of contents
Other Echowell Bicycle Accessories manuals
