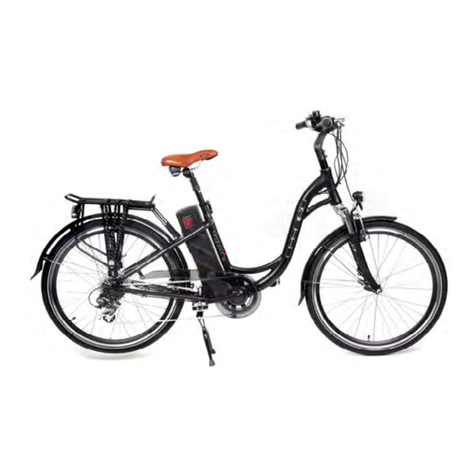
Ecobike S3 User manual

Manual instruction for
S3

Table of contents:
1. Your e-bike
1.1. Introduction
2. Function Display: Bigstone C300S
2.1. About the user manual
2.2. Button definition
2.3. Function summary
2.4. Full view area
2.5. Normal view area
2.6. Normal operation
2.7. Normal setting
2.8. Distance indicator
2.9. Battery indicator
2.10. Cable definition
2.11. Auto sleep after 10 minutes
2.12. Error code table
3. Using the bike
3.1. Riding the bike
3.2. Self-assembly
3.3. How to adjust the saddle height to suit the rider
3.4. Precautions required prior to each use
4. The battery
4.1. Li-on battery
4.2. Installing and removing the battery
4.3. Charging the battery
4.4. Protecting the battery
4.5. Using the charger
5. Safety maintenance and recommendations
5.1. Safety recommendation
5.2. Maintenance
6. Accessories

1. Your e-bike
1.1. Introduction
We would like to thank you for your e-bike purchasing. The e-bike, equipped
with pedals and an auxiliary electric motor, cannot be propelled exclusively by
means of this auxiliary electric motor. You will thoroughly enjoy riding this new
and electrical power- assisted bike.
Riding an e-bike means that you’re helping preserve the environment, since
any CO2 or other polluting gases will not be released. For your safety and for
the safety of others, we recommend that you obey all road regulations and
wear a protective helmet. For optimal, safe and enjoyable use of the e-bike,
make sure you thoroughly read this user guide before you first use it.
Use the e-bike according to the user guide, or it may shorten the life cycle.
Have a pleasant ride!
2. Function display: Bigstone C300S
2.1. About the user manual
To ensure better performance of your e-bike, please read through the C300S-
LCD product introduction carefully before using it. We will inform you all the
details concisely (including hardware installation, setting and normal use of the
display), when using our display. Meanwhile, the introduction will also help
you solve possible confusion and malfunction.
2.2. Button definition
C300S has three buttons, including MODE, UP and DOWN. "MODE" names to
"M", "UP" names to "+" and "DOWN" names to "-".

2 .3. FUNCTION SUMMARY
C300S provides a wide range of functions and indicators to fit the users’ needs.
The indicated contents are as below.
1. MODE
2. Current display
3. Speed display
4. KM/H & MPH
5. Backlight indicator
6. 6KM/H work
7. Assist level selection
8. Error code indicator
9. SET operation
10. Distance indicator
11. Battery indicator
12. Cable definition
13. Auto sleep after 10 minutes
2.4 Full view area

2.5 Normal view area
The normal viewing area of the C300S is shown below.
2.6. Normal operation
2.6.1. MODE
Hold MODE and start the display. The display will provide power for the
controller. Hold MODE again can open the backlight. With display on, press
MODE for 1.5 seconds to turn off the power. With the display off, there is no
battery consumption. The leakage current is no more than 2 µA.
The panel will go to sleep when speed is less than 2 km/h for 10
minutes.
2.6.2. CURRENT DISPLAY
That represents the discharging current of the controller currently, each
segment is 2A, six segments is >=12A.

2.6.3. SPEED DISPLAY
It displays the current riding speed of e-bike. The speed display is as below.
2.6.4. KM/H & MPH
Select KM/H or MPH for the speed and mileage, display will be the currently
selected units display.
2.6.5. BACKLIGHT INDICATOR
With the power on, hold UP for 1.5 seconds and turn on the backlight. Click it
again and turn off the backlight.
2.6.6. KM/H WORK
Hold DOWN for 1.5 seconds and enter into the mode of power assist walk. The
e-bike is traveling at 6Km/h. Display as shown below.
2.6.7. ASSIST LEVEL SELECTION
Click UP or DOWN to change the stages and output power ratio, the output
power range from level 1 to level 6 for the default (the levels can be
customized by user) , the default value is level 1.

2.6.8. ERROR CODE INDICATOR
If there is something wrong with the electronic control system, the display will
flash at 1 HZ and show the error code automatically. Different error code is
corresponding with different fault information, please see the last page Error
code table for details.
2.7. Normal setting
Hold DOWN & UP 2 seconds to enter into the mode of setting. Click MODE to
choose setting parameters and click DOWN & UP to exit setup.
2.7.1 Reset trip distance, trip time and max speed
Click DOWN to clear trip distance, trip time and max speed.
2.7.2. Wheel diameter setting
Select the accurate wheel diameter value to ensure the accuracy of display
about speed and mileage.
Click UP or DOWN to set the wheel diameter.

2.7.3. KM/H & MPH
Click UP or DOWN to switch the KM/H & MPH selection.
2.7.4. Riding Mode Selection
There are three modes for riding selection:
1: ECO 2:NORMAL 3:POWER
2.7.5. Max speed setting
Hold DOWN and UP for 5 seconds and enter into password in putting interface,
the password is “12”, Click MODE to choose setting parameters and click
DOWN & UP to exit setup.
Throttle speed limit
Click UP or DOWN to choose different throttle speed as Max speed limited.

PAS level speed limit
Click UP or DOWN to choose different PAS speed as Max speed limited.
2.8 DISTANCE INDICATOR
With the display on, click the MODE to switch the display information. In turn
shows ODO and trip time, trip distance, max speed, auto cycle display.
means auto cycle display.
2.9 BATTERY INDICATOR
When the battery capacity is high, the six battery segments are all light. When
the battery is low, the battery frame will flash. It indicates that the battery is
severely low and needs to be recharged immediately.

Low battery flash
2.10. CABLE DEFINITION
1. Red:Battery +
2. Blue:Weak lock
3. Black: Battery-
4. Green: UART-RECEIVE (RXD)
5. White: UART- SEND (TXD)
2.11. AUTO SLEEP AFTER 10 MINUTES
When the riding speed is less than 2 km/h for 10 minutes, the system will go to
sleep automatically.
2.12. Error code table
The error code is corresponding with the fault definition.
Error code
definition
21
Current error or MOS damaged
22
Throttle error(Start detection)
23
motor no phase position
24
Hall error
25
Brake error(Start detection)
9
communication display receiving error
3. Using the bike
3.1. Riding the bike
Before each start, make sure that your bike is technically sound and check the
following items in particular:
• Properly tighten the screws.
• Fasteners or any parts of the bicycle are not damaged.
• Is the ride position adequate?
• Proper steering wheel alignment.

• Wheel adjustment.
• Appropriate tire pressure.
• Pedal adjustment.
• Derailleurs are adjusted appropriately.
• The lighting is properly set.
After checking all the above items, make sure that the cables in the bike are not
damaged and are in the correct position. Every 6 months, the bike should be
provided with a comprehensive service at any service point to ensure that the
user is completely safe while using.
3.2. Self-assembly
Below you will find useful information about the installation of our bicycles,
especially those that require self-assembly:
Step 1: Preparation:
Pull the bike out of the carton with all the components in it. Be careful not to
scratch your bike and be careful not to damage any cables or other
components. Make sure your bike does not miss any items.
Step 2: Assemble the seat
1) Unscrew the clamping nuts (on both sides).
2) Insert the seat into the frame.
3) Tighten the seat bolts on both sides.
4) Unscrew the saddle on the saddle yoke and then slide the seat end up or
down so that it is parallel to the ground.

Step 3: Pedal mounting
1) The pedals on the axle are marked with the letter "R" or "L".
2) Tighten the pedal by the letter "R" clockwise in the clockwise direction. Then
tighten it with key # 15 with a force of 34 Nm.
3) Tighten the pedal by the letter "L" on the left counterclockwise. Then tighten
it with key No. 15 with a force of 34 Nm.
Step 4: Adjust the brakes
The brakes should be set up already at the factory, but the cables tend to
deregulate, so they need to be checked after the first test drive. Adjustments
should also be made during use of the bicycle in case of necessity. If you need
additional consultation, please contact a professional cycling center.
Step 5: Install the front wheel
The front wheel is disassembled, so after opening the carton, remove the
protective foil and fit on the front fork.

Then, use the pin.
3.3. How to adjust the saddle height to suit the rider.
3.4. Precautions required prior to each use
Verify that the brakes and the front & rear lights are all working properly. Also,
check the pressure of the tires.
On derailleur geared bicycles the rear derailleur automatically tensions the
chain.

Make sure that the hinges on your bike are properly locked. Indeed, when
using the bike on a regular basis, the tension of the hinges’ adjustment and
locking systems can change slightly. Whenever necessary, adjust the tension
once again.
This bike is not designed for rough usage condition, such as jumps, riding up or
off of pavements, and riding on unpaved roads. For your own safety, do not
modify the bike.
Please note: if you use the bike frequently, it is recommended that you
inspect the state of the fork, the frame, the suspension and the fasteners. The
materials and components may be subject to different reactions to usage and
wear.
If you have any doubts, contact your dealer, who will proceed with the
necessary inspection.
4. The battery
4.1. Li-on battery
ECOBIKE uses high quality lithium-ion batteries in their bikes. These batteries
are light and do not pollute the environment.
In addition, they are characterized by:
No memory effect during charging
High capacity despite small size of housing
Long lifetime
Wide temperature range: -10 ° C to + 40 °.

4.2. Installing and removing the
battery
To remove the battery, unfasten
the lock which is located along the
battery’s box. Remove the battery
by pulling it out.
To put the battery back into place,
insert the battery along to the
guide rail. Push it closely against
the controller box. Fasten the lock.
4.3. Charging the battery
WARNING: Do not charge a battery
in a frame. Remove your battery
before charging.
Never leave the battery charging unattended.
Battery level is indicated by four LEDs on the side of the battery and on the LCD
display. Charge the battery at ambient temperature, on a non-flammable and
dry surface, away from heat, moisture or flammable materials. Observe the
following steps when charging the battery:
Insert the charger plug into the battery charging socket, and then
connect the charger cable to the power point.
When the charger light is red, the battery is charging. When the red light
turns green, the battery is fully charged.
When charging is completed, at first unplug the power cord from the
power point and then from the battery.
WARNING:
Only use the original charger to charge the battery, otherwise the
battery may be damaged and the warranty will be lost.

When charging, both the charger and the battery must not be less than
10 cm away from other items!
Before starting to fully charge, read the entire user manual.
4.4 Protecting the battery
In order to prolong the life of the battery and protect it from damage, observe
the following guidelines:
It is best to charge the battery when it is empty.
If you ride not often, fully charge the battery once a month.
If you do not intend to use the bike for a long period of time, fully charge
the battery and leave it at room temperature and after about 3 months
repeat the operation.
The li-on battery should be used at -10 ° C to + 40 ° C, 65 ± 20% humidity;
stored at room temperature.
WARNING:
1. Failure to observe section 4.4.3 may damage the battery.
2. Never use any metal tools to connect the battery to the charger as it will
short circuit and damage the battery.
3. Never place batteries near fire or hot items.
4. Never shake, never hit and never throw the battery.
5. When you remove the battery from your bicycle, keep it away from children.
4.5. Using the charger
Do not use the charger in a potentially explosive atmosphere and near
corrosive substances.
Never shake, shake or throw the charger.
Protect the charger against rain and moisture
The charger should be stored and used at temperatures between 0°C and
+40°.

5. Safety and maintenance recommendations
5.1. Safety recommendations
Helmet
For safe riding, use a bicycle helmet.
Tires
Inspect the wear of your tires on a regular basis and verify the tire pressure at
least once a month. Tire pressure: 40-65 PSI depending on the weight of the
user.
Wheel-rims
Take care of any risk of damage in case of defective wheel-rims. Swap them
immediately when the rim is worn out.
Important: braking distance increases on humid or slippery ground
Gears
Like the chain, freewheel must be kept clean and well lubricated. If the chain
has become worn and need to be replaced, then it is likely that freewheel will
also have become worn and should also be replaced. Take the chain off
freewheel and rotate it with your hand. If you hear a grinding noise of
freewheel stops suddenly after spinning it, it may need to be adjusted or to be
replaced. The nexus gear does not require any sort of maintenance.
Signaling device
The bike is silent. In order to alert others as to your presence, you have an
approved signaling device located on the left brake lever: Use it only when
absolutely necessary, don’t abuse it!
WARNING: As with all mechanical components, the bicycle is subjected to wear
high stresses. Different materials and components may react to wear or stress
fatigue in different ways. If the design life of a component exceed, it may
suddenly fail possibly causing injuries to the rider.

5.2. Maintenance
Caution:
Bike maintenance and repair require specific skills and appropriate tools. Do
not repair your bike or change any of its settings if you have the slightest doubt
regarding your ability to correctly proceed with such work. Contact your dealer.
Any adjustments or repairs that are not properly done can damage the bike
and lead to accidents resulting in extensive injuries. Use only genuine
replacement parts for safety-critical components.
Cleaning
Always remove the battery when cleaning. Use soapy water or water mixed
with a gentle detergent, and then rinse it with clean water. Make sure that the
controller located behind the battery compartment is not exposed to humidity
as it contains. Electronic components. Do not use a high pressure washer!
Maintenance
Make sure your bike is safe for the environment. Used parts must be disposed
of in appropriate selective sorting recycling bins. A battery which no longer
works must be returned to your dealer so that he may pass it to a recycling
company.
Replacing the rear light batteries: remove the screw to access the batteries.
(It is recommended that you need to replace them every year)
Engine: the engine does not require any sort of maintenance.
Chain:
It is recommended that you lubricate your bike’s 7 speed gearwheels and chain
on a regular basis using appropriate products (ask your dealer for advice).
6. Accessories
Mudguards (Place the mudguard assembly between the stays, make sure the
mudguard bracket holes line up with those in the frame. Tighten all bolts and
screws until snug.)

Helmet, baskets and storage pouch are not provided with the vehicle.
To order these accessories, get in touch with your dealer.
Using only genuine replacement parts for safety-critical components.
Have a pleasant ride!

Warranty
1. The seller grants a 24-month warranty on the purchase of an electric
bicycle from the date of purchase or a 12-month warranty for persons
running a business from the date of purchase.
2. The battery warranty is 12 months from the date of purchase.
3. The basis for acknowledging the complaint during the warranty period is
valid and completed with a warranty card with proof of purchase.
Warranty card not filled or partially filled, (without a bicycle model,
battery number, date of sale, stamp) or seller's signature is invalid.
4. The guarantor within the meaning of this charter is the seller.
5. The user undertakes to carry out a review of the purchased Ecobike bike
after driving from 70 to 120 km. The cost of this review is the
responsibility of the user. Failure to do so will void the guarantee for
mechanical components. Confirmation of the performance of the review
is a fiscal document confirming the performance of the service.
6. The warranty provides the purchaser with a free removal by repairing
physical defects (defects in construction, assembly or material defects
occurring during normal operation).
7. The warranty does not cover the replacement of faulty items.
8. Only service points indicated by the Guarantor are eligible for damage
assessment. The rating is determined by the manufacturer, which is the
same for all users of the equipment.
9. The warranty does not apply to: tires, brake pads, brake discs, centered
wheels, components that have been damaged by mechanical shocks or
damages, paint splashes, crankshaft rupture and wear of light bulbs,
natural chain wear, mode lenses, on the basis of an expert opinion, the
defective parts or components are repaired or replaced under the
warranty.
10. User (Buyer) loses his / her warranty rights if:
•use the bike improperly (jumps, acrobatics, driving, etc.)
•damages the equipment mechanically, improperly stores the
equipment,
•does not lubricate and maintain equipment,
•use improper materials or use equipment not in accordance with the
instructions,
•damage equipment due to a random event (eg traffic accident);
•does not have a fiscal document for the bicycle survey (section 5.)
Table of contents
Other Ecobike Bicycle manuals

