Econ ELA100 User manual

Installation & Operation Manual Proven Quality since 1892
ECON actuator Fig 7907, type ELA80 –3000 www.eriks.com
Rev.23 –August, 2023
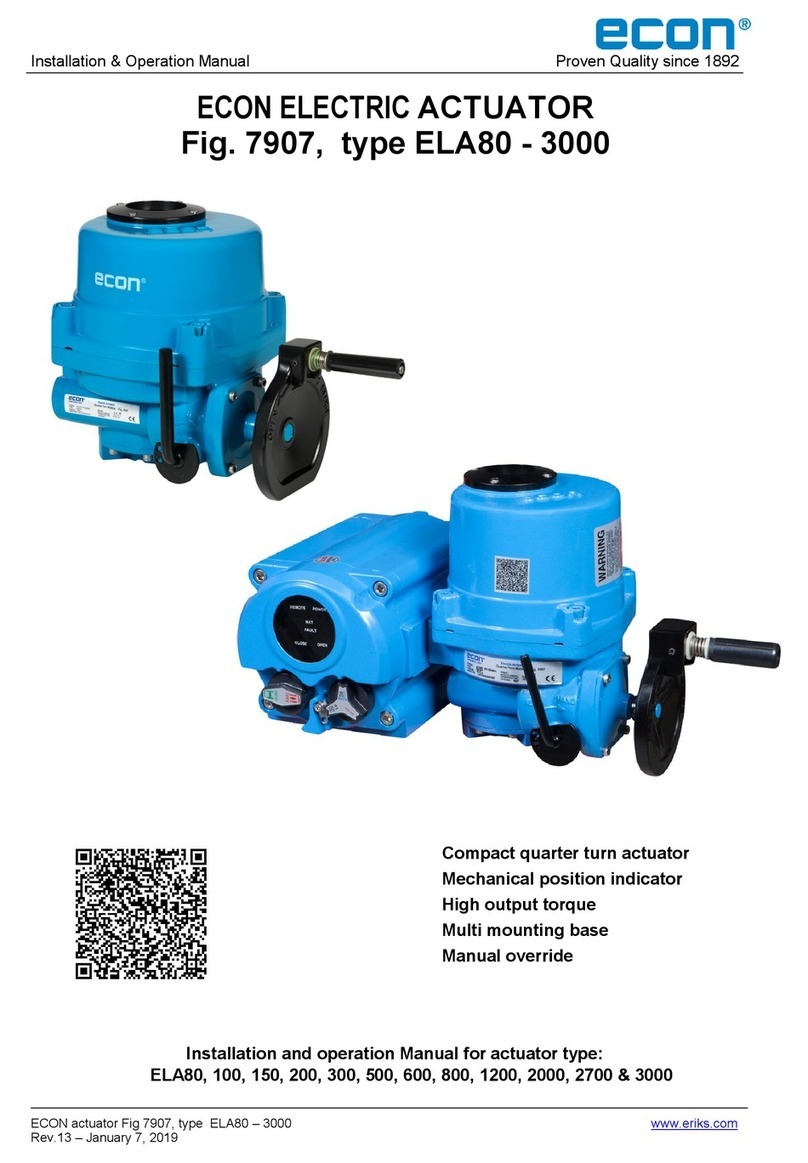
ECON ELECTRIC
ACTUATOR
Fig. 7907, type ELA80 - 3000
Compact quarter turn actuator
Mechanical position indicator
High output torque
Multi mounting base
Manual override
Installation and Operation Manual for actuator type:
ELA80, 100, 150, 200, 300, 500, 600, 800, 1200, 2000, 2700 & 3000o, Republic
:
Scan for manual

Installation & Operation Manual Proven Quality since 1892
ECON actuator Fig. 7907, type ELA80 –3000 www.eriks.com
Rev.23 –August, 2023 1
Contents
1. INTRODUCTION 3
1.1 Purpose 3
1.2 Safety notices 3
2. PRODUCT IDENTIFICATION 4
2.1 Product
Identification 4
2.1.1 Marking 4
2.1.2 Applied Standards 5
2.1.3 Certification 5
2.2 Initial Inspection 5
2.3 Storage 5
3. GENERAL INFORMATION AND FEATURES 6
3.1 General Information 6
3.1.1 Standard Technical Data 6
3.1.2 ELA Actuator Versions and Additional Technical Data 6
3.1.3 ELA-Series Options 7
3.1.4 Duty Cycle 7
3.1.5 Space Heater 7
3.1.6 Hand Wheel and Declutching 7
3.1.7 Lubrication 8
3.2 External Parts for Standard Models 8
3.2.1 ELA80-1200 8
3.2.2 ELA2000 - 3000 (Actuator + Gear Box) 8
3.3 Internal Parts for Standard
Models 9
3.3.1 ELA80-3000 9
4. INSTALLATION 10
4.1 Pre-installation 10
4.1.1 Use in General Service 10
4.1.2 Use in Potentially Explosive Atmosphere 10
4.2 Actuator Mounting 10
4.2.1 Actuator Mounting Base Details (ISO 5211) 11
4.2.2 Actuator Drive Bushing 11
4.3 Limit Switch Setting 12
4.4 Torque Switch Setting 13
4.5 Counter-Clockwise to Close Setting 13
4.6 Mechanical Travel Stop Adjustment 13
4.7 Setting Potentiometer (Optional
) 14
4.8 Current Position Transmitter –CPT (Optional) 14
4.8.1 Standard Features 14
4.8.2 Calibration of Zero and Span –CPT 15
4.9 Proportional Control Units - PCU (Optional) 16
4.9.1 PCU-A Proportional Control Unit Alternating Current 16
4.9.2
PCU-D
Proportional Control Unit Direct Current 17
4.9.3 LED Signal Indication
18
4.9.4 Setting PCU Functions 18
4.9.5 PCU-EB Proportional Control Unit Alternating Current (2020 version) 23
4.10 AC/DC Multi-Board (Optional) 31

Installation & Operation Manual Proven Quality since 1892
ECON actuator Fig. 7907, type ELA80 –3000 www.eriks.com
Rev.23 –August, 2023 2
5. RECHARGEABLE BATTERY PACK –RBP (Optional) 32
5.1 General 32
5.2 Features 33
5.3 Specifications 33
5.4 PCB Layout 34
5.5 Operations 36
6. FIELDBUS COMMUNICATION PROTOCOLS (Optional) 37
6.1 ProfiBus Controler 37
6.1.1 Specification 37
6.2 ModBus Controler 37
6.2.1 Specification 38
7. OPERATION 39
7.1 Electrical Connections and Preliminary Test 39
8. MAINTENANCE 40
8.1 Maintenance 40
8.2 Tools 40
9. TROUBLE SHOOTING 41
10. INSTALLATION AND MAINTENANCE TIPS 42
11. WIRINGDIAGRAMS 43
12. GROUNDING 70

Installation & Operation Manual Proven Quality since 1892
ECON actuator Fig. 7907, type ELA80 –3000 www.eriks.com
Rev.23 –August, 2023 3
1 INTRODUCTION
1.1 Purpose
The purpose of this manual is to introduce and explain the installation, operation and maintenance of ELA-
series electric actuators.
1.2 Safety Notices
This manual contains safety notices and precautions the user must take to reduce the risk of personal
injury and damage to the equipment. The user(s) must read these instructions before the installation,
operation or maintenance of the ELA-series electric actuators.
DANGER: Refers to personal safety and alerts the user for danger and/or injury.
Hazardous or unsafe practice may result in severe injury or death.
WARNING: Refers to personal safety. Alerts the user for potential danger.
Not following warning notices could result in personal injury or death.
CAUTION: Directs the user’s attention to general precautions that,
if not followed, could result in personal injury and/or equipment
damage.
Note: Information in this manual is critical to the user’s understanding of the actuator’s installation
and operation.

Installation & Operation Manual Proven Quality since 1892
ECON actuator Fig. 7907, type ELA80 –3000 www.eriks.com
Rev.23 –August, 2023 4
2 PRODUCT IDENTIFICATION
2.1 Product Identification
The actuator name plate is located on the opposite side of the conduit entry. The name plate
contains the following:
2.1.1 Marking
A) General
•ECON logo (trade mark)
•Electrical power supply
•Model
•Type
•Rated current
•Torque output
•Operation time (seconds)
•Serial number
•Options
B) Ex-version Actuators
•ECON logo (trade mark)
•CE ATEX and IECEx mark
•Model
•Electrical power supply
•Rated current
•Ambient temperature limitation
•Torque output
•Speed / operation time (seconds)
•Conduit entries
•Serialnumberandproductiondate*
•Warning text
•Manufacturer’s address
*The production date is incorporated in the serial number: For example: SER.#: EW21 01- 0001, in which 21 represents
the production year 2021 and 01 represents the production month January.

Installation & Operation Manual Proven Quality since 1892
ECON actuator Fig. 7907, type ELA80 –3000 www.eriks.com
Rev.23 –August, 2023 5
2.1.2 Applied Standards
•IEC60079–0: 2011 (Ed.6 +ISO1), EN60079-0: 2012 +A11
•IEC60079-1: 2014 (Ed.7), EN60079-1: 2014
•IEC60079-31: 2013 9ED.2), EN60079-31: 2014
2.1.3 Certification
Series ELA80 ~ ELA3000
IECEx: IECEx DEK 16.0042X
•Ex db IIB T4 Gb, Ta -20°C to +60°C
•Ex tb IIIC T135°C Db
ATEX: DEKRA 18 ATEX 0098 X
•II 2 G Ex db IIB T4 Gb, Ta -20°C to +60°C
•II 2 D Ex tb IIIC T135°C Db
Notes :
•Sealing devices must be used and shall be fitted directly at the enclosure wall when using conduit.
•Cable glands shall be suitable for the environment and shall be certified as flameproof if used in Zone 1
application.
•Cable glands and conduit to be installed for minimum 6 full threads and the thread length must be 8mm
minimal.
•The temperature of the cable entry is maximum 100
℃
. A heat resistance cable is recommended.
•Ex db and/or Ex tb certified cable glands suitable for 100
℃
must be used.
•Minimal requirements concerning the material and the allowance of LCU fasteners:
oFasteners with yield strength ≥ 210MPa (stainless steel)
oBolts type: M5x0.8, M6x1, M8x1.25, M10x1.5, M12x1.75 (Tolerance Fit 6g).
•Cable connection: Refers to the Appendix I - (Wiring Diagram)
•For cable entries or conduit entries that are not used, user or installer shall close them with certified blanking
elements (stopping plugs) in order to maintain flameproof or dust ignition proof properties of the enclosure.
•Always ground the enclosure in accordance with local electric codes. The most effective enclosure grounding
method is a direct connection to earth ground with minimal impedance. Methods for grounding the enclosure
include:
oInternal ground connection: The internal ground is located in the terminal block #1. Refer to the
enclosed wiring diagram.
oExternal ground connection: The ground lug is located on the centre of cable entries. For more
information, refer to the Appendix II –(Grounding).
•Stainless steel name plates for the flame proof and dust ignition proof versions shall be permanently attached
by rivets.
2.2 Initial Inspection
Upon on the receipt of the actuator, the user should inspect the condition of the product and ensure
that the product specification stated on the name plate matches with the order sheet.
•Remove the packing wrap or wooden box carefully. Inspect the product for any physical
damage that may have occurred during shipment.
•Check the product specification of the received product. If a wrong product has been
supplied, please immediately report this to the distributing company.
2.3 Storage
Actuators must be stored in a clean, cool and dry area. The unit should be stored with the cover
installed and the conduit openings sealed. Storage must be off the floor, covered with a sealed
dust protector.

Installation & Operation Manual Proven Quality since 1892
ECON actuator Fig. 7907, type ELA80 –3000 www.eriks.com
Rev.23 –August, 2023 6
3 GENERAL INFORMATION AND FEATURES
3.1 General Information
ECON ELA-series electric actuators are designed for the operation of industrial valves; e.g. butterfly
valves and ball valves.
The actuator has a torque output range from 80 Nm to 3,000 Nm (708 in-lbs to 26,552 in-lbs).
3.1.1 Standard Technical Data
Enclosure Rated Weatherproof IP67, NEMA 4, 4X & 6
Enclosure High grade aluminium alloy, corrosion coated
Power Supply 115 / 230VAC ±5% 1Ph, 380 / 440 VAC 3Ph 50/60Hz
acc. To IEC 60034-1 24VAC and 24VDC
Duty Type See table in paragraph 3.1.2
Motor Squirrel caged induction motor
Limit Switches 2 x open/close SPDT, 250V AC 16A rating
Auxiliary Limit Switches 2 x open/close SPDT, 250V AC 16A rating (except for ELA80 and ELA100 Ex-versions)
Torque Switches Open/close SPDT, 250VAC 16A Rating (except for ELA80 and ELA100)
Stall Protection Built–in thermal protection
Travel Angle 90 degree +/- 10%
Indicator Continuous position indicator
Manual Override Declutchable manual override
Self-Locking By means of worm gear
Mechanical Travel Stops 2 x external adjustable mechanical travel stops
Space Heater See table in paragraph 3.1.5
Conduit Entries 2x M25 or 2x NPT 3/4 (for “Ex db" versions)
2x M20, 2x M25 or 2x NPT 3/4" with M30 adapter (for ”Ex tb” versions )
Lubrication Grease moly EP
Ambient Temperature
-20°C (-4°F) up to +80°C (176°F)
Ex-versions: -20°C (-4°F) up to +60°C (140°F) (CPT and PCU boards excluded)
External Coating Dry Polyester powder coating
3.1.2 ELA Actuator Versions and Additional Technical Data
Notes:1. Operation time of 115V 1Ph actuators is 112/93 s/90°.
2. 24VAC actuators have 24VDC motors.
3. 115VAC and 230VAC ±5% according to IEC 60034-1
4. Duty ratings: ELA80 and ELA100 in 380 VAC/3Ph –S4-70% and 440 VAC/3Ph - S4-40%.
12VDC
24VDC
(24VAC)2
115VAC3
1 Phase
230VAC3
1 Phase
380VAC
3 Phase
440VAC
3 Phase
Nm (in-lb)
s/90°
(50/60Hz)
A A
A
(50/60Hz)
A
(50/60Hz)
A
(50/60Hz)
A
(50/60Hz)
IEC 60034-1
S4
Number kg (lbs)
ELA80 78 (694) 16/13 6,4 3,7 1,2/1,2 0,7/0,6 0,3/,04 0,6/0,5
70%410 7,5 (16.5)
ELA100 98 (868) 20/17 9,5 4,0 1,2/1,2 0,7/0,6 0,3/0,3 0,6/0,5 70%410 7,5 (16.5)
ELA150 147 (1,302) 25/21 5,3 2,2/2,0 1,0/1,0 0,7/0,5 0,7/0,4 70% 11 16,5 (36.4)
ELA200 196 (1,736) 25/21 6,5 2,3/2,1 1,1/1,1 0,8/0,5 0,7/,04 70% 11 16,5 (36.4)
ELA300 294 (2,604) 31/26 8,6 2,2/2,4 1,0/1,3 0,7/0,6 0,4/,03 70% 13,5 22 (48.5)
ELA500 490 (4,340) 31/26 - 3,3/4,2 1,7/1,9 1,0/0,8 0,8/,05 70% 13,5 23 (50.7)
ELA600 588 (5,208) 31/26 - 3,5/4,4 1,9/2,1 1,1/,09 1,4/0,9 70% 13,5 23 (50.7)
ELA800 785 (6,944) 37/31 - 5,4/5,8 2,6/2,8 1,3/1,0 1,7/1,0 70% 16,5 29 (63.9)
ELA1200 1.177 (10,416) 37/31 - 6,5/6,9 2,9/3.0 1,6/1,2 1,8/1,0 70% 16,5 29 (63.9)
ELA2000 1.961 (17,359) 37/311- 5,4/5,8 3,1/3,0 1,4/1,0 1,7/1,0 50% 49,5 75 (165.3)
ELA2700 2.678 (23,435)
56/471- 6,4/6,7 3,2/3,1 1,6/1,2 1,8/1,0 50% 49,5 75 (165.3)
ELA3000 2.942 (26,039) 112/93 - 6,5/6,9 2,9/3,0 1,6,1,2 1,8/1,0 50% 49,5 75 (165.3)
Weight
Fig. 7907
type
Maximum
torque
Operating
time
Duty cycle
according to
Hand
wheel
turns
Rated current

Installation & Operation Manual Proven Quality since 1892
ECON actuator Fig. 7907, type ELA80 –3000 www.eriks.com
Rev.23 –August, 2023 7
3.1.3 ELA-Series Options
EXD Flameproof enclosure
EXTB Dust ignition proof
WTA Watertight enclosure (IP68 (10m/72hr) Nema 6P
ATS Additional torque switches (SPDT x 2ea, 230VAC –16A)
EXT Rotating extension - 120°, 180° or 270° (90° is standard)
ALS Additional limit switches (SPDT x 2ea, 230VAC –16A)
PIU Potentiometer unit (0~1KΩ)
PCU Proportional control unit (input, output 0~10 VDC, 4~20mA DC)
CPT Current position transmitter (output 4~20mA DC)
ADCM AC/DC Multi-board
SICU Semi-Integral Control Unit (LCU-B + IMS + phase protect indicator) (5W max.)
ICU Intelligent Digital Control Unit (LCU-C + IMS + auto phase discriminator) (5W max.)
PRB ProfiBus (5VDC, 0.1A max., in redundant configuration, multiplied by 2)
MOB ModBus (5VDC, 0.1A max., in redundant configuration, multiplied by 2)
3.1.4 Duty Cycle
Duty cycle rating according IEC60034-1 S4. See table in paragraph 3.1.2 for rating figures.
Exceeding the actuator’s rated duty cycle may cause thermal overload.
Intermittent duty S4
The duty is a sequence of identical cycles which consist of starting time, operation time with constant
load and rest period. The rest period allows the machine to cool down so that thermal equilibrium is
not reached. The relative on-time at S4-25% or S4-50% is limited to 25% and 50% respectively.
3.1.5 Space Heater
Condensation in the actuator is possible due to wide fluctuation of the ambient temperature. The
heater integrated in the control unit prevents this in general.
Ceramic housing with thermostat to prevent over heating with 60℃set temperature.
Heating Element
Self-regulating
Voltage Range (ELA80~100) (based on the power supply)
115V 5W 4.5KΩJ
230V 5W 18KΩJ
24V DC 5W 200ΩJ
12V DC 5W 47ΩJ
Voltage Range (ELA150~3000) (based on the power supply)
115V 10W 2KΩJ
230V 10W 8KΩJ
24V DC 10W 100ΩJ
12V DC 10W 27ΩJ
3.1.6 Hand Wheel and Declutching
ELA-series actuators are provided with a declutchable manual override
system.
•In order to manually operate the actuator, pull the manual
override lever towards the hand-wheel until. It will remain in position.
•Turn the hand-wheel until the valve reaches the required position.
•Turn clockwise to close and counter-clockwise to open.
Note: The manual override lever returns automatically to auto-position
when the actuator is operated electrically.

Installation & Operation Manual Proven Quality since 1892
ECON actuator Fig. 7907, type ELA80 –3000 www.eriks.com
Rev.23 –August, 2023 8
3.1.7 Lubrication
ELA-series are totally enclosed units with a permanent lubricated gear train (Moly EP Grease). Once
installed, lubricating the actuator should not be required. However, periodic preventative maintenance will
extend the operating life time of the actuator.
3.2 External Parts for Standard Models
3.2.1 ELA80 - 1200
3.2.2 ELA2000 - 3000 (Actuator + Gear Box)
Body
Handwheel
Top cover
Lever
Window & Indicator
Mechanical
travel stops
Actuator base and
Driving bushing
Conduit
entries
Body
Gear box including
Driving bushing
Mechanical
travel stops
Handwheel
Top cover
Lever
Window & Indicator
Actuator base

Installation & Operation Manual Proven Quality since 1892
ECON actuator Fig. 7907, type ELA80 –3000 www.eriks.com
Rev.23 –August, 2023 9
3.3 Internal Parts for Standard Models
3.3.1 ELA80 - 3000
Note: ELA80 and ELA100 do not have a torque switch provision!
Motor
Terminal
block
Torque switch
assembly
Capacitor
Limit switch
assembly

Installation & Operation Manual Proven Quality since 1892
ECON actuator Fig. 7907, type ELA80 –3000 www.eriks.com
Rev.23 –August, 2023 10
4 INSTALLATION
4.1 Pre-installation
•Please check if the electric power supply corresponds with your specification and the information on
the actuator type plate.
•Make sure the power supply has been switched off before you start wiring the actuator.
4.1.1 Use in General Service
Verify the actuator’s nameplate to ensure that model number, torque output, operating speed, voltage
and enclosure type are correct before installation or use.
It is important to verify that the torque output of the actuator is appropriate for the torque requirements
of the valve and that the duty cycle of the actuator is appropriate for the intended application.
Make sure the power supply has been switched off before the actuator is being wired.
4.1.2 Use in Potentially Explosive Atmosphere
Model: ELA80 ~ ELA3000
Type of Enclosure : IECEx: Ex db IIB T4 Gb and Ex tb IIIC T135°C Db
ATEX: II 2 G Ex db IIB T4 Gb and II 2 D Ex tb IIIC T135°C Db
Ambient Temperature: -20°C (-4°F) up to +60°C (140°F)
WARNING:
Read this installation, operation and maintenance manual carefully
and completely before attempting to install, operate, or troubleshoot
the ELA actuator.
CAUTION:
Installation, commissioning, maintenance, repairs and modification work
may only be performed by qualified personnel with extensive knowledge on
how to work on explosion-proof electrical equipment.
4.2 Actuator Mounting
Note: Prior to mounting, the part-turn actuator must be checked for any damage.
Damaged parts must be replaced by original spare parts
Mounting is most easily done with the valve shaft pointing vertically upwards. But mounting is also
possible in any other position.
The ELA-series electric actuators are supplied with a female double square drive output. The
ISO5211 bolt patterns are provided for actuator mounting. The actuator drive bush can be replaced or
removed for machining easily.
It is mandatory for the actuator to be firmly secured to a robust mounting bracket or to be mounted
directly to the valves’ISO mounting pad. High tensile bolts or studs with spring locking washers must be
used.
The valve stem must be in line with the actuator output drive to avoid side loads to the shaft. To avoid
backlash play between the actuator, mounting bracket and valve is not allowed.
CAUTION:
Do not attempt to work on your ECON actuator without first shutting off the power supply
Do not attach ropes or hooks to the hand wheel for lifting purposes

Installation & Operation Manual Proven Quality since 1892
ECON actuator Fig. 7907, type ELA80 –3000 www.eriks.com
Rev.23 –August, 2023 11
4.2.1 Actuator Mounting Base Details (ISO 5211)
4-M8TAP
D.P12
P.C.D
Ø
70
(ISO 5211 F07)
ELA80/100
ELA150/200
4-M10TAP D.P15
P.C.D
Ø
102
(ISO 5211 F10)
4-M8TAP
D.P12
P.C.D
Ø
70
(ISO 5211 F07)
4-M12TAP
D.P18
P.C.D
Ø
125
(ISO 5211 F12)
4-M10TAP D.P15
P.C.D
Ø
102
(ISO 5211 F10)
ELA300/500/600 ELA800/1200
4-M12TAP D.P18
P.C.D
Ø
125
(ISO 5211 F12)
4-M16TAP D.P24
P.C.D
Ø
140
(ISO 5211 F14)
4-M20TAP
D
.
P
30
P.C.D Ø
165
(ISO
5211
F
16
)
ELA2000/2700/3000
4.2.2 Actuator Drive Bushing
ELA actuators have a Double Square (star) driving bush, which can be replaced by another dimension to
fit the valve stem. This means that the actuators are suitable for valves with a parallel or diagonal stem
connection. Also drive bushings with a double-D shape or round shape with keyway are available as an
option. Hereunder the ELA-versions with standard connection
and possible double square options can be
found:
Standard Optional
•ELA80 DS 17mm DS 9-11-14-16mm
•ELA100 DS 17mm DS 9-11-14-16mm
•ELA150 DS 17mm DS 11-14-19-22mm
•ELA200 DS 17mm DS 11-14-19-22mm
•ELA300 DS 22mm DS 14-17-19-27mm
•ELA500 DS 27mm DS 14-17-19-27mm
•ELA600 DS 27mm DS 14-17-19-27mm
•ELA800 DS 27mm DS 22mm
•ELA1200 DS 27mm DS 22-30mm
•ELA2000 DS 36mm DS 27-46-55mm
•ELA2000 DS 36mm DS 27-46-55mm
•ELA3000 DS 46mm DS 27-36-55mm
Threaded bolt
holes 4x
Pitch

Installation & Operation Manual Proven Quality since 1892
ECON actuator Fig. 7907, type ELA80 –3000 www.eriks.com
Rev.23 –August, 2023 12
4.3 Limit Switch Setting
•Rotate the hand wheel of the actuator manually to the fully closed position of the valve.
•Use an Allen key, loosen the set screw of the CLOSE limit switch cam
•Rotate the CLOSE cam CW until the limit switch ‘clicks’ (see Figure 1)
•Tighten the set screw with the Allen key
•Manually rotate the hand wheel of the actuator to the fully opened position of the valve
•Use an Allen key to loosen the set screw of the OPEN limit switch cam
•Rotate the OPEN cam CCW until the limit switch ‘clicks’ (see Figure 2)
•Tighten the set screw with the Allen key.
DANGER:
HAZARDOUS VOLTAGE.
Make sure all incoming power is disconnected before setting the limit switches

Installation & Operation Manual Proven Quality since 1892
ECON actuator Fig. 7907, type ELA80 –3000 www.eriks.com
Rev.23 –August, 2023 13
4.4 Torque Switch Setting
The torque spring, which detects the variation of torque during the operation, is installed to prevent
damaging the valve and actuator under overload conditions. If an overload of the actuator occurs, the
torque switch will be activated and the actuator stops immediately.
The torque switches are set by manufacturer on the production site. If re-setting is necessary, please
contact the ECON actuator distributer before setting the torque switch.
CAUTION:
Do not reset the torque switch to a setting higher than the maximum setting
stated by the manufacturer.
4.5 Counter-Clockwise to Close Setting
Standard actuators are normally set to clockwise rotation to close. However, the rotation can be
reversed to counter-clockwise to close by simply reconfiguring the wiring as follows:
•Reverse wiring on the main terminal block: 9 & 10 as well as 11 & 12.
•Adjust the visual indicator to suit the counter-clockwise rotation.
If a PCU card is installed:
•Reverse P1 (orange) and P3 (grey) on the PCU board.
•Move the actuator manually to the half-open position and push the auto-reset button once.
4.6 Mechanical Travel Stop Adjustment
•Loosen both (open and close) travel stopper bolt nuts.
•Operate the actuator manually by turning the hand wheel (the clutch lever must be
switched to “manual” first) to the closed position until the “close” open limit switch is being
activated.
•Tighten the close travel stopper bolt until resistance is felt. (In this position the close travel
stopper bolt should not be able to travel any further).
•Loosen back the close travel stopper bolt by only one turn and tighten the close travel stopper
bolt nut.
•Repeat the same operation for setting of the open travel stopper bolt.
CLOSE TRAVEL
STOPPER BOLT
OPEN TRAVEL
STOPPER BOLT

Installation & Operation Manual Proven Quality since 1892
ECON actuator Fig. 7907, type ELA80 –3000 www.eriks.com
Rev.23 –August, 2023 14
14 | P a g e
4.7 Setting Potentiometer (Optional)
The potentiometer has been calibrated at the factory. However, if re-calibration is required, proceed as
follows:
•Manually rotate the hand wheel of the actuator to the fully closed position.
•While measuring the resistance between P1 (black) and P2 (blue), gently rotate the
Potentiometer Gear until it reaches between 80 - 120 Ω(100 Ω preferred), by using a flat head
screw driver.
•Engage the Potentiometer Gear into the Point Shaft Gear and use an Allen key to fasten the
locking bolt of the Potentiometer Gear.
4.8 Current Position Transmitter –CPT (Optional)
The potentiometer is used for the actuator signal fe
e
db
ac
k
.
It reads a resistance value w h i c h
corresponds with
t
he
current position of the actuator and transfers i t to the CPT
c
ar
d
.
The CPT
indicates the current position of
t
he
actuator throughout the complete stroke by a 4 –20mA output
si
gna
l
.
4.8.1 Standard Features
Model
CPT
Power
230(115) VAC ±5%, 50/60Hz 2VA Max
Output Signal
4~20mA DC
Output Impedance
750Ω Max
Resolution
Min 1/1000
Position Conversion Accuracy
±0.5 ~ ±1.5%
Ambient Temperature
-20°C (-4°F) up to +70C (158°F)
Ambient Humidity
90% RH Max (Non-condensing)
Dielectric Strength
1 s at (Rated VAC x 2 + 1000) x 1.2
(from Input to power ground)
Insulation Resistance
Above 500V DC 30MΩ
Vibration
10g, 0~34Hz
P1
P2
P3

Installation & Operation Manual Proven Quality since 1892
ECON actuator Fig. 7907, type ELA80 –3000 www.eriks.com
Rev.23 –August, 2023 15
4.8.2 Calibration of Zero and Span - CPT
The settings of Zero and Span have been calibrated at the factory. However, if re-calibration is required,
proceed as follows:
•Apply power (or use the manual override) to move the actuator to its fully closed position
(clockwise rotation).
•When the actuator is in the fully closed position, adjust the ZERO close setting on the CPT board
until an output value of 4mA is achieved.
•Apply power (or use the manual override) to move the actuator to its fully open position
(counter- clockwise rotation).
•When the actuator is in the fully open position, adjust the SPAN open setting on the CPT board until
an output value of 20mA is achieved.
Zero dial
Span dial

Installation & Operation Manual Proven Quality since 1892
ECON actuator Fig. 7907, type ELA80 –3000 www.eriks.com
Rev.23 –August, 2023 16
4.9 Proportional Control Unit –PCU (Optional)
The actuators can be equipped with an additional PCU-PCB (Printed Circuit Board). This circuit board
includes a mounting kit and can be installed in any standard open-close actuator. The PCU converts an
open-close actuator into a modulating actuator.
Note: Please be aware that since the year 2020 a second version PCU (VAC) became available. This PCU can
be recognized by the “PCU-EB” marking on the PCB. This PCB has a slightly different setting
instruction, which can be found in paragraph 4.9.5..
4.9.1 PCU-A –Proportional Control Unit Alternating Current
PCU-A (1P and 3P) High performance Controller, using a 10 bit A/D converter and 8 bit
microprocessor technology.
PCU-A Features
Model
PCU-A (1 Phase and 3 Phase)
Power
85 ~ 260 VAC Free Voltage ± 10%, 50/60Hz, Max. 4 VA
Input Signal
4~20mA DC, 1~5V DC, 2~10V DC, 0~5V DC, 0~10V DC
Input Impedance
250Ω
Output Signal
4~20mA DC, 1~5V DC, 2~10V DC, 0~5V DC, 0~10V DC
Output Impedance
250Ω Max
Output Contact
1 (Fault monitor)
Deadtime Adjustment
0.05~7.5 seconds
Deadband Adjustment
0.0625~1mA (0.0625mA + step no. x 0.0625mA, 15 steps total)
Ambient Temperature
-10°C (14°F) up to +70°C (158°F)
Ambient Humidity
90% RH Max (non-condensation)
The factory settings of the PCU card are normally set according to the customer requirements at the
time of order. However, we strongly recommend that input power, signal input selection and DIP switches
are to be verified prior to the actuator start up.
Settings the PCU functions are shown in paragraph 4.9.3 and 4.9.4.
PCU-A 1P
PCU-A 3P

Installation & Operation Manual Proven Quality since 1892
ECON actuator Fig. 7907, type ELA80 –3000 www.eriks.com
Rev.23 –August, 2023 17
4.9.2 PCU-D –Proportional Control Unit Direct Current
PCU-D High Performance Controller, using a
10 bit A/D converter and 8 bit microprocessor
technology
PCU-D Features
Model
PCU-D
Power
24V DC Voltage ±15%, Max. 36V DC
Input Signal
4~20mA DC, 1~5V DC, 2~10V DC, 0~5V DC, 0~10V DC
Input Impedance
250Ω
Output Signal
4~20mA DC, 1~5V DC, 2~10V DC, 0~5V DC, 0~10V DC
Output Impedance
250Ω Max
Deadtime Adjustment
0.05 ~ 7.5 seconds
Deadband Adjustment
0.0625~1mA (0.0625mA + step no. x 0.0625mA, 15 steps total)
Ambient Temperature
-25°C (-13°F) up to +80°C (176°F)
Ambient Humidity
90% RH Max (non-condensation)
The factory settings of the PCU card are normally set according to the customer requirements at the
time of order. However, we strongly recommend that input power, signal input selection and DIP switches
are to be verified prior to the actuator start up.
Settings the PCU functions are shown in paragraph 4.9.3 and 4.9.4.

Installation & Operation Manual Proven Quality since 1892
ECON actuator Fig. 7907, type ELA80 –3000 www.eriks.com
Rev.23 –August, 2023 18
4.9.3 LED Signal Indication
4.9.4 Setting PCU Functions
A) Selecting Input
Signal (SW7 on PCU-A or SW2 on PCU-D)
User can select different types of input signals by adjusting the DIP switches as follows:
4 - 20mA DC
1 - 5V
DC
Input Signal
Switch
2 - 10V DC
0 - 5V DC
0 - 10V DC
60 Hz (not applicable for PCU-D)
50 Hz (not applicable for PCU-D)
Note: If not specified, the factory setting of the input signal is 4 - 20mA.
LED
State
Indication
Blue
On
Power on (auto)
Flickering
Auto calibrating
Green
On
Fully closed
Flickering
Closing
Red
On
Fully open
Flickering
Opening
Yellow
On
Manual mode
Flickering
Fault indication, either:
-no input signal
-wrong input wiring
-wrong PIU setting

Installation & Operation Manual Proven Quality since 1892
ECON actuator Fig. 7907, type ELA80 –3000 www.eriks.com
Rev.23 –August, 2023 19
B) Selecting Output Signal (SW8 on PCU-A or SW3 on PCU-D)
User can select different types of output signals by adjusting the DIP switch as follows:
4 - 20mA
DC
Output Signal
Switch
Input signal switch No. 3
(PCU-A SW7 or
PCU-D SW2) “ON”
0 –10V DC
Input signal switch No. 3
(PCU-A SW7 or
PCU-D SW2) “OFF”
2 –10V DC
Input signal switch No. 3
(PCU-A SW7 or
PCU-D SW2) “ON”
0 –5V DC
Input signal switch No. 3
(PCU-A SW7 or
PCU-D SW2) “OFF”
1 –5V DC
Note 1: If not specified, the factory setting of the output signal is 4 - 20mA.
Note 2: If the ELA150~3000, 115/230VAC actuators only will be operated by open and close
commands on terminal 11 and 12, the following procedure must be followed in order to select
the desired feedback signal:
•Select the output signal by adjusting the DIP switches as mentioned in this paragraph.
•Connect the power supply; Neutral on terminal 5 and Live on terminal 13.
•Make a link between terminal 13 and 14 and connect a multi-meter to terminal 17 and 18.
•Push “auto adjust” (red button on the circuit board) for 2 seconds.
•The actuator will now “auto adjust” itself.
•After the adjusting cycle has stopped, remove the link between 13 and 14.
•Now the actuator van be operated by giving the open and close commands on terminal 11
and 12. The feedback signal will be given on terminal 17 and 18.
•The feedback signal however still needs to be checked and if necessary adjusted. Therefor
measure the voltage or current on terminal 17 and 18, while opening and closing the
actuator. If necessary adjust the potentiometers “zero” and “span” on the bottom of the
circuit board until the output values are correct.
This manual suits for next models
12
Table of contents
Other Econ Controllers manuals
