manuals.online logo
Brands
  1. Home
  2. •
  3. Brands
  4. •
  5. EcoSmart Fire
  6. •
  7. Indoor Fireplace
  8. •
  9. EcoSmart Fire 650DB User manual

EcoSmart Fire 650DB User manual

! WARNINGS:
If the InformatIon In thIs manual Is not followed exactly, a fIre or explosIon
may result causIng property damage, personal Injury or loss of lIfe.
CLEARANCES
AND INSTALLATION
MANUAL
e-NRG bioethanol is the
ONLY fuel to be used in
this appliance.
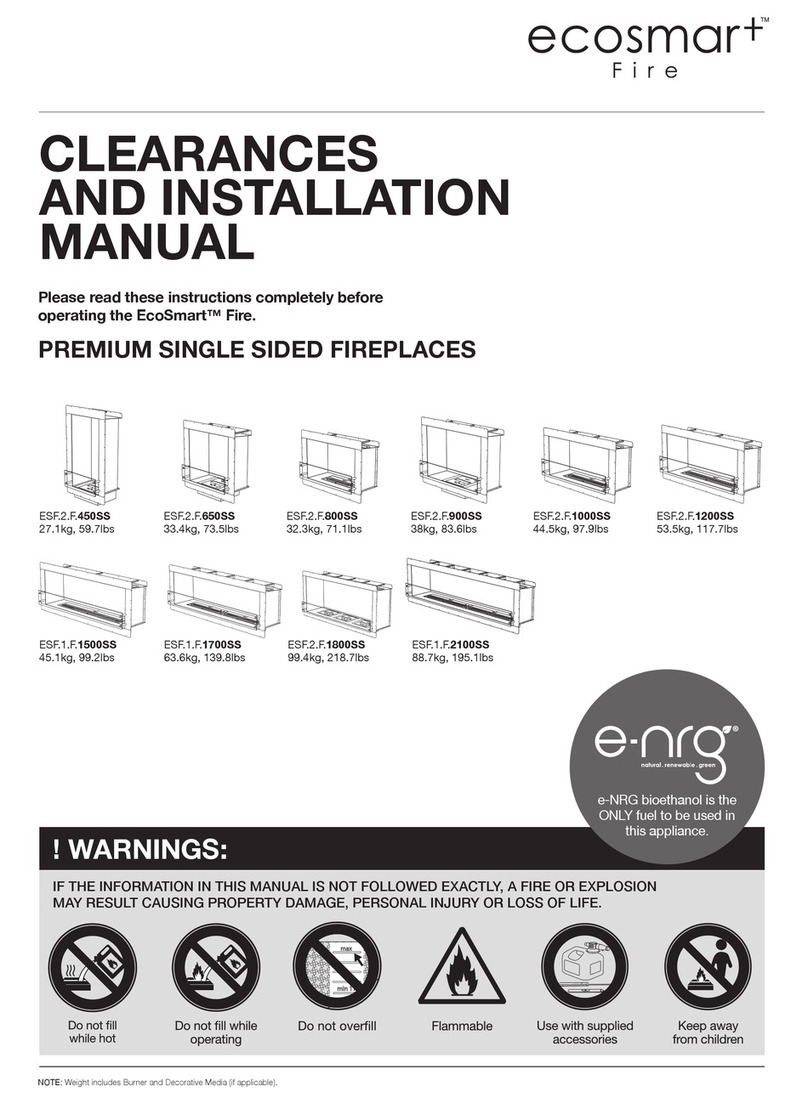
ESF.2.F.900DB
40.3kg, 88.7lbs
ESF.2.F.1000DB
45kg, 99lbs
ESF.2.F.1200DB
54kg, 118.8lbs
ESF.2.F.800DB
33.3kg, 73.3lbs
ESF.2.F.650DB
44.7kg, 98.3lbs
NOTE: Weight includes Burner.
Please read these instructions completely before
operating the EcoSmart™ Fire.
PREMUIM DOUBLE SIDED FIREPLACES
www.ecosmartre.com
ENGLISH
Please read these instructions completely before operating the
EcoSmart™ Fire.
These models are suitable for use both indoors and outdoors.
There are no requirements for side and/or overhead clearances as
spacers are part of the design.
The appliance cavity should include a layer of cement sheeting prior to
inserting the appliance to limit heat transference. Missing heat insulation
can cause overheating, which may result in damages to the material
surrounding the appliance.
DO NOT PACK REQUIRED AIR SPACES (THE SPACE BETWEEN
THE APPLIANCES AND THE SPACER) WITH INSULATION OR
OTHER MATERIALS. THE AIR SPACES ARE NEEDED FOR PROPER
VENTILATION OF THE BURNER.

materials and other sources of ignition at all times. Pay very close


For example trees/branches/curtains/
paper and the like.
Note: Stainless steel will rust or corrode over time if contamination
or debris is not cleaned or removed immediately. When not in use, it
is recommended that you protect your replace from water damage
or corrosion with a protective cover and always use the Burner Lid
included with your model to safeguard the burner.
Fireplace Inserts
Clearances
Fireplace Inserts
Installation
Double-sided appliances cannot be inserted into a one-way cavity wall,
it must be a two-way cavity where the complete glass rear is free from
obstruction. Do not apply pressure or materials to the glass. Double
sided appliances are designed as wall divider inserts. The glass side is
the back in all circumstances. If you do not comply with this installation
instruction the wall could overheat and catch re.
WARNING: Fire hazard. Install double-sided appliance only into a cavity
open on both sides of the wall. Installing into closed cavity can cause
overheating and re.
WARNING: Fire hazard. Do not remove the rear glass panel. Air ow
could push ames out the front or rear of the replace. The glass used
in the EcoSmart™ Fire appliance is toughened glass, which means
it is stronger than normal glass and can withstand high temperature
variations. Importantly, even though it is stronger, toughened glass still has
weaknesses. The corners and sides are specic pressure points where it
is more fragile and can break if care is not taken.
NOTICE: Handle glass with care. If glass is cracked or damaged, do not
use range until glass is replaced.
In the case of breakage, toughened glass will shatter into small crystal-
like pieces, which can cause potential injury and be a choking hazard
for small children. We advise that the glass be handled with special care
and that operation of the product should cease immediately if a fault is
found. Breakage due to mishandling is not covered by warranty.
MAD Design Group is not liable for any damages arising from incorrect
installation.
WARNING: DO NOT OPERATE WITHOUT THE GLASS WINDSCREEN
The appliance must be fully assembled before being operated.


burner.
© Copyright 2004 - 2019 The Fire Company Pty Ltd. All rights reserved. V0119
Fireplace Inserts
Installation
Before getting started, ensure you have
received all necessary parts.
4 x Glass Spigots 4 x Rear Glass Holders
SCREW PIN
MOUNT TUBE
NYLON WASHERS
ASSEMBLED
REAR GLASS
BUSH
M8 HEX SCREW
REAR GLASS
HOLDER
www.ecosmartre.com
ENGLISH
4. Slide the appliance inside the cavity (the bottom
tray can sit directly on top of the cement board).
3. Silicone all internal edges to make the
cavity watertight.
5. Fix the appliance to the structural frame using the existing mount
holes on the appliance ange. Ensure back ange is ush with
vertical wall struts.
Premium Double Sided Fireplace Inserts
Installation
Equipment required:
Power Drill, Screw Driver, Hand Trowel for Plaster, Silicone Gun, Caulk Gun
1. Construct main wall framework leaving an opening as
dimensioned in Table A.
MODEL W
mm [in]
D [MAX]
mm [in]
H
mm [in]
650DB 790 [31.1] 414 [16.3] 876 [34.5]
800DB 940 [37.0] 500 [19.7] 713 [28.1]
900DB 1040 [40.9] 500 [19.7] 876 [34.5]
1000DB 1140 [44.9] 500 [19.7] 713 [28.1]
1200DB 1340 [52.8] 500 [19.7] 713 [28.1]
2. Create a sealed cavity using MAX 8mm [0.3in]re
retardant cement boards xed to the framework.
Table A: Framing Dimensions
Physical model dimensions should be veried against cut out dimensions BEFORE
installation begins to conrm tolerances align.
© Copyright 2004 - 2019 The Fire Company Pty Ltd. All rights reserved. V0119
6. Apply surrounding gyprock/dry wall panels. Fix steel
end beads on all 4 edges (mitre the corners).
7. Plaster all seams and beads then paint to
create the nished wall appearance. 8. Place the burner into position (use leveling screws in
the corner of the tray to achieve a level setting).
10. Install Rear Back Glass using xings
provided.
Premium Double Sided Fireplace Inserts
Installation
25mm
9. Install the Static Wind Screen using the
spigots and washers provided. OPERATE ACCORDING TO THE BURNER
OPERATIONS MANUAL INCLUDED WITH
THE BURNER.
Caution: Leave a 25mm [1in] trim around the appliance to permit
installation of the accompanying wind screens.
www.ecosmartre.com



EcoSmart Fire™ Feuerstelle vollständig durch.
Diese Modelle können sowohl im Innen- wie in Außenbereichen
eingesetzt werden.
Für die Seiten und Decken sind keine Mindestabstände vorgeschrieben,
da die Modelle über Abstandhalter verfügen.
Die Aussparung für die Firebox sollte mit einer Betonverschalung
ausgekleidet sein, um eine mögliche Hitzeübertragung der Firebox zu
begrenzen. Ohne diese Isolationsschicht ist eine Überhitzung möglich,
die eine Beschädigung des die Firebox einschließenden Materials nach
sich ziehen kann.
DIE LUFTABSTANDHALTER SIND FÜR DIE ORDNUNGSGEMÄSSE
BELÜFTUNG NOTWENDIG. FÜLLEN SIE DIESE NICHT MIT
ISOLIERUNG ODER ANDEREN MATERIALIEN.
ACHTUNG: Stellen Sie sicher, dass das Feuer jederzeit in sicherem

positioniert ist. Achten Sie v.a. darauf, dass das Feuer in sicherer


Vorhängen, Papierdekorationen o.Ä.
Bitte beachten Sie: Edelstahl korrodiert bzw. rostet mit der Zeit, falls
Verschmutzungen oder Nässe nicht unmittelbar entfernt werden. Sollte
der Burner, die Feuerstelle nicht in Gebrauch sein, empfehlen wir, dass
Sie Ihr Outdoor Modell gegen Wasserschäden oder Verschmutzungen
mit einem Wetterschutz-Cover schützen. Um die Burner-Brennkammer
zu schützen und vor Verunreinigungen zu bewahren, benutzen Sie auf
jeden Fall die mitgelieferte Burner-Abdeckung.


DEUTSCH
Zweiseitige Fireboxen können nicht in eine Wand mit einer einseitigen
Aussparung eingebaut werden. Die Aussparung muss von beiden Seiten
zugänglich sein, damit die komplette Glasrückwand frei ist. Üben Sie
keinen Druck auf die Glasäche aus und bedecken Sie diese nicht mit
irgendwelchen Materialien. Zweiseitige Fireboxen dienen als Einsätze in
Trennwänden. Die Glasäche ist in jedem Fall die Rückseite. Wenn Sie diese
Installationsanweisungen nicht befolgen, kann die Wand überhitzen und Feuer
fangen.
WARNUNG: Brandgefahr. Installieren Sie zweiseitige Fireboxen nur in
Aussparungen, die von beiden Seiten zugänglich sind. Eine Installation in
einer einseitigen Aussparung kann zu Überhitzung und Feuer führen.
WARNUNG: Brandgefahr. Entfernen Sie niemals die Glasrückwand. Die Flammen
könnten sonst durch den Luftzug an der Vorder- oder Rückseite der Firebox
austreten. Das in der EcoSmart™ Fire Firebox verwendete Glas ist gehärtet, d.
h. es ist dicker als normales Glas und kann höheren Temperaturveränderungen
Stand halten. Doch obwohl es dicker und somit stärker ist, hat auch gehärtetes
Glas Schwachstellen. Die Kanten und Seiten sind spezielle Druckpunkte, an
denen das Glas empndlicher ist und bei Unachtsamkeit zerbrechen kann.
HINWEIS: Gehen Sie vorsichtig mit Glas um. Wenn das Glas bricht oder
beschädigt wird, dürfen Sie die Firebox nicht verwenden, bis das Glas
ausgetauscht wurde.
Wenn gehärtetes Glas bricht, zerspringt es in kleine kristallartige Stücke,
die zu Körperverletzungen und bei kleinen Kindern zur Erstickung führen
können. Es wird empfohlen, sehr achtsam mit dem Glas umzugehen und
den Betrieb des Produkts sofort einzustellen, wenn ein Fehler auftaucht.
Glasbeschädigungen, die durch eine falsche Handhabung entstehen, sind
nicht von der Garantie abgedeckt.
MAD Design Group haftet nicht für Schäden, die durch eine falsche
Installation entstehen.
ACHTUNG: NIEMALS OHNE GLASS-WINDSCHUTZ/WINDSCREEN
ENTZÜNDEN!
Die Firebox muss sicher und vollständig verbaut sein, bevor diese

(oder komplett entfernter) Glas-Windschutz/Windscreen setzt
die Garantie außer Kraft. Der Gebrauch des mitgelieferten
Brenners/Burners ist nur in Verbindung mit der Firebox UND dem
obligatorischen Windschutz zugelassen.


DEUTSCH
Erforderliches Werkzeug: Bohrmaschine, Schraubendreher,
Putzspachtel, Silikon-Spritze, Fugen-Spritze
Vgl. Abbildung auf Seite 4 & 5.
1. Errichten Sie eine Trockbau-Wand-Rahmen-Einheit mit einer
entsprechenden Önung für die Firebox mit der Bemaßung wie in
Tabelle A angegeben.
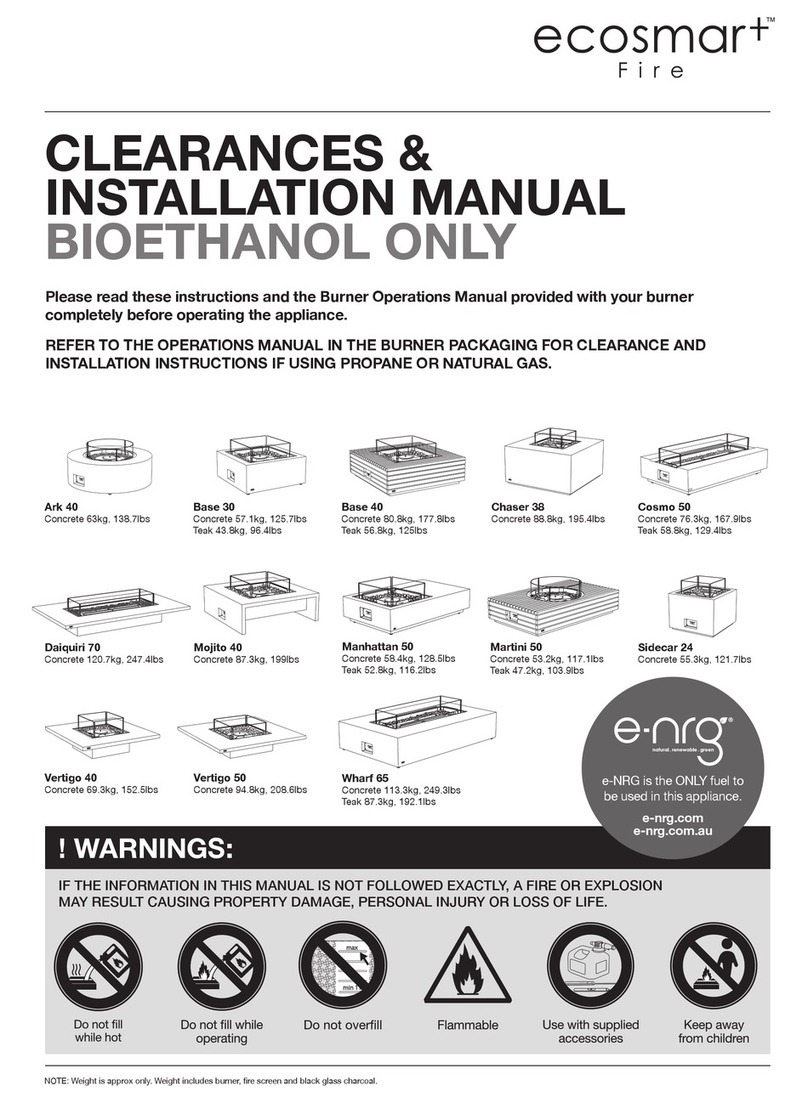
Tabelle A: Rahmen-Maße
Die tatsächlichen Abmessungen und Tolleranzen des Modells sollten gründlich überprüft
werden, BEVOR die Installation beginnt und evtl. Ausschnitte vorgenommen werden.
MODELL B
mm [inch]
T (MAX)
mm [inch]
H
mm [inch]
650DB 790 [31.1] 414 [16.3] 876 [34.5]
800DB 940 [37.0] 500 [19.7] 713 [28.1]
900DB 1040 [40.9] 500 [19.7] 876 [34.5]
1000DB 1140 [44.9] 500 [19.7] 713 [28.1]
1200DB 1340 [52.8] 500 [19.7] 713 [28.1]
2. Kleiden Sie die Aussparung mit einer fest verschraubten
feuerdämmenden Betonverschalung von MAX 8mm [0.3 inch]
Stärke aus.
3. Dichten Sie alle innenliegenden Kanten der Verschalung mit Silikon
ab.
4. Schieben Sie die Firebox in die Verschalung (die Bodenwanne kann
direkt auf der Betonschalung platziert werden).
5. Fixieren Sie die Firebox durch die vorhandenen Schraubönungen
des Rahmens an der Trockenbau-Wand. Stellen Sie sicher, dass der
hintere Rahmen der Firebox plan zu den vertikalen Wand-Stützen
verläuft.
6. Befestigen Sie die umlaufenden Trockenbau-Panelen über dem
Rahmen der Firebox. Fixieren Sie Stahlprole an allen vier Kanten
(gehren Sie die Ecken).
ACHTUNG: Lassen Sie auf jeden Fall einen Rand von mind. 25mm
[1 inch] zwischen Firebox und Panelen oen, um die Installation des
Glas-Windscreens zu ermöglichen.
7. Verputzen Sie bündig alle Kanten und Panele. Anschließend
gestalten Sie die Trockenbau-Wand im gewünschten Design.
8. Platzieren Sie den Brenner in der Firebox (benutzen Sie die
Stelleschrauben in den Ecken der Sicherheitswanne, um den
Brenner waagrecht auszurichten).
9. Befestigen Sie den Glas-Windscreen mit Hilfe der beiliegenden
Schraub-Zylinder und –Bolzen.
10. Befestigen Sie das Glas auf der Rückseite der Firebox mit Hilfe des
beiliegenden Befestigungs-Equipments.
NEHMEN SIE DEN BRENNER ENTSPRECHEND DER
BEDIENUNGS- UND INSTALLATIONS-ANLEITUNG, DIE JEDEM
BRENNER BEIGEFÜGT IST, IN BETRIEB.
ZWEISEITIG GEÖFFNETE FIREBOX-EINSÄTZE
Bevor Sie beginnen, stellen Sie sicher, dass alle benötigten Teile
vorliegen.
4 x Glas-Halterungen
SCHRAUB-BOLZEN
SCHRAUB-ZYLINDER
NYLON-UNTERLEGSCHEIBEN
4x Glas-Halterungen für die Rückseite
VORMONTIERT
RÜCKSEITEN-GLAS-
HÜLSE
M8 HEX SCHRAUBE
RÜCKSEITEN-
GLAS-HALTER
© Copyright 2004 - 2019 MAD Design Group. Alle Rechte vorbehalten. V0719
www.ecosmartre.com
FRANÇAIS
Veuillez lire ces instructions dans leur intégralité avant de faire
fonctionner le système EcoSmart™ Fire.
Ces modèles sont adaptés pour une utilisation a l’extérieur et à
l’intérieur.
Les modèles de la Gamme Rénovation ne requièrent aucun
dégagement de sécurité dans la mesure où les guides d’espacement
sont intégrés au produit ni.
La cavité pour l’Insert devrait inclure une couche de brociment avant
d’insérer l’unité an de limiter le transfert de chaleur. Le manque
d’isolation peut causer une surchaue, ce qui peut entraîner des
dommages aux matériaux autour de l’insert de cheminée.
NE PAS BLOQUER OU REMPLIR CES ESPACES VIDES, entre le
Brûleur et les espaceurs, AVEC DES MATÉRIAUX ISOLANTS OU TOUT
AUTRE MATÉRIAU. CES VIDES D’AIR SONT NÉCESSAIRES À LA
BONNE VENTILATION DU SYSTÈME.
ATTENTION : Assurez-vous que votre cheminée est constamment


/ choses susceptibles de se déplacer en raison du vent et des

papiers, etc.
Remarque : L’acier inoxydable rouillera ou corrodera au l du temps
en cas de contamination ou de débris n’ayant pas été nettoyés ou
supprimés immédiatement. Il est recommandé de protéger votre foyer
des dégâts d’eau ou de corrosion avec une housse de protection et en
utilisant toujours le couvercle du brûleur fourni avec votre modèle an
de préserver le brûleur.
Dégagements pour Insert de Cheminée

Installation pour Insert de Cheminée

Les inserts cheminée à double ouverture ne peuvent pas être installés dans
la cavité d’un mur avec ouverture unique; il leur faut une cavité avec deux
ouvertures où la vitre arrière sera libre de toute obstruction. Ne pas exercer
de pression ou apposer un matériau sur la vitre. Les inserts cheminée à
double ouverture sont conçus pour être des séparateurs de pièces. La face
vitrée est toujours l’arrière. Tout manquement à l’application des conditions
d’installation peut causer la surchaue et l’embrasement du mur.
AVERTISSEMENT: Risque d’incendie. Installer l’insert cheminée à double
ouverture uniquement dans la cavité d’un mur avec une ouverture de chaque
côté du mur. L’installation dans une cavité à ouverture unique peut causer
surchaue et incendie.
AVERTISSEMENT: Risque d’incendie. Ne pas retirer le panneau de verre de
l’arrière. L’appel d’air pourrait faire déborder les ammes à l’avant ou à l’arrière
de l’insert cheminée. Le fond en verre de l’insert EcoSmart™ est fait d’un verre
trempé, qui, plus résistant que le verre ordinaire, peut supporter des variations
de températures très élevées. Toutefois, il est bon de noter que bien que plus
résistant, le verre trempé a ses faiblesses. Les coins et bordures sont des
points de pression particuliers, c’est là que le verre est le plus fragile et peut se
briser si l’on n’y prend garde.
NOTE: Manipuler les vitres avec précaution. Si le verre est ssuré ou abîmé,
ne pas utiliser le système jusqu’à ce que la vitre soit remplacée.
En cas de bris de la vitre, le verre trempé éclatera en petits cristaux
susceptibles de causer des blessures et posant un risque d’étouement
pour les jeunes enfants. Nous vous recommandons d’être particulièrement
vigilants lors de la manipulation et de cesser immédiatement d’utiliser
le système dès qu’un défaut est noté. La casse due à une mauvaise
manipulation n’est pas couverte par la garantie.
MAD Design Group décline toute responsabilité quant aux dommages
résultant d’une mauvaise installation.
ATTENTION: NE PAS FAIRE FONCTIONNER SANS LE VERRE DE
PROTECTION


garantie et le produit ne sera pas approuvé pour une utilisation
avec le brûleur inclus.
FRANÇAIS
Installation pour Insert de Cheminée

Matériel nécessaire: Perceuse, Tournevis, Truelle pour le plâtre, Pistolet
à silicone, Pistolet à calfeutrer.
Reportez-vous à la page 4-5 pour les illustrations.
1. Construire le cadre de la paroi principale en laissant une ouverture
en respectant les dimensions dans le tableau A.
Tableau A : Les Dimensions de la paroi/cavité.
Les dimensions du modèle réel devraient être comparées avec les dimensions de la
découpe AVANT l’installation nale an de conrmer l’alignement parfait.
MODÈLE L
mm [in]
P (MAX)
mm [in]
H
mm [in]
650DB 790 [31.1] 414 [16.3] 876 [34.5]
800DB 940 [37.0] 500 [19.7] 713 [28.1]
900DB 1040 [40.9] 500 [19.7] 876 [34.5]
1000DB 1140 [44.9] 500 [19.7] 713 [28.1]
1200DB 1340 [52.8] 500 [19.7] 713 [28.1]
2. Créer une cavité scellée en utilisant des panneaux de ciment xés
au cadre. MAX 8mm [0.3in].
3. Siliconer tous les bords internes pour rendre la cavité étanche.
4. Faites glisser la chambre de combustion à l’intérieur de la cavité
(le plateau inférieur peut s’asseoir directement sur le dessus de la
planche de ciment).
5. Fixer l’appareil à la charpente en utilisant les trous de montage
existants sur la bride de l’insert de cheminée. Assurez vous que
l’aile arrière est alignée avec les paroies de support.
6. Appliquer autour du foyer le Placoplatre / Panneaux muraux.
Fixer les manchons d’extrémité en acier sur les 4 bords
ATTENTION: Laisser un espace de 25mm [1 pouce] autour de
l’appareil pour permettre l’installation du pare-feu.
7. Plâtrer tous les bords et les coins puis peindre pour créer
l’apparence nale du mur.
8. Placez le brûleur en position (utiliser la vis de nivellement dans
chaque coin du caisson étanche pour obtenir un réglage de niveau).
9. Installez le pare-feu statique en utilisant les pieds et rondelles
fournies.
10. Installez la vitre arrière en utilisant les xations fournies.

FOURNIS AVEC LE BRÛLEUR.
Avant de commencer, assurez-vous que vous avez reçu toutes les
pièces nécessaires.
4 x Pieds de soutien
VIS
PIED/TUBE
RONDELLES EN NYLON
4 x Support de Vitre Arrière
ASSEMBLÉ
DOUILLE DE
VITRE ARRIÈRE
VIS HEXAGONALE M8
SUPPORT DE
VITRE ARRIÈRE
© Copyright 2004 - 2019 MAD Design Group. Tous droits résevés. V0719
www.ecosmartre.com
中文
使用EcoSmart®壁炉前请认真阅读本操作指南。
户外壁炉同样适合于室内使用。
无需留有侧面和/或过热间隙,两侧及顶部的隔板属于设计的一部分。
在壁炉受热之前需要在火箱壁炉四周安装一层防火板。否则直接燃烧会
导致壁炉四周温度过热,可能损害壁炉周围的材料。
警告!不要用绝缘或其他材料把火炉再包裹起来,且需要一些空间以确
保火炉有一个最佳的通风状态。且应留有空气空间以确保火炉的最佳通
风。
警告:确保壁炉总是远离易燃材料和明火。小心由于风造成火的摆动而
可能使火接近例如树/树枝/窗帘/纸等可燃物。
注:如果户外火炉长时间不被清洗或者立刻被移动的话,随着时间的推
移,不锈钢将会生锈或被腐蚀,建议壁炉不使用时,保护壁炉不要被水
损坏或腐蚀,总是使用防护罩罩在燃烧器上。
双面火炉不能插入到一个空心墙内,其必须被插入到一个双向腔里,该
双向腔的玻璃后端应畅通无阻。不要在玻璃上施加压力或放置材料。双
面火炉旨在作为一个墙分离插件。在所有情况下玻璃侧都应位于后面。
如果不能遵守该安装说明的话,可能会导致过热甚至火灾现象。
警告:火灾的危险。只能把双面火炉安装在墙壁两侧上的开放腔室里。
如果安装在封闭腔室里可能会导致过热甚至火灾现象。
警告:火灾的危险。不要拆除背板玻璃。否则空气流可能会把烟雾从火
炉的前端或后端吹出去。EcoSmart®壁炉内配备的玻璃为钢化玻璃,因
此强度比普通玻璃高,并能承受高温变化。更需要注意的是,即使该玻
璃的强度比较高,但仍然是比较脆弱的。拐角和侧边为敏感压力点,因
此这些地方比较脆弱且如果不小心的话可能会打破它们。
注意:使用玻璃时要非常小心。如果玻璃破裂或损坏的话,则不要使用
它们,要更换新玻璃。
在破损的情况下,钢化玻璃粉碎成小水晶般的小块,这可能会导致潜在
伤害或使较小的儿童发生窒息的危险。我们建议处理玻璃时要非常小
心。如果发现故障应立即停止操作。由于处理不当而导致的破损不再保
修范围内。
The Fire Company有限公司不对由于不正确安装所导致的损坏负责。
注意:使用前请先安装玻璃。
使用前,请安装好所有壁炉的配件。移除玻璃或玻璃组装不当将会影响
壁炉的正当使用,构成安全隐患,同时产品的保修将不涵盖由此造成的
损失。
内嵌式壁炉
预留间隙要求
内嵌式壁炉
安装指导
中文
双向开放式壁炉
所需设备:电钻,螺丝刀,石膏手镘刀,硅胶枪,填缝枪
参阅 4-5 页的插图
1. 表A. 承重墙框架构建预留开口尺寸
 表A:框架尺寸
必须在安装底托前确认好开槽尺寸和底托之间的公差一致。
系列 宽
毫米 [英寸]
深(最大)
毫米 [英寸]
高
毫米 [英寸]
650DB 790 [31.1] 414 [16.3] 876 [34.5]
800DB 940 [37.0] 500 [19.7] 713 [28.1]
900DB 1040 [40.9] 500 [19.7] 876 [34.5]
1000DB 1140 [44.9] 500 [19.7] 713 [28.1]
1200DB 1340 [52.8] 500 [19.7] 713 [28.1]
2. 请使用最厚厚度为8mm [0.3英寸] 的阻燃板安装至壁炉框架内,以起
到密封框架内腔体,隔离防火的作用。
3. 使用硅胶密封所有内部边缘, 请确保不渗水
4. 把火箱放入腔体内(火箱底座可以直接放在上面的水泥板上)
5. 使用现有的壁炉安装孔固定火箱到腔室内。 后翼缘与垂直墙杆要确
保平行(垂直)。
6. 粉刷周围的石膏板。在边框固定四个边条 (斜切角)。
注意:在壁炉四周预留一个25毫米[ 1英寸]的边用於安装防火屏。
7. 先粉刷所有的接缝和条边,然后用油漆刷好墙面。
8. 把火炉放入正确的位置(在底托的角落用调平螺丝来达到一个水平设
置)
9. 请使用标配螺丝钉, 安装管和垫圈安装防火屏。
10. 用提供的固定配件去安装壁炉背面玻璃
壁炉安装(包含燃烧器)请根据安装操作手册。
开始操作前,请确保您已收到所有必需的零件。
4x玻璃龙头
螺丝钉
安装管
尼龙垫圈
4×后玻璃支架
預组配件
后玻璃衬套
M8六角螺钉
后玻璃支架
©版权所有2004–2019 The Fire Company有限公司保留所有权利。V0719
www.ecosmartre.com
ITALIANO
Distanze caminetti
a inserimento
Installazione caminetti
a inserimento
Gli apparecchi a doppia facciata non possono essere inseriti in un
muro a cavità unidirezionale, deve essere una cavità a due vie in cui il
retro di vetro completo è libero da ostruzioni. Non applicare pressione
o materiali sul vetro. Gli apparecchi a doppia facciata sono progettati
come inserti divisori per pareti. Il lato di vetro è la schiena in tutte le
circostanze. Se non si è conformi a queste istruzioni il muro potrebbe
surriscaldarsi e prendere fuoco.
AVVERTENZA: pericolo d’incendio. Installare l’apparecchio a
doppia facciata solo in una cavità aperta su entrambi i lati del muro.
L’installazione nella cavità chiusa può causare surriscaldamento e
fuoco.
AVVERTENZA: pericolo d’incendio.
Non rimuovere il pannello posteriore di vetro. Flusso d’aria potrebbe
spingere le amme fuori dalla parte anteriore o posteriore del camino.
Il vetro usato nell’apparecchio EcoSmart ™ Fire è un vetro temperato,
il che signica è più resistente del normale e può resistere alle alte
temperature. È importante sottolineare che, anche se è più forte, il vetro
temprato è fragile. Gli angoli e i lati sono punti di pressione specici dove
è più fragile e può rompersi se non si presta attenzione.
AVVISO: maneggiare il vetro con cura. Se il vetro è incrinato o
danneggiato, non utilizzare no alla sostituzione del vetro.
In caso di rottura, il vetro temprato si frantumerà in piccoli pezzi, che
possono causare lesioni potenziali e causare il soocamento per i
bambini piccoli. Si consiglia di maneggiare il vetro con cura e che
l’operazione del prodotto dovrebbe cessare immediatamente in caso
di guasto. Le rotture dovute a maltrattamenti non sono coperte da
garanzia.
MAD Design Group non è responsabile per eventuali danni provocati da
un’ installazione sbagliata.
AVVERTENZA: NON UTILIZZARE SENZA IL VETRO WINDSCREEN.

utilizzato. La mancata installazione (o rimozione) dei pannelli in vetro



EcoSmart™ Fire.
Questi modelli sono adatti per uso interno ed esterno.
Non ci sono requisiti specici e / o autorizzazioni generali ambientali
come i distanziatori fanno parte del design.
La cavità dell’apparecchio deve includere uno strato di fogli di cemento
prima di inserire l’apparecchio, per limitare il trasferimento di calore.
La mancanza di isolamento termico può causare surriscaldamento e
causare danni a materiali circostanti.
NON CONFEZIONARE SPAZI D’ARIA RICHIESTI (LO SPAZIO TRA
GLI ELETTRODOMESTICI E IL DISTANZIATORE) CON ISOLAMENTO
O ALTRI MATERIALI. GLI SPAZI D’ARIA SONO NECESSARI PER
UN’APPROPRIATA VENTILAZIONE DEL BRUCIATORE.
AVVERTENZA: assicurarsi che il fuoco sia posizionato lontano da

Prestare molta attenzione a posizionare il fuoco lontano da oggetti

/ rami / tende / carta e simili.
Nota: l’acciaio inossidabile può mostrare tracce di corrosione nel tempo
se la contaminazione o detriti non vengono puliti immediatamente.
Quando non è in uso, si consiglia di proteggere il camino da danni
causati dall’acqua o dalla corrosione con una copertura protettiva e
utilizzare sempre il cappuccio del bruciatore incluso nel modello per
proteggerlo.
ITALIANO
Attrezzatura richiesta: Trapano elettrico, cacciavite, spatola a mano per
intonaco, pistola silicone.
Vedere foto pagine 4 & 5.
1. Costruisci la struttura della parete principale lasciando un’apertura
come dimensionato nella Tabella A.
 
Le dimensioni del modello devono essere vericate rispetto alle dimensioni tagliate
PRIMA che l’installazione inizi confermare le tolleranze allineate
Modello L
mm [in]
P [MAX]
mm [in]
A
mm [in]
650DB 790 [31.1] 414 [16.3] 876 [34.5]
800DB 940 [37.0] 500 [19.7] 713 [28.1]
900DB 1040 [40.9] 500 [19.7] 876 [34.5]
1000DB 1140 [44.9] 500 [19.7] 713 [28.1]
1200DB 1340 [52.8] 500 [19.7] 713 [28.1]
2. Creare una cavità sigillata usando MAX 8mm [0.3in] pannelli di
cemento ignifughi ssati al telaio.
3. Siliconare tutti i bordi interni per rendere una cavità a tenuta stagna.
4. Far scorrere l’apparecchio all’interno della cavità (il vassoio
sottostante può sedersi direttamente sulla parte superiore del
pannello di cemento).
5. Fissare l’apparecchio al telaio portante utilizzando il supporto
esistente sulla angia dell’apparecchio. Assicurarsi che la angia
posteriore sia parallelo contro la parete.
6. Applicare i pannelli gyprock / cartongesso circostanti. Fissare le
estremità in acciaio su tutti e 4 i bordi (gli angoli).
Attenzione: lasciare un ritaglio di 25 mm attorno all’apparecchio per
consentire l’installazione degli schermi anti vento.
7. Intonacare tutte le fessure e dipingi per creare l’aspetto del muro
nito.
8. Metti il bruciatore in posizione (usare le viti di livellamento nell’
angolo del vassoio per ottenere un’impostazione livellata).
9. Installare il vetro statico usando gli spigot e le rondelle fornite.
10. Installare il vetro posteriore posteriore usando i ssaggi forniti.
OPERARE IL BRUCIATORE SECONDO IL MANUALE DELLE
OPERAZIONI INCLUSO CON IL BRUCIATORE.
CAMINETTI PREMIUM A DOPPIA FACCIATA
Prima di iniziare, assicurati di aver
ricevuto tutte le parti necessarie.
4x “Spigots” per il vetro
CHIODO PER AVVITARE
TUBO MONTANTE
RONDELLE DI NYLON
4x supporti posteriori del vetro
ASSEMBLAGGIO
BOCCOLA DEL VETRO
POSTERIORE
M8 VITE ESAGONALE
SUPPORTO
POSTERIORE
DEL VETRO
© Proprietà limitata 2004 - 2019 MAD Design Group. Tutti i diritti riservati. V0719
Installazione caminetti
a inserimento
www.ecosmartre.com
ESPAÑOL
Chimeneas Premium de Doble Cara
Inserciones Encastrables
Por favor, lea las instrucciones completamente antes de utilizar el
EcoSmart™ Fire.
Estos modelos son apropiados para su uso tanto en interior como en
exterior.
No hay requerimientos especiales para distancias mínimas laterales y/o
superiores ya que los separadores son parte del diseño.
La cavidad para la rebox debe incluir una capa de lámina de cemento
antes de insertar la rebox para limitar la transferencia de calor. Falta de
aislamiento térmico puede causar sobrecalentamiento, que puede resultar
en daños al material que rodea la rebox.
NO CUBRIR LOS ESPACIOS DE AIREACIÓN REQUERIDOS (EL
ESPACIO ENTRE EL ENCASTRE Y EL SEPARADOR) CON AISLANTE
U OTROS MATERIALES. LOS ESPACIOS LLENOS DE AIRE SON
NECESARIOS PARA UNA ADECUADA VENTILACIÓN DEL QUEMADOR.
PRECAUCIÓN: Asegúrese de que su chimenea esté situada lejos de


cosas que puedan moverse como resultado del viento o corrientes.
Por ejemplo árboles/ramas/cortinas/papel y similares.
Nota: El acero inoxidable puede mostrar restos de corrosión con el
tiempo si la contaminación o restos no son limpiados inmediatamente.
Cuando no esté en uso, es recomendable que proteja su chimenea
de daños producidos por el agua o la corrosión con una cubierta
protectora y use siempre la tapa del quemador incluida en su modelo
para salvaguardarlo.
Chimeneas Premium de Doble Cara
Gama Encastrables
Los encastres con apertura doble, por ambos lados, no pueden ser
insertados en una cavidad de una sola apertura, han de ser instalados
siempre en una pared con apertura por ambos lados donde el cristal
trasero esté libre de obstrucciones. No aplicar presión sobre el cristal.
Estos encastres están diseñados como divisores de estancias. El
lado de cristal completo es la parte trasera siempre, en cualquier
circunstancia. Si no se cumplen estas normas la pared podría
sobrecalentarse y arder.
PRECAUCIÓN: Peligro de incendio. Instale siempre los encastres
de doble cara en cavidades abiertas por ambos lados de la pared.
Instalarlos en cavidades cerradas por un lado puede provocar
sobrecalentamiento y fuego.
PRECAUCIÓN: Peligro de incendio. No retirar el cristal trasero. El ujo
de aire podría empujar las llamas fuera de los límites de la chimenea.
El vidrio utilizado en el aparato chimenea es un vidrio fortalecido mas
solido que un vidrio normal y que puede soportar grandes variaciones
de temperatura. Aunque sea fortalecido, el vidrio puede fallar. Los
rincones y lados tienen puntos de presión especícos mas frágiles y
que pueden romper en caso de mala utilización.
ATENCIÓN: Maneje el cristal con cuidado. Si el cristal se agrieta o
rompe, no utilice la chimenea hasta que el cristal sea sustituido.
En caso de que el vidrio fortalecido se rompa, crearía pequeños
pedazos de cristal que pueden provocar heridas y atragantarse los
niños. Se recomienda manipular vidrio con precaución y apagar
inmediatamente el funcionamiento del aparato si hay un defecto.
La garantía no cobra rompimientos provocados por manipulación
inadecuada.
MAD Design Group no es responsable por los daños causados por una
instalación incorrecta.
PRECAUCIÓN: NO UTILICE SIN EL CRISTAL PROTECTOR
“WINDSCREEN”
El aparato tiene que estar completamente montado antes de ponerse
en funcionamiento. En caso de no instalar (o retirar) los paneles de
cristal, se anulará la garantía y el producto perderá su aprobación para
ser utilizado con el quemador.
ESPAÑOL
Chimeneas Premium de Doble Cara
Inserciones Encastrables
Herramientas Requeridas: Taladro eléctrico, destornillador, Mano
allanadora de yeso, Pistola de silicona, Pistola para calafatear.
Consulte la página 4 & 5 para las ilustraciones.
1. Construye el marco de la pared principal dejando una abertura
dimensionada como en la Tabla A.
Tabla A: Dimensiones Enmarcado
Las dimensiones físicas del modelo deberán ser vericadas con las dimensiones de corte
antes de.
MODELO AN
mm [in]
L (MAX)
mm [in]
A
mm [in]
650DB 790 [31.1] 414 [16.3] 876 [34.5]
800DB 940 [37.0] 500 [19.7] 713 [28.1]
900DB 1040 [40.9] 500 [19.7] 876 [34.5]
1000DB 1140 [44.9] 500 [19.7] 713 [28.1]
1200DB 1340 [52.8] 500 [19.7] 713 [28.1]
2. Crear una cavidad sellada usando 8mm [0.3in] tableros de cemento
MÁXIMO ignífugas jos al marco.
3. Silicona todos los bordes internos para hacer la cavidad estanco.
4. Deslice la caja de fuego dentro de la cavidad (la bandeja inferior
puede sentarse directamente en la parte superior de la placa de
cemento).
5. Fije la caja de fuego al marco estructural utilizando los agujeros de
montaje existentes en la brida de la caja de fuego. Asegúrese de
que la brida de espalda es a ras de pared los puntales verticales.
6. Aplique gyprock circundante o paneles de la pared secos. Fije
perlas de acero nales en los 4 bordes (inglete las esquinas).
Precaución: Deje una 25 mm [1 pulgada] recorte alrededor de la
caja de fuego para permitir la instalación de las pantallas de viento
que acompañan.
7. Escayola todas las costuras y los granos luego pinte para crear la
apariencia de la pared terminada.
8. Coloque el quemador en su posición (Use tornillos de nivelación en
las esquinas de la bandeja para lograr un ajuste de nivel).
9. Instale la pantalla estática de viento utilizando los grifos y las
arandelas suministrados.
10. Instalar trasera de cristal trasera utilizando jaciones previstas.
SIEMPRE USE DE ACUERDO CON EL MANUAL OPERACIONAL,
INCLUIDO CON EL QUEMADOR.
Antes de empezar, asegúrese de que ha recibido todas las piezas
necesarias.
4 x Espitas de Vidrio
TORNILLO PERNO
TUBO DE MONTAJE
ARANDELAS DE NAILON
4 x Titulares de Vidrio Trasero
ARMAR
TRASERA DE CRISTAL
DE BUSH
M8 TORNILLO HEXAGONAL
TRASERA
DE CRISTAL
TITULAR
© Copyright 2004 - 2019 MAD Design Group. Reservados todos los derechos. V0719
MAD Design Group
Showrooms 3 & 4, 40-42 O’Riordan Street
Alexandria NSW 2015 Australia
Tel: +61 2 9997 3050 Email: [email protected]
reV0719

This manual suits for next models

4

Other EcoSmart Fire Indoor Fireplace manuals

EcoSmart Fire Base User manual

EcoSmart Fire

EcoSmart Fire Base User manual

EcoSmart Fire Flex Series User manual

EcoSmart Fire

EcoSmart Fire Flex Series User manual

EcoSmart Fire Pillar Series User manual

EcoSmart Fire

EcoSmart Fire Pillar Series User manual

EcoSmart Fire Lighthouse Series User manual

EcoSmart Fire

EcoSmart Fire Lighthouse Series User manual

EcoSmart Fire BK Series User manual

EcoSmart Fire

EcoSmart Fire BK Series User manual

EcoSmart Fire Round 20 User manual

EcoSmart Fire

EcoSmart Fire Round 20 User manual

EcoSmart Fire 450S User manual

EcoSmart Fire

EcoSmart Fire 450S User manual

EcoSmart Fire ESF.2.O.Ark 40 User manual

EcoSmart Fire

EcoSmart Fire ESF.2.O.Ark 40 User manual

EcoSmart Fire CV Series User manual

EcoSmart Fire

EcoSmart Fire CV Series User manual

EcoSmart Fire Linear 130 User manual

EcoSmart Fire

EcoSmart Fire Linear 130 User manual

EcoSmart Fire Ark 40 User manual

EcoSmart Fire

EcoSmart Fire Ark 40 User manual

EcoSmart Fire ESF.1.F.650CV User manual

EcoSmart Fire

EcoSmart Fire ESF.1.F.650CV User manual

EcoSmart Fire Flex Series User manual

EcoSmart Fire

EcoSmart Fire Flex Series User manual

EcoSmart Fire Igloo User manual

EcoSmart Fire

EcoSmart Fire Igloo User manual

EcoSmart Fire Aspect Specification sheet

EcoSmart Fire

EcoSmart Fire Aspect Specification sheet

EcoSmart Fire Ark 40 User manual

EcoSmart Fire

EcoSmart Fire Ark 40 User manual

Popular Indoor Fireplace manuals by other brands

Hearth Craft Rainbow owner's manual

Hearth Craft

Hearth Craft Rainbow owner's manual

Valor Legend 739ILN owner's manual

Valor

Valor Legend 739ILN owner's manual

Town & Country Fireplaces TC36.NGST04C instructions

Town & Country Fireplaces

Town & Country Fireplaces TC36.NGST04C instructions

Kemlan Super Nova Freestanding Series II Installation & operating instructions

Kemlan

Kemlan Super Nova Freestanding Series II Installation & operating instructions

FireplaceXtrordinair 864 TRV (Top/Rear Vent) installation instructions

FireplaceXtrordinair

FireplaceXtrordinair 864 TRV (Top/Rear Vent) installation instructions

JAYLINE IS500 Installation and operating instructions

JAYLINE

JAYLINE IS500 Installation and operating instructions

Regency Horizon HZ54-NG Owners & installation manual

Regency

Regency Horizon HZ54-NG Owners & installation manual

Continental Fireplaces CVF42P Installation and operating instructions

Continental Fireplaces

Continental Fireplaces CVF42P Installation and operating instructions

Twin-Star International Classic Flame 28MMS9954 manual

Twin-Star International

Twin-Star International Classic Flame 28MMS9954 manual

Regency F5102 - AUSTRALIA Owners & installation manual

Regency

Regency F5102 - AUSTRALIA Owners & installation manual

Valcourt ANTOINETTE FP7CB Quick install guide

Valcourt

Valcourt ANTOINETTE FP7CB Quick install guide

Empire Comfort Systems TRADITIONAL DXT30IN NAT Installation instructions and owner's manual

Empire Comfort Systems

Empire Comfort Systems TRADITIONAL DXT30IN NAT Installation instructions and owner's manual

Heat&GloGlo 6000CF-OAK-IPI owner's manual

Heat&GloGlo

Heat&GloGlo 6000CF-OAK-IPI owner's manual

Mendota AA-11-02969 Installation and operating instructions

Mendota

Mendota AA-11-02969 Installation and operating instructions

Mayer Barbecue ELEGANZA MFP-36 CURVE Assembly instructions

Mayer Barbecue

Mayer Barbecue ELEGANZA MFP-36 CURVE Assembly instructions

superior fires CORINTHIA BLACK NG F500373 Installation & user's instructions

superior fires

superior fires CORINTHIA BLACK NG F500373 Installation & user's instructions

Burley 570-R Series Operating & installation instructions

Burley

Burley 570-R Series Operating & installation instructions

Regency Fireplace Products P121-NG10 Owners & installation manual

Regency Fireplace Products

Regency Fireplace Products P121-NG10 Owners & installation manual

manuals.online logo
manuals.online logoBrands
  • About & Mission
  • Contact us
  • Privacy Policy
  • Terms and Conditions

Copyright 2025 Manuals.Online. All Rights Reserved.