EcoSpeed Electric Mid-Drive Guide

1
ElectricMid-Drive™
InstallationandAssembly InstructionsforBurleyLWB(Koosah,
Sandpoint,Nasoke,Spider)
copyright2006,EcoSpeedLLC
http://www.ecospeed.com/docs/emd11_assy_rev1.01 Revision 1.01

2
ElectricMid-DriveComponents
(600W.750Wisslightly different.)

3
Congratulations onyourpurchaseofEcoSpeed’s ElectricMid-DrivefortheBurleylongwheelbasere-
cumbentbicycles.TheElectricMid-Driveis theworld’sbestmulti-speed,throttleoperated,electric-
assistconversionand theonlyelectric-assistdesigned specificallytofita varietyofrecumbentbicycles.
Theseinstructions will guideyoustepbystepthroughwhatwehopewill bea simpleand painless instal-
lationof yourEMD.Themechanicalskills involved are modestand,wegiveyouhints andtips atevery
stepthatreflectwhata professionalmechanicknows.Ifatanytimeyouhaveproblems,call us at1-866-
EcoSpeed (866-326-7733)forfriendlytechnicalassistanceore-mailus at support@ecospeed.net.
A word onhowtheseinstructions areorganized.Eachstepis under a majorheading–Step1:,Step2:,
etc.Ifyou’veinstalled anEMDbefore youcanjustread themajorheadings and ignore theexplanatory
text.Beloweachmajorheadingis a listof sub-steps.Theimportantinformationineachsub-stepis in
boldtext.Ifyou’re a competentbikemechanic,youcanjustreadthebold textand safelyignore therest.
Theremainingtextis there toclarifythings fornon-mechanics. We’vealsoincluded tips andhints in
Italics.
Beforegettingstartedcheckthatall thepiecesneededwereincludedinyourshipment:
Checkthepackinglistincludedwithyourshipment.
Youwill also needthefollowingtools:
1)Bicyclechainbreaker. Availablefromanybikeshop.
2)2.5mm,3mm,4mm and5mmhex(orAllen)wrenches. (Thestandard “L”shapedhex
wrenches sold atbikeshops andhardwarestoreswill probablywork but,theirshorthandlesmake
looseningand tighteningdifficult,especiallyinthelargersizes.A betteralternativeis a¼”ratchet
drivewrenchand hexsockets.Yourlocal hardwarestoremayhavethemortry www.snapon.com for
topquality.)
3)10mm boxoropenendwrench.
4)8mmnutdriver.
5)Wireclippersorscissors.
6)Rivet Nut (waterbottlemount)installationtool. (You canpurchasethistoolfromus,useit,
thenreturnitforafull refund.Or, keepit—yourchoice.)
7)Drill with3/32” (or2.5mm),3/16” (or5mm)and19/64” (or7.5mm) bits.
8)Machiniststransferpunch(includedinkit).
9)TorqueWrench(optional).
10)11/16”and7/8”wrenchesortwoadjustablewrenches(optional). Needed ifusingoptional
rivetnutinstallationtool.
Onceyouhaveall theparts and toolsyouneed,it’stimetoclear a nicespacetowork,find severalof
hours time, and gettoit.
Step 0:Makesurethatyourbikeisingoodcondition.
Ifyouhaven’thad yourbiketunedupbyyourlocalbikeshopina while, nowwouldbea good time. In-
stallingtheEMDwill placeextra stress onyourbikesoit’s importantthatitbeintopcondition.

4
Step 1:Findawayto secureyourbikewhile working.
Theidealhereistomountyourbikeonaworkstandsuchasbikeshopsuse.Ifyouhaveac-
cess toonegreat,otherwisethere are other possibilities.
Ifyouhavea workarea where it’s OK to
puthooks intheceiling, youcanhangthe
bikefromtheceilingusingropes or
straps.
Putintwohooks about3 feet(1meter)
apartandhangtheseatcrossbracefrom
these. Putina thirdhookatthefrontof
thebikeand hangthefrontof thebike
fromthis hook.
Makesure thebikehangs levelwith all
wheels off theground.
Ifyoucan’tuseceilinghooks,youcan
leanthebikeagainsta wall withthefront
brakelockedtopreventrolling. Wrap
severaltightrubber bands around the
frontbrakelever untilthefrontwheel
cannolonger roll.
Step 2:Removeidlerandchain.
Removethefront chainidlerandall associated
pieces. Usingyourchainbreaker tool,splitthechain,
remove, and setaside. Removeonlythefrontchain
idler. Somemodels havea rear idler as well.
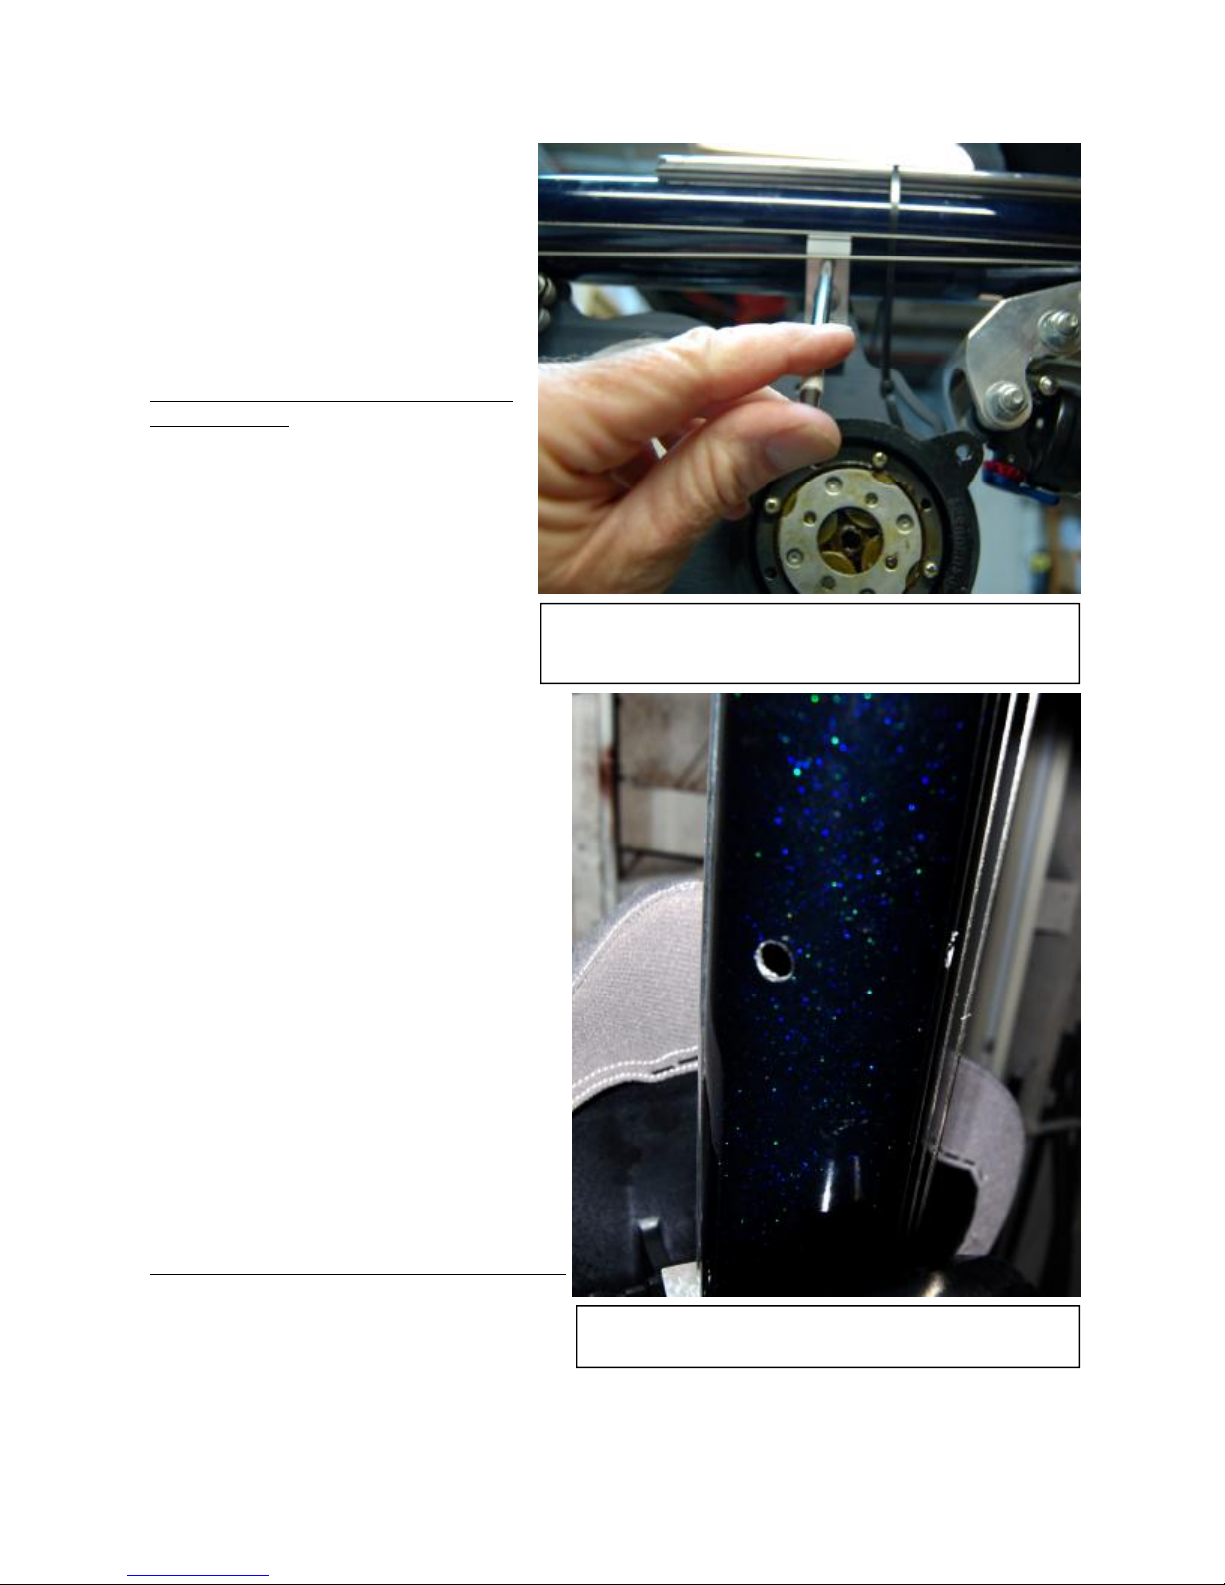
Step 3):Removethemotor fromthemotor unit.
1)RemovethemotorfromtheEMDunitbyre-
movingthe3bolts(photo 3)holdingitto the
gearbox.
Setasidethebolts and associated washers.Oncethe
bolts areremoved,themotorcanbepulled awayfrom
thegearbox.
Photo5 shows thegearboxwithmotorremoved.Be
carefulnottowipemuchof thewhiteheattransfer
grease fromthemotororgearboxhousing.
This stepmakestheunitlighter and easesthefollowing
steps.
Step 4:AttachtheT-Bracketsto youridlermount.
1)SlipthetwoT-Bracketsatthefrontofthemo-
torplatebetweenthetwotabsthatheldthe
chainidler.
(1)Front Idler Pulley
(2)T-BracketsAttachedto Idler
Mount

5
2)PlaceanM6fenderwasherunderthe
headofan M6x16mmbuttonheadbolt,
andslipit throughtheholeinone ofthe
idlermountingtabsasshowninPhoto2.
Dothesameontheoppositeside.
3)Placeafenderwasherovertheendof
eachboltandlooselythreadan
M6nylocknutonto eachbolt.
Theunitshould nowhangfree as
showninPhoto4.Notetheorientation.
Theunitshouldbeabletoswingup
and towards therear ofthebike.
Step 5:Swingmotor unitupagainst
theframeandadjust thepositionof
theT-Brackets andQuarterBrack-
ets.(photo 5)
1)Swingtheentiremotorunitup
andagainsttheframe.
2)Pushthefrontofthemotor
unitupwardssothatthereislittle
orno clearancebetween thetop
edgeofthemotorplateandthe
bottomoftheframetube.
3)Loosentheboltsholdingthe
quarterbracketsinplace.
WiththeEMDheldagainsttheframeso thatthereislittleorno clearancebetweenthe
motorplateandthebottom oftheframe,adjusttheplacementofthequarterbracketsso
thattheyarepressedflushagainsttheframe.
(4)MotorHangingfromFrame.Rear
of4Biketo Left
(5)EMDWith QuarterBracketsFlushwith
Frame.
(3)MotorBoltLocations
6
Whenyou’resatisfiedthatthey’re
properly aligned,tightenthetwo
boltsandnutsholdingthemtothe
motorplate.
Makingsure thebrackets areflushdistrib-
utes stresses evenlyontotheframeand
insures thattheboltsholdingthequarter
brackets inplacegoinstraight.
Step 6:Marktherearattachboltcen-
ters.(photo 6)
Therear of theunitisheld inplacewith
twoM5 x 20mm bolts.Thebolts thread
intowater bottlemountsthatare placed in
theframeforthatpurpose. Inthis stepyou
preciselymarktheplaces where the
mounts will beinstalled. (notethatifyou
everdecidetoremovetheEMD,you can
add asecond pairofthesemounts
2.5” (64mm)fromthefirstand placea
pairofwaterbottleholders underyour
seat.Also,ifyou wantto install awater
bottleholderortwoelsewhereonyourframe
whileyou havethetool,wecansupplyyou
with extrarivetnuts.)
1)Swingtheunit againsttheframeas
showninPhoto5.Besurethatthequar-
terbracketsareflushwiththesurfaceof
theframetube.
2)Sliptheincludedmachiniststransfer
punchintotheholeinthequarter
bracket withthepointedinagainstthe
frame. Thepunchis almosttheexactsame
sizeas theholeinthequarterbracket,soyou
mayhavetoplaywith itto getittogoin.
3)Taptheendofthepunchwithaham-
mertomakeasmall markontheframe.
You mayhavetotapitafewtimes togetan
easilyvisibleindentation.
4)Repeat1,2,and3forthequarter
bracketontheotherside.
Step 7:Install WaterBottle MountingNuts
Youcandothis stepyourselfor,takethebike
toanybikeshopandhavetheminstall thein-
cluded water bottlemountingnuts (knownas
RivetNuts).Doingityourselfis easywiththefollowinginstructions.
(6)MarkingHoleCenterwith Machinists
TransferPunch
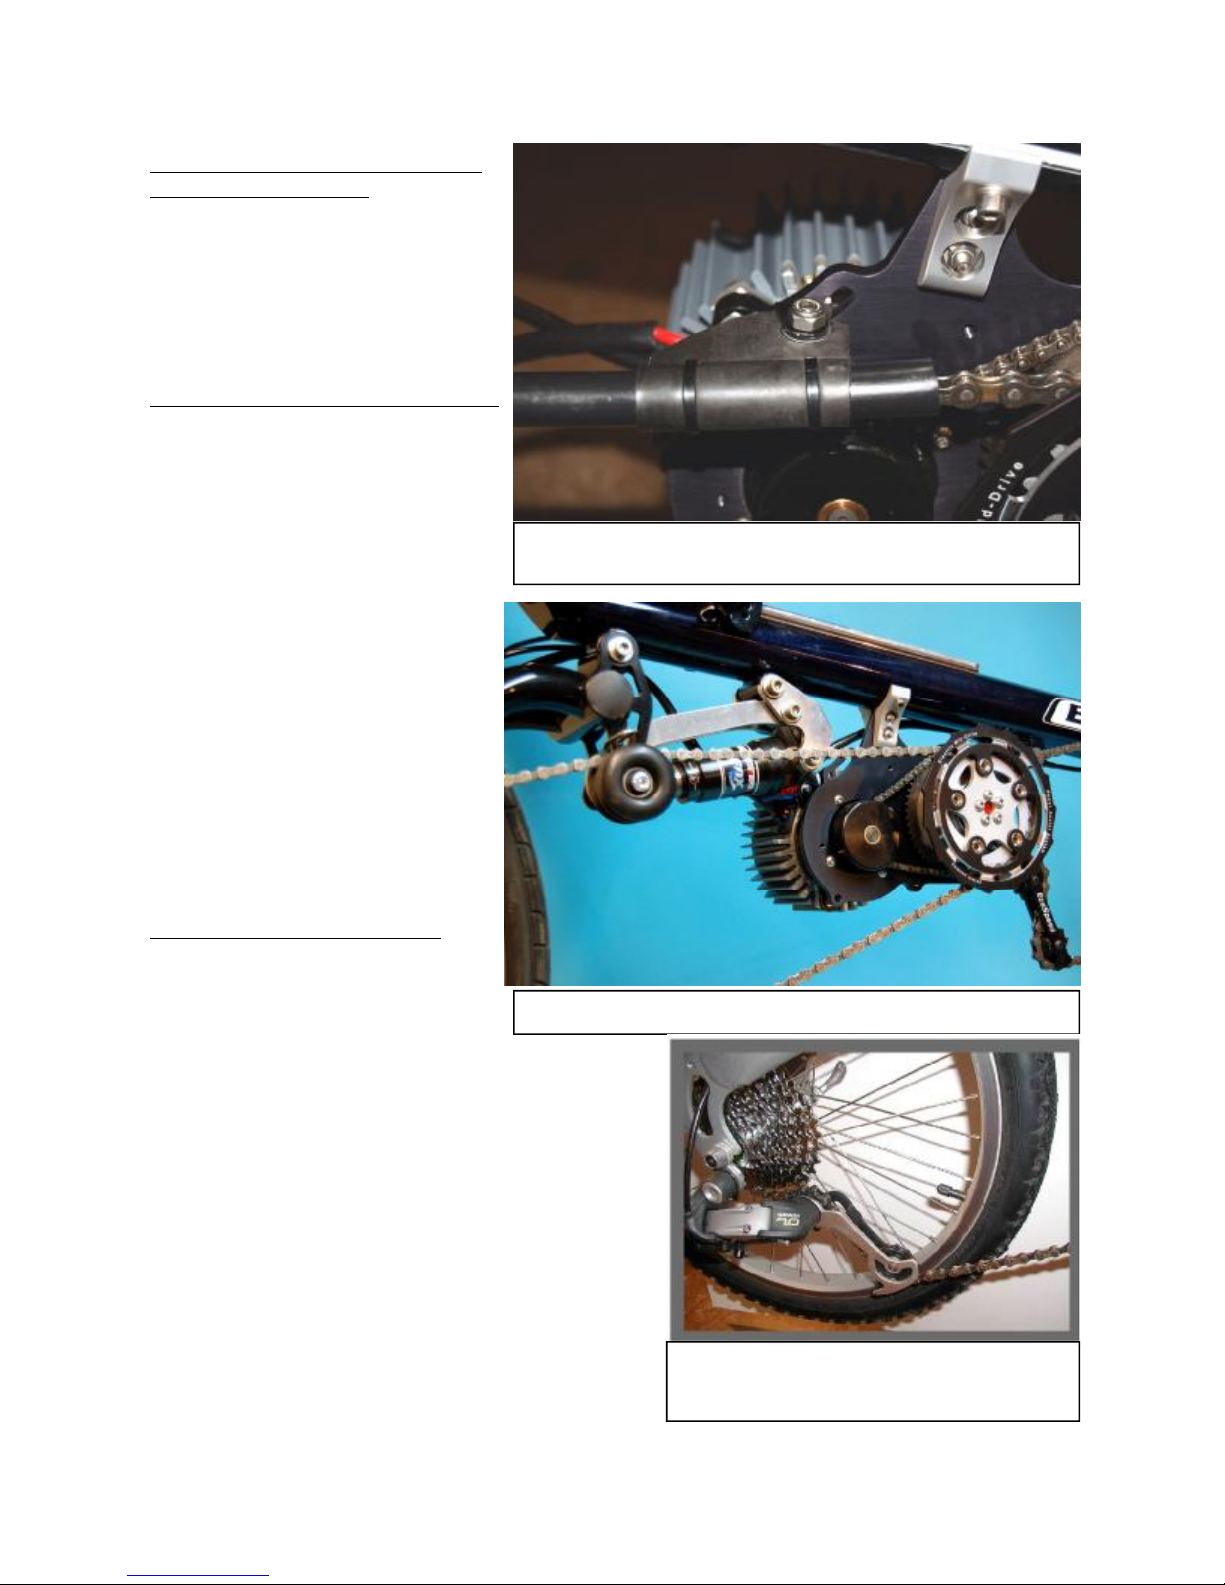
(7)HolesDrilledinto FrameTube

7
1)Drill asmall pilotholeatthelo-
cationofeachmarkyoumadein
step 6.Useasmall bit (asmall bitis
easierto preciselyalignwith theinden-
tation) suchasa3/32”(2.5mm).
2)Expandtheholesizeusingabit
ofapproximately3/16”(5mm).
3)Expandtheholetoitsfinalsize
usinga19/64”(7.5mm)bit(photo
7). Gettingtothefinal holesizeintwo
steps allows thedrills topenetratemore
smoothlyreducingthechanceofpaint
chipping.
4)Install therivet nutsusingthe
instructionsthat camewithyour
tool.Photo 8showsinstallationus-
ingawrenchtyperivetnuttool.
Whenusingwrenchtypetool,besureto
notovertighten thetool.Doingsowill
stripthethreads frominsidetherivetnut.
Thewaytoavoid overtighteningis to
gripthewrenches closeto therivetnut
toolandcarefullynotetheeffortyou’re
exerting.Whentheeffortstartsto in-
crease,stopturningthetool.Thenutis
fullyinstalled atthatpoint.
5)ThreadoneoftheM5x 20mm
intoeachrivetnut afterinstallation.
Photo 9.Tightentheboltslightlyto
makesuretherivetnutdoesn’t
turn.
Ifitdoesturn,reattachtherivetnut
toolandtighten thetoolanother
eighthturn.Repeatuntiltherivet
nut doesn’tturnwhen theboltis
moderatelytightened.
Step 8: FinishInstallingtheEMD
unit.
1)Loosen thetwoboltsandcorre-
spondingnutsthatholdthequarterbracketstotheEMDunit.
2)SwingtheEMD unitupandslipthequarterbracketsovertherivetnuts.
3)Attachthequarterbracketstotherivetnutsusingthem5x 20mm bolts.Slip alock
washerandthenaflatwasherovertheheadofeachboltbeforeinstalling.
4)Makesurethatthetopedgeofthemotorplateisflush,ornearlyso,againsttheframe,
thentightentheboltsholdingthequarterclampsto themotorplate.
(8)InstallingRivet NutUsingWrenchType
Tool
(9)Rivet NutInstalled

8
5)Tightentheboltsholding
thequarterclampstothe
rivet nuts.Werecommend
thatyouuseatorque
wrenchandtorquethebolts
to 55inch-lbs(6.2N-m). If
you don’thaveafeelforhow
tight bolts should be,you should
useatorquewrench.You don’t
wanttostripoutthethreads of
therivetnuts and you don’t
wanttheboltstowork loose
whileyou’reriding.
6)Finally,reinstall themo-
tor.Notethatthemotorshaftis
“D”shaped and fits intothecor-
respondingopeninginthemid-
dleof thegearbox.
Youmayneed totwistthemotor
slightlytotheleftorright togettheshaftto
slipintothegearbox.
Oncethemotorslips intothegearbox,twistit
leftorright tomakethedecalupright and
insure thatthewires are towards therear of
thebike.
Install andtightenthemotorbolts.
Step 9:Install thefrontchain.
1)Usethechainyouremovedinstep 2
asthefrontifyourbikehasan8speed
rearcassette.Otherwise,usethechain
includedwiththekit.(read warningbe-
low)
2)Setthefront derailleurtothesmall-
estgear.Threadthechainthroughthe
derailleurcage,aroundtheinnermost
frontsprocket,andthroughtheEMD
sprocketsasshowninphoto10.You
canuseabentcoathangerto holdtheends
ofthechainwhileyou adjustthelengthas showninthephoto.
Shortenthechainusingyourchainbreaker and jointheends sothatitends uplookingroughlylike
photo10withthechainonthesmallestfrontring.
(Hint: ifyouneed anyinstructionintheuseofcommonbicycletools goto
http://www.parktool.com/repair_help/FAQindex.shtml)
WARNING: Useonlydrylubricantsonall chains.Ifyouhavebeenusingoiltolubricateyourchain,
youmusteither replaceitwith a newchain,orcleanitthoroughlyand switchlubricants.See Mainte-
nancesection.
(10)FrontChain Path
(11)DriveSprocket andChain Guard
9
Step 10:Attachdrivesprocketand
chain-guardassembly.
Attachthedrivesprocketand
chain-guardassemblytothedrive
spindleusing5M6x 20mmbutton
headboltsasshowninphoto11.
Tightenall5 bolts securely.
Step 11:Install thechainguidetube.
NOTE: Skip thisstepandstep13
ifyourbikehasarearchainidler
asshowninphoto13.
1)AttachusingM5x16mm boltto
theslot attherearofthemotor
plateasshowninphoto12.Use
an M5nylocknutandwasheron
themotorsideofthemotorplate.
2)Don’ttightentheboltyet,let
theguidetubehangfreeasshown
inthephoto.
Youmaybetempted toleavethechain
guidetubeoff.Wedon’t recommend
doingthis.Its purposeis todamp
chainshakewhichcancausethechain
tocomeoff themid-sprocketunder
someconditions.
Step 12:Install therearchain.
Settherear derailleurtothelargest
cog.
Usethesupplied68inchesof
SRAMPC-48chainifyourbikehasan 8-speed
rearcassette.Otherwiseusethechainyoure-
movedinstep2.
Threadthechainaroundthemid-sprocket,
throughthechainguidetube,aroundtherear
cassette,andthroughtherearderailleurcage.
Ifyourbikehasarearchainidler,threadthe
chainovertheidlerasshowninphoto13.
Shortenthechain,ifneeded,usingyourchainbreaker
tool.Withthechainaroundthelargestrear cog, itshould
lookapproximatelylikephoto14.
(13)RearChainInstalledon Bikewith RearIdler
(12)ChainGuideTube
(14)ProperlyAdjustedChain
10
Jointheends ofthechainwiththeincluded Powerlink™
connectorifusingthepC-48chain,otherwisejointhe
ends usingyourchainbreaker tool.
Step 13: Adjust thechainguidetube.
1)Alignthechainguidetubesothattheflexible
attachmentishorizontalandthebracketisverti-
calasonphoto12.
2)Tighten thenut andboltholdingthebracket
to themotorplate.
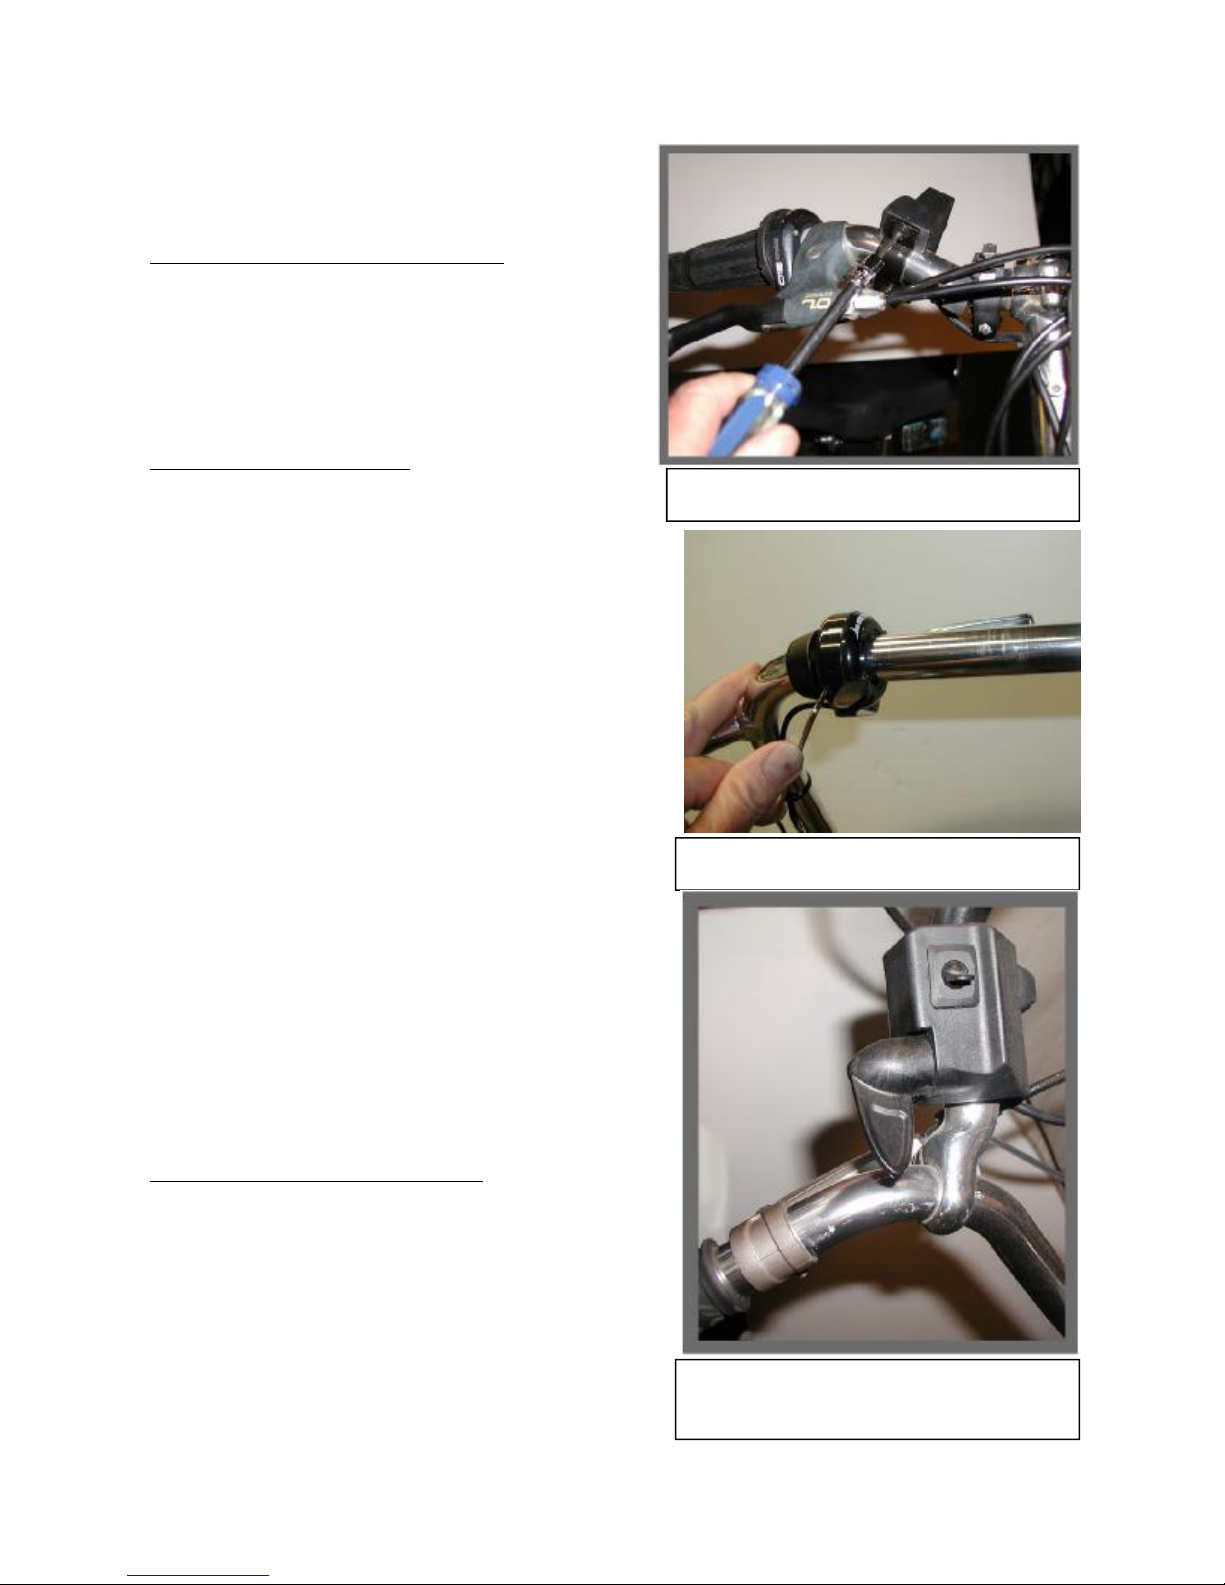
Step 14:Install thethrottle
Yourkit will haveoneoftwothrottletypes.
1a)The resistor throttlemountstoyourhandlebar
usingabracket asshowninphoto15,.
1b)The hall-effect throttleslidesontotheendof
yourhandlebarasshowninphoto16.
Thehall-effectthrottleis designed tobemountedonthe
right side, butmaybemounted ontheleftas well.
Tomounttheresistorthrottleontheleftyouwill needa
bar extensionas showninphoto17.
Right sidemountingistheusualbut,lefthandmounting
allows youtoshiftandoperatethethrottlesimultaneously,
whichsomeprefer.
2)Routethethrottlewiresothatisdoesn’timpair
turningthebars,won’tsnagonanything,and
reachesthethrottleconnectoronthemotor.
3)Connect thethrottletothemotor.
4)Don’tsecurethethrottlewirewithwiretiesyet.
Waituntilyoutestthesystemand knowthateverythingis
workingthensecure all thewires totheframewiththein-
cluded wire ties.
Step 15:Install thebatterysystem.
1)See theincludedseparateinstructionsforyour
typeofbatterysystem.
2)Afterinstallingthebattery,secureloosewires
withtheincludedwireties.Makesurethatthe
wiresarelocatedso asnotto interferewiththe
movementofthesuspension.
(15)MountingResistorThrottle
(16)MountingHall-EffectThrottle
(17)ResistorThrottleMountedon
LeftSideusingBarExtension

11
Step 16:FinishupandTest.
1)Withtherearwheelsuspendedoffoftheground,turnonthebatterypackswitchand
pressthethrottleto testthesystem.Runthebikethroughall ofthegearstomakesurethe
derailleurisproperly adjusted. Lookat themotorchainandverify that itisrunning
smoothly.Makesurethatall wiresareout ofthewayofall movingparts.Makesureaxle
boltsorskewersaretight.
Proper adjustmentofthegears and makingsure thattherear cassetteandbearings areingood shapeis
especiallycriticalgiventheextra load thedrivetrainwillbesubjected to.Also,checkthattherear axle
skewer orbolts arefullytightened.Axlebolts shouldbetorqued toabout20ft-lbs (28Nm).Skewers
shouldbeas tight as youcancomfortablymakethem.Itis possibleforthemotortopull theaxleright
outof thedropouts iftheyare loose.
3)Roadtest. Runthroughall thegears makingsure theyare shiftingsmoothly.Usefull throttleineach
gear tocheckforskippingofthedrivechain.Keepspeeds lowatfirstuntilyou’re sure thateverythingis
functioningproperlyand youbecomefamiliar withridingwiththemotorassist.
Other manuals for Electric Mid-Drive
2
Other EcoSpeed Bicycle Accessories manuals


