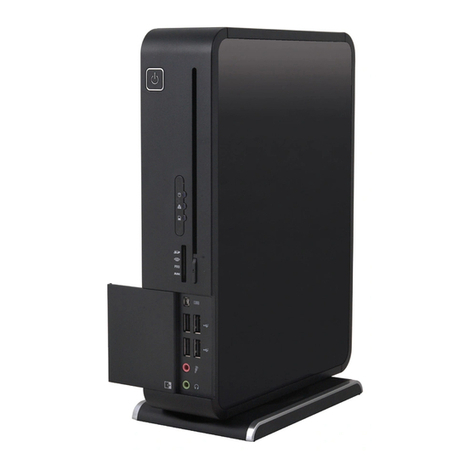
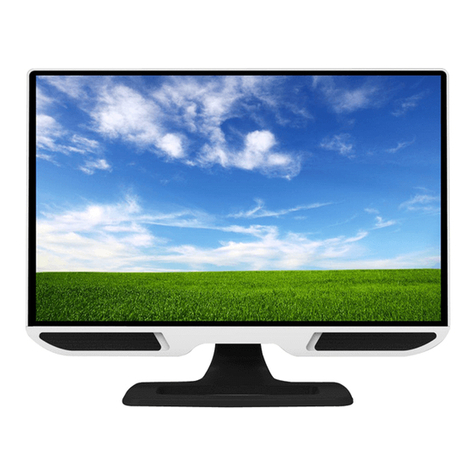
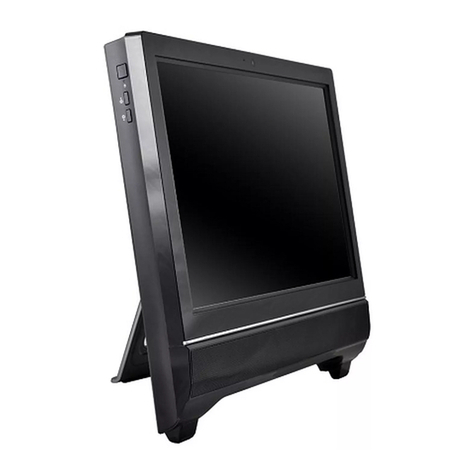
ECS ECS G24 User manual

Preface
i
Preface
Copyright
This publication, including all photographs, illustrations and software, is protected
under international copyright laws, with all rights reserved. Neither this manual, nor
any of the material contained herein, may be reproduced without written consent of
the author.
Version 1.0
Disclaimer
The information in this document is subject to change without notice. The manufac-
turer makes no representations or warranties with respect to the contents hereof and
specifically disclaims any implied warranties of merchantability or fitness for any
particular purpose. The manufacturer reserves the right to revise this publication and
to make changes from time to time in the content hereof without obligation of the
manufacturer to notify any person of such revision or changes.
FCC
This equipment has been tested and found to comply with the limits for a Class B
digital device, pursuant to Part 15 of the FCC Rules. These limits are designed to
provide reasonable protection against harmful interference in a residential installa-
tion. This equipment generates, uses, and can radiate radio frequency energy and, if
not installed and used in accordance with the instructions, may cause harmful inter-
ference to radio communications. However, there is no guarantee that interference
will not occur in a particular installation. If this equipment does cause harmful
interference to radio or television reception, which can be determined by turning the
equipment off and on, the user is encouraged to try to correct the interference by one
or more of the following measures:
• Reorient or relocate the receiving antenna
• Increase the separation between the equipment and the receiver
• Connect the equipment onto an outlet on a circuit different from that to
which the receiver is connected
• Consult the dealer or an experienced radio/TV technician for help
Shielded interconnect cables and a shielded AC power cable must be employed with
this equipment to ensure compliance with the pertinent RF emission limits govern-
ing this device. Changes or modifications not expressly approved by the system’s
manufacturer could void the user’s authority to operate the equipment.
Trademark Recognition
Windows®7/8 are registered trademarks of Microsoft Corp.
Other product names used in this manual are the properties of their respective
owners and are acknowledged.

ii
Preface
Canadian Department of Communications
This class B digital apparatus meets all requirements of the Canadian Interference-
causing Equipment Regulations.
Cet appareil numérique de la classe B respecte toutes les exigences du Réglement sur
le matériel brouilieur du Canada.
Declaration of Conformity
This device complies with part 15 of the FCC rules. Operation is subject to the
following conditions:
• This device may not cause harmful interference, and
• This device must accept any interference received, including interfer-
ence that may cause undesired operation
CE
This product has been tested and found to comply with the limits of the European
Council Directive on the approximation of the laws of the member states relating to
electromagnetic compatibility according to 2004/108/EC.

Preface
iii
Safety Instructions
Your system is designed and tested to meet the latest standards of safety for informa-
tion technology equipment. However, to ensure your safety, it is important that you
read the following safety instructions.
Setting up your system
• Read and follow all instructions in the documentation before you oper-
ate your system.
• Do not use this product near water or a heated source such as a
radiator.
• Set up the system on a stable surface.
• Openings on the chassis are for ventilation. Do not block or cover these
openings. Make sure you leave plenty of space around the system for
ventilation. Never insert objects of any kind into the ventilation open-
ings.
• Use this product in environments with ambient temperatures between
0°C and 40°C.
• If you use an extension cord, make sure that the total ampere rating of
the devices plugged into the extension cord does not exceed its am-
pere rating.
Attention during use
• Do not step on the power cord or let anything rest on top of it.
• Do not spill water or any other liquid on your system.
• When the system is turned OFF, a small amount of electrical currentstill
flows. Always unplug all power, modem, and network cables from the
power outlets before cleaning the system.
• If you encounter the following technical problems with the product,
unplug the power cord and contact a qualified service technician or
your retailer.
• The power cord or plug is damaged.
• Liquid has been spilled into the system.
• The system does not function properly even if you follow the
operating instructions.
• The system was dropped or the cabinet is damaged.
• The system performance changes
The warranty does not apply to products that have been disassembled by
users.

iv
Preface
Safety cautions and warnings
Optical Drive Safety Information
CAUTION:
Invisible laser radiation when open. Do not stare into beam or view
directly with optical instructions.
WARNING:
Makeing adjustments or performing procedures other than those speci-
fied in the user’s manual may result in hazardous laser exposuer. Do
not attempt to disassemble the optical drive. For your safety, have the
optical drive serviced only by an authorized service provider.
Optical drive sold with this system contains a CLASS 1 LASER PRODUCT.
Product disposal notice
INPORTANT:
This symbol if the crossed out wheeled bin indicates that the product
(electrical and electronic equipment) should not be placed in munici-
pal waste. Check local regulations for disposal of electronic products.
Nordic Lithium Cautions (for lithium-ion batteries)
CAUTION:
Danger of explosoin if battery is incorrectly replace only with the same
or equivalent type recommended by the manufacturer. Dispose of used
batteries according to the manufacturer’s instructions.
Product disposal notice
1. Do not place this product underneath heavy loads or in an unstable
position.
2. Do not use or expose this product around magnetic fields as mag-
netic interference may affect the performance of the product.
3. Do not expose this product to high levels of direct sunlight, high-
humidity or wet conditions.
4. Do not block the air vents to this product or impede the airflow in
any way.

v
TT
TT
TABLE OF CONTENTSABLE OF CONTENTS
ABLE OF CONTENTSABLE OF CONTENTS
ABLE OF CONTENTS
Preface i
Chapter 1 1
Introducing the PC 1
Introduction......................................................................................1
1.1 Specfications...............................................................................1
1.2 Front view....................................................................................2
1.3 Left and right view of the computer.........................................3
1.4 Back view.....................................................................................5
1.5 VESA Mount Installation..........................................................6
1.6 Connecting your computer.......................................................7
1.7 Optional-Remote controller.......................................................9
Packing Contents............................................................................13
Chapter 2 1515
1515
15
Trouble Shooting 15
Start up problems during assembly............................................15
Solving Problems.........................................................................15
Display Problems............................................................................15
TroubleshootingAudio Problems...................................................16
Troubleshooting Remote Controller Problems...............................17
Maintenance and care tips.................................................................17
Panel clean tips.............................................................................17

vi
Memo

1
IntroducingthePC
Chapter1
IntroducingthePC
Introduction
Thank you for choosing G24 which has great performance with stylish and flexible
design. The G24 will give you an exciting PC experience by allowing you to choose
your own favorite motherboard to install in.
1.1Specifications
• CPU support up to 77W
Processor
• Power, Brightness Up/Down, Display On/Off (depends
on motherboard support)
Button
• Support 2 x SO-DIMM DDR3
• Built-in up to 1.3M pixel webcam/MIC
• 2 x USB 2.0 ports
• 2 x Audio jacks (Headphone out, MIC-IN)
• 1 x Multi card reader (SD/MMC/MS)
• Wireless module
• TV kit (IR receiver, antenna and remote controller)
Memory (L6
w/ motherboard)
Webcam
I/O (Side)
Option
• 19v, DC-In adapter (The required wattage depends on
motherboard specification.)
Power
Display Panel • 23.6” wide screen 16:9 HD LED Panel
(panel voltage 5v, backlight converter voltage 19v)
Max resolution 1920 x 1080
• Optional Panel:
Non-touch panel
• Support 1 x 3.5” HDD or 2 x 2.5” HDD
• Support 1 x SATA II Slim DVD Super-multi tray type or
1 x External 2.5” HDD
Drive Bays
• 675(W) x 580(H) x 275(D) mm
• Net Weight: 13Kg
• Gross Weight: 15Kg
Dimension
• Thin Mini-ITX form factor
Form Factor
Multi-touch panel

2
IntroducingthePC
Webcam/WebcamLEDLight
The built-in webcam with the microphone can be used for picture taking, video
recording, online conference and any other interactive applications. Webcam
LED light is on when webcam is activated.
Built-in Microphone
The built-in microphone can be used for online video chatting.
LCD/LED Display
The 23.6-inch TFT LCD/LED display is with an optimal resolution of 1920X 1080.
Speakers
The built-in stereo speakers deliver high quality sound blaster with stereo system
and Hi-Fi function supported.
1.2Frontview
Note:
ID design may vary.
WARNING:
Do not thrust the speaker with your fingers or sharp-pointed things such as
pens.

3
IntroducingthePC
1. Brightness Up
2. Brightness Down
3. Display On/Off (Depend on motherboard support)
4. Power Button
5. USB Ports
6. Headphone Jack
7. Microphone Jack
1.3Leftandrightviewofthecomputer
1.Brightness Up
Press this button to turn up the brightness of screen.
2.Brightness Down
Press this button to turn down the brightness of screen.
3.Display On/Off (Depend on motherboard support)
Press the auto button to switch video input or monitor display.
4.Power Button
Press the power button to turn the system on and off. The power LED is on
when you turn on the system; the power LED is off when you turn off the
system.
5. USB Ports
The USB (Universal Serial Bus) ports are provided for attaching USB devices
such as mouse, keyboard, printer, scanner, camera, PDAor other USB compatible
devices.

4
IntroducingthePC
8. External HDD Box or Optical Drive
To switch the external HDD box with optical drive (vice versa), press the eject
button to pull out the external HDD or optical drive. For optical drive device, the
LED is on when CD/DVD is read from or written to the optical drive.
9. Multi Card Reader
The built-in card reader may support various types of memory card, such as XD
(eXtreme Digital), SD (Secure Digital), SDHC (SD High Capacity), MS (Memory
Stick), MS Pro (Memory Stick Pro) or MMC (Multi-Media Card) cards that usually
used in devices like digital cameras, MP3 players, mobile phones and PDAs.
Contact the local dealer for further information and please be noted that the
supported memory cards may vary without notice.
8. External HDD Box or Optical drive
9. Multi Card Reader
6. Headphone Jack (Green)
This is a jack for headphone.
7. Microphone Jack (Pink)
This is a jack for microphone.
WARNING:
Push to remove the device. Please don’t push while data is in
processing.

5
IntroducingthePC
1.4Back view
Ventilator
The ventilator on the enclosure is used for air convection and to prevent the
equipment from overheating. Do not cover the ventilator.
Attention:
Be sure not to block any air vent on the computer. Blocked air vents may
cause thermal problems.
Computer stand
Use the stand to position the display to your preference. The tilt down degree
of monitor can be adjusted from -5 oto 20o. The stand provides stability to the
computer, please remain installed all the time to ensuere maximum system
stability.
-5°min. 20°max.

6
IntroducingthePC
NOTE:
The descriptions in this part might vary from your computer, depending on
motherboard model and configurations.
1.5VESAMountInstallation
Please remove the stand before installing VESA bracket.
Rear I/O
There are many ports below of the main chassis, it mainly depends on the mother-
board you choose. There are USB ports, Lan connector, HDMI ports and audio
jacks on the motherboard. Please refer to the specification in motherboard manual.
You will find the I/O position as below.
Attention:
Recommend to reserve 3 cm space between VESA bracket and wall.

7
IntroducingthePC
(Optional)
(Optional)
Note:
After you connect the AC/DC Adapter and the AC Power Core, please connect
the AC/DC Adapter to the DC-IN power connector in the Inside I/O port of
the computer first, then connect the AC Power Cord to the power.
1.6Connecting yourcomputer
Use the following information to connect your computer:
Look for the small connector icons on the back of your computer. Match the
connectors to the icons.
1. Check the voltage rating before you connect the equipment to an electrical
outlet to ensure that the required voltage and frequency match the available
power source.
2. Connect the keyboard cable to the appropriate keyboard connector (PS2
connector or USB connector).
3. Connect the mouse cable to the appropriate mouse connector (PS2 connector
or USB connector).
Note:
Your computer might not have all of the connectors that are described in this
section. It mainly depend the motherboard you choose.

8
IntroducingthePC
5. Your computer is equipped with a Memory Card Reader Connector, it is
able to read/write data from: SD/MMC, MS, MS pro, SD Pro.
4. Connect the R45J LAN cable to the LAN port.

9
IntroducingthePC
1.7Optional-Remote controller
Using the Remote Controller
You use the remote control to interact with most of the features in Media Center. No
software or setup procedure is required. Just point the remote control at the receiver,
and then enter your commands.
Your remote control has five types of buttons:
Do not immerse any part of this product in water or other liquid.
Navigation buttons, to move between items on the screen. (for example, up
arrow or enter)
Playback buttons, to control your media (for example, pause or stop).
Audio-visual (AV) and power buttons, to change channels and adjust volume.
(for example, channel up or mute)
Shortcut buttons, to provide a quick way for users to access key media
experiences in Windows Media Center.
Numeric keypad buttons, to enter alphanumeric characters or TV channels.
[if available] Teletext buttons to access Teletext functionality. For more
information, see “Teletext Buttons” later in this User Manual.
WARNING:
Any changes or modifications not expressly approved by the party respon-
sible for compliance could void the user’s authority to operate the equip-
ment. To protect against risk of fire, bodily injury, electric shock or damage
to the equipment:
Do not spray liquid on this product or allow excess liquid to drip
inside.
Do not use this product if it has sustained damage, such as a damaged
cord or plug.
Disconnect this product or remove its batteries before cleaning.

10
IntroducingthePC
CommandTask Icon
PCPower
(Standby)
PuttheWindowsMediaCentercomputerintostandbymode
ifthecomputerisrunning.Ifthecomputerisinstandby
mode,thecomputerwakesfromstandbymode.
TVPower [ifavailable]Bydefault,theTVbuttonhasnocommand
assignedtoit.Thisbuttoncan“learn”toturnontheTV.
VolumeUp
Increasethecurrentvolumebyoneunit.Iftheaudiois
currentlymutedwhenthisbuttonispressed,mutingis
disabledandthevolumeincreasesbyoneunit.
Volume
Down
Decreasethecurrentvolumebyoneunit.Iftheaudiois
currentlymutedwhenthisbuttonispressed,mutingis
disabledandthevolumedecreasesbyoneunit.
ChannelUp
Increasethecurrentchannelnumberbyone.IfWindows
MediaCenterisinalistviewwhenthisbuttonispressed,
thefocuspointmovesforwardonepageinthelist.
Channel
Down
Decreasethecurrentchannelnumberbyone.IfWindows
MediaCenterisinalistviewwhenthisbuttonispressed,
thefocuspointmovesbackwardonepageinthelist.
Mute Mutethecomputeraudio.
Navigation Buttons
Use the navigation buttons on the remote control to move between items on the
screen in Media Center.
CommandTask Icon
Start TaketheusertotheWindowsMediaCenterStartmenu.
Up Movethefocuspointuponeposition.
Down Movethefocuspointdownoneposition.
Left Movethefocuspointtotheleftoneposition.
Right Movethefocuspointtotherightoneposition.
Ok Performtheactionatthefocuspoint.
Back Movebackonepositionintheuserinterfacestack.
More Provideinformationforthefocuspoint.
AV and Power Buttons
Use the AV and power buttons to change channels, adjust volume, access a DVD
menu, or to put Media Center in standby mode.

11
IntroducingthePC
Playback Buttons
Playback buttons in Media Center behave just like similar controls on common
home electronic devices, such as CD or DVD players. Playback buttons are used to
control the playback or display of your media – music, pictures, video, and radio.
CommandTask Icon
Play
Startplayingmediaatthecurrentposition.Ifplaybackis
paused,pressingthisbuttonbeginsplaybackfromthe
currentposition.
Pause Pausemediaplaybackatthecurrentposition.
Stop Stopplayingmediaatthecurrentpositionandmoves the
pointertothestartingpointofthedigitalmediafile.
Record
RecordtheTVshowtodisk.IfpressedwhileliveTVison,
recordthecurrentshow.IfpressedfromtheElectronic
ProgrammingGuide,recordaTVshoworTVseriestodisk.
(forWindowsMediaCentercomputersthatincludeTVtuner
hardware).
FastForward
Speedupthetimebaseofthedigitalmediafiletothefirst
fastforwardvalue(3X).Ifaslideshowiscurrentlyplaying,
thenextpictureisdisplayedwhenthisbuttonispressed.
Rewind
Reversedirectionofthedigitalmediastreamandspeedsup
thetimebasetothefirstrewindvalue(3X).
Ifaslideshowiscurrentlyplaying,thepreviouspictureis
displayedwhenthisbuttonispressed.
SkipForward
Skipforwardoneincrementwhenthisbuttonispressed.The
meaningofanincrementdependsonthetypeofmediathat
isplaying:
•IfaCDorplaylistisplaying,thenextsongisplayed.
•IfaDVDisplaying,thenextchapterisplayed.
•Ifaslideshowisplaying,thenextpictureisdisplayed.
•IfarecordedTVshowisplaying,playbackskipsahead29
seconds.
SkipBack
Skipbackwardoneincrementwhenthisbuttonispressed.
Themeaningofanincrementdependsonthetypeofmedia
thatisplaying:
•IfaCDorplaylistisplaying,theprevioussongisplayed.
•IfaDVDisplaying,thepreviouschapterisplayed.
•Ifaslideshowisplaying,thepreviouspictureisdisplayed.
•IfarecordedTVshowisplaying,playbackskipsbackward
7seconds.

12
IntroducingthePC
Shortcut Buttons
These buttons provide a quick way for users to access key media experiences in
Windows Media Center.
CommandTask Icon
Guide DisplaytheGuideinWindowsMediaCenter.
LiveTV ShowliveTVonthecurrentlyselectedchannel.
RecordTV DisplaytheRecordedTVpageinWindowsMedia
Center.
Mus ic DisplaytheMusicLibraryinWindowsMediaCenter.
Pictures DisplaythePictureLibraryinWindowsMediaCenter.
Videos DisplaytheVideoLibraryinWindowsMediaCenter.
Radio DisplaythemainRadiopageinWindowsMediaCenter.
DVDMenu DisplaytheDVDmenu.
Zoom [ifavailable]Togglebetweenvariousaspectmodes in
TV.
Teletext Buttons (if available)
Media Center supports Teletext when it is available. The colored Fastext buttons
on the remote control for Media Center PC work much like the Teletext buttons
on a standard Teletext-enabled TV. Teletext buttons should appear below the numeric
keypad on the remote control.
To display Page 100 (Teletext home page)
Press the TELETEXT button. Page 100 will appear in a few seconds and
completely replace the TV picture, but it will not affect the TV sound.
To access Teletext pages
Type the three-digit number of the page you want to display by using the
numeric keypad. For example, enter 300 to access the A-Z Teletext Index.
To navigate between Teletext pages
Press the UP and DOWN buttons on your remote control to navigate
between Next and Previous pages.
To use the Fastext buttons
The red, green, yellow, and blue buttons on your remote control correspond
to the same colored buttons on your TV. Press a colored button on your
remote control to go to a preset page. For example, on page 100, press the
green button on the remote control to go to the New Zealand News Index,
or Page 102.

13
IntroducingthePC
PackingContents
NOTE:
Please contact us immediately if any of the items is damaged or missing.
Driver DVD Manual
QuickGuide Power Cable
Adapter Heat Pipe & CPU Fan
(Options: depend on
motherboard)
RemoteController
(Optional)

14
IntroducingthePC
Memo
Other manuals for ECS G24
1
Table of contents
Other ECS Desktop manuals
