Edco SLURRY PRO VACUUM Assembly instructions

E-SPVAC-I-0419
Page 1
Printed in USA
JWA ©2019
EQUIPMENT DEVELOPMENT COMPANY, INC.
100 Thomas Johnson Drive, Frederick, MD 21702-4600 USA
Phone: 800-638-3326 or 301-663-1600 • Fax: 800-447-3326 or 301-663-1607
OPERATOR’S INSTRUCTION MANUAL
FOR
SLURRY PRO VACUUM
READ AND UNDERSTAND THE OPERATOR’S INSTRUCTION MANUAL
THOROUGHLY BEFORE ATTEMPTING TO OPERATE THIS EQUIPMENT.
Death or serious injury could occur if this machine is used improperly.

E-SPVAC-I-0419
Page 2
1-800-638-3326 • edcoinc.com • [email protected]
•Engine exhaust from this product contains chemicals
known to the State of California to cause cancer, birth
defects or other reproductive harm.
• Tilting a gasoline powered machine tted with an
EPA approved vented charcoal lter gas cap, beyond
20° can cause fuel leakage. If a leak occurs, do not
start or run the engine until the leak is xed. Eliminate all other ignition
sources in the immediate area (no smoking, ares, sparks or ames).
Use approved gasoline absorbing material to contain the fuel leakage.
Then use clean, non-sparking tools to collect absorbed materials then
dispose of these contaminants properly.
• Gasoline is extremely ammable and poisonous. It should
only be dispensed in well ventilated areas, and with a cool
engine.
• Small gasoline engines produce high concentrations of
carbon monoxide (CO) example: a 5 HP 4 cycle engine operation in
an enclosed 100,000 cu. ft. area with only one change of air per hour
is capable of providing deadly concentrations of CO in less than fteen
minutes. Five changes of air in the same area will produce noxious
fumes in less than 30 minutes. Gasoline powered equipment should
not be used in enclosed or partially enclosed areas. Symptoms of CO
poisoning include, head-ache, nausea, weakness, dizziness, visual
problems and loss of consciousness. If symptoms occur - get into
fresh air and seek medical attention immediately.
• Never refuel a hot engine or an engine while it is running.
• Engines are shipped from factory without fuel/oil.
SAFETY MESSAGES
Indicates an imminent hazard which, if not avoided,
will result in death or serious injury.
Indicates an imminent hazard which, if not avoided,
can result in death or serious injury.
Indicates hazards which, if not avoided, could result in
serious injury and or damage to the equipment.
• Safety Instructions are proceeded by a graphic alert symbol of DANGER,
WARNING, or CAUTION.
GASOLINE / PROPANE POWERED EQUIPMENT
• Do not disconnect power by pulling cord. To disconnect, grasp the
plug, not the cord.
• Unplug power cord at the machine when not in use and before servic-
ing.
• Switch motor OFF before disconnecting power.
• Never use frayed, damaged, taped or under rated extension cords.
Electrical shock could result in death or serious injury to the operator
and damage to the equipment.
• Assure you are using the proper extension cord length.
• Equipment should only be operated by trained personnel in good
physical condition and mental health (not fatigued). The operator and
maintenance personnel must be physically able to handle the bulk
weight and power of this equipment.
• This is a one person tool. Maintain a safe operating distance to other
personnel. It is the operators’ responsibility to keep other people (work-
ers, pedestrians, bystanders, etc.) away during operation. Block o
the work area in all directions with roping, safety netting, etc.
Failure to do so may result in others being injured by ying debris or
exposing them to harmful dust and noise.
• This equipment is intended for commercial use only.
• For the operator’s safety and the safety of others, always keep all
guards in place during operation.
• Never let equipment run unattended.
• Personal Protection Equipment and proper safety attire must be worn
when operating this machinery. The operator must wear approved
safety equipment appropriate for the job such as hard hat and safety
shoes when conditions require. Hearing protection MUST be used
when operational noise levels of this equipment may exceed 85db.
Eye protection MUST be worn at all times.
GENERAL INSTRUCTIONS
Keep body parts, loose clothing and accessories away from
moving parts. Failure to do so could result in dismemberment
or death.
• Do not modify the machine.
• Stop motor/engine when adjusting or servicing this equipment. Maintain
a safe operating distance from ammable materials. Sparks
from the cutting-action of this machine can ignite ammable
materials or vapors.
• Propane is extremely ammable and is heavier than air
and tends to settle in low areas where a spark or ame could
ignite gas. DO NOT start or operate this propane engine in
a poorly ventilated area where leaking propane gas could accumulate
and endanger safety of persons in area. If headache develops, shut o
machine. Have it checked for carbon monoxide emissions by a qualied
technician before using it again. To ensure personal safety, installation
and repair of propane fuel supply systems must be performed only by
qualied technicians. Carbon monoxide emissions from this machine are
greatly increased due to a dirty combustion air cleaner.
Extreme care must be taken when operating electric models
with water present: Ensure power cord is properly grounded,
is attached to a Ground-Fault-Interrupter (GFI) outlet, and is
undamaged.
• Check all electrical cables - be sure connections are tight and cable
is continuous and in good condition. Be sure cable is correctly rated
for both the operating current and voltage of this equipment.
• Improper connection of the equipment grounding conductor can
result in a risk of electric shock. Check with qualied electrician or
service person if there is any doubt as to whether the outlet is properly
grounded. Adhere to all local codes and ordinances.
• NOTE: In the event of a malfunction or breakdown, grounding provides
a path of least resistance for the electric current to dissipate. The motor
is equipped with a grounded plug and must be connected to an outlet
that is properly installed and properly grounded. DO NOT modify the
plug provided on the motor. If the plug does not t the outlet have a
qualied electrician install the proper receptacle.
ELECTRICAL POWERED EQUIPMENT
DUST WARNING
Some dust created by power sanding, sawing, grinding,
drilling, and other construction activities contains chemi-
cals known to cause cancer, birth defects, or other
reproductive harm. Materials being removed can be toxic or hazardous.
A breathing respirator is required to help protect the operator.
Some examples of these chemicals are:
• Lead from lead-based paints.
• Crystalline silica from bricks, concrete and other
masonry products.Your risk of exposure to these chemi cals varies de-
pending on how often you do this type of work. To reduce your risk: work
in a well ventilated area, use a dust control system, such as an industrial-
style vacuum, and wear approved personal safety equipment, such as a
dust/particle respirator designed to lter out microscopic particles.
• See more on the importance of dust prevention and silica warnings at:
osha.gov/silica
• More concrete and silica dust supression training and educational ma-
terials available at edcoinc.com/silica-standards or scan the QR code on
page 5.
• Written exposure plans are provided at http://www.edcoinc.com/written-
exposure-control-plans/
ELECTRICAL POWERED EQUIPMENT CONTINUED
SAFETY INFORMATION
E-SPVAC-I-0419
Page 3
1-800-638-3326 • edcoinc.com • [email protected]
OPERATOR’S INSTRUCTION MANUAL
FOR
SLURRY PRO VACUUM
Section Page Number
Safety Information . . . . . . . . . . . . . . . . . . . . . . . . . . . . . . . . . . . . . . . . . . . . . . . . . . 2
Safety - Specically for the Slurry Pro Vacuum . . . . . . . . . . . . . . . . . . . . . . . . . . . . 4
Features . . . . . . . . . . . . . . . . . . . . . . . . . . . . . . . . . . . . . . . . . . . . . . . . . . . . . . . . . 4
Specications . . . . . . . . . . . . . . . . . . . . . . . . . . . . . . . . . . . . . . . . . . . . . . . . . . . . . . 5
Dimensions . . . . . . . . . . . . . . . . . . . . . . . . . . . . . . . . . . . . . . . . . . . . . . . . . . . . . . . 5
Startup and Shutdown . . . . . . . . . . . . . . . . . . . . . . . . . . . . . . . . . . . . . . . . . . . . . . . 6
Emptying . . . . . . . . . . . . . . . . . . . . . . . . . . . . . . . . . . . . . . . . . . . . . . . . . . . . . . . . 7
Pump Cleaning Instrcutions . . . . . . . . . . . . . . . . . . . . . . . . . . . . . . . . . . . . . . . . . . 8
Filter Inspection . . . . . . . . . . . . . . . . . . . . . . . . . . . . . . . . . . . . . . . . . . . . . . . . . . . . 9
Motor Cover Disassembly for Brush Inspection . . . . . . . . . . . . . . . . . . . . . . . . . . . . 10
Ametek Motor Brush Inspection . . . . . . . . . . . . . . . . . . . . . . . . . . . . . . . . . . . . . . . . 11
Electro Motor Brush Inspection . . . . . . . . . . . . . . . . . . . . . . . . . . . . . . . . . . . . . . . . 12
Troubleshooting . . . . . . . . . . . . . . . . . . . . . . . . . . . . . . . . . . . . . . . . . . . . . . . . . . . . 13
Limited Equipment Warranty of Sale . . . . . . . . . . . . . . . . . . . . . . . . . . . . . . . . . . . . . 15
STOP - Before Using This Product . . . . . . . . . . . . . . . . . . . . . . . . . . . . . . . . . . . . . . 16
TABLE OF CONTENTS

E-SPVAC-I-0419
Page 4
1-800-638-3326 • edcoinc.com • [email protected]
CAUTION: Standard machines are not to be used for the removal of liquids or any volatile,
viscous, ammable or explosive media.
CAUTION: Slurry Vac machines are for the pick-up of wet material and solids only.
Slurry Vac machines should not be used for the pickup of ne dust.
CAUTION: Standard machines are designed for intermittent use, i.e. not more than 2 hours
continuously.
CAUTION: A dust mask should be worn when working with used lters.
CAUTION: Disconnect the machine from power before and during inspection or maintenance.
When in use, this machine should always be connected to a ground fault interrupter (GFCI/GFI),
either the circuit breaker or receptacle type.
Use only EDCO replacement parts, accessories and hoses specically designed for your
machine. Clean unit daily.
SAFETY - SPECIFICALLY FOR THE SLURRY PRO VACUUM
FEATURES
Technical Key:
1. 2 Motor, 200cfm, 110 volt
2. Industry leading return pump designed
specically for abrasive solids (40gpm)
3. Durable “bulletproof” compression cast
composite modular housing
4. 32 gallon liquid capacity
5. 44 sq.ft. of hydrophobic ltration
6. Positive closure foat for liquid ll shut o
7. 32” oor sweep
8. Bottom gravity feed discharge with blast gate
9. Separate slurry collection chamber decreases
cleaning and maintenance time

E-SPVAC-I-0419
Page 5
1-800-638-3326 • edcoinc.com • [email protected]
SPECIFICATIONS
5/3/2019 SLURRY-VAC-DIMENSIONAL-2.26.19-WITH-FLOORSWEEP.png (2000×2000)
https://www.ruwac.com/wp-content/uploads/2019/01/SLURRY-VAC-DIMENSIONAL-2.26.19-WITH-FLOORSWEEP.png 1/1
DIMENSIONS
31.500” 50.685”
59.117”

E-SPVAC-I-0419
Page 6
1-800-638-3326 • edcoinc.com • [email protected]
4Questions? Call Ruwac at (413) 532-4030 or e-mail us at [email protected]!
III. Start-Up
Note: Electrical installation should be performed by a qualied electrician in accordance with
governing national and local electrical codes.
1 2 34
Check that the slide
valve is closed.
Connect to proper
power source as
indicated on the
serial tag.
Start machine using
the ON / OFF switch
on the motor domes.
Turn machine off using
the ON / OFF switch
on the motor domes.
SLURRY VAC INSTRUCTIONS:
START UP / SHUTDOWN
Machine should be
emptied after every use.
5
It is critical that you
empty/clean the vacuum
after each use. If
material is allowed to
“set up” inside it will
render the vacuum
inoperable. Please
refer to Section IV for
instructions.
STARTUP AND SHUTDOWN

E-SPVAC-I-0419
Page 7
1-800-638-3326 • edcoinc.com • [email protected]
5
IV. Inspection & Maintenance
1 2 3
Use the internal pump
to evacuate the water.
You must hold the
switch down to operate
the pump.
If pump becomes
clogged, refer to
the pump cleaning
instruction on the next
page.
SLURRY VAC INSTRUCTIONS:
EMPTYING - Collection vessel and pump must be cleaned after every single use. The
pump may be used while the vacuum is running, but if the pump needs to be cleaned
you must turn the vacuum off.
4
Once most of the water
has been pumped out
of the machine you
can open the slidegate
at the bottom of the
collection unit. The
solids can be ushed
or scooped out. Close
sidegate when nished.
Check for carryover
liquid by opening
the slidegate under
the lter hosuing.
Close slidegate when
nished.
Note: The emptying/cleaning instructions must be performed after each use. Do not allow the
material to set up inside.
3

E-SPVAC-I-0419
Page 8
1-800-638-3326 • edcoinc.com • [email protected]
6Questions? Call Ruwac at (413) 532-4030 or e-mail us at [email protected]!
IV. Inspection & Maintenance
1 2 34
5
Loosen hose cuff. Disconnect clamps on
either side.
Remove motordeck. Remove the pump
from the tank without
disconnecting the hose.
Place the pump in a 5
gallon bucket and run
the clean water through
the pump.
SLURRY VAC INSTRUCTIONS:
PUMP CLEANING INSTRUCTIONS
Note: Pump should be cleaned daily to ensure material doesn’t build up and harden.
PUMP CLEANING INSTRUCTIONS

E-SPVAC-I-0419
Page 9
1-800-638-3326 • edcoinc.com • [email protected]
7
1
Disconnect clamps on
either side.
2
Disconnect the pump
from power if included.
Remove motordeck
and inspect lter. The
lter is used to stop
moisture from entering
the motor and not for
ltering dust.
3
IV. Inspection & Maintenance
4
56
Loosen lter hold down
bracket bolts enough to
remove the lter.
Remove lter and
inspect. Replace lter
as needed to maintain
optimal performance.
SLURRY VAC INSTRUCTIONS:
FILTER INSPECTION
Note: Inspection of the lter will vary with usage of the machine.
Open the slidegate
under the lters to
empty any liquid from
the lter chamber.
Close the slide gate
before using the unit.
FILTER INSPECTION

E-SPVAC-I-0419
Page 10
1-800-638-3326 • edcoinc.com • [email protected]
8Questions? Call Ruwac at (413) 532-4030 or e-mail us at [email protected]!
IV. Inspection & Maintenance
SLURRY VAC INSTRUCTIONS:
MOTOR COVER DISASSEMBLY FOR BRUSH INSPECTION
1 2 34
5
Turn the machine off,
then disconnect the
power source.
Disconnect motor
terminal.
Loosen the motor
retaining knobs
enough to remove
motor under negative
pressure.
Remove the 6 screws
attached to each motor
assembly.
Remove the plastic
motor cover to access
the top of the motor.
6
Remove the 2 metal
motor-cap-retaining
clips locating on each
motor (for Ametek
motors only)
SEE PAGE 9 FOR
AMETEK
MOTOR BRUSH
INSPECTION
INSTRUCTIONS
SEE PAGE 10 FOR
ELECTRO MOTOR
MOTOR BRUSH
INSPECTION
INSTRUCTIONS
MOTOR COVER DISASSEMBLY FOR BRUSH INSPECTION
SEE PAGE 11 FOR
AMETEK
MOTOR BRUSH
INSPECTION
INSTRUCTIONS
SEE PAGE 12 FOR
ELECTRO
MOTOR BRUSH
INSPECTION
INSTRUCTIONS

E-SPVAC-I-0419
Page 11
1-800-638-3326 • edcoinc.com • [email protected]
9
IV. Inspection & Maintenance
SLURRY VAC INSTRUCTIONS:
AMETEK MOTOR BRUSH INSPECTION
1 2 34
Remove motor fan
cover by pressing down
on clips located on
each side.
Remove the two
screws securing the
brush. Repeat the
process for the other
side.
Pull brush out from
wire clip.
Remove brush from
wire clip by sliding off
groove. If brush is worn
down to a length of
0.25” or less, replace
brush.
To replace or reinstall
brush, repeat process
in reverse.
NOTE: A motor brush should be replaced if its length is less than 0.25 inches.
AMETEK MOTOR BRUSH INSPECTION

E-SPVAC-I-0419
Page 12
1-800-638-3326 • edcoinc.com • [email protected]
IV. Inspection & Maintenance
SLURRY VAC INSTRUCTIONS:
ELECTRO MOTOR BRUSH INSPECTION
5
Carefully dislodge the
plastic motor cap via
the built-in hooks on
both sides of motor
brush. (TIP: Dislodge
one side of a cap rst
followed by the other.)
With a athead
screwdriver, ip brush
tab upward. Use pliers
to then pull the brush
out by the tab.
If the brush is worn
down to a length of
0.25” or less, replace
the brush. To replace
or reinstall brush, hold
down internal spring
using the tool supplied
with brush.
While holding spring
down, push the brush
back in. Remove the
brush tool once the
brush is in.
Push the motor brush
in until it’s ush.
1 2 34
NOTE: A motor brush should be replaced if its length is less than 0.25 inches.
ELECTRO MOTOR BRUSH INSPECTION

E-SPVAC-I-0419
Page 13
1-800-638-3326 • edcoinc.com • [email protected]
11
V. Troubleshooting
PROBLEM POSSIBLE CAUSE CORRECTIVE ACTION
Insufcient Vacuum - Hose blocked - Unplug hose.
- Filter clogged or improperly - Follow lter inspection procedure (Section IV)
seated
- Vacuum leak - Check that motor deck is properly seated and
secured. Also, check all hoses.
Air Leaks - Worn or poorly seated seals, - Block the inlet with a at and rigid material to
Retainers improperly installed place the unit under vacuum pressure then
remove retainers and turn the unit off. Inspect the
seals for completeness, then reseat and secure
components again under vacuum pressure.
Unable to Control - Incorrect pump setting - Remove the motor deck (Section IV), then check
Pump Manually that the internal sump pump switch (near handle)
is set to the manual “HAND” position, i.e. the
switch is pushed up.
Unusual or High - Motor bearings, turbine - Follow relevant motor / turbine inspection
Pitched Noises bearing procedure, Section III. Check motor bearings for
noise by hand.
- Worn or poorly seated seals, - Block the inlet with a at and rigid material to
Retainers improperly installed place the unit under vacuum pressure then
remove retainers and turn the unit off. Inspect the
seals for damage, then reseat and secure
components again under vacuum pressure.
TROUBLESHOOTING

E-SPVAC-I-0419
Page 14
1-800-638-3326 • edcoinc.com • [email protected]
THIS PAGE LEFT BLANK INTENTIONALLY

E-SPVAC-I-0419
Page 15
1-800-638-3326 • edcoinc.com • [email protected]
Equipment Development Company, Inc. herein referred to as EDCO (Seller) warrants that
each new unit manufactured by EDCO to be free from defects in material and workmanship
in normal use and service for a period of (1) one year (except for the cutter drum assembly
on all model concrete/asphalt planers AND the chisel head assembly on all model ALR’s &
ALR-BS in which case the warranty period shall be 90 days) from date of shipment to the
original retail or equipment rental center owner.
Accessories or equipment furnished and installed on the product by EDCO but manufactured by
others, including, but not limited to engines, motors,electrical components, transmissions etc.,
shall carry the accessory manufacturers own warranty.
EDCO will, at its option, repair or replace, at the EDCO factory or at a point designated by
EDCO, any part which shall appear to the satisfaction of EDCO inspection to have been
defective in material or workmanship.
EDCO reserves the right to modify, alter and improve any part or parts
without incurring any obligation to replace any part or parts previously sold without such
modified, altered or improved part or parts.
This warranty is in lieu of and excludes all other warranties, expressed, implied, statutory,
or otherwise created under applicable law including, but not limited to the warranty of
merchantability and the warranty of fitness for a particular purpose in no event shall seller
or the manufacturer of the product be liable for special, incidental, or consequential dam-
ages, including loss of profits, whether or not caused by or resulting from the negligence
of seller and/or the manufacturer of the product unless specifically provided herein. In ad-
dition, this warranty shall not apply to any products or portions there of which have been
subjected to abuse, misuse, improper installation, maintenance, or operation, electrical
failure or abnormal conditions and to products which have been tampered with, altered,
modified, repaired, reworked by anyone not approved by seller or used in any manner
inconsistent with the provisions of the above or any instructions or specifications provided
with or for the product.
FORCE MAJEURE
Seller’s obligation hereunder are subject to, and Seller shall not be held responsible for, any
delay or failure to make delivery of all or any part of the Product due to labor difficulties,
fires, casualties, accidents, acts of the elements, acts of God, transportation difficulties,
delays by a common carrier, inability to obtain Product, materials or components or qualified
labor sufficient to timely perform part of or all of the obligations contained in these terms
and conditions, governmental regulations or actions, strikes, damage to or destruction in
whole or part of manufacturing plant, riots, terrorist attacks or incidents, civil commotions,
warlike conditions, flood , tidal waves, typhoon, hurricane, earthquake, lightning, explosion
or any other causes, contingencies or circumstances within or without the United States not
subject to the Seller’s control which prevent or hinder the manufacture or delivery of the
Products or make the fulfillment of these terms and conditions impracticable. In the event
of the occurrence of any of the foregoing, at the option of Seller, Seller shall be excused
from the performance under these Terms and Conditions, or the performance of the Seller
shall be correspondingly extended.
This document sets forth the terms and conditions pursuant to which the purchaser (“Pur-
chaser”) will purchase and Equipment Development Co.Inc. (“Seller”)will sell the products,
accessories, attachments (collectively the Products “) ordered by the Purchaser. These
terms and conditions shall govern and apply to the sale of Seller’s Products to Purchaser,
regardless of any terms and conditions appearing on any purchase order or other forms
submitted by Purchaser to Seller, or the inconsistency of any terms therein and herein.
1. PRICE
All prices set forth on any purchase order or other document are F.O.B. Sellers facility or dis-
tribution point, as may be determined by Seller (F.O.B.Point). All prices are exclusive of any
and all taxes, including, but not limited to, excise, sales, use, property or transportation taxes
related to the sale or use of the Products, now or hereafter imposed, together with all penalties
and expenses. Purchaser shall be responsible for collecting and/or paying any and all such
taxes, whether or not they are stated in any invoice for the Products. Unless otherwise speci-
fied herein, all prices are exclusive of inland transportation, freight, insurance and other costs
and expenses relating to the shipment of the Products from the F.O.B. point to Purchaser’s
facility. Any prepayment by Seller of freight insurance and other costs shall be for the account
of Purchaser and shall be repaid to Seller.
2. PAYMENT TERMS
Payment terms are as follows. 2% 10 days (to approved and qualified accounts). Net 30
days. This is a cash discount for invoices paid within 10 days after the invoice date, regard-
less of date of receipt of shipment. This is not a trade discount and will not be granted to
accounts that do not adhere to stated terms.
*All past due accounts are subject to a late payment fee of 1.5% per month or a maximum
allowed by law if different, along with the expenses incidental to collection including reason-
able attorney’s fees and costs.
*Seller reserves the right to hold shipments against past due accounts.
*Seller reserves the right to alter payment terms.
3. FREIGHT TERMS
All shipments will be made F.O.B. shipping point as designated in these Terms and Condi-
tions, and title shall pass at the F.O.B. point. Delivery to the initial common carrier shall
constitute delivery to the Purchaser. Any claims for loss or damage during shipment
are to be filed with carrier by the Purchaser. Seller will not assume responsibility for the
performance of the carrier.
Back orders will be shipped in the most practical fashion with charges consistent with
our freight policy established with the original order. UPS, FED EX, MAIL or shipments
by other couriers are subject to the same terms and conditions as outlined in paragraph
#3”Freight Terms”.
4. DELIVERY, DAMAGES, SHORTAGES
Seller shall use reasonable efforts to attempt to cause the Products to be delivered as provided
for in these Terms & Conditions. Delivery to the initial common carrier shall constitute the delivery
to the Purchaser. Sellers responsibility, in so far as transportation risks are concerned ceases
upon the delivery of the Products in good condition to such carrier at the F.O.B. point and all the
Products shall be shipped at the Purchaser’s risk. Seller shall not be responsible or liable for
any loss of income and/or profits, or incidental, special, consequential damages resulting from
Seller’s delayed performance in shipment and delivery.
5. RETURN OF DEFECTIVE PRODUCTS
Defective or failed material shall be held at the Purchaser’s premises until authorization has
been granted by Seller to return or dispose of Products. Products that are to be returned
for final inspection must be returned Freight Prepaid in the most economical way. Credit
will be issued for material found to be defective upon Seller’s inspection based on prices
at time of purchase.
6. PRODUCTS ORDERED IN ERROR
Products may be returned, provided that claim is made and Seller is notified within 7 days
of receipt of Products, and the Products are in original buyer’s possession not more than
30 days prior to return, subject to Seller’s approval. If Products are accepted for return,
they must be Freight Prepaid and buyer will be charged a minimum of 15% restocking
charge, plus a charge back for outbound freight charges if the original order was shipped
prepaid. Returns are not accepted for any Products that are specifically manufactured to
meet the buyer’s requirement of either specifications or quantity.
AGREEMENTS
These Terms and Conditions constitute the entire agreement between Seller and Purchaser as
it relates to terms and conditions of sale, and supersedes any and all prior oral or written agree-
ments, correspondence, quotations or understandings heretofore in force between the parties
relating to the subject matter hereof. There are no agreements between Seller and Purchaser
with respect to the Product herein except those specifically set forth in and made part of these
terms and conditions. Any additional terms, conditions and/or prices are rejected by Seller.
These terms and conditions may be modified, cancelled or rescinded only by a written
agreement of both parties executed by their duly authorized agents.
USE ONLY GENUINE EDCO PARTS & ACCESSORIES
For your own safety, the safety of others and the life of your machine.
SUBMIT ALL WARRANTY CLAIMS AT:
edcoinc.com/customer-support/warranty-claim-form/
LIMITED EQUIPMENT WARRANTY OF SALE
TERMS AND CONDITIONS
(NOT APPLICABLE TO SALES THROUGH AUTHORIZED DISTRIBUTION)

E-SPVAC-I-0419
Page 16
1-800-638-3326 • edcoinc.com • [email protected]
Scan This QRC or Visit
www.edcoinc.com/customer-support
READ: EDCO Owner’s Manuals and Parts Listings share basic information
and parts of each product. Download and print them whenever needed.
WATCH: EDCO Product Training Videos show how to use products, install
tooling, and perform basic maintenance.
FIND: Somewhere on this product is an EDCO QRC Training Decal. Scanning
this code provides owner’s information, videos, and other training content
anywhere/anytime on your mobile device.
JOIN: EDCOed.com is a free, 24-hour training space. Each certication track
focuses on a specic EDCO product group. The information in these tracks help
businesses be successful with those products.
Example Only
EDCO is always updating online training / information so you always have the most recent content.
Also see Operator’s Safety & Limited Warranty Manual
BEFORE USING THIS PRODUCT
Have You Used EDCO’s Online Customer Support??
Table of contents
Other Edco Vacuum Cleaner manuals

Edco
Edco VAC-290 Assembly instructions

Edco
Edco VAC-290 Assembly instructions

Edco
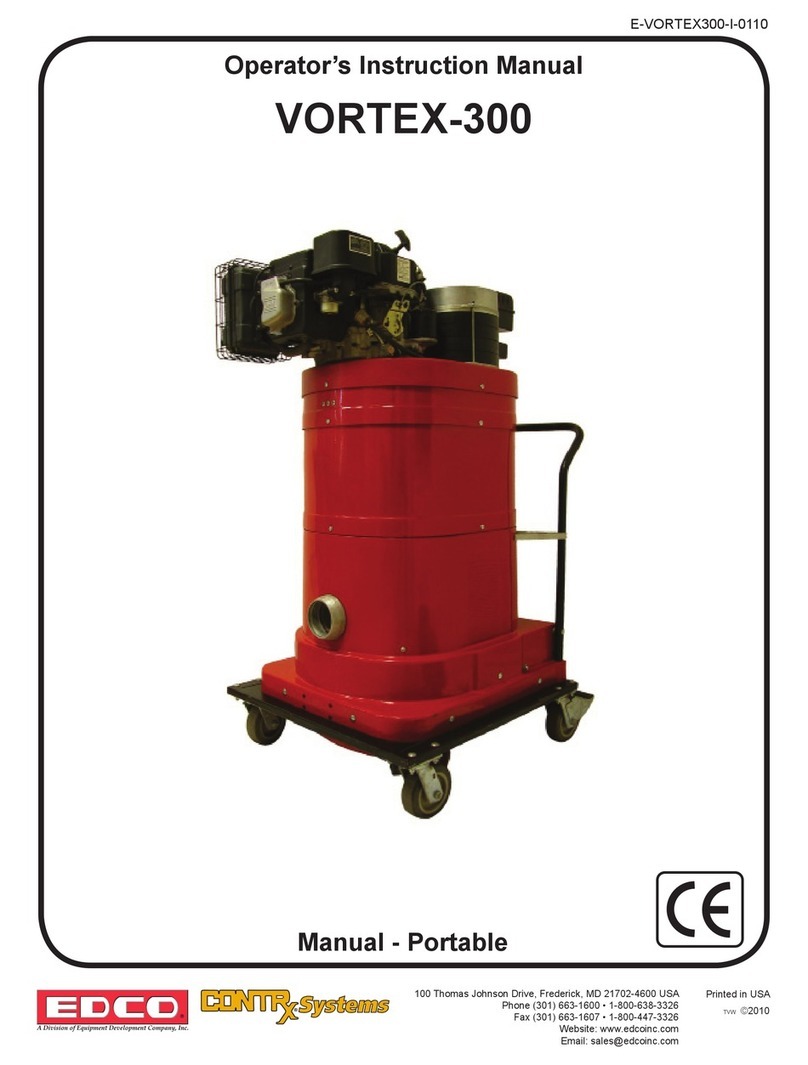
Edco VORTEX-300 Assembly instructions

Edco
Edco Kit AH2 User manual

Edco
Edco Vortex 300 Datasheet

Edco
Edco GVE 370 User manual

Edco
Edco VAC-100 User manual

Edco
Edco Numatic HZC 390S-2 User manual

Edco
Edco Numatic CVC370 User manual

Edco
Edco WV 570 User manual