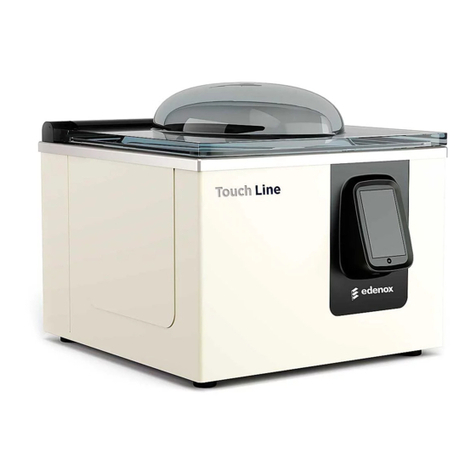
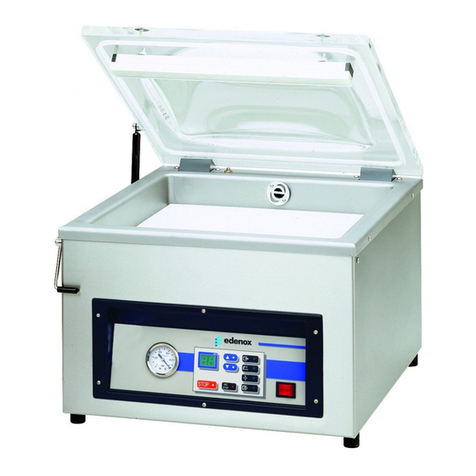
edenox VAKSIC-8 E User manual

SAVE THESE INSTRUCTIONS CAREFULLY
Read these instructions carefully before using your
microwave oven, and keep it carefully.
If you follow the instructions, your oven will provide you with
many years of good service.
Model:
MICRO-1834-D
CHAMBER VACUUM
PACKING MACHINE
USER’S MANUAL

INDEX
1. SUMMARY
2. USAGE
3. FEATURE
4. TECHNICAL PARAMETER
5. STRUCTURE AND PRINCIPLE
6. CONTROL PANEL INDICATION
7. INSPECTION AND ADJUSTMENT
8. OPERATION PROCESS
9. TROUBLESHOOTING
10. MAINTENANCE
11. CONTROL PANEL VIEW
12. ELECTRIC PRINCIPLE DIAGRAM
13. MACHINE EXPLODED DIAGRAM
14. ACCESSORIES

1. Summary
Single chamber vacuum packing machine with computer control panel is a novel packing machine which is to
vacuum and seal bag. The package in high degree vacuum and less remain air can avoid the bacteria to multiply,
oxygenize, mildewed. Meanwhile, it can reduce the soft product volume after vacuum packing in order to convenient
to transport and reserve.
2. Usage
The vacuum packager use compound film and pack solid, liquid and powder product such as food stuff,
medicine material, native and special product, marine product, chemical material and so on. The packaged
production can avoid to oxygenizing, mildewing, rusting, wetting, and pro-long the reserve time.
3. Feature
The machine is equipped with transparent organic grass cover; user can use whole packing process. Lower
chamber is stainless steel, reasonable structure, and strong draw vacuum and sealing, and nice appearance with
durable character. It conforms to the requirement of food hygienic standard.
These machine finishes draw vacuum and seal in one time. Adjust vacuum degree, sealing temperature, and
sealing time according to different packing material and requirement. Choose the best state to get best result.
The machine has character of advanced design, complete function, sable behavior, wide usage, strong sealing
and convenient maintenance. It is an ideal packing machine.
4. Technical Parameter
Model Number
VAKSIC-8 E
VAKSIC-10 E
VAKSIC-20 2A E
VAKSIC 20L 2A E
VAC-20E
Shell detail
(materials)
Stainless steel
Stainless steel
Stainless steel
Stainless steel
Stainless steel
Chamber
size(mm)
305×380×75
305×380×120
440×445×180
550×525×180
520×520×180
Voltage(V/Hz)
230/50
230/50
230/50
230/50
230/50
Power(W)
370
370
900
900
900
Sealing length
(mm)
260
300
400
400
500
Seal width(mm)
8
8
10
10
10
MAX Seal
Thickness(mm)
0.1-0.5
0.1-0.5
0.1-0.5
0.1-0.5
0.1-0.5
Vacuum time
range(Sec)
10-30
10-30
10-30
10-30
10-30
Package
Dimension(mm)
530*420*490
550*520*525
650*580*755
770*680*895
1040*670*750
Carton
weight(KG)
30
30
75
95
100
Pump
capacity(m³/H)
8
10
20
20
20

5. Structure and Principle
The machine composes of organic cover, vacuum chamber, machine body, electric appliance and vacuum
system. The vacuum chamber has heat-seal device and the heating element is nickel belt which installed on
heat-seal frame and insulated with vacuum chamber. Heat-seal frame touches closely on ballonet, which is in low
vacuum state before heat-sealed. When heat-seal, ballonet connects the air through solenoid valve, then ballonet
becomes big and heating element is pressed down. Press sealing part tightly and heat, the heating temperature and
time can be adjusted.
The machine power is AC 230V 50Hz, the motor for vacuum pump is AC230V. This heating system is
pressure adjustable type. Its means, the fist class of heating transformer is 220V, and second class has three shifts
(high, middle, low). Charging the power of second class can charge the sealing temperature, but the heat-seal
temperature is adjusted by button in panel.
The vacuum system composes of heat-seal electromagnetic valve YV2, release electromagnetic valve YV1.
When star the vacuum pump, vacuum chamber is drawing out the air. When reaches the preset vacuum degree, the
vacuum system stops running and next process will star, and automatic seal and release at one time.
6. Control panel indication
1) Control panel
There is vacuum meter, emergency stop key, setting key, adding key, reducing key, temperature adjusting key,
time display key and some pilot lamp.
2) Machine enters into waiting state when closed the air switch behind machine, Then set Vacuum
degree, sealing time, cooling time and sealing temperature.
a. to adjust vacuum degree: Press SET Button, the vacuum pilot lamp is on. Machine enters the setting
state of exhausting time, it shows the current exhausting time on time monitor, Meanwhile, user could
set the vacuum time according to the packing product. Press up and down key to change the vacuum
time. The longer time, and the higher vacuum degree, on the contrary, the lower degree of short
time(the range of exhausting time is between 1-99 second). Press “set” key, again after getting the
required exhausting time, and the “sealing pilot lamp” is on, and the machine enter the heat-seal time
setting state.
b. To set the sealing time, press “set” two times, the “sealing pilot lamp” is on. The machine enters the
setting state if sealing time, and it shows the current sealing time. Set sealing time according to the
thickness and material of vacuum-bag, press up and down key to increase or reduce the sealing time
(the range of sealing time is between 0.1-9.9 second). Press “set” again after setting sealing time, and
the “cooling pilot lamp” is on and then machine enters the cooling time setting state.
c. To set the cooling time: model VAKSIC-8 E / VAKSIC-10 E: press “set” key three times, the “cooling
pilot lamp” is on, and the machine enters the setting state of cooling time. It shows the current cooling
time on time monitor, and user set the cooling time according to the sealing time and sealing
temperature. Press up and down key to increase or reduce cooling time (the range of cooling time is
between 0.1-9.9 second). Press “set” key again after sealing cooling time, and show “ED” that indicate
setting is success, and machine start to run according to your setting digital. Model VAKSIC-20 2A E /
VAKSIC 20L 2A E / VAC-20E: the cooling time and heat-seal time is the same as the above.
d. To set the Sealing temperature is adjusted according to thickness and material of bag. The adjustment
of temperature have three shifts: high-middle-low. There are three pilot lamps on panel, in which have
the neutral shifts (pilot lamp is off, it indicate that there is without temperature). Press the “temperature
adjustment” key on time, the pilot lamp beats on time, continues to press it, the temperature circulate
beat among three shifts and neutral shift. As long as pilot lamp in any shift is on, it indicates the
temperature is this shift one.
e. Vacuum degree, sealing time, cooling time and sealing temperature are set by the requirement of
user.

7. Inspection and Adjustment
7.1 After opening the container, check whether accessory is completely, and the screws in all parts of the
machine are tighten and the organic glass cover move up and down freely.
7.2 Lubricate the moving parts, oil hole and oil nozzle regularly. Add rational gasoline, vacuum oil into vacuum
pump, oil level is between 1/4-3/4 of oil window.
7.3 Adjustment
7.3.1 Vacuum degree adjustment
According to the requirement of packing goods, choose the best exhausting time to obtain the appropriate
vacuum degree. The longer exhausting time, the higher vacuum degree.
7.3.2 Adjustment of heat-seal time and temperature
According to the bag material and different product, choose the best heat-seal temperature (1-3 shifts adjustable)
and heat-seal time (0.1-9.9second) one panel. Adjusting is from low to high until the best seal intensity and
appearance.
8. Operation Process
8.1 Connect to power supply, turn on the power switch, namely, the pilot lamp is on, Set exhausting time, heat-seal
time and heat-seal temperature.
8.2 Put the product into packing bag (plastic compound or aluminum foil bag) into the vacuum chamber and put
the bag top under heating seal strip orderly.
8.3 Press cover down, and the pilot lamp for vacuum in panel is on. The vacuum pump is exhausting, and the
cover is sucked automatically. Adjust vacuum time according to the packing requirement.
8.4 When the exhausting time reaches the set one (required vacuum degree), the process are finished, and the
pilot lamp is off. Now the pilot lamp for heat-seal time is on and begin to seal. There are heat-seal time and
temperature adjustment buttons on panel to adapt the different thickness material, and according to the specification
of bag.
8.5 When time reached the preset, the pilot lamp is off. It means the heating seal is finished and exhausting
electromagnetic valve works. The air enters into vacuum chamber, and the cover is lifted up. Now the packing
process is completed and turns to next process.
9. Troubleshooting
9.1 Can not vacuum and vacuum degree is low
9.1.1 Check if the vacuum pump rotates anticlockwise, and the rotating direction of vacuum pump is the same as
the arrows marked in motor.
9.1.2 When using new machine, the gasket in cover doesn’t touch the vacuum chamber well.
9.1.3 Check if the micro-switch is connected well.
9.1.4 The release electromagnetic valve isn’t closed well, check if the release electromagnetic valve and its axis
(rubber) is damaged or polluted and its axis is moving away. Please repair if replace if appears above states.
9.1.5 Check if the parts are leakage or loosed.
9.2 The heat-seal quality isn’t good.
9.2.1 Check if the bag mouth is clean.
9.2.2 Check if the heating element works regularly.
9.2.3 Check if the transformer output the voltage, if it isn’t output, please check the input circuit. If transformer has
input but without output, replace the transformer.
9.3 Main board trouble
9.3.1 Keep electric circuit of main board clean and dry. Not allow the metal on surface in order not to cause
short-circuit of main board interior, or the procedure chaotic.
9.3.2 Machine doesn’t vacuum and heat-seal, check the relative plug is connected well or button is damaged.
9.3.3 The digital board shows the trouble or without action indicates, check the plug of digital board is loose or
digital board is damaged.
9.3.4 One of heat-seal shifts is out of work, check the plug of relative relay isn’t connected well or the relay is
damaged.

10. Maintenance
10.1 Read the manual carefully before operation.
10.2 Add oil into the vacuum pump periodically.
10.3 Check if the machine is connected well with ground.
10.4 check if the Teflon tape surface is clean, smooth and strong sealing.
10.5 Turn off the power while appears trouble, or press the emergency stop.
10.6 Lift the cover up after releasing air, then turn of power and check it.
11. Control Panel
VAKSIC-8 E / VAKSIC-10 E
VACUUM PACKER
VACUUM
SEALING
COOLING
DEFLATE
TIME
S
HIGH
LOW
STOP VACUUM SEALINGVACUUM METER
WORKING PROCEDURE
VAKSIC-20 2A E / VAKSIC 20L 2A E / VAC-20E
VACUUM
SEALING
COOLING
DEFLATE
TIME
S
HIGH
MIDDLE
LOW
STOP VACUUM SEALING INCREASE DECREASE SEALING TEMPERATURE
VACUUM METER OPERATION ADJUST
VACUUM PACKER

12. Electric Principle Diagram (same for all models)
Diagrama del principio eléctrico
0 1 2 3
230V
A1 A2
A1
A2
220V
Working circuit diagram
Breaker
Heating wire
Sealing Transformer out
Sealing Transformer in
Pump
High
Low
Middle
PCB
Micro Swich
230V/Solenoid valve

13. MACHINE EXPLODED DIAGRAM
VAKSIC-8 E / VAKSIC-10 E
1
2
3
4
5
6
22
24
9
18
19
20
10
8
21
7
15
16
14 25
17
12
23
13
11
vacuum packing mahcine parts list
Number Name USE Quantity
1Cover's Platen 2
2Plexiglass cover 1
3Silicone seat 1
4Silicone 1
5Heating block 1
6Vacuum chamber 1
7Chassis 1
8Breaker 1
9Solenoid valve 1
10 Micro Switch 1
11 Vacuum pump 1
12 Sealing transformer 1
13 AC contactor 1
14 Control Panel 1
15 Vacuum Meter 1
16 Panel frame 1
17 Chassis's Bottom
plate 1
18 Gas spring bracket 2
19 Gas spring pin 2
20 Gas spring 2
21
Power line
waterproof
connector
1
22 Gland bars 1
23 Low voltage control
transformer
1
24 seatSolenoid valve
seat
1
25 Bottom side box 1

VAKSIC-20 2A E / VAKSIC 20L 2A E
1
2
3
4
5
6
18
19
8
21
20
10
9
24
22
7
16
15 14
23
11
12
13
17
Outlook and control panel
vacuum packing mahcine parts list
Number Name USE Quantity
1Cover's Platen 2
2Plexiglass cover 1
3Silicone seat 2
4Silicone 2
5Heating block 2
6Vacuum chamber 1
7Chassis 1
8Breaker 1
9Solenoid valve 1
10 Micro Switch 1
11 Vacuum pump 1
12 Sealing transformer 1
13 AC contactor 1
14 Control Panel 1
15 Vacuum Meter 1
16 Panel frame 1
17 Chassis's Bottom
plate 1
18 Gas spring bracket 2
19 Gas spring pin 2
20 Gas spring 2
21
Power line
waterproof
connector
1
22 Gland bars 1
23 Bottom side box 1
24 Solenoid valve seat 1

VAC-20E
SGQ2600-102,103 spare parts exploded View & list
14. Accessories
Description
Quantity
Vacuum packing machine
1 SET
Pump oil
1 BOTTLE
Heating wire
2 PCS
Teflon tape
2 PCS
User's manual
1 PC
Allen wrench 4mm 5mm
2 PCS
Screwdriver
2 PCS
Open-end wrench pump
1 PC

SAVE THESE INSTRUCTIONS CAREFULLY
Read these instructions carefully before using your
microwave oven, and keep it carefully.
If you follow the instructions, your oven will provide you with
many years of good service.
Model:
MICRO-1834-D
ENVASADORA AL VACÍO
CON CÁMARA
MANUAL DEL USUARIO

ÍNDICE
1. RESUMEN
2. USO
3. PRESTACIONES
4. PARÁMETROS TÉCNICOS
5. ESTRUCTURA Y PRINCIPIOS
6. INDICACIONES DEL PANEL DE CONTROL
7. INSPECCIÓN Y AJUSTE
8. PROCESO DE FUNCIONAMIENTO
9. DETECCIÓN Y SOLUCIÓN DE PROBLEMAS
10. MANTENIMIENTO
11. VISTA DEL PANEL DE CONTROL
12. DIAGRAMA DEL PRINCIPIO ELÉCTRICO
13. DIAGRAMA DE DESPIECE DE LA MÁQUINA
14. LISTA DE CONTENIDOS DEL PAQUETE

1. Resumen
Esta máquina envasadora con una cámara de vacío y panel de control computarizado es una máquina de envasado
nueva que sirve para generar vacío y soldar bolsas. El vacío de alta calidad del envasado elimina el aire para evitar
que las bacterias se multipliquen, se oxigenen y creen moho. Asimismo, el envasado al vacío puede reducir el
volumen de productos blandos para poder transportarlos y conservarlos fácilmente.
2. Uso
La envasadora al vacío utiliza película compuesta y sirve para envasar productos sólidos, líquidos y en polvo, tales
como alimentos, medicinas, productos nativos y especiales, productos marinos, materiales químicos y demás. El
envasado del producto puede impedir la oxidación, creación de moho, corrosión y humectación, además de
prolongar el periodo de conservación.
3. Prestaciones
Esta máquina está equipada con una tapa de plexiglás transparente a través de la cual el usuario puede observar el
proceso completo de envasado. La cámara inferior es de acero inoxidable, tiene una estructura óptima, ofrece un
potente proceso de aspiración de vacío y sellado y cuenta además con una buena apariencia y gran durabilidad.
Cumple los requisitos de la normativa de higiene de los alimentos. Esta máquina realiza el proceso de aspiración
de vacío y soldadura de una sola vez. Es posible ajustar el grado de vacío, la temperatura de la soldadura y el
tiempo de la soldadura en función de los diferentes materiales y requisitos de envasado. Elija el ajuste apropiado
para obtener los mejores resultados. La máquina cuenta con un diseño avanzado, funcionalidad completa,
funcionamiento estable, amplias aplicaciones de uso, un sellado fuerte y un mantenimiento sencillo. Es la máquina
ideal para envasar.
4. Parámetros técnicos
Model Number
VAKSIC-8 E
VAKSIC-10 E
VAKSIC-20 2A E
VAKSIC 20L 2A E
VAC-20E
Datos de la
carcasa
(materiales)
Acero
inoxidable
Acero
inoxidable
Acero inoxidable
Acero inoxidable
Acero
inoxidable
Tamaño de la
cámara(mm)
305×380×75
305×380×120
440×445×180
550×525×180
520×520×180
Tensión (V/Hz)
230/50
230/50
230/50
230/50
230/50
Potencia (W)
370
370
900
900
900
Longitud de la
soldadura (mm)
260
300
400
400
500
Ancho de la
soldadura(mm)
8
8
10
10
10
Grosor máx. de
la soldadura
(mm)
0.1-0.5
0.1-0.5
0.1-0.5
0.1-0.5
0.1-0.5
Rango de tiempo
para el vacío
(seg.)
10-30
10-30
10-30
10-30
10-30
Dimensiones del
paquete (cm)
530*420*490
550*520*525
650*580*755
770*680*895
1040*670*750
Peso de la caja
(KG)
30
30
75
95
100
Capacidad de la
bomba(m³/H)
8
10
20
20
20

5.Estructura y principios
La máquina está compuesta de carcasa orgánica, cámara de vacío, cuerpo de la máquina, circuito eléctrico y
sistema de vacío. La cámara de vacío tiene un dispositivo de sellado térmico. El elemento calefactor está sujeto con
níquel, instalado en la estructura de sellado térmico y aislado con la cámara de vacío. La estructura de sellado
térmico está muy cerca de la cámara neumática, que está en estado de vacío bajo antes del sellado térmico.
Cuando se sella térmicamente, la cámara neumática conecta el aire a través de la válvula solenoide, luego se
hincha y presiona el elemento calefactor. La fuerza de presión de la parte de sellado, el calor, la temperatura de
calentamiento y el tiempo se pueden ajustar.
La tensión de la máquina es 230 VAC 50 Hz, el motor para la bomba de vacío es AC230V.
El sistema de calefacción es del tipo de presión ajustable. Lo que significa que la primera clase del transformador
térmico es 230 V, y la segunda clase tiene tres turnos (alto, medio, bajo). Cambiar la tensión de la segunda clase
puede modificar la temperatura de sellado, pero la temperatura del sellado térmico se ajusta mediante un botón en
el panel.
El sistema de vacío está compuesto por una válvula electromagnética de sellado térmico y una válvula
electromagnética de liberación. Cuando se inicia la bomba de vacío, la cámara de vacío extrae el aire. Al alcanzar el
grado de vacío predeterminado, el sistema de vacío se detiene y empezará el siguiente proceso, el sellado
automático y la liberación simultáneamente.
6. Indicaciones del panel de control
1) Panel de control
Hay un manómetro de vacío, tecla de parada de emergencia, tecla de configuración, tecla para aumentar, tecla
para disminuir, tecla de ajuste de temperatura, tecla para ver el tiempo y algunas lámparas piloto.
2) La máquina entra en estado de espera cuando se cierra el interruptor de aire detrás de la máquina.
Entonces se establece el grado de vacío, tiempo de sellado, tiempo de enfriamiento y temperatura de
sellado.
a. Para ajustar el grado de vacío: Pulsar el botón SET, se activará la lámpara piloto de vacío. La máquina entra
en el estado de ajuste del tiempo de aspiración, muestra el tiempo de aspiración actual en el monitor del tiempo.
Mientras tanto, el usuario puede establecer el tiempo de vacío según el producto de embalaje. Pulse la tecla
arriba y abajo para cambiar el tiempo de vacío. Cuando mayor sea el tiempo, mayor será el grado de vacío. Por
otro lado, cuando menor sea el tiempo, menor será el grado de vacío (el rango del tiempo de aspiración está
entre 1 y 99 segundos). Vuelva a pulsar la tecla “set” una vez conseguido el tiempo de aspiración necesario, se
activará la “lámpara piloto de sellado” y la máquina entrará en el estado de ajuste de tiempo de sellado térmico.
b. Para establecer el tiempo de sellado, pulse “set” dos veces, se encenderá la “lámpara piloto de sellado”. La
máquina entra en el estado de ajuste del tiempo de sellado, y muestra el tiempo de sellado actual. Establezca el
tiempo de sellado según el grosor y el material de la bolsa de vacío, pulse la tecla arriba y abajo para aumentar
o disminuir el tiempo de sellado (el rango del tiempo de sellado está entre 0,1 y 9,9 segundos). Vuelva a pulsar
“set” después de establecer el tiempo de sellado, la “lámpara piloto de sellado” se encenderá y la máquina
entrará en el estado de ajuste del tiempo de enfriamiento.

c. Para establecer el tiempo de enfriamiento: VAKSIC-10E: pulse la tecla “set” tres veces, la “lámpara piloto de
enfriamiento” se encenderá y la máquina entrará en el estado de ajuste del tiempo de enfriamiento. Muestra el
tiempo de enfriamiento actual en el monitor de tiempo. El usuario establece el tiempo de enfriamiento según el
tiempo de sellado y la temperatura de sellado. Pulse la tecla arriba y abajo para aumentar o disminuir el tiempo
de enfriamiento (el rango del tiempo de enfriamiento está entre 0,1 y 9,9 segundos). Vuelva a pulsar la tecla
“set” después de establecer el tiempo de enfriamiento de sellado. Aparecerá “ED” para indicar que el ajuste se
ha realizado con éxito. La máquina empezará a funcionar según el ajuste digital. Modelos VAKSIC 20 20A E,
103, 104: El tiempo de refrigeración y el tiempo de sellado térmico es el mismo que el mencionado más arriba.
d. Para establecer la temperatura de sellado que se ajusta según el grosor y el material de la bolsa. El ajuste de
la temperatura tiene tres turnos: alto-medio-bajo. Hay tres lámparas piloto en el panel, donde tenemos el turno
neutro (la lámpara piloto estáapagada, indica que no hay temperatura). En ese momento pulse la tecla “ajuste
de temperatura”, la lámpara piloto parpadea, siga pulsándola, la temperatura de circulación parpadea entre tres
turnos y turno neutro. Cuando la lámpara está encendida en un turno, indica que la temperatura es la de este
turno.
e. El grado de vacío, tiempo de sellado, tiempo de refrigeración y temperatura de sellado se establecen según
las necesidades del usuario.
7. Inspección y ajuste
7.1 Tras la apertura del paquete, compruebe que todos los accesorios estén incluidos, que los tornillos de todos
los componentes de la máquina estén apretados y que la tapa de plexiglás se pueda mover libremente hacia arriba
y hacia abajo.
7.2 Lubrique los componentes móviles y ponga aceite regularmente en el orificio para el aceite y en la boquilla
para el aceite. Ponga aceite de vacío en la bomba de vacío. El nivel de aceite debe encontrarse entre 1/4-3/4 de la
mirilla del aceite.
7.3 Ajuste
7.3.1 Ajuste del grado de vacío Para obtener el grado de vacío apropiado, seleccione el mejor tiempo de
aspiración en función de los requisitos de los productos a envasar. Cuanto más prolongado sea el tiempo de
aspiración mayor será el grado de vacío.
7.3.2 Ajuste del tiempo y la temperatura de la soldadura térmica
En función del material de la bolsa y de los diferentes productos, seleccione en el panel la mejor temperatura
para la soldadura térmica (1-3 turnos ajustables) y el mejor tiempo para la soldadura térmica (0,1-9,9 segundos).
Empiece ajustando los valores de menor a mayor hasta conseguir la mejor intensidad y apariencia de la
soldadura.

8. Proceso de funcionamiento
8.1 Conecte la unidad al suministro eléctrico, encienda el interruptor de alimentación, esto es, la lámpara piloto
debe iluminarse. Establezca el tiempo de aspiración, el tiempo de la soldadura térmica y la temperatura de la
soldadura térmica.
8.2 Ponga el producto en una bolsa de envasado (de plástico, compuesta o de aluminio), introdúzcalo en la
cámara de vacío y coloque la parte superior de la bolsa debajo de la tira de soldadura térmica, alineada con ella.
8.3 Empuje la tapa hacia abajo y la lámpara piloto para el mecanismo de vacío del panel se iluminará. La
bomba de vacío realizará la aspiración y se succionará automáticamente la tapa. Establezca el tiempo de vacío
según los requisitos de envase.
8.4 Cuando el tiempo de aspiración alcance el ajuste establecido (el grado de vacío deseado) el proceso habrá
terminado y la lámpara piloto se apagará. Seguidamente, se encenderá la lámpara piloto para el tiempo de la
soldadura térmica y la unidad comenzará el proceso de soldado. En el panel de control encontrará los botones de
ajuste del tiempo y la temperatura de la soldadura térmica para poder adaptarlos a los diversos grosores de material
y las especificaciones de la bolsa.
8.5 Cuando se haya alcanzado el tiempo establecido la lámpara piloto se apagará. Esto significa que ha
finalizado el proceso de soldadura térmica y que la válvula electromagnética de aspiración funciona correctamente.
El aire entra a la cámara de vacío y la tapa se levanta. El proceso de envasado ya se habrá completado y podrá
comenzar el siguiente proceso.
9. Detección y solución de problemas
9.1 No aspira y el grado de vacío es bajo(Comprobar aceite)
9.1.1 Compruebe que la bomba de vacío gira en sentido contrario a las agujas del reloj y que el sentido de la
bomba de vacío es el mismo que el de las flechas marcadas en el motor.
9.1.2 Cuando se utiliza una máquina nueva, la junta de la tapa no toca la cámara de vacío correctamente.
9.1.3 Revise si el microinterruptor está bien conectado.
9.1.4 La válvula electromagnética de liberación no se cierra bien. Revise si la válvula electromagnética de
liberación y su eje (goma) están dañados o sucios, o si el eje se aparta. Si así fuera, repárelos o sustitúyalos.
9.1.5 Compruebe que no haya fugas en los componentes y que no se hayan aflojado.
9.2 La calidad de la soldadura térmica no es buena.
9.2.1 Compruebe que la apertura de la bolsa esté limpia.
9.2.2 Revise si el elemento calefactor funciona correctamente.
9.2.3 Compruebe si el transformador suministra a tensión indicada, de lo contrario, revise el circuito de entrada.
Si hay tensión de entrada, pero no de salida, sustituya el transformador.
9.3 Problemas con la placa principal
9.3.1 Mantenga el circuito eléctrico de la placa principal limpio y seco. No permita que haya metal en la
superficie para evitar que se provoque un cortocircuito en el interior de la placa principal o que haya problemas con
el funcionamiento.
9.3.2 El proceso de aspiración y soldadura térmica de la máquina no funciona. Revise si el enchufe
correspondiente está conectado correctamente o si el botón se ha averiado.
9.3.3 La tarjeta digital muestra indicación de que se ha producido un problema o que el accionamiento no
funciona. Compruebe que la tarjeta digital no se haya soltado ni dañado.
9.3.4 Uno de los turnos de la soldadura térmica no funciona. Revise si el conector del relé correspondiente está
conectado correctamente o si el relé se ha averiado.

10. Mantenimiento
10.1. Lea el manual con atención antes de utilizar el dispositivo.
10.2. Añada aceite a la bomba de vacío con frecuencia, control de nivel semanal. Si se envasan productos con
líquidos o especiales, será necesario cambios de aceite según necesidad y de forma más periódica.
10.3. Compruebe la conexión a la toma de tierra de la máquina.
10.4. Compruebe si la superficie de la cinta de Teflon está limpia, suave y el sellado es resistente.
10.5. Desconecte la alimentación de la máquina si hay un problema, o pulse la parada de emergencia.
10.6. Levante la cubierta después de liberar el aire, luego desconecte la alimentación y compruébela.
11. Vista del panel de control
VAKSIC-8 E / VAKSIC-10 E
VACUUM PACKER
VACUUM
SEALING
COOLING
DEFLATE
TIME
S
HIGH
LOW
STOP VACUUM SEALINGVACUUM METER
WORKING PROCEDURE
VAKSIC-20 2A E / VAKSIC 20L 2A E / VAC-20E
VACUUM
SEALING
COOLING
DEFLATE
TIME
S
HIGH
MIDDLE
LOW
STOP VACUUM SEALING INCREASE DECREASE SEALING TEMPERATURE
VACUUM METER OPERATION ADJUST
VACUUM PACKER
This manual suits for next models
4
Table of contents
Languages:
Other edenox Kitchen Appliance manuals