EDIFIER M601DB User manual

Multimedia Speaker
Usermanual|Manueldʼutilisateur|Manualdeusuario|Bedienungsanleitung
Manualedellʼutente|Manualdoutilizador|ユーザーズガイド|Руководствопользователя
M601DB

1
English
Important safety instruction
1. Please read the instructions carefully. Keep it in safe place for future reference.
2. Use only accessories approved by the manufacturer.
3. Install the instrument properly by following the instructions in the device connection section.
4. Using the product in a 0-35℃environment is recommended.
5. To reduce the risk of fire and electric shock, do not expose the product to rain or moisture.
6. Do not use this product near water. Do not immerge the product into any liquid or have it exposed to dripping or splashing.
7. Do not install or use this product near any heat source (e.g. radiator, heater, stove, or other devices that generate heat).
8. Do not place any object filled with liquids, such as vases on the product; neither should any open fire, such as lighted candles be placed on the product.
9.
Do not block any ventilation openings. Do not insert any object into ventilation openings or slots. It may cause fire or electric shock.
10. Keep sufficient clearance around the product to maintain good ventilation (minimum 5cm is recommended).
11. Do not force a plug into the jack. Before connection, check for blockage in the jack and whether the plug matches the jack and is oriented to the right direction.
12. Keep the provided accessories and parts (such as screws) away from children to prevent from being swallowed by mistake.
13.
Do not open or remove the housing yourself. It may expose you to dangerous voltage or other hazardous risks. Regardless the cause
o
f damage (such as damaged wire
or plug, exposure to liquid splash or foreign object falling in, exposure to rain or moisture, product not working or being dropped, etc.), the repair has to be
performed by an authorized service professional immediately.
14. Before cleaning the product with dry cloth, always turn off the product and disconnect the power plug first.
15. Never use strong acid, alkali, gasoline, alcohol, or other chemical solvents to clean the product surface. Use only neutral solvent or clear water for cleaning.
This device contains licence-exempt transmitter(s)/receiver(s) that comply with Innovation, Science and Economic Development Canada’s licence-exempt RSS(s).
Operation is subject to the following two conditions:
(1) This device may not cause interference.
(2) This device must accept any interference, including interference that may cause undesired operation of the device.
L’émetteur/récepteur exempt de licence contenu dans le présent appareil est conforme aux CNR d’Innovation, Sciences et Développement économique Canada applicables aux
appareils radio exempts de licence. L’exploitation est autorisée aux deux conditions suivantes :
(1) L’appareil ne doit pas produire de brouillage;
(2) L’appareil doit accepter tout brouillage radioélectrique subi, même si le brouillage est susceptible d’en compromettre le fonctionnement.
The OEM integrator is responsible for ensuring that the end-user has no manual instruction to remove or install module.
The module is limited to installation in mobile application;
A separate approval is required for all other operating configurations, including portable configurations with respect to Part 2.1093 and difference antenna configurations.
There is requirement that the grantee provide guidance to the host manufacturer for compliance with Part 15B requirements.
This device complies with Part 15 of the FCC Rules. Operation is subject to the following two conditions:
(1) this device may not cause harmful interference, and
(2) this device must accept any interference received, including interference that may cause undesired operation.
Changes or modifications do not expressly approved by the party responsible for compliance could void the user’s authority to operate the equipment.
Please notice that if the FCC identification number is not visible when the module is installed inside another device, then the outside of the device into which the module
is installed must also display a label referring to the enclosed module. This exterior label can use wording such as the following: “Contains FCC ID: 2ABA2ATM200” any
similar wording that expresses the same meaning may be used.
This equipment complies with FCC radiation exposure limits set forth for an uncontrolled environment. This equipment should be installed and operated with a minimum
distance of 20cm between the radiator & your body. This transmitter must not be co-located or operating in conjunction with any other antenna or transmitter.
The module is limited to OEM installation ONLY.
The statements for 5.8G module:

Important safety instruction
2
English
This symbol is to alert the user to the presence of un-insulated dangerous voltage within the product's enclosure that may be
of sufficient magnitude to constitute a risk of electric shock to persons.
This symbol is to warn the user not to disassemble the enclosure of the product and there is no user-replaceable part inside.
Take the product to an authorized service center for repair.
This symbol indicates that the product is a CLASS II or double insulated electrical device with no earth requirement.
This symbol indicates that the product is for indoor use only.
Excessively loud music may lead to hearing loss. Please keep the volume in a safe range.
Correct Disposal of this product. This marking indicates that this product should not be disposed with other household wastes
throughout the EU. To prevent possible harm to the environment or human health from uncontrolled waste disposal, recycle it
responsibly to promote the sustainable reuse of material resources. To return your used device, please use the return and collection
systems or contact the retailer where the product was purchased. They can take this product for environmental safe recycling.
Use only with the cart, stand, tripod, bracket, or table specified by the manufacturer, or sold with the apparatus. When a cart is used,
use caution when moving the cart/apparatus combination to avoid injury from tip-over.
Power warning:
1. Place the product near the power outlet for easy use.
2.
Before use, make sure that the operating voltage is the same as your local power supply. Correct operating voltage can be found on the product plate.
3. For safety purpose, unplug the product during lightning storms or when unused for extended periods of time.
4. Under normal conditions, the power supply may get hot. Please keep good ventilation in the area and exercise caution.
5. Safety warning labels on the housing or bottom of the product or power adaptor.
For wireless product:
1.
Wireless product may generate shortwave radio frequencies and interfere with the normal use of other electronic devices or medical equipment.
2. Turn off the product when it’s disallowed. Do not use the product in medical facilities, on airplane, at gas stations, near automatic gates,
automatic fire alarm system or other automated devices.
3. Do not use the product in the vicinity of a pacemaker within a 20cm range. The radio waves may affect the normal operation of the
pacemaker or other medical devices.
Please notice that if the IC identification number is not visible when the module is installed inside another device, then the outside of the device
into which the module is installed must also display a label referring to the enclosed module. This exterior label can use wording such as the
following: “Contains IC: 11534A-ATM200” any similar wording that expresses the same meaning may be used.
The MAINS plug is used as the disconnect device, the disconnect device shall remain readily operable.

3.5mm-RCA audio cable Fiber optic audio cable Power cable User manual
Passive speaker Subwoofer Active speaker Remote control
3
English
Box contents
Note: Images are for illustrative purposes only and may differ from the actual product.
RCA-RCA audio cable

4
English
Illustration
1. Pairing button (subwoofer pairing with active speaker)
The active speaker has been paired with the subwoofer before leaving factory. The wireless connection is supposed to
resume automatically when both active speaker and subwoofer are powered on, and the red indicator will be constantly lit.
If the wireless connection fails to resume, please follow the steps below to complete the pairing again.
• Power on the subwoofer, the status indicator should blink slowly, which means no active wireless connection;
• Press the "Pair" button on the back panel of the subwoofer to put it into pairing mode. The status indicator will blink rapidly;
• Press the "Pair" button on the back panel of the active speaker to put it into pairing mode;
• Wait until the status indicator is lit constantly. Then the pairing is done and wireless connection is made.
2. Status indicator 3. Power switch 4. Power cable 5. Bass adjustment
1
2
3
4
5
13
(same operation for the " " point)

5
English
Illustration
6. Power cable
7. Power switch
8. AUX input
9. Line In input
10. Optical input
11. Coaxial input
12. Status indicator
13. Pairing button (subwoofer pairing with active speaker)
14. Connect to passive speaker
15. Volume down button
Press: volume down
Press and hold for around 3 seconds to disconnect Bluetooth
(Bluetooth mode)
16. Power on/off / mode switch / mode indicator
Press: mode switch
Bluetooth: blue light flashes
AUX: green light flashes once
Line In: green light flashes twice
Optical: red light flashes once
Coaxial: red light flashes twice
Press and hold: power on/off
17. Volume up button
Press: volume up
15 16 17
7
8
6
9
10
11
12
13
14

6
English
Remote control
WARNING!
1. Don’t swallow the battery; danger of chemical burn.
2. The product includes a wafer battery. Swallowing this battery may lead to injury or death. Do not place the new or old
battery in where children can get to it.
3. Don’t use the product if the battery cover is missing or not closed, and keep the remote inaccessible to children.
4. Please go to the hospital immediately if the battery is swallowed.
Note:
1. Do not place the remote control in places that are hot and humid.
2. Do not charge the batteries.
3. Remove the batteries when unused for a long period of time.
4. The battery should not be exposed to excessive heat such as direct sun, fire or similar.
5. Danger of explosion if battery is incorrectly replaced. Replace only with the same or equivalent type.
Battery loading:
Please refer to the illustration to open the battery
compartment, insert the CR2032 battery and close
the compartment.
1. Power on/off
2. Volume up
3. Previous track/next track
(Bluetooth mode)
4. Play/pause
(Bluetooth mode)
5. Volume down
6. Line In mode
7. AUX mode
8. Coaxial mode
9. Optical mode
10. Bluetooth mode
Press: Bluetooth mode
Press and hold: disconnect
Bluetooth (Bluetooth mode)
11. Mute/mute off
3
7
8
10
1
2
5
6
9
11
4

7
English
Connection

8
English
Audio inputs
or
1. AUX/Line In mode
• Press the " " button on the active speaker, or press the " " or " " button on the remote control to switch to AUX
or Line In mode (the green indicator will flash and then will be steady lit);
• Connect audio source (mobile phone, tablet, etc.) to the "AUX" or "Line In" input port (note color matching) on the rear panel
of the active speaker using audio cable;
• Play music on the connected device and adjust the settings to a desired level.
2. Optical mode
• Press the " " button on the active speaker, or press the " " button on the remote control to switch to optical mode (the
red indicator will flash once and then will be steady lit);
• Connect audio source (DVD, Set Top Box, etc.) to the "OPT" input port on the rear panel of the active speaker using fiber optic
audio cable;
• Play music on the connected device and adjust the settings to a desired level.
3. Coaxial mode
• Press the " " button on the active speaker, or press the " " button on the remote control to switch to coaxial mode
(the red indicator will flash twice and then will be steady lit);
• Connect audio source to the "COAX" input port on the rear panel of the active speaker using coaxial cable (coaxial cable not
included);
• Play music on the connected device and adjust the settings to a desired level.

9
English
Audio inputs
4. Bluetooth mode
• It is Bluetooth mode by default when powered on for the first time; You can also press the " " button on the active speaker,
or press the " " button on the remote control to switch to Bluetooth mode (the blue indicator will flash rapidly);
• Set your Bluetooth device to search for and connect to "EDIFIER M601DB", after pairing is successful, the blue indicator will be
steady lit.
• Play music on the connected device and adjust the settings to a desired level.
• To disconnect Bluetooth, please press and hold " " on the active speaker for around 3 seconds, or press and hold the
" " button on the remote control.
Note:
• To enjoy all Bluetooth functions of this product, please ensure your audio source device has A2DP (Advanced Audio
Distribution Profile) and AVRCP(Audio Video Remote Control Profile) profiles.
• Bluetooth connectivity and compatibility may differ amongst different source devices, depending on the software versions of
source devices.
• Only the standard PCM audio signals (44.1KHz/48KHz) function in optical/coaxial mode.

10
English
Specifications
Total watts (peak): 220W
Total watts (RMS): 110W (R/L: 20W+20W SW: 70W)
Frequency response: R/L: 140Hz-20KHz
SW: 50Hz-170Hz
Audio inputs: Line In, AUX, Optical, Coaxial, Bluetooth
Declaration for EU
Frequency Band: 2.402GHz ~ 2.480GHz
RF Power output: ≤20 dBm (EIRP)
There is no restriction of use.

11
English
Troubleshooting
No sound
• Check if the speaker is ON.
• Try to turn up the volume using the volume control or remote control.
• Ensure the audio cables are firmly connected and the input is set correctly on the speaker.
• Check if there is a signal output from the audio source.
Cannot connect via Bluetooth
• Make sure the speaker is switched to Bluetooth input. If it is in other audio input modes, Bluetooth will not connect.
Disconnect from any Bluetooth device by pressing and holding the " " button, then try again.
• Effective Bluetooth transmission range is 10 meters; please ensure that operation is within that range.
• Try another Bluetooth device for connection.
The M601DB does not turn on
• Check if main power is connected, or if the wall outlet is switched on.
Noise coming from speakers
• EDIFIER speakers generate little noise, while the background noise of some audio devices are too high. Please unplug audio
cables and turn the volume up, if no sound can be heard at 1 meter away from the speaker, then there is no problem with
this product.
To learn more about EDIFIER, please visit www.edifier.com
For EDIFIER warranty queries, please visit the relevant country page on www.edifier.com and review the section titled
Warranty Terms.
South America: Please visit www.edifier.com (English) or www.edifierla.com (Spanish/Portuguese) for local contact
information.

Consignes de securite importantes
12
Français
L'écoute de musique à volume extrême de manière prolongée peut affecter l'audition de l'utilisateur. Veillez à régler le volume
à un niveau adéquat.
Élimination correcte de ce produit. Ce symbole avise qu’en Europe, ce produit ne doit pas être éliminé avec les autres déchets
ménagers.Recyclez-le de manière responsable pour promouvoir la réutilisation durable des ressources matérielles et éviter
tout risque pour l’environnement ou la santé résultant d’une élimination non contrôlée des déchets. Pour retourner le produit
usagé, utilisez les points de retour et de collecte ou contactez le vendeur du produit qui peut prendre en charge ce produit
pour un recyclage respectueux de l’environnement.
N’utiliser qu’avec le panier, le support, le trépied, le crochet ou la table stipulés par le fabricant ou vendus avec l’appareil.
Faire attention lors du déplacement d’un panier/appareil combiné afin d’éviter des blessures en cas de renversement si un
panier est utilisé.
1. Lisez toutes ces instructions avec attention. Conservez-les avec soin pour référence future.
2. N'utilisez que les pièces et accessoires certifiés par le fabricant.
3. Installez le produit correctement en suivant les instructions données dans la section concernant la connexion du dispositif.
4. Le produit est conçu pour une utilisation en environnement de température situé entre 0 et 35 °C.
5. Pour réduire le risque d'incendie ou d'électrocution, ne pas exposer le produit à la pluie ou à l'humidité.
6. Ne pas utiliser cet appareil à proximité de l'eau. Ne pas immerger le produit dans l'eau ni l'exposer à des éclaboussures ou à des
égouttements.
7. Ne pas installer ni utiliser ce produit à proximité d'une source de chaleur (par ex. un radiateur, un chauffe-eau, un four ou tout
autre appareil produisant de la chaleur).
8.
Ne pas poser d'objet rempli d'eau, comme un vase sur le produit. Ne pas y déposer de source de flamme nue, comme une bougie.
9. Ne pas obstruer les ouvertures d'aération. Ne pas insérer d'objet dans une ouverture de l'appareil. Ceci pourrait entraîner des
incendies ou des électrocutions.
10. Veillez à conserver un espace libre sur tout le pourtour de l'appareil pour garantir une aération correcte (un espace de 5
centimètres est recommandé).
11. Ne jamais forcer pour insérer une prise. Avant de brancher un câble, assurez-vous que le port sur l'appareil est libre de toute
obstruction et que la prise corresponde bien au type de port.
12. Conservez les accessoires et les pièces (comme les vis) hors de portée des enfants, pour éviter qu'ils ne les avalent.
13.
Ne jamais ouvrir ni retirer le boîtier de l'appareil. L'ouverture ou le retrait du boîtier peut vous exposer à des tensions dangereuses
et d'autres dangers. Quelle que soit la cause du dommage (un câble ou une prise endommagée, la mise en contact avec de
l'eau, la pluie ou de l'humidité, une chute ou une défaillance de source inconnue), toute réparation doit être effectuée aussitôt
que possible, par le personnel agréé.
14. Avant de nettoyer le produit avec un tissu sec, toujours éteindre le produit et débrancher d’abord la fiche électrique.
15. Ne jamais utiliser d'acide puissant, de produits alcalis, d'essence, d'alcool ou un autre dissolvant chimique pour en nettoyer la
surface. Utilisez uniquement un dissolvant neutre ou de l'eau claire pour le nettoyage.

Consignes de securite importantes
13
Français
Ce symbole indique à l'utilisateur la présence de voltage dangereux non isolé à l'intérieur de l'appareil, qui pourrait être
suffisant pour constituer un risque d'électrocution.
Ce symbole est présent pour indiquer que le produit ne doit pas être ouvert et qu'il ne contient aucun composant
remplaçable par l'utilisateur. En cas de besoin de réparation, apportez le produit au centre de service agréé.
Ce symbole indique que le produit doit être utilisé uniquement en intérieur.
Ce symbole indique que le produit est de CLASSE II, autrement dit à double isolation électrique et qu'il ne nécessite donc
pas de mise à la terre.
Avertissement sur l'alimentation électrique:
1. Placez le produit à proximité de la prise électrique pour une utilisation facile.
2. Avant utilisation, assurez-vous que le voltage délivré par la prise murale soit bien compatible avec le produit. Vous pouvez
consulter les informations de voltage sur l'étiquette présente sur le produit.
3. Pour des raisons de sécurité, débranchez l'appareil pendant les orages ou lors des périodes d'inutilisation prolongées.
4. L'alimentation peut chauffer en cours d'utilisation normale. Veillez à ce que le lieu d'utilisation soit correctement ventilé et
surveillez le produit.
5. Étiquettes d'avertissement apposées sur le boîtier ou au-dessous du produit ou de l'adaptateur secteur.
Lors de l’utilisation d’une prise au RESEAU ELECTRIQUE ou d’un coupleur comme dispositif de déconnexion ; ce dernier sera
maintenu opérationnel.
Les produits sans fils:
1. Les produits sans fils peuvent émettre des fréquences radio susceptibles d'interférer avec le bon fonctionnement normal
des appareils électroniques et des équipements médicaux.
2. Éteignez le produit lorsque cela est requis. Ne pas utiliser le produit dans des centres médicaux, à bord d'un avion, dans les
stations-service, à proximité d'un portail automatique, d'une alarme incendie ou de tout autre appareil automatisé.
3. Ne pas approcher le produit à moins de 20 centimètres d'un stimulateur cardiaque. Les ondes radio peuvent interférer avec
le fonctionnement normal du stimulateur ou d'autres équipements médicaux.

14
Français
Contenu du l’emballage
Câble audio
RCA-3,5mm Câble d’entrée en
fibre optique Câble d’alimentation Manuel d’utilisateur
Haut-parleur passif Caisson de basses Haut-parleur actif Télécommande
Remarque: Les images utilisées servent de référence uniquement, et peuvent ne pas correspondre au produit.
Câble audio RCA-RCA

15
Français
Illustration
1. Bouton d’association (association du caisson de basses avec le haut-parleur actif)
Le haut-parleur actif a été associé avec le caisson de basses en usine. La connexion sans fil reprendra automatiquement
lorsque le haut-parleur actif et le caisson de basse sont rallumés. L’indicateur rouge sera alors illuminé en continu.
Si vous ne parvenez pas à reconnecter, suivez les étapes ci-dessous pour rétablir la connexion:
• Allumez le caisson de basse, l'indicateur rouge doit alors clignoter lentement, ce qui signifie qu’il n’y a pas de connexion
sans fil active;
• Appuyez sur le bouton «Pair» sur le panneau arrière du caisson de basses pour activer le mode association. L’indicateur
d’état clignote rapidement;
• Appuyez sur le bouton «Pair» sur le panneau arrière du haut-parleur actif pour activer le mode association;
• Attendez que l’indicateur d’état s’illumine en continu. L’association est alors terminée et la connexion sans fil est effectuée.
2. Voyant de statut 3. Interrupteur marche/arrêt 4. Câble d’alimentation 5. Touche des graves
1
2
3
4
5
(même utilisation que pour l’étape « »)
13

16
Français
Illustration
6. Câble d’alimentation
7. Interrupteur marche/arrêt
8. Entrée AUX
9. Entrée ligne
10. Entrée optique
11. Entrée coaxiale
12. Voyant de statut
13. Bouton d’association
(association du caisson de basses avec le haut-parleur actif)
14. Connexion au haut-parleur passif
15. Bouton de réduction du volume
Appuyez: réduction du volume
Maintenez le bouton appuyé pendant environ 3 secondes pour
déconnecter le Bluetooth (mode Bluetooth)
16. Allumer/éteindre / sélection de mode / indicateur de mode
Appuyez: sélection de mode
Bluetooth: voyant bleu clignotant
AUX: l’indicateur vert clignote une fois
Entrée ligne: l’indicateur vert clignote deux fois
Optique: l’indicateur rouge clignote une fois
Coaxiale: l’indicateur rouge clignote deux fois
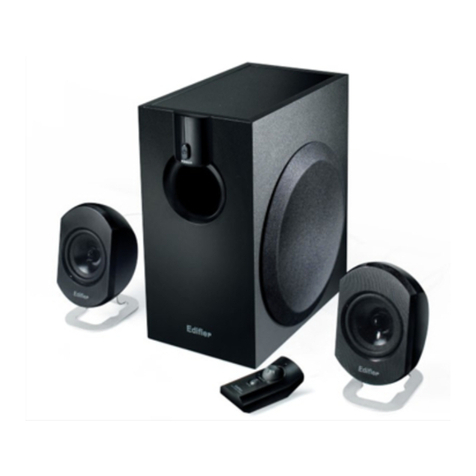
Maintenir enfoncé: allumer/éteindre
17. Bouton d’augmentation du volume
Appuyez: augmentation du volume
15 16 17
7
8
6
9
10
11
12
13
14

17
Français
Télécommande
AVERTISSEMENT!
1. Ne pas avaler la pile, risque de brûlure chimique.
2. Le produit comporte une pile-bouton. L'ingestion de la pile peut entraîner des blessures et même la mort. Ne pas placer
une pile neuve ou usagée à portée des enfants.
3. Ne pas utiliser le produit si le cache de pile est manquant ou n'est pas fermé, et gardez la télécommande hors de portée
des enfants.
4. Rendez-vous immédiatement à l'hôpital en cas d'ingestion de la pile.
Remarque:
1. Ne pas placer la télécommande dans un lieu chaud et humide.
2. Ne pas recharger la pile.
3. Retirer la pile avant une période d'inutilisation prolongée.
4. Ne pas exposer la pile à une température excessive, comme la lumière directe du Soleil, un feu ou similaire.
5. Risque d'explosion si la pile est remplacée de façon incorrecte. Ne remplacez une pile que par une pile du même type ou
de type équivalent.
Installation et remplacement de la pile:
Faites tourner le cache de la pile dans la direction
de la flèche pour le retirer. Installez la pile CR2032
dans le sens correct dans le compartiment, puis
fermez le cache.
1. Allumer/éteindre
2. Augmentation du volume
3. Piste précédente/piste suivante
(mode Bluetooth)
4. Lecture/pause
(mode Bluetooth)
5. Réduction du volume
6. Mode entrée ligne
7. Mode AUX
8. Mode coaxiale
9. Mode optique
10. Mode Bluetooth
Appuyez: mode Bluetooth
Maintenir enfoncé: déconnecter le
Bluetooth (mode Bluetooth)
11. Couper le son/rétablir le son
3
7
8
10
1
2
5
6
9
11
4

18
Français
Connexions

19
Français
Entrée audio
ou
1. Mode AUX/entrée ligne
• Appuyez sur le bouton « » sur le haut-parleur actif, ou appuyez sur le bouton « » ou « » de la télécommande
pour basculer au mode AUX ou entrée ligne (l’indicateur vert clignote puis s’illumine en continu);
• Pour connecter la source audio (téléphone mobile, tablette, etc.) au port de source audio «AUX» ou «Line In» (notez la
correspondance des couleurs) sur le panneau arrière du haut-parleur actif à l’aide d’un câble audio;
• Lisez la musique sur l’appareil connecté et faites les réglages à votre convenance.
2. Mode optique
• Appuyez sur le bouton « » sur le haut-parleur actif ou appuyez sur le bouton « » de la télécommande pour passer en
mode optique (l’indicateur rouge clignote une fois puis s’illumine en continu);
• Connectez une source audio (DVD, récepteur, etc.) au port de source «OPT» sur le haut-parleur actif à l’aide d’un câble audio
optique;
• Lisez la musique sur l’appareil connecté et faites les réglages à votre convenance.
3. Mode coaxiale
• Appuyez sur le bouton « » sur le haut-parleur actif ou appuyez sur le bouton « » de la télécommande pour passer en
mode coaxiale (L’indicateur rouge clignote deux fois puis s’illumine en continu);
• Connectez la source audio au port source «COAX» sur le haut-parleur actif à l’aide du câble coaxiale (câble coaxiale non inclus);
• Lisez la musique sur l’appareil connecté et faites les réglages à votre convenance.
Other manuals for M601DB
1
Table of contents
Languages:
Other EDIFIER Speakers manuals

EDIFIER
EDIFIER S2000MK III User manual

EDIFIER
EDIFIER P17 User manual

EDIFIER
EDIFIER M3300 User manual

EDIFIER
EDIFIER R231T User manual

EDIFIER
EDIFIER M203BT User manual

EDIFIER
EDIFIER MP230 User manual

EDIFIER
EDIFIER S1000DB User manual

EDIFIER
EDIFIER XM3BT User manual

EDIFIER
EDIFIER e20 User manual

EDIFIER
EDIFIER R231T User manual

EDIFIER
EDIFIER R1580MB User manual

EDIFIER
EDIFIER e1100MKII User manual

EDIFIER
EDIFIER HECATE G1500 User manual

EDIFIER
EDIFIER M206BT User manual

EDIFIER
EDIFIER MG300 User manual

EDIFIER
EDIFIER M2300 User manual

EDIFIER
EDIFIER S550 encore User manual

EDIFIER
EDIFIER X400 User manual

EDIFIER
EDIFIER MG250 User manual

EDIFIER
EDIFIER e3350BT User manual