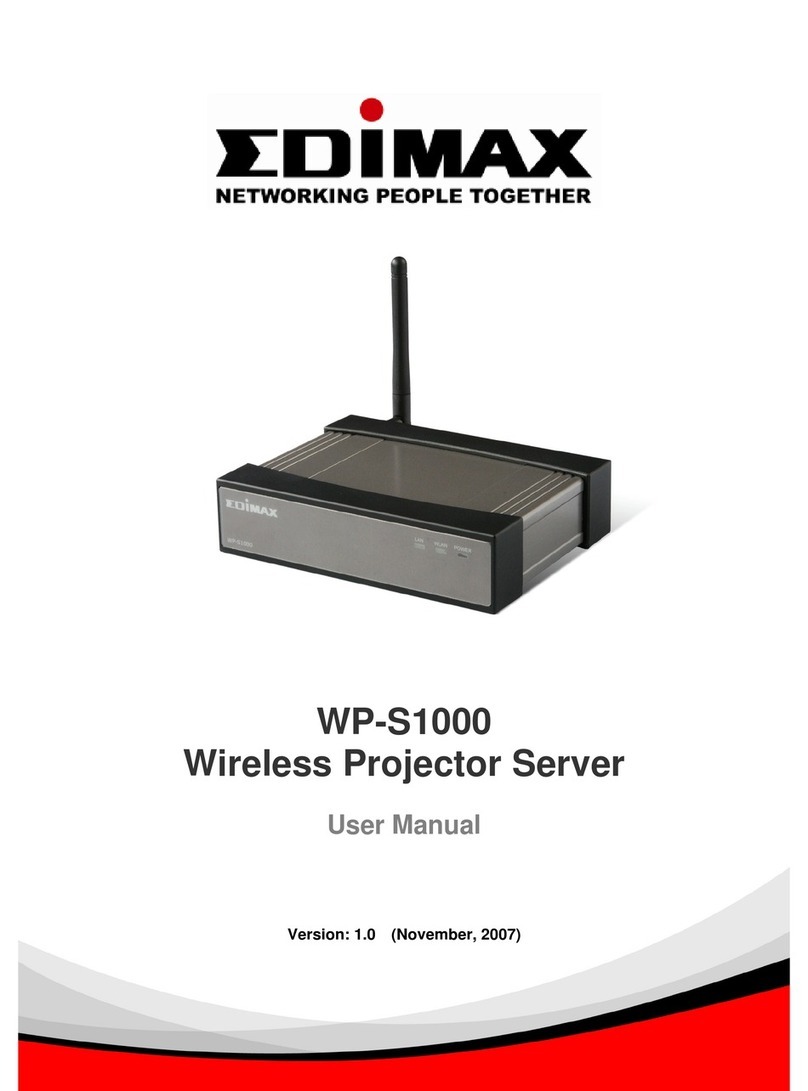
Edimax WP-S1100 User manual

1

2
Table of Contents
Chapter I Product Introduction..................................................................................8
1-1 Package Contents........................................................................................8
1-2 Safety Instructions........................................................................................9
1-3 System Requirements...............................................................................11
1-4 Highlights of this Wireless Projector Server...........................................12
1-5 Familiar with Wireless Projector Server / Remote Controller..............13
1-6 Install Wireless Projector Server..............................................................20
Chapter II Using Projector Server...........................................................................23
2-1 Switch the Projector Server On and Check IP address.......................23
2-2 Connect to Projector Server by Wireless Ethernet...............................25
2-3 Set the IP address of the Computer........................................................25
2-3-1 Windows XP IP address setup:..............................................25
2-3-2 Windows Vista IP address setup:...........................................26
2-4 Download and Install Client Software .....................................................29
2-5 Launch Client Software.............................................................................36
2-6 Using Client Software................................................................................42
2-6-1 Projector Server .....................................................................42
2-6-2 On-Screen Keyboard..............................................................44
2-6-3 About......................................................................................44
2-6-4 Exit.........................................................................................45
2-7 Using Remote Controller...........................................................................45
2-8 Select User..................................................................................................46
2-8-1 Use Remote Controller...........................................................47
Chapter III Configure Projector Server..................................................................48
3-1 Connect to Web Configuration Menu......................................................48
3-2 Utility Download..........................................................................................51
3-3 Basic Setting...............................................................................................52
3-3-1 Password ...............................................................................53
3-4 Network Setting ..........................................................................................55
3-5 Wireless Setting..........................................................................................57
3-5-1 ‘Basic’ Settings.......................................................................58
3-5-2 ‘Advanced’ Settings................................................................61
3-5-3 ‘Security’ Settings...................................................................64
3-5-3-1 Encryption: Disabled...........................................................66
3-5-3-2 Encryption: WEP.................................................................68

3
3-5-3-3 Encryption: WPA pre-shared key......................................70
3-5-3-4 Encryption: WPA RADIUS..................................................72
3-5-4 ‘WPS’ Settings........................................................................74
3-9 Configuration Tools ....................................................................................80
3-9-1 Configuration Tools.................................................................80
3-9-2 Firmware Upgrade..................................................................82
3-9-3 Reset......................................................................................84
4-1 Hardware Specification..............................................................................85
4-2 Troubleshooting..........................................................................................86

4
Copyright©by Edimax Technology Co, LTD. all rights reserved. No part of
this publication may be reproduced, transmitted, transcribed, stored in a
retrieval system, or translated into any language or computer language, in any
form or by any means, electronic, mechanical, magnetic, optical, chemical,
manual or otherwise, without the prior written permission of this company.
This company makes no representations or warranties, either expressed or
implied, with respect to the contents hereof and specifically disclaims any
warranties, merchantability or fitness for any particular purpose. Any software
described in this manual is sold or licensed "as is". Should the programs prove
defective following their purchase, the buyer (and not this company, its
distributor, or its dealer) assumes the entire cost of all necessary servicing,
repair, and any incidental or consequential damages resulting from any defect
in the software. Further, this company reserves the right to revise this
publication and to make changes from time to time in the contents hereof
without obligation to notify any person of such revision or changes.
The product you have purchased and the setup screen may appear slightly
different from those shown in this QIG. For more detailed information about this
product, please refer to the User Manual on the CD-ROM. The software and
specifications are subject to change without notice. Please visit our web site
www.edimax.com for the update. All rights reserved including all brand and
product names mentioned in this manual are trademarks and/or registered
trademarks of their respective holders.
Notice according to GNU/GPL-Version 2
This product includes software that is subject to the GNU/GPL-Version 2.
You find the text of the license on the product cd/dvd. The program is free
software and distributed without any warranty of the author. We offer, valid
for at least three years, to give you, for a charge no more than the costs of
physically performing source distribution, a complete machine-readable
copy of the corresponding source code.
Please contact Edimax at: Edimax Technology co., Ltd, NO. 3, Wu-Chuan
3rd RD Wu-Ku-Industrial Park, Taipei Hsien, Taiwan. R.O.C., TEL :
N20379
5
Federal Communication Commission
Interference Statement
FCC Part 68
This equipment complies with Part 68 of the FCC Rules. On the bottom of this
equipment is a label that contains the FCC Registration Number and Ringer
Equivalence Number (REN) for this equipment. You must provide this
information to the telephone company upon request.
The REN is useful to determine the quantity of devices you may connect to the
telephone line and still have all of those devices ring when your number is
called.
In most, but not all areas, the sum of the REN of all devices connected to one
line should not exceed five (5.0). To be certain of the number of devices you
may connect to your line, as determined by the REN, you should contact your
local telephone company to determine the maximum REN for your calling area.
If the modem causes harm to the telephone network, the telephone company
may discontinue your service temporarily. If possible, they will notify you in
advance.
But if advance notice isn't practical, you will be notified as soon as possible.
You will be advised of your right to file a complaint with the FCC.
The telephone company may make changes in its facilities, equipment,
operations, or procedures that could affect the proper operation of your
equipment.
If they do, you will be notified in advance to give you an opportunity to maintain
uninterrupted telephone service.
If you experience trouble with this modem, please contact your dealer for
repair/warranty information. The telephone company may ask you to
disconnect this equipment from the network until the problem has been
corrected or you are sure that the equipment is not malfunctioning.

6
This equipment may not be used on coin service provided by the telephone
company. Connection to party lines is subject to state tariffs.
Installation
This device is equipped with a USOC RJ11C connector.
FCC Part 15
This equipment has been tested and found to comply with the limits for a Class
B digital device, pursuant to Part 15 of FCC Rules. These limits are designed
to provide reasonable protection against harmful interference in a residential
installation. This equipment generates, uses, and can radiate radio frequency
energy and, if not installed and used in accordance with the instructions, may
cause harmful interference to radio communications. However, there is no
guarantee that interference will not occur in a particular installation. If this
equipment does cause harmful interference to radio or television reception,
which can be determined by turning the equipment off and on, the user is
encouraged to try to correct the interference by one or more of the following
measures:
1. Reorient or relocate the receiving antenna.
2. Increase the separation between the equipment and receiver.
3. Connect the equipment into an outlet on a circuit different from that
to which the receiver is connected.
4. Consult the dealer or an experienced radio technician for help.
FCC Caution
This equipment must be installed and operated in accordance with provided
instructions and a minimum 20 cm spacing must be provided between
computer mounted antenna and person’s body (excluding extremities of hands,
wrist and feet) during wireless modes of operation.
This device complies with Part 15 of the FCC Rules. Operation is subject to the
following two conditions: (1) this device may not cause harmful interference,
and (2) this device must accept any interference received, including
interference that may cause undesired operation.
Any changes or modifications not expressly approved by the party responsible
for compliance could void the authority to operate equipment.
Federal Communication Commission Radiation Exposure Statement
This equipment must be installed and operated in accordance with provided

7
instructions and a minimum 20 cm spacing must be provided between
computer mounted antenna and person’s body (excluding extremities of hands,
wrist and feet) during wireless modes of operation.
The equipment version marketed in US is restricted to usage of the channels
1-11 only.
R&TTE Compliance Statement
This equipment complies with all the requirements of DIRECTIVE 1999/5/EC
OF THE EUROPEAN PARLIAMENTAND THE COUNCIL of March 9, 1999 on
radio equipment and telecommunication terminal Equipment and the mutual
recognition of their conformity (R&TTE).
The R&TTE Directive repeals and replaces in the directive 98/13/EEC
(Telecommunications Terminal Equipment and Satellite Earth Station
Equipment) As of April 8, 2000.
Safety
This equipment is designed with the utmost care for the safety of those who
install and use it. However, special attention must be paid to the dangers of
electric shock and static electricity when working with electrical equipment.All
guidelines of this and of the computer manufacture must therefore be allowed
at all times to ensure the safe use of the equipment.
EU Countries Intended for Use
The ETSI version of this device is intended for home and office use in Austria,
Belgium, Denmark, Finland, France, Germany, Greece, Ireland, Italy,
Luxembourg, Bulgaria, Cyprus, Czech Republic, Estonia, Hungary, Latvia,
Lithuania, Malta, Poland, Romania, Slovakia, Slovenia, the Netherlands,
Portugal, Spain, Sweden, and the United Kingdom.
The ETSI version of this device is also authorized for use in EFTA member
states: Iceland, Liechtenstein, Norway, and Switzerland.
EU Countries Not intended for use
None.
CE Mark Warning
This is a class B product. In a domestic environment, this product may cause
radio interface, in which case the user may be required to make adequate
measures.
A CE declaration of conformity is available on www.edimax.com

8
Chapter I Product Introduction
1-1 Package Contents
Thank you for purchasing this wireless projector server! Before you start to use
this product, please check every item in the package. If any of them is missing,
please ask your dealer of purchase for a new package.
Packaging List
Item
No. Name Quantity
1 Wireless Projector Server 1
2 Antenna 2
2 Power Adapter 1
3 Ethernet Cable 1
4 Remote Controller 1
5 CR-2302 Lithium Battery
(Installed in Remote Controller) 1
6 Rubber Foot Pad 4
7 CD(Multi-languages QIG, Manual and Utility) 1
8 Quick Installation Guide 1

9
1-2 Safety Instructions
Please follow the following safety instructions when you’re using this wireless
projector server, or you may damage this projector server and / or yourself!
1. THIS PROJECTOR SERVER IS NOTATOY! Keep out of reach of children!
2. Do not place this wireless projector server in humid and / or hot environment,
like bathroom or kitchen. Please refer to the specification of this wireless
projector server to understand the environmental requirements of this wireless
projector server.
3. This wireless projector server is designed to be used indoor. Do not use this
wireless projector server at places like garden or any other outdoor
environment.
4. Do not put any part or any component, accessories of this projector server
into your body.
5. If any part or any component is dropped into water, return it to your dealer of
purchase and ask for an examination; never use it again before it has been
properly processed by certified technician.
6. If the projector server is dropped into water when it’s powered on, DO NOT
ATTEMPT TO GET IT BACK BY YOURSELF! Switch the electrical power
switch off, and call a qualified electrical technician or us immediately for help.
7. If you want to hang this wireless projector server at high places, please
make sure that the wireless projector server is properly secured. Falling down
from high places will damage this wireless projector server, and may cause
serious injury to people!
8. Do not drag any connected cord with force; the terminal and cord will be
damaged.
9. Only use dry cloth with water to clean this wireless projector server; do not
use alcohol or other chemical solution to clean this wireless projector server.

10
10. There’s no user-serviceable part inside this wireless projector server; if the
wireless projector server is not working properly, please contact the dealer of
purchase to ask for help.
11. Do not put the wireless projector server and / or adapter on paper, cloth, or
other flammable materials. After hours of use, this projector server will become
hot, and may cause flammable materials placed under it to burn.
12. Do not cover the wireless projector server with cloth or any material; the
projector server will become overheat and cause malfunction, even cause fire.
13. When the projector server is powered on, do not connect or disconnect any
connection cable.
14. Do not display the same video content on projector, CRT / LCD display,
and plasma TV for too long time. The image may remain PERMENTALY. Use
screen saver to prevent to display the same video content for too long time.
15. If you smell something strange or even see smoke coming out from the
wireless projector server or power adapter, disconnect the power cord
immediately, and call your dealer of purchase for help.

11
1-3 System Requirements
Video Display:
A projector, CRT display, LCD display, or plasma TV that support VGA or
HDMI video input.
The display should support at least one resolution listed below:
800 x 600
1024 x 768
1152 x 864
1280 x 720
1280 x 768
1280 x 960
1280 x 1024
1400 x 1050
1440 x 900
1600 x 1200
1680 x 1050
1920 x 1200
1920 x 1440
Audio amplifier or speaker that accepts 3.5 audio connector.
Computers support wired or wireless Ethernet connectivity.
Windows XP / Vista32/64 operating system with Internet Explorer V6.0
above browser.
At least 100MB of available hard disk space.
NOTE: Please check the user manual or specification of the display
you’re going to use with this projector server for supported resolution.
Using an unsupported resolution may damage your projector, CRT /
LCD display, or plasma TV.

12
1-4 Highlights of this Wireless Projector Server
Thanks again for choosing this wireless projector server. This projector server
eases the procedure of sharing a single projector among many presenters;
they don’t have to switch VGA video cables, just use wired or wireless network
connection to connect the projector server, and the video on their computer
display will be projected on big-screen.
Other functions of this wireless projector server include:
Supports both wired (10/100Mbps Ethernet connection) and wireless
(802.11b / g / n 11Mbps / 54Mbps / 150Mbps connection).
Wireless interface supports encryption - protects the content of
presentation from theft.
Presenter needs to input a random 4-digit projector server access code as
2nd level security check.
WPS (Wi-Fi Protected Setup) function provides fast, easy, and secure
wireless encryption setup.
No pre-installed software required – new users can download application
from projector server directly, and get it installed within 30 seconds.
Works with any projector, LCD / CRT display, plasma display with VGA or
HDMI video input.
Supports 4/3, 16/10, and 16/9 display aspect ratio.
Supports all major LCD display / projector resolutions - from 800 x 600
SVGA to 1920 x 1440 Full-HD resolution.
Also supports audio output!
Presenter can use supplied IR remote controller to do presentation.
USB port - You can connect USB wired or 2.4G remote control to assist
your presentation

13
1-5 Familiar with Wireless Projector Server / Remote Controller
Front / Top
Name Description
Remote IR signal receiver (for remote controller), DO NOT block
the receiver, or remote controller will not function.
Blackout LED Indicated that wireless projector server is in ‘Blackout’
mode (no display output). When this LED lights, nothing
will be displayed on external display.
Ready When this LED lights, indicates wireless projector server
is ready to serve incoming requests.
WPS When this LED lights, indicates WPS mode is active.
WLAN When this LED flashes, indicates wireless LAN activity.
LAN When this LED lights, indicates wired LAN is connected.

14
Power When this LED lights, indicates this wireless projector
server is correctly powered.
WPS button WPS (Wi-Fi Protected Setup) button: press this button to
start WPS pairing.
Power Press this button to switch this projector server on / off.
Heat Sink Heat generated by this projector server will be removed
through these holes (DO NOT BLOCK THESE HOLES
WHEN THIS PROJECTOR SERVER IS POWERED
ON!)

15
Back
Name Description
Power Jack 5V Connect to 5V power adapter .
Reset When this projector server is not working properly, you
can use a pen or pin to press and hold this button for 5
seconds to reset the projector server.
Antenna
(Left and Right) Transmits wireless signal. Please keep both antennas
perpendicular to the ground for best signal reception.
HDMI HDMI audio / video output (Connects to any
HDMI-compatible display).
VGA VGA D-sub 15 pin video output (Connects to any
VGA-compatible display).
Audio Output Stereo audio output (Connects to external speaker or
audio amplifier).
USB Back USB slot for wired or wireless mouse.
LAN 10/100Mbps fast Ethernet port (Connects to your local
area network)

16
Bottom
Name Description
Wall Mounting
Hole If you want to hang this projector server on the wall, use
these wall mounting holes to mount the projector server.
Foot Pad Sticks the 4 foot pads (supplied in product package) here
so the project server can be steadily placed on the desk
or other horizontal places. You don’t have to stick foot
pads here if you plan to mount the projector server on the
wall.
MAC Address
Label Indicates the MAC address of this projector server.
Product Label Indicates the model name and serial number of this
projector server. This information is very useful when you
need to request for assistance from the dealer of
purchase.

17
Remote Controller - Front
Name Description
‘Black out’ Button Press this button to activate ‘Black Out’ function, which
will remove any display contents displayed on external
display; Press this button again to resume.
‘Menu’ Button Press this button to switch the display output of projector
server between presenter’s computer display content
and projector server’s configuration menu.
‘Page down’
button Equivalent to ‘Left’ key on your computer’s keyboard.
‘Page up’ button Equivalent to ‘Right’ key on your computer’s keyboard.
‘Prev.’ button Select previous user (presenter) in projector server’s
configuration menu; Equivalent to ‘Up’ key on your
computer’s keyboard when presentation is in progress.
‘Next’ button Select next user (presenter) in projector server’s
configuration menu; Equivalent to ‘Down’ key on your
computer’s keyboard when presentation is in progress.
button Select user in projector server’s configuration menu.

18
Remote Controller - Top
Name Description
IR Transmitter Infrared signal transmitter. When using the remote
controller, point the IR transmitter to the front of the
projector server. DO NOT use your finger or other object
to block the IR transmitter, or your command will not be
received by projector server.
IR Transmitter

19
Remote Controller - Back
Name Description
Battery Lid Press battery lid and push it out to open battery
compartment (to install or remove CR-2032 lithium
battery).
Battery Lid

20
1-6 Install Wireless Projector Server
Please follow the following instructions to get the projector server installed:
1. Unpack the wireless projector server’s package, and make sure no item in
the package is missing.
2. Stick the foot pads on the 4 locations indicated on the picture shown below if
you plan to put the projector server on the desk or other horizontal places.
You can skip this step if you plan to hang the projector server on the wall, and
use the 2 wall-mounting holes located at the bottom of the projector server to
do this.
3. Connect the Ethernet cable to the LAN port (this port is labeled as ‘LAN’ and
located at the back of this projector server)
4. Insert the audio cable which connects with external amplifier / speaker to
‘Audio Out’ port located at the back of this projector server.
You can skip this step if you don’t have external audio amplifier / speaker.
Table of contents
Other Edimax Server manuals

Edimax
Edimax VS-100 User manual

Edimax
Edimax PS-1208UWg User manual

Edimax
Edimax EDIMAX FAST ETHERNET MFP SERVER VERSION: 2.0 User manual

Edimax
Edimax WP-S1300 User manual

Edimax
Edimax WP-S1000 User manual

Edimax
Edimax WP-S1300 User manual

Edimax
Edimax WP-S1000 User manual

Edimax
Edimax WP-S1300 User manual

Edimax
Edimax WP-S1000 User manual

Edimax
Edimax NS-2501 User manual
Popular Server manuals by other brands

Fujitsu
Fujitsu Primergy RX4770 M1 Upgrade and maintenance manual

Huawei
Huawei 1288H V5 quick start guide

Moxa Technologies
Moxa Technologies ioLogik E1210 user manual

Supermicro
Supermicro SuperServer 5018D-LN4T user manual

Compaq
Compaq StorageWorks SAN Director 64 installation guide

Supermicro
Supermicro 7045B-3 user manual