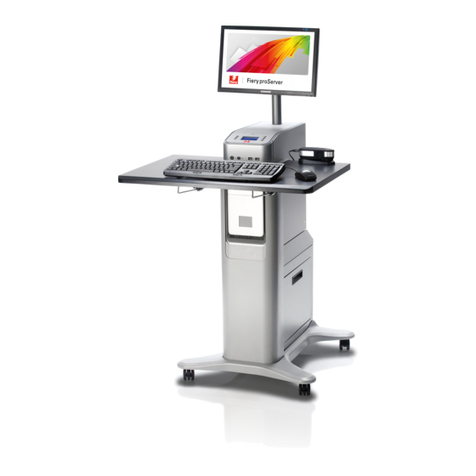
EFI Fiery proServer User manual

45117727© 2013 Electronics For Imaging
29 May 2013 *45117727*
Introducing EFI Fiery proServer for
EFI Cretaprint printers
Welcome to the Fiery proServer, a powerful production solution for Cretaprint printers. The
Fiery proServer increases your Cretaprint printers’ productivity, performance and efficiency
on every job, while producing consistent and accurate color on all your output.
Getting started
To get started, connect the Fiery proServer cables and components, start the Fiery proServer,
and download the latest Fiery proServer documentation.
Connecting and starting the Fiery proServer
All required cables and components are provided in the Fiery proServer shipping box.
Keep the following guidelines in mind when making connections:
• Be sure to use the appropriate power cable for your regional outlet type.
• The dongle is required to use Fiery XF server software. If the dongle is not installed or is
removed during a work session, Fiery XF server software will be unavailable.
• By factory default, the upper Ethernet port is configured for DHCP, which means that it
can dynamically request IP addresses. Use the upper Ethernet port to connect the Fiery
proServer to your company network.
• The lower Ethernet port provides an optional isolated network segment for the printer. If
the Fiery proServer and printer are both on the company network, you do not need to use
this port. However, if you wish to establish an isolated network connection between the
Fiery proServer and printer, connect a cable from the lower Ethernet port to the printer.

2
TOCONNECT CABLES AND COMPONENTS AND START THE FIERY PROSERVER
1 Connect the following cables and components to the Fiery proServer:
2 Move the power switch to the ON ( | ) position.
Key:
1 Power cable
2 Network cable (straight-through Ethernet cable)
3 Monitor
4 Keyboard and mouse
5 Printer cable (optional)
6 Fiery XF dongle
2
3
5
1
64

3
3 Press the power button on the front panel.
4 At the Admin login on the monitor, enter Fiery.1 in the password field, and then press Enter.
Type Fiery.1 exactly. The password is case-sensitive; for example, fiery.1 will not work.
NOTE:By factory default, the keyboard uses English-language layout.
5 Allow startup to proceed until the Fiery proServer desktop appears on the monitor, and the
Fiery XF commands appear on the control panel located on the top front of the Fiery
proServer.
The Fiery proServer takes approximately two minutes to start up. Follow the on-screen
instructions to complete initialization of the Fiery proServer.
6 Do one of the following:
• If you need to change the language of the Fiery proServer from English, proceed to
“Changing the language of the Fiery proServer” on page 3.
• If you need to configure a static IP address for the Fiery proServer, proceed to
“Configuring a static IP address for the Fiery proServer” on page 4.
• Otherwise, proceed to “Downloading the Fiery proServer documentation” on page 4.
Changing the language of the Fiery proServer
By factory default, the Fiery proServer ships with the system language set to English. If
needed, you can change the system language from English.
NOTE:The system language change takes approximately 15 minutes to complete. When the
language change is in progress, it cannot be aborted.
The language change is applied to the operating system, Fiery XF Control, and Fiery XF.

4
TOCHANGE THE LANGUAGE OF THE FIERY PROSERVER:
1 Move the pointer to the bottom of the screen to display the Windows taskbar, and click the
globe icon .
2 When asked if you want to allow the following program to make changes to this computer,
click Yes.
3 Follow the on-screen instructions to select a new language.
At the end of the language change, Windows restarts automatically. All programs are closed
without saving.
Configuring a static IP address for the Fiery proServer
By factory default, the network port on the Fiery proServer is configured for DHCP, which
means that it can dynamically request IP addresses. If your network does not support DHCP,
you must configure the Fiery proServer to use a static IP address instead. For more
information, refer to the Windows documentation.
Downloading the Fiery proServer documentation
The Fiery proServer documentation set consists of the following:
•Installation Guide describes how to install the Fiery proServer and activate the Fiery XF
license.
•Quick Start Guide is a step-by-step guide on how to set up and use the Fiery proServer with
your Cretaprint printers.
•User Guide describes how to keep the Fiery proServer in good working condition after
initial installation and setup.
TODOWNLOAD DOCUMENTATION FOR THE FIERY PROSERVER
1 Double-click the Adobe icon on the Fiery proServer desktop to open the Adobe website and
download Adobe Reader.
You need Adobe Reader in order to access the Fiery proServer documentation, which is
provided in PDF format.
2 If needed, click Start > All Programs > Internet Explorer to open a browser window.
3Gotohttp://help.efi.com/fieryproservercretaprint.
4 If needed, click the links for your product version and language, and download the latest
documentation.

5
Troubleshooting problems
This section describes how to return the Fiery proServer system to an earlier state if the system
becomes unresponsive and other troubleshooting remedies do not solve the problem.
This process can take up to one hour, depending on the backup medium used and the volume
of job data being restored.
TORETURN THE FIERY PROSERVER TO AN EARLIER STATE
1 Exit Fiery XF client.
2 Use Fiery XF Control to shut down the Fiery proServer.
3 Insert System Software 1 DVD. Then power on the Fiery proServer using the power button on
the front panel.
Windows loads the installation files. This takes a few minutes.
4 If you are restoring the Fiery proServer system from a backup, insert the backup medium.
5 Continue with the on-screen instructions until you are requested to select a language from
the drop-down list box.
This is the language used to lead you through the restore procedure.
6 When asked what you want to do, click “Restore from backup or recovery partition”.
7 When asked to select a backup source, choose one of the following:
• Click “Restore from recovery partition” to return the Fiery proServer system to its factory
state.
• Click “Search for backups from this system” to restore a previously created backup.
8 Click Continue to confirm that you want to erase all the data on the hard disk drive.
9 Continue to follow the on-screen instructions.
At the end of the procedure, Windows starts automatically.
If you returned Fiery proServer to its factory state, you must now reinstall the Fiery XF
license, as described in the User Guide. If you restored Fiery proServer from a backup, the
license is already installed.


7
Presentación del EFI Fiery proServer para
impresoras EFI Cretaprint
Le damos la bienvenida al Fiery proServer, una potente solución de producción para
impresoras EFI Cretaprint. El Fiery proServer aumenta la productividad, rendimiento y
eficiencia de sus impresoras EFI Cretaprint en todos los trabajos, produciendo a la vez color
uniforme y exacto en todas las salidas impresas.
Procedimientos iniciales
Para empezar, conecte los cables y componentes del Fiery proServer, inicie el Fiery proServer,
y descargue la documentación más reciente del Fiery proServer.
Conexión e inicio del Fiery proServer
Encontrará todos los cables y componentes necesarios en la caja de envío del Fiery proServer.
Tenga en cuenta las siguientes explicaciones cuando realice las conexiones:
• Asegúrese de utilizar el cable de alimentación adecuado para el tipo de toma de corriente
de su zona.
• Para poder utilizar el software del servidor Fiery XF se necesita el dongle. Si el dongle no
está instalado o se retira durante una sesión de trabajo, el software del servidor Fiery XF no
estará disponible.
• Por omisión de fábrica, el puerto Ethernet superior está configurado para DHCP, lo que
significa que puede solicitar dinámicamente direcciones IP. Utilice el puerto Ethernet
superior para conectar el Fiery proServer a la red de su compañía.
• El puerto Ethernet inferior proporciona un segmento de red opcional aislado para la
impresora. Si tanto el Fiery proServer como la impresora están en la red de la compañía, no
necesita utilizar este puerto. Sin embargo, si desea establecer una conexión aislada de red
entre el Fiery proServer y la impresora, conecte un cable desde el puerto Ethernet inferior a
la impresora.

8
PARA CONECTAR CABLES YCOMPONENTES EINICIAR EL FIERY PROSERVER
1 Conecte los siguientes cables y componentes al Fiery proServer:
2 Mueva el interruptor de alimentación a la posición de encendido (|).
Leyenda:
1 Cable de alimentación
2 Cable de red (cable Ethernet directo)
3 Monitor
4 Teclado y mouse
5 Cable para la impresora (opcional)
6 dongle de Fiery XF
2
3
5
1
64

9
3 Pulse el botón de encendido del panel delantero.
4 Cuando aparezca en el monitor el inicio de sesión Admin, introduzca Fiery.1 en el campo de
contraseña y, a continuación, pulse Intro.
Introduzca Fiery.1 exactamente. En la contraseña se distingue entre mayúsculas y minúsculas,
por ejemplo, no aceptará fiery.1.
NOTA:De fábrica por omisión, el teclado utiliza la disposición para idioma inglés.
5 Deje que el proceso de inicio continúe hasta que se muestre el escritorio del Fiery proServer
en el monitor y aparezcan los comandos de Fiery XF en el panel de control situado en la parte
superior delantera del Fiery proServer.
El Fiery proServer necesita aproximadamente dos minutos para iniciarse. Siga las
instrucciones que aparecen en la pantalla para completar la inicialización del Fiery proServer.
6 Realice una de las operaciones siguientes:
• Si necesita cambiar el idioma del Fiery proServer del inglés, continúe en “Cambio del
idioma del Fiery proServer” en la página 9.
• Si necesita configurar una dirección IP fija para el Fiery proServer, continúe en
“Configuración de una dirección IP fija para el Fiery proServer” en la página 10.
• En caso contrario, continúe en “Descarga de la documentación del Fiery proServer” en la
página 10.
Cambio del idioma del Fiery proServer
El Fiery proServer se suministra de fábrica por omisión con el idioma inglés como idioma de
sistema. Si es necesario, puede cambiar el idioma del sistema a otro idioma que no sea inglés.
NOTA:Se requieren aproximadamente 15 minutos para que se complete el cambio de idioma
del sistema. Cuando el cambio de idioma está en proceso, no puede anularse.
El cambio de idioma se aplicará al sistema operativo, a Fiery XF Control y a Fiery XF.

10
PARA CAMBIAR EL IDIOMA DEL FIERY PROSERVER:
1 Mueva el puntero hacia la parte inferior de la pantalla para mostrar la barra de tareas de
Windows y haga clic en el icono del globo .
2 Cuando le pregunte si desea permitir al siguiente programa realizar cambios en esta
computadora, haga clic en Sí.
3 Siga las instrucciones que aparecen en la pantalla para seleccionar un nuevo idioma.
Al final del cambio de idioma, Windows se reinicia automáticamente. Se cerrarán todos los
programas sin guardar los cambios.
Configuración de una dirección IP fija para el Fiery proServer
De fábrica por omisión, el puerto de red en el Fiery proServer está configurado para DHCP, lo
que significa que puede solicitar dinámicamente direcciones IP. Si su red no admite DHCP,
debe configurar el Fiery proServer para utilizar una dirección IP fija en su lugar. Para obtener
más información, consulte la documentación de Windows.
Descarga de la documentación del Fiery proServer
La documentación del Fiery proServer consta de lo siguiente:
•Guía de instalación describe cómo instalar el Fiery proServer y activar la licencia de
Fiery XF.
•Guía de inicio rápido es una guía detallada acerca de cómo configurar y utilizar el
Fiery proServer con sus impresoras EFI Cretaprint.
•La
Guía del usuario describe cómo mantener el Fiery proServer en buenas condiciones de
funcionamiento tras la instalación y la configuración iniciales.
PARA DESCARGAR LA DOCUMENTACIÓN DEL FIERY PROSERVER
1 Haga doble clic en el icono Adobe en el escritorio del Fiery proServer para abrir el sitio web
de Adobe y descargar Adobe Reader.
Necesitará Adobe Reader para poder ver la documentación del Fiery proServer, ya que está en
formato PDF.
2 Si es necesario, haga clic en Inicio > Todos los programas > Internet Explorer para abrir una
ventana de navegador.
3 Vaya a http://help.efi.com/fieryproservercretaprint.
4 Si es necesario, haga clic en los enlaces de su versión de producto e idioma y descargue la
documentación más reciente.

11
Solución de problemas
Esta sección describe cómo devolver el sistema del Fiery proServer a un estado anterior, si el
sistema no responde y otros métodos de solución de problemas no resuelven el problema.
Este proceso puede tardar una hora, dependiendo de los medios utilizados para la copia de
seguridad y el volumen de los datos de trabajo que se están restaurando.
PARA DEVOLVER EL FIERY PROSERVER AUN ESTADO ANTERIOR
1 Salga de Fiery XF Client.
2 Utilice Fiery XF Control para apagar el Fiery proServer.
3 Introduzca el DVD System Software 1. A continuación, encienda el Fiery proServer mediante
el botón de encendido del panel delantero.
Windows carga los archivos de instalación. Este proceso requiere unos minutos.
4 Si está restaurando el sistema Fiery proServer desde una copia de seguridad, introduzca el
soporte de la copia de seguridad.
5 Siga las instrucciones que aparecen en la pantalla hasta que se le pida que seleccione un
idioma del cuadro de lista desplegable.
Este es el idioma utilizado para guiarle a través del procedimiento de restauración.
6 Cuando se le pregunte qué quiere hacer, haga clic en Restaurar de partic. copia o
recuperación.
7 Cuando se le pida que seleccione un origen de copia de seguridad, elija una de las opciones
siguientes:
• Haga clic en Restaurar de participación de recuperación para devolver el sistema del
Fiery proServer a su estado de fábrica.
• Haga clic en Buscar copias de seguridad en este sistema para restaurar una copia de
seguridad creada anteriormente.
8 Haga clic en Continuar para confirmar que desea eliminar todos los datos de la unidad de
disco duro.
9 Continúe siguiendo las instrucciones que aparecen en la pantalla.
Al final del procedimiento, Windows se inicia automáticamente.
Si devolvió el Fiery proServer a su estado de fábrica, ahora debe instalar la licencia Fiery XF
como se describe en la Guía del usuario. Si ha restaurado el Fiery proServer desde una copia de
seguridad, la licencia ya está instalada.


13
适用于 EFI Cretaprint 打印机的 EFI Fiery
proServer 简介
欢迎使用 Fiery proServer,这是一款适用于 Cretaprint 打印机的强大生产解决方案。
Fiery proServer 可提高 Cretaprint 打印机每个作业的生产率、性能和效率,同时能在
所有输出中生成一致和精确的色彩。
开始使用之前的准备
要开始使用,请连接 Fiery proServer 电缆和组件,启动 Fiery proServer,下载最新版
本的 Fiery proServer 文档。
连接并启动 Fiery proServer
Fiery proServer 装运箱中随附所有必需的电缆和组件。
连接时请牢记以下指导原则:
• 确保使用适合您当地电源插座类型的适当电源线。
• 使用 Fiery XF Server 软件时需要连接加密狗。如果未安装加密狗或在工作会话中
将其移除,则 Fiery XF Server 软件将不可用。
• 在出厂默认设置下,上部的以太网端口是为 DHCP 配置的,这意味着它可动态
请求 IP 地址。使用上部的以太网端口将 Fiery proServer 连接到您的公司网络。
• 下部的以太网端口为打印机提供了一个可选的独立网段。如果 Fiery proServer 和
打印机都在公司网络上,则不需要使用此端口。但是,如果您希望在 Fiery
proServer 与打印机之间建立一个独立网络连接,则用电缆从下部以太网端口连接
到打印机。

14
连接电缆和组件,然后启动 FIERY PROSERVER
1将下列电缆和组件连接到 Fiery proServer:
2将电源开关移至 “开” ( | ) 位置。
关键接口:
1电源线
2网络电缆 (直通式以太网电缆)
3监视器
4键盘和鼠标
5打印机电缆 (可选)
6 Fiery XF 加密狗
2
3
5
1
64

15
3按下前面板上的电源按钮。
4在监视器上以管理员身份登录时,在密码字段中输入 Fiery.1,然后按 Enter 键。
请准确键入 Fiery.1。该密码区分大小写,例如, fiery.1 为无效密码。
注:在出厂默认设置下,键盘使用英语键盘布局。
5 Fiery proServer 桌面出现在监视器中后才可以继续启动,Fiery XF 命令出现在 Fiery proServer
前上方的控制面板中。
Fiery proServer 需要用大约两分钟的时间来启动。按照屏幕说明完成 Fiery proServer
的初始化。
6执行以下操作之一:
• 如果需要将 Fiery proServer 的语言从英语改为其他语言,跳至第15 页上的“更改
Fiery proServer 的语言”。
• 如果需要为 Fiery proServer 配置静态 IP 地址,跳至第16 页上的“为 Fiery proServer
配置静态 IP 地址”。
• 否则跳至第16 页上的 “下载 Fiery proServer 文档”。
更改 Fiery proServer 的语言
在出厂默认设置下,Fiery proServer 附带的系统语言设置为英语。如果需要,可以将
系统语言从英语改为其他语言。
注:系统语言的更改大约需要 15 分钟的时间来完成。语言更改进行时不能中止。
语言更改适用于操作系统、 Fiery XF Control 和Fiery XF。

16
更改 FIERY PROSERVER 的语言:
1将指针移到屏幕的底部,以显示 Windows 任务栏,然后单击全局图标 。
2当询问您是否允许以下程序对这台计算机进行更改时,请单击 “是”。
3按照屏幕中的说明选择新的语言。
语言更改结束后, Windows 将自动重启。所有程序将在不保存的情况下关闭。
为Fiery proServer 配置静态 IP 地址
在出厂默认设置下,Fiery proServer 上的网络端口是为 DHCP 配置的,这意味着它可
动态请求 IP 地址。如果网络不支持 DHCP,则必须配置 Fiery proServer 以使用静态
IP 地址。有关详细信息,请参见 Windows 文档。
下载 Fiery proServer 文档
Fiery proServer 文档集包含以下文档:
• 《安装指南》描述如何安装 Fiery proServer 和激活 Fiery XF 许可证。
• 《快速入门指南》是关于如何设置 Fiery proServer 并将其与 Cretaprint 打印机结合
使用的逐步指南。
• 《用户指南》描述在初始安装和设置之后如何将使 Fiery proServer 保持良好的工
作状态。
下载适用于 FIERY PROSERVER 的文档
1双击 Fiery proServer 桌面上的 Adobe 图标,打开 Adobe 网站并下载 Adobe Reader。
您需要安装 Adobe Reader 才能访问以 PDF 格式提供的 Fiery proServer 文档。
2如果需要,单击 “开始” >“所有程序” >“Internet Explorer”,打开浏览器窗口。
3请转至 http://help.efi.com/fieryproservercretaprint。
4如果需要,单击适用于产品版本和语言的链接,下载最新版本的文档。

17
故障排除
此部分描述在 Fiery proServer 系统变为无响应和其他故障排除措施无法解决故障的
情况下,如何将该系统恢复至之前的状态。
该过程可能最多需要一个小时,具体情况取决于所用的备份介质和正在恢复的作业
数据量。
将FIERY PROSERVER 恢复至之前的状态
1退出 Fiery XF 客户端。
2使用 Fiery XF Control 关闭 Fiery proServer。
3插入 System Software 1 DVD。然后,按下前面板上的电源按钮,开启 Fiery proServer。
Windows 将加载安装文件。这将需要几分钟时间。
4如果您要从备份恢复 Fiery proServer 系统,请插入备份介质。
5继续按屏幕上的说明操作,直到要求您从下拉列表框中选择一种语言。
这就是引导您完成恢复过程所使用的语言。
6当询问您要执行的操作时,单击 “从备份或恢复分区恢复”。
7当要求选择一个备份源时,选择以下选项之一:
• 单击 “从恢复分区恢复”可将 Fiery proServer 系统恢复到其出厂状态。
• 单击 “搜索此系统中的备份”以恢复先前创建的备份。
8单击 “继续”以确认您要擦除硬盘上的所有数据。
9按照屏幕上的说明继续操作。
在该过程结束时, Windows 将自动启动。
如果您已将 Fiery proServer 恢复到出厂状态,必须按照《用户指南》中所述,立即重
新安装 Fiery XF 许可证。如果您从备份恢复了 Fiery proServer,则已经安装许可证。

Other manuals for Fiery proServer
3
Table of contents
Languages:
Other EFI Print Server manuals

EFI
EFI Fiery EX700i Quick guide

EFI
EFI DocuColor 5000 User manual

EFI
EFI Fiery proServer User manual

EFI
EFI Pi6500 Pro User manual

EFI
EFI FIERY X3eTY 35C-KM User manual

EFI
EFI DocuColor 5000 Quick guide

EFI
EFI Fiery FS150 Pro User manual

EFI
EFI DocuColor 5000 Configuration guide

EFI
EFI DocuColor 5252 Manual

EFI
EFI Fiery ES IC-418 Quick guide