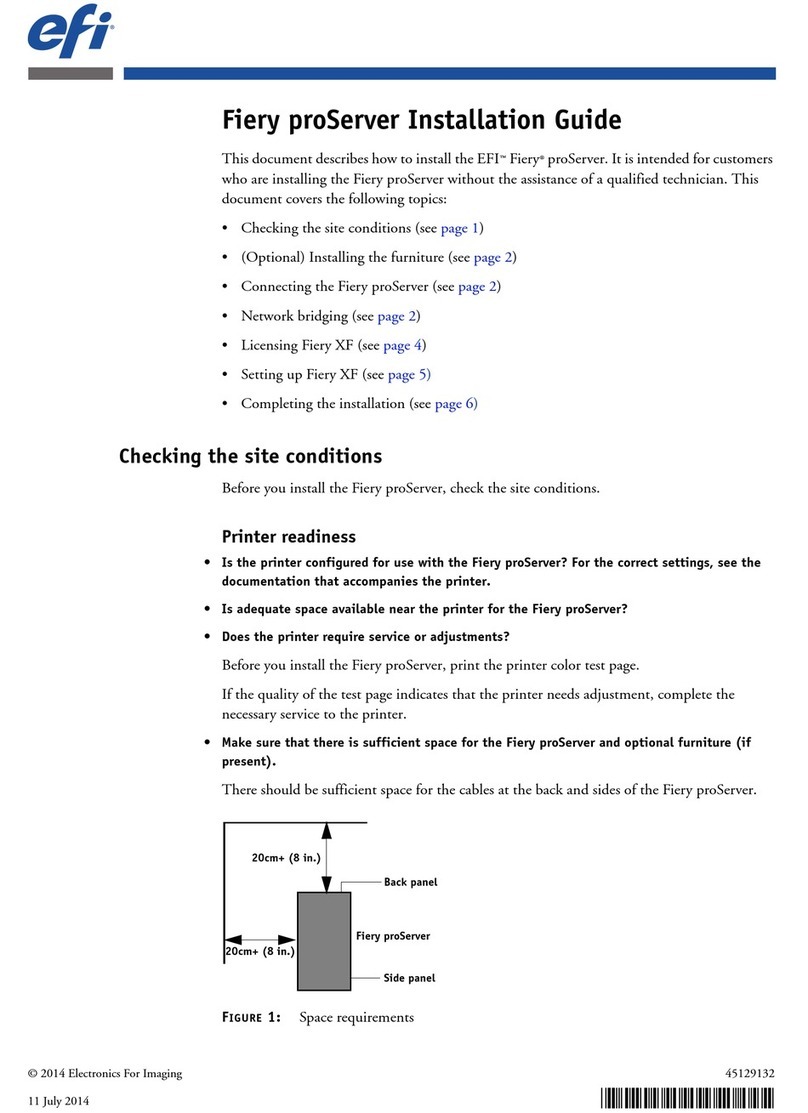
EFI Splash RPX-i User manual

Splash RPX-i Color Server
Troubleshooting Guide

© 2006 Electronics for Imaging, Inc. The information in this publication is covered
under
Legal Notices
for this product.
45054832
19 June 2006

3
C
ONTENTS
I
NTRODUCTION
5
The troubleshooting process
5
Terminology and conventions
6
T
ROUBLESHOOTING
7
Splash RPX-i Macintosh computer
7
Network Connect
9
Checking the dongle 9
Connecting to the network 9
Connecting to the Fiery 10
Direct Connect
11
Checking connections 11
Checking the dongle 11
Checking the Direct Connect Activation Key 11
Replacing the Direct Connect Activation Key 12
Checking the IP address on the copier 12
Printing
14
Printing to the copier 14
Printing to the Fiery 16
Reinstalling Fiery system software
17
I
NDEX
19


INTRODUCTION 5
I
NTRODUCTION
This document identifies the source of common problems that may occur with the
Splash RPX-i Color Server and suggest ways of correcting them.
The troubleshooting process
The Splash RPX-i Color Server is connected to the DocuColor 240/250 and a Fiery Network
Controller, either by Direct Connect or Network Connect. This document discusses
problems that may occur in any of the following areas:
•Inside the Splash RPX-i Color Server
•In the interface between the Splash RPX-i Color Server and the Fiery Network Controller
•In the interface between the Splash RPX-i Color Server and the network
Issues that relate exclusively to the Fiery Network Controller and the interface between the
Fiery Network Controller and the DocuColor 240/250 are beyond the scope of this
document. For information about operating, servicing, and troubleshooting the Fiery
Network Controller, see the documentation that accompanies it.
N
OTE
:
Detailed information about the Apple Macintosh computer is beyond the scope of
this document. If you require more information specifically about operating, servicing, and
troubleshooting the Macintosh computer, see the documentation that accompanies your
Macintosh.

INTRODUCTION 6
Terminology and conventions
This document uses the following terminology and conventions.
Term or convention Refers to
Copier DocuColor 240/250
Fiery Fiery Network Controller
Mac OS Mac OS 9, Mac OS X
Splash RPX-i Splash RPX-i Color Server
Titles in
italics
Other documents in this set
Windows Microsoft Windows 2000, Windows XP, Windows Server 2003

TROUBLESHOOTING 7
T
ROUBLESHOOTING
This chapter provides troubleshooting guidelines and explains some common problems you
may encounter.
Follow the procedures in
Getting Started
for connecting the Splash RPX-i, installing Splash
RPX-i server software, and configuring network settings. These tasks should be performed in
the order in which they are listed in
Getting Started
.
If you follow these procedures in the correct order and still encounter problems, see the
following sections.
Splash RPX-i Macintosh computer
The following table lists some of the problems you may encounter with the computer on
which the Splash RPX-i server software is installed.
If this happens Try this
The Splash RPX-i is installed and
connected, but does not start
when the power button is
pressed.
•Properly connect the power cables for the Splash RPX-i to live, grounded AC outlets.
• Consult other Macintosh documentation or contact your Macintosh service support center.
The Splash RPX-i starts with the
start-up tone, but no image
appears on the monitor.
• Connect the power cable for the display to a live, grounded AC outlet.
• Connect both ends of the display cable.
•Turn on the monitor.
•Increase the brightness and contrast.
•The monitor may be faulty. If a different Mac OS-compatible monitor is available, try substituting
it.
The Splash RPX-i starts, but the
keyboard and/or mouse do not
work.
• Connect the keyboard and secure all cable connections. If a different Mac OS keyboard and cable
are available, substitute them if securing the connections does not resolve the problem.
• Connect the mouse to the keyboard. If a different Mac OS mouse is available, substitute it for the
mouse.
Optical drive is not responding. • If a disk is in the drive, wait one minute to make sure that the drive is not busy reading the disk.
•Press the Eject button on the keyboard.
•If the problem persists, navigate to Applications> Utilities>Disk Utility, select the disk icon, and
then click the Eject button near the top of the Disk Utility window.
• Check the cable connections to the drive.

TROUBLESHOOTING 8
System performs slowly
and/or hangs periodically.
•Recheck all cables and connections.
•Reinstall Splash RPX-i server software (see
Getting Started
).
•Verify the type, speed, capacity, and installation of the memory DIMMs. For minimum system
requirements, see
Getting Started
.
The Splash RPX-i starts, but the
Splash RPX-i server software
reports that there is a problem.
• The Splash RPX-i server software requires that several system extension files be present.
If one or more is missing, reinstall the Splash RPX-i server software from the Splash RPX-i server
software DVD.
If this happens Try this

TROUBLESHOOTING 9
Network Connect
This section describes some of the issues you may encounter when using Network Connect,
which allows the Splash RPX-i to access the copier over the network.
With Network Connect, you can use the features and workflow of the Splash RPX-i and the
Fiery at the same time.
N
OTE
:
Communication between the Splash RPX-i and the Fiery is optimized for a Gigabit
Ethernet connection. In the Network Connect configuration, you can achieve maximum
performance by putting both the Splash RPX-i and the Fiery on the same Gigabit switch.
This also helps minimize slowdowns due to other traffic on the network.
Checking the dongle
If a message on the Splash RPX-i indicates that no dongle is attached, try the following:
• Check that a dongle is plugged into the Splash RPX-i and that the light is on.
•Remove the dongle and plug it in again.
• Check that you plugged in the dongle, not the Direct Connect Activation Key.
Connecting to the network
If you cannot connect to the network, try the following:
•Check the cable connection to the back panel and the network. Make sure the cable is the
correct type. Do not use the Ethernet crossover cable in place of the network Ethernet
cable. You can identify the crossover cable by the label. The cables are not interchangeable.
•If the network Ethernet cable is the correct type and is properly connected to the back of
the Splash RPX-i, try connecting a new network Ethernet cable to the back of the
Splash RPX-i.
The network Ethernet cable should be connected to the first port on the Splash RPX-i.
• Check that the Fiery scan crossover cable is connected correctly. If you unplug the cable
and reconnect it, restart the Fiery.
• Check the network settings on the Splash RPX-i. For information about Network Setup,
see
Getting Started
and
Configuration Guide.
•Review network sections of the documentation that accompanies the Macintosh
computer.
•If the problem persists, ask the network administrator to check other devices on the
network. If other devices are not functioning, the problem may be with the network.
•Reinstall Splash RPX-i server software (see
Getting Started
). Corrupt Splash RPX-i server
software may cause the system to hang.

TROUBLESHOOTING 10
Connecting to the Fiery
If you cannot connect to the Fiery, do the following.
• Check the Fiery IP address.
To confirm the IP address, print a Configuration page, or consult your network
administrator.
•Type the IP address manually. The Fiery may be on a different subnet.
•Try connecting to a different Fiery controller for the DocuColor 250/240.
•If nothing prints, check that port 9100 on the Fiery is enabled in Network Setup.
Quit the Splash RPX-i, restart the Fiery, and then restart the Splash RPX-i.
For information about port 9100 on the Fiery, see
Configuration and Setup
and
Printing
from Windows
on the DC240/250 User Documentation CD.
• Check for issues with the Direct Connect Activation Key.
For more information, see “Checking the Direct Connect Activation Key” on page 11 and
“Replacing the Direct Connect Activation Key” on page 12.
•Restart the Fiery (see “Restarting the Fiery” on page 13).

TROUBLESHOOTING 11
Direct Connect
This section describes some of the issues you may encounter when setting up Direct Connect
between the Splash RPX-i and the Fiery.
Direct Connect allows the Splash RPX-i to access the Fiery by an Ethernet crossover cable.
The Splash RPX-i is visible on the network, but the Fiery is not.
If you connect the Splash RPX-i to the Fiery, and a message indicates that the Splash RPX-i
cannot find a Fiery connected to the second Ethernet port, perform the following checks.
Checking connections
Check that the correct Ethernet crossover cable has been connected from the NET jack on
the Fiery to the correct Ethernet port on the Splash RPX-i. The Ethernet crossover cable is
labeled. For more information, see
Getting Started
and the
Server Installation and Setup
Roadmap
.
Check that the Fiery scan Ethernet cable is securely connected by unplugging the cable and
plugging it in again.
Checking the dongle
If a message on the Splash RPX-i indicates that no dongle is attached, try the following:
• Check that a dongle is plugged in to the Splash RPX-i and that the light is on.
•Remove the dongle and plug it in again.
• Check that you plugged in the dongle, not the Direct Connect Activation Key.
Checking the Direct Connect Activation Key
If you attach the Direct Connect Activation Key to the Fiery, but no Fiery Start Page is
printed, try the following:
•Cycle power on the copier to print a Start Page.
• Check the FieryIP address on the Start Page.
If the IP address is not correct, set the correct IP address. See “To configure the copier IP
address using the copier control panel” on page 12.
• Check you that you plugged in the Direct Connect Activation Key to the Fiery, not the
dongle.

TROUBLESHOOTING 12
Replacing the Direct Connect Activation Key
If you lose the Direct Connect Activation Key, see the following procedure.
T
O
REPLACE
THE
D
IRECT
C
ONNECT
A
CTIVATION
K
EY
1 Purchase any USB key drive.
N
OTE
:
The drive must be formatted for MS-DOS (FAT-16).
2 Delete all data on the drive.
3 Plug the drive into the Splash RPX-i Macintosh computer.
4 Start the “Setup Direct Connect Activation Key” application in the Splash > Splash Extras
folder.
5 Select the USB drive from the list of drives.
The application creates the activation folder on the USB drive.
6 Remove the USB drive from the Splash RPX-i Macintosh computer and plug it into the Fiery.
Checking the IP address on the copier
If you cannot complete the Direct Connect connection, the IP address on the copier may be
set incorrectly. To fix this, try the following:
•Quit the Splash RPX-i.
•Set the IP address using the copier control panel (see “To configure the copier IP address
using the copier control panel”).
•Wait until the Fiery Start Page prints.
N
OTE
:
You may have to manually restart the Fiery. See “To restart the Fiery manually” on
page 13.
•Verify that the IP address on the Start Page is correct.
•Start the Splash RPX-i.
Setting the IP address
Set the copier to the fixed IP address of 192.168.0.2 for networking. For more information,
see the following procedure.
T
O
CONFIGURE
THE
COPIER
IP
ADDRESS
USING
THE
COPIER
CONTROL
PANEL
1Power on or wake up the copier.
2Press the Log In/Out button on the console.
3Type the ID using the keypad and press Confirm on the control panel.
N
OTE
:
The ID is usually “11111”.

TROUBLESHOOTING 13
4Press System Settings > System Settings > Network Controller Settings > Network Settings on
the control panel.
5 Select “2 TCP/IP - Get IP Address,” and then press Change Settings.
6 Select Manual, and then press Save.
7 Select “3 TCP/IP - IP Address,” and then press Change Settings.
8Type “192.168.000.002” on the keypad and press Save.
N
OTE
:
If the IP address is correct, no update occurs. In this case, reboot the Fiery manually.
For more information, see “To restart the Fiery manually”.
9 Select “4 TCP/IP - Subnet Mask” and press Change Settings.
10 Type “255.255.255.000” on the keypad and press Save.
11 Press Close > Close > Close > Close, and then press Exit.
Restarting the Fiery
After you set the IP address, the Fiery should automatically reboot and print a Start Page. You
can then check that the IP address on the Fiery Start Page is correct. If it is not, you must go
back to the copier and reset the IP address.
T
O
RESTART
THE
F
IERY
MANUALLY
1Turn off the copier.
2Wait one minute, and then turn on the copier.
It takes a few minutes for the Fiery to restart and print the Start Page.
You may have to wait a few minutes for the Fiery to restart and print the Start Page and for
the Splash RPX-i to detect the Fiery. The Splash RPX-i will not complete a connection until
the Fiery Start Page prints.
Once the connection is successful, a Splash Startup Page prints.

TROUBLESHOOTING 14
Printing
Intermittent print quality and color quality problems are difficult to trace. Before you
troubleshoot print quality problems, print a Start Page to make sure that the copier does not
need servicing or adjusting.
N
OTE
:
A Fiery Start Page prints when the Fiery is restarted or turned on if Print Start Page has
been enabled in Fiery Server Setup. For information about Fiery Setup, see
Configuration and
Setup
on the Fiery User Documentation CD. A Splash RPX-i Startup Page prints when the
Splash RPX-i is started, if Print Startup Page has been enabled in the Splash RPX-i
Preferences.
Printing to the copier
Some common problems and solutions are described in the following table:
If this happens Try this
Start Page fails to print. • Make sure the copier is turned on and ready to print.
•Recheck that the crossover cable is present and properly connected to the Fiery.
•If the problem persists:
–Power off the copier.
–Power off the Splash RPX-i by selecting Shut Down from the Apple menu.
–Wait one minute.
–Power on the copier, wait for the Fiery Start Page to print, and verify that the Fiery IP
address is correct.
–Power on the Splash RPX-i and start the Splash RPX-i server software.
•If the problem persists, service the copier.
Color quality is inconsistent. • The copier may require service (call your authorized service/support center).
•To check the color quality of the copier, make copies of color documents from the
copier glass.

TROUBLESHOOTING 15
Print quality is poor. • Print a Splash RPX-i Startup Page.
To print a startup page, you must quit and then restart the Splash RPX-i. Make sure that
you have enabled Print Startup Page in Splash RPX-i Server Preferences.
•If the quality of the Splash RPX-i Startup Page is good, the error condition may be caused
by a file or application problem.
•Print a Test Page from Help > Troubleshooting.
•Make sure that the appropriate printer description file is installed. (For details, see the
Printing Guide.)
• Check that the video cable is securely connected between the Fiery and the copier.
• Calibrate the system. (For details, see the Color Guide.)
•Make sure that you installed the correct Splash RPX-i printer drivers.
•Quit the Splash RPX-i, go to the Home/Library/Preferences, delete Splash Color Prefs.xml,
and then restart the Splash RPX-i.
• Choose Output Profiles from the Color Profiles menu. If any profile entries are blank,
reinstall the Splash RPX-i server software.
Splash RPX-i appears on the
list of printers on a client
workstation, but certain jobs
do not print.
•Try printing a job from a different application to determine if the problem is associated with
a particular application.
•Make sure the connection between the Splash RPX-i and the client workstation is working
by printing a simple file, such as a text file.
•Resend the problem file.
•If the problem persists, select the file in the Hold queue and choose Save Spool File from the
File menu. Save the file and send it to Technical Support for analysis.
If this happens Try this

TROUBLESHOOTING 16
Printing to the Fiery
If you have problems printing, do the following.
Sending Test Pages
•Open the Help > Troubleshooting menu in the Splash RPX-i.
•In the Fiery Connection Test Pages dialog box, click a page size.
•If the page prints, the Splash RPX-i can communicate with the Fiery, and the Fiery can
print jobs.
Verifying print output
•If the Test Page prints correctly, but other pages sent from the Splash RPX-i do not,
contact Technical Support.
•If the printed output is bad, the problem may be with the Fiery. See the documentation
that accompanies your Fiery.
If you can print the Configuration page but cannot print a job from a computer on the
network, make sure you:
•Check all components of the network, including cables, connectors, terminators, network
adapter boards, and network drivers.
• Confirm that the applicable network settings (such as AppleTalk zone, IP address, Subnet
mask, and Gateway address) match the settings used in the network.

TROUBLESHOOTING 17
Reinstalling Fiery system software
If the Fiery system software is reinstalled for any reason, you must:
•Quit the Splash RPX-i.
•Follow the connection procedures in Getting Started.


INDEX 19
A
Apple menu 14
B
brightness 7
C
cable connections 7, 9, 16
calibration 15
checking cables 8
checking connections 7, 8
color
preferences 15
profiles 15
quality 14
Configuration Page 10, 16
contrast 7
copier control panel 12
copier IP address 12
crossover cable 9, 11, 14
D
deleting preferences 15
DIMMs 8
Direct Connect Activation Key 9, 10, 11, 12
dongle 9, 11
E
eject button 7
Ethernet cable 9, 11
Ethernet connection 9
extension files 8
F
faulty monitor 7
Fiery documentation 5, 10, 16
Fiery IP address 11, 12
Fiery Setup 14
Fiery Start Page 11, 12, 13
Fiery system software 17
Fiery user documentation 10, 14
G
Gigabit Ethernet 9
H
hard disk 7
I
ID on copier 12
IP address 10, 12
configuring 12
IP address of Fiery 11, 12
IP address on copier 12
K
keyboard 7
M
Macintosh documentation
5, 7, 9
memory 8
minimizing slowdowns 9
monitor 7
mouse 7
N
network cable 9
network issues 9
network settings 16
network traffic 9
O
optical drive 7
output profiles 15
P
port 9100 10
power button 7
power cable 7
Print Start Page 14
printer description file 15
profiles 15
INDEX

INDEX 20
R
reinstalling Fiery system
software 17
reinstalling software 8, 9, 15
restarting the Fiery 10, 13
S
scan cable 11
scan crossover cable 9
server software 9
servicing the copier 14
setting the Fiery IP address 11
Splash dongle 9, 11
Splash Startup page 13
Start Page 11, 12
subnet 10
system requirements 8
T
Technical Support 15, 16
terminology 6
Test Pages 16
Tr oubleshooting Help menu 16
U
USB key drive 12
user documentation 10
V
video cable 15
Table of contents
Other EFI Server manuals
Popular Server manuals by other brands

Gigabyte
Gigabyte R183-S95-AAD1 user manual
NEC
NEC Express5800/GT110d-S (2C/i3-2120) EXP281A user guide
HP
HP ML570 - ProLiant - G2 Setup and installation guide
Asus
Asus RS700-X7/PS4 user guide
Synology
Synology FX2421 Hardware installation guide
SMC Sierra Monitor
SMC Sierra Monitor FieldServer FS-8700-122 PROFIBUS DP Master Driver manual


