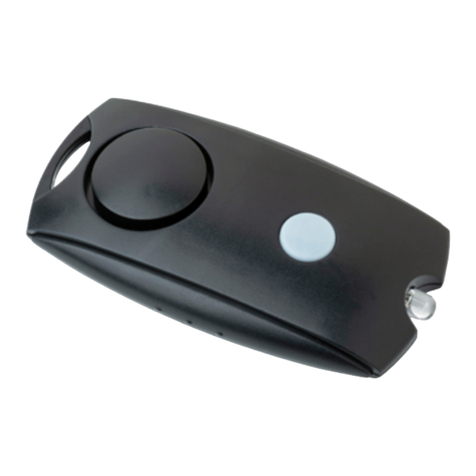
Egardia Bell box User manual

installation guide
Bell box

1
INSTALLATION GUIDE BELL BOX
Congratulations on the purchase of your Egardia bell box.
Customer Service
Please visit www.egardia.com if you would like further information about the installation and use of
Egardia. The answers to a number of frequently asked questions can be found at
www.egardia.com/userquestions.
This package has been put together with care. Please contact our customer service if you would like
any help during installation or if something is missing from the package. Never return a package
without prior instruction from our customer service.
Bell box
The bell box with a maximum siren output of 104 dB will be activated during an alarm. The bell box
works wirelessly and is powered by factory installed batteries. There is no need for a connection to
a power supply and the installation is extremely easy.
Please note! In some municipalities it is not allowed to sound a siren outside. Please check with
your local authorities. Set DIP switch number 5 to "OFF" to deactivate the siren.
Sound and light signals for each type of alarm
Sound signal
Light signal
Duration
Burglar alarm
Continuous
Continuous
Depends on the
Panic alarm
Continuous
Continuous
settings of DIP
Fire alarm
Beeps of 2 sec.
The 3 LED indicators
flash
switches number 3
and 4
Flood alarm
Beeps of 2 sec.
The 3 LED indicators
flash
OVERVIEW BELL BOX
1. Battery switch –To turn the bell box on or off.
2. DIP switches –To adjust the settings of the bell box.
3. Tamper switch –The alarm is triggered when this switch is activated.
4. Mounting holes (4x) –To mount the bell box using screws.
5. Safety screw –Prevents the opening of the bell box.
Tampering
The bell box is secured with a tamper switch. Removing the bell box from the wall or removing the
cover of the bell box will trigger an alarm. Temporarily deactivate the tamper switch while mounting
the bell box to the exterior wall.
Confirmation sounds
The bell box can be set to beep to confirm the alarm system has been turned on or off. Also the bell
box can be set to beep during the delay period. These confirmation sounds are deactivated by
default. You may activate these sounds in your Egardia account.
1. Login to your Egardia account and click on the tab "Alarm system".
2. Click under heading "Accessories" on "Change settings".
3. Then click "Set bell box" and choose the preferred settings.
4. Click "Confirm" to save the settings.
For more information read the appendices:
Appendix A –Audible and light signals bell box
Appendix B –DIP switches bell box
Website Egardia
www.egardia.com

2
INSTALLING THE BELL BOX
The installation process of the Egardia bell box consists of four easy steps.
Please note! Before registering the bell box with your alarm system at least one other Egardia
accessory (e.g. a door/window sensor or a motion detector) has to be registered.
STEP 1: CHECK CONTENTS
Check the contents of the packaging for the following parts:
1. Bell box (batteries are factory installed in the bell box)
2. Bag containing screws and plugs
STEP 2: ADD TO ALARM SYSTEM
You are now about to register the bell box with your Egardia alarm system.
1. Ensure at your gateway that the alarm is turned off. The top indicator light (Status) and the
bottom indicator light (Online) are lit green.
2. Place the bell box on a flat surface. Remove the safety screw at the bottom of the bell box and
remove the cover.
3. Press the "Reset" button at the side of the gateway for at least 5 seconds. The top indicator
light (Status) of your gateway flashes green to indicate it is searching for new accessories.
4. Switch the battery switch of the bell box to "ON" to activate the batteries. All LED indicators of
the bell box will glow and a beep will sound.
5. Set DIP switch number 1 to "ON". LED 1 and LED 3 glow shortly and a short beep sounds.
After 3 seconds all LED indicators of the bell box flash once. The gateway beeps once to
indicate the bell box is successfully registered. To confirm LED 1 and LED 3 of the bell box will
flash once and a short beep sounds. The gateway beeps twice to indicate the bell box has
already been successfully registered.
6. Set DIP switch number 1 to "OFF". LED 2 of the bell box flashes once and a beep sounds to
confirm the bell box has now returned to normal operation.
7. Press again the "Reset" button at the side of the gateway for at least 5 seconds if no more
accessories are being added. The gateway returns to normal operation.
8. Login to your Egardia account and go to the tab "Alarm system". The registered bell box will
appear after a few minutes.
9. Rename the bell box for easy recognition.
10. Switch the battery switch of the bell box to "OFF" to temporarily deactivate the tamper switch.
11. Set the other DIP switches of the bell box as desired.
12. Do not replace the cover of the bell box yet.
STEP 1.
CHECK CONTENTS
CHECK THE CONTENTS OF THE BOX
STEP 2.
ADD TO ALARM SYSTEM
REGISTER THE BELL BOX WITH YOUR
EGARDIA ALARM SYSTEM
STEP 3.
MOUNT BELL BOX
DETERMINE THE LOCATION AND
MOUNT THE BELL BOX
STEP 4.
CHECK AND TEST
CHECK AND TEST THE BELL BOX
Please note! Set DIP switch
number 1 back to "OFF"
after the bell box has been
successfully registered. The
bell box returns to normal
operation.

3
Functions other DIP switches
DIP switch number 2: configure whether the LED indicators of the bell box will keep glowing
after an alarm. When the alarm system is turned off the bell box will sound 2 beeps to confirm
an alarm has been triggered.
DIP switch 2
Alarm system
Duration active LED indicators
ON
ON
Until the alarm system is turned off
ON
OFF
Depends on settings of DIP switch 3
and 4
OFF
ON/OFF
Depends on settings of DIP switch 3
and 4
DIP switch number 3 and 4: configure the duration that the bell box emits audible and light
signals during an alarm. The default duration is 3 minutes.
DIP switch 3
DIP switch 4
Duration sound and light signals
ON
OFF
5 minutes
OFF
ON
10 minutes
OFF
OFF
3 minutes
ON
ON
1 second (test)
DIP switch number 5: configure whether the siren has to be activated or deactivated. The siren
is activated by default.
DIP switch number 6: to erase the memory of the bell box. To erase the memory, switch the
battery switch to "OFF". Now wait for 5 minutes and set DIP switch number 6 to "ON". Switch
the battery switch back to "ON". The LED indicators will flash in sequence (from left to right
and back) and a beep sounds to confirm. Set DIP switch number 6 back to "OFF".
DIP switch number 7: configure whether the control function has to be activated or deactivated.
The control function is activated by default so that the bell box regularly transmits a control
signal to the Egardia gateway.
STEP 3: MOUNT BELL BOX
Place the bell box in a highly visible location on the exterior wall. Before mounting use the key fob to
test the desired mounting place is within range of the gateway.
Important guidelines
The optimal location for the bell box is highly visible but also high enough to be out of reach of
a burglar.
The end of the tamper switch protrudes out of the backside of the bell box so that an alarm is
triggered when the bell box is pulled from the wall. Ensure during mounting whether the tamper
switch is fully pressed against the wall.
Instructions
1. Ensure that the battery switch is set to "OFF" so the bell box can be mounted without triggering
a tamper alarm.
2. Use the 4 pre-punched holes in the bell box to mark the drill holes on the wall.
3. Drill the holes and use the plugs for stone or plaster walls.
4. Secure the back of the bell box to the wall using the screws.
5. Ensure DIP switch number 1 is set on "OFF" and that the other DIP switches are set as
desired.
6. Switch the battery switch to "ON" to activate the tamper switch.
7. Replace the cover and secure with the security screw at the bottom.

4
STEP 4: CHECK AND TEST
To make sure that the bell box functions correctly it is advisable to test the bell box.
Turn the alarm system on by using your remote control (red button) and trigger an alarm with a
motion detector or door/window sensor. When the bell box emits sound and/or light signals the bell
box has been installed correctly.
Please note! When the tamper switch is still deactivated, the bell box will not react. When all LED
indicators flash 3 times when the alarm is turned on, the tamper switch has not been placed
correctly.
Congratulations! The installation is complete.
MAINTENANCE
Batteries
The bell box is powered by four 1,5V D alkaline batteries. Depending on use, the average life of the
battery is 2-4 years. The bell box itself will indicate when the battery is low. When the battery has
power left for about one month you will receive the following warnings:
1. When the alarm system is turned on the bell box beeps five times and all LED indicators flash
three times. When the alarm system is turned off the bell box beeps five times and all LED
indicators will flash in sequence twice (from left to right and back).
2. In your Egardia account you will see the message "Battery low level" under the tab "Alarm
history".
3. You will receive a one-time message by telephone, SMS or email.
4. The central indicator light (Alarm) of your gateway is lit yellow. After the batteries have been
replaced the gateway will return to normal status.
Replacing the batteries
1. Login to your Egardia account and click on the tab "Alarm system".
2. Click under heading "Accessories" on "Change settings".
3. Then click "Set bell box" and select "Tamper function –Deactivate temporarily".
4. Click "Confirm" and the tamper switch is now deactivated for 1 hour.
5. Remove the safety screw at the bottom of the bell box and remove the cover.
6. Switch the battery switch to "OFF".
7. Remove the four screws of the battery compartment and remove the old batteries.
8. Wait for at least 5 minutes and insert four new 1,5V D alkaline batteries.
9. Switch the battery switch back to "ON" and close the battery compartment using the screws.
10. Replace the cover and secure with the security screw at the bottom.
11. Login to your Egardia account and click on the tab "Alarm system".
12. Click under heading "Accessories" on "Change settings".
13. Then click "Set bell box" and select "Tamper function –Activate".
14. Click "Confirm" and the tamper switch is now reactivated.
Please note! When the tamper
switch is still deactivated, the
bell box will not react.

5
APPENDICES
A –Audible and light signals bell box
B –DIP switches bell box
APPENDIX A: SOUND AND LIGHT SIGNALS BELL BOX
The table below lists the various types of sound and light signals the bell box can emit.
No delay time set
A
Al
la
ar
rm
m
s
sy
ys
st
te
em
m
Sound signal
Light signal
Activate –ON
1 beep*
All LED indicators flash 1x
Activate –ON, partially
1 beep*
All LED indicators flash 1x
Deactivate
2 beeps*
LED indicators flash in sequence (from
left to right and back)
Deactivate –Alarm in memory
Beep of 3 sec.
LED indicators flash in sequence 2x
(from left to right and back)
Delay time set
A
Al
la
ar
rm
m
s
sy
ys
st
te
em
m
Sound signal
Light signal
Activate –ON
Throughout delay time
one beep per second
All LED indicators flash 1x
Activate –ON, partially
Throughout delay time
one beep per second
All LED indicators flash 1x
Deactivate
2 beeps
LED indicators flash in sequence
(from left to right and back)
Deactivate –Alarm in memory
Beep of 3 sec.
LED indicators flash in sequence 2x
(from left to right and back)
Activate –Battery low
5 beeps
All LED indicators flash 3x
Deactivate –Battery low
5 beeps
LED indicators flash in sequence 2x
(from left to right and back)
Activate –Tamper switch is not
fully pressed to the wall
5 beeps
All LED indicators flash 3x
Deactivate –Tamper switch is
not fully pressed to the wall
2 beeps*
LED indicators flash in sequence 4x
(from left to right and back)
* When the siren is deactivated those sound signals cannot be heard.

6
APPENDIX B: DIP SWITCHES BELL BOX
The Egardia bell box features 7 DIP switches that allow you to adjust the operation of the bell box.
Here below you will find an overview of the operation of the various DIP switches.
DIP switch 1
Installation
OFF
Default
ON
Installation mode
DIP switch 2
Duration active LED indicators
OFF
During alarm
ON
Until alarm system is turned off
DIP switch 3
DIP switch 4
Duration sound and light signals
OFF
OFF
3 min.
ON
OFF
5 min.
OFF
ON
10 min.
ON
ON
1 second (test)
DIP switch 5
Siren
OFF
Siren deactivated
ON
Siren activated
DIP switch 6
Erase memory
OFF
Default
ON
Erase memory
DIP switch 7
Control function
OFF
Control function off
ON
Control function on
Table of contents
Other Egardia Security System manuals
Popular Security System manuals by other brands
Eaton
Eaton i-on Compact Administration and User Manual

WG SECURITY
WG SECURITY SKY-GUARD installation manual

Nice
Nice HSCU1 Instructions and warnings for installation and use
ChinaPST
ChinaPST PST-G10A user manual
Teknim
Teknim TFM-1190 Installation and operating manual
Dynacord
Dynacord PROMATRIX 9000 Release notes
